

Colourful Fall Birch Trees Art Project

This is a simple art project that can be done in any primary classroom. I did it in Kindergarten (in small groups) but you can absolutely do it in higher grades as well!
When I taught K, I mostly did art in small groups because it made it so much easier to manage. Since this project takes a few steps, it would be easy to quickly pull small groups and have them complete the task. Since I’ve taught 2/3 I do art as full group but you can definitely do small groups too if that’s the way you like to manage your art time.
Time required: 2 blocks
The first is quick, only 5-10 minutes max to do the background.
The second will take more time, 30-40 minutes, depending on age.
Materials:
White paper (card stock or heavier weight does best with paint but you can use regular printer weight as well)
Tempera pucks/paint palette (green, blue)
Acrylic paint or liquid tempera paint (red, orange, yellow)
Paint brushes (large for background, smaller for leaves)
Newspaper
Sharpie
Glue stick
Teacher prep:
I cut apart the newspaper to get rid of any images as we only want the black and white text parts. I allow my students to cut their own trees, so just cut it in chunks that they could then cut apart.
Procedure:
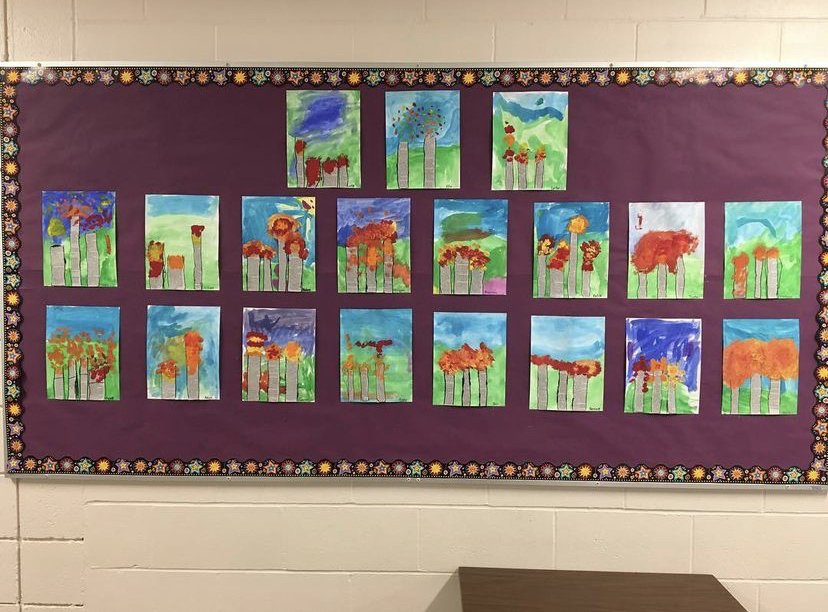
Day 1 (background)
Using the tempera pucks, paint a hill in green and then a sky in blue. If they wanted to add a sun, go for it.
Leave to dry.
Once dry, they’ll likely be curled on the edges. Weigh them down under some heavy books so that it’s flat when you go to do step 2.
Day 2 (trees)
Using the newspaper, cut strips that are tree trunk shaped. You can have 2-4 trees of varying thickness and height.
Glue the newspaper trunk to your background.
Outline the tree with a Sharpie. If you have older students, you could allow them to add some marks like on actual birch trees.
Create leaves in red, orange and yellow paint with your paintbrush. I tell my students to start with red, then orange, then yellow so that the colours don’t get too muddled.
Alternatively you could have students do this with their fingers.
Some students do not like the feeling of paint on their fingers, in which case a paintbrush or Q-tip would be a fine alternative.
Some students could also opt to add leaves falling and/or leaves on the ground.