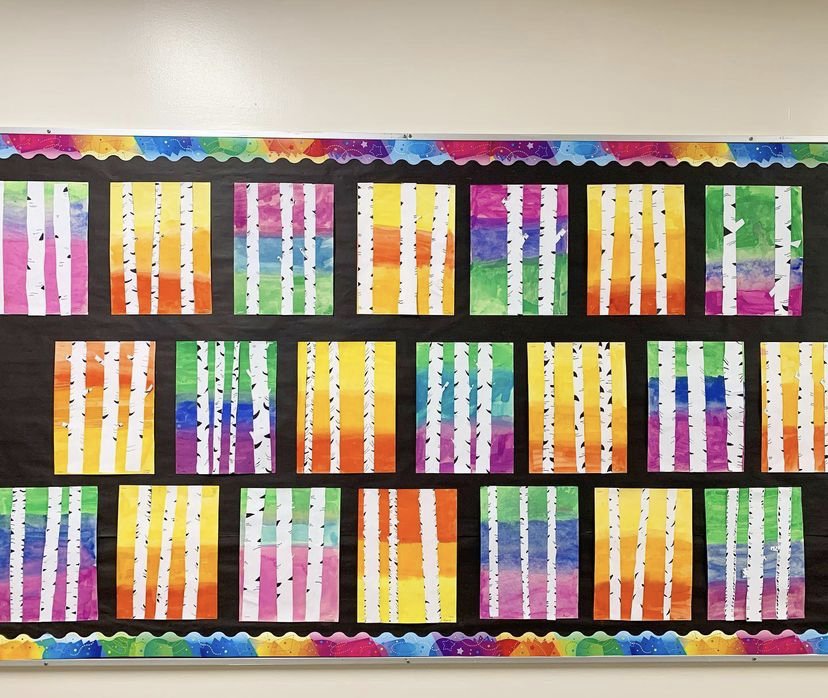
Sunset Birch Trees Art Project
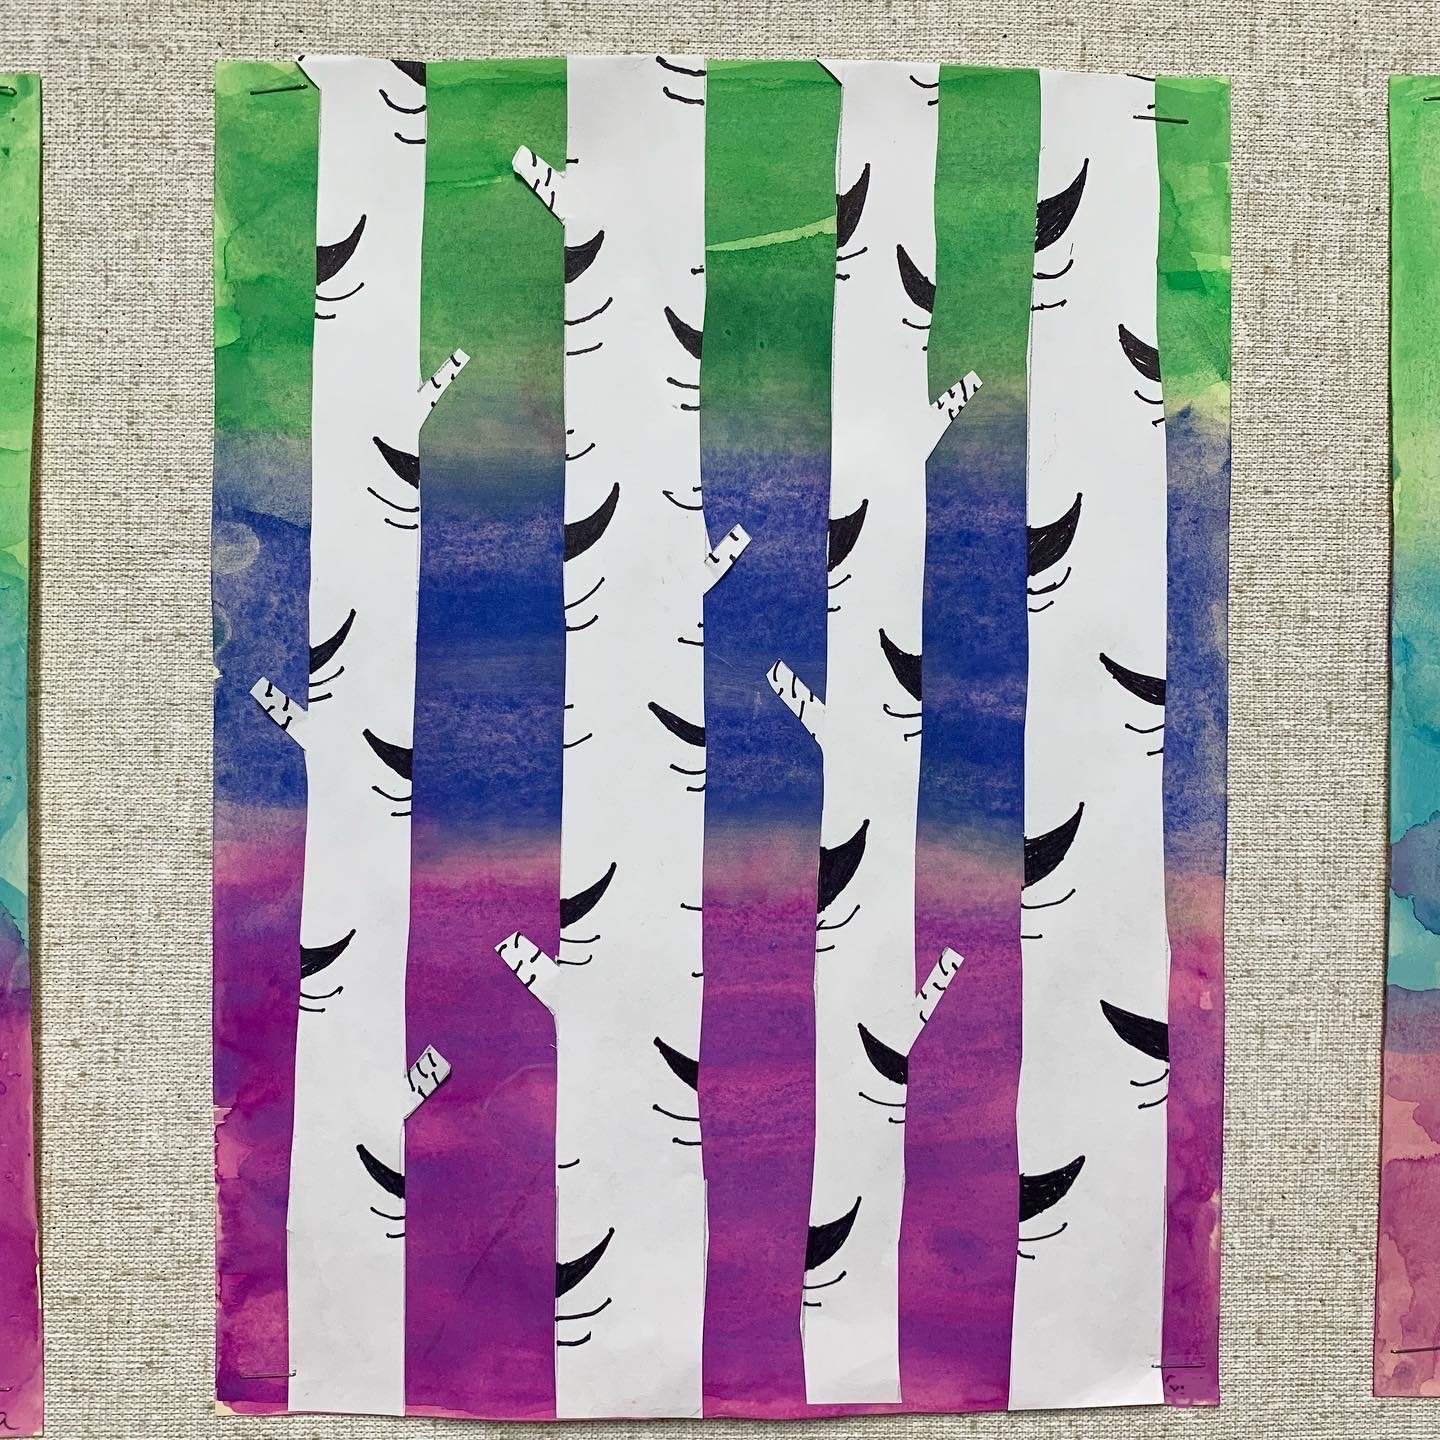
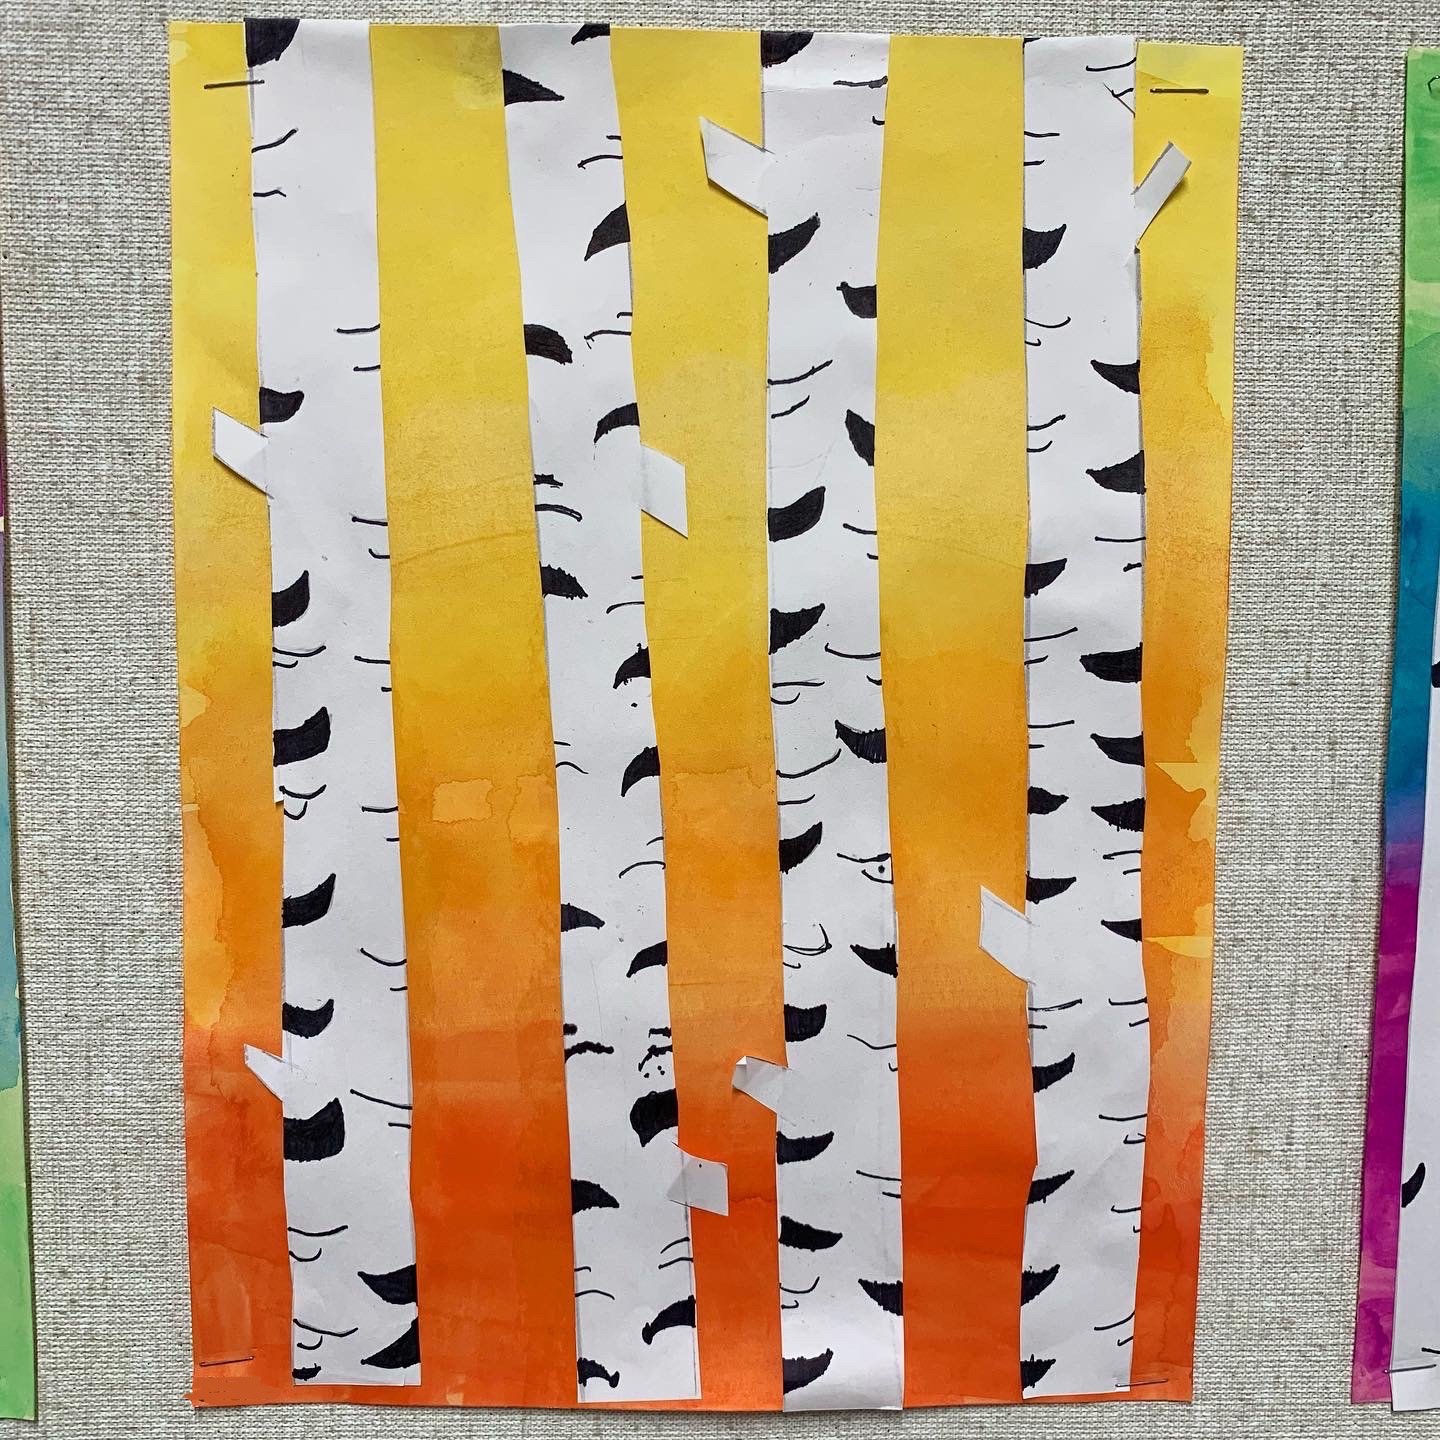
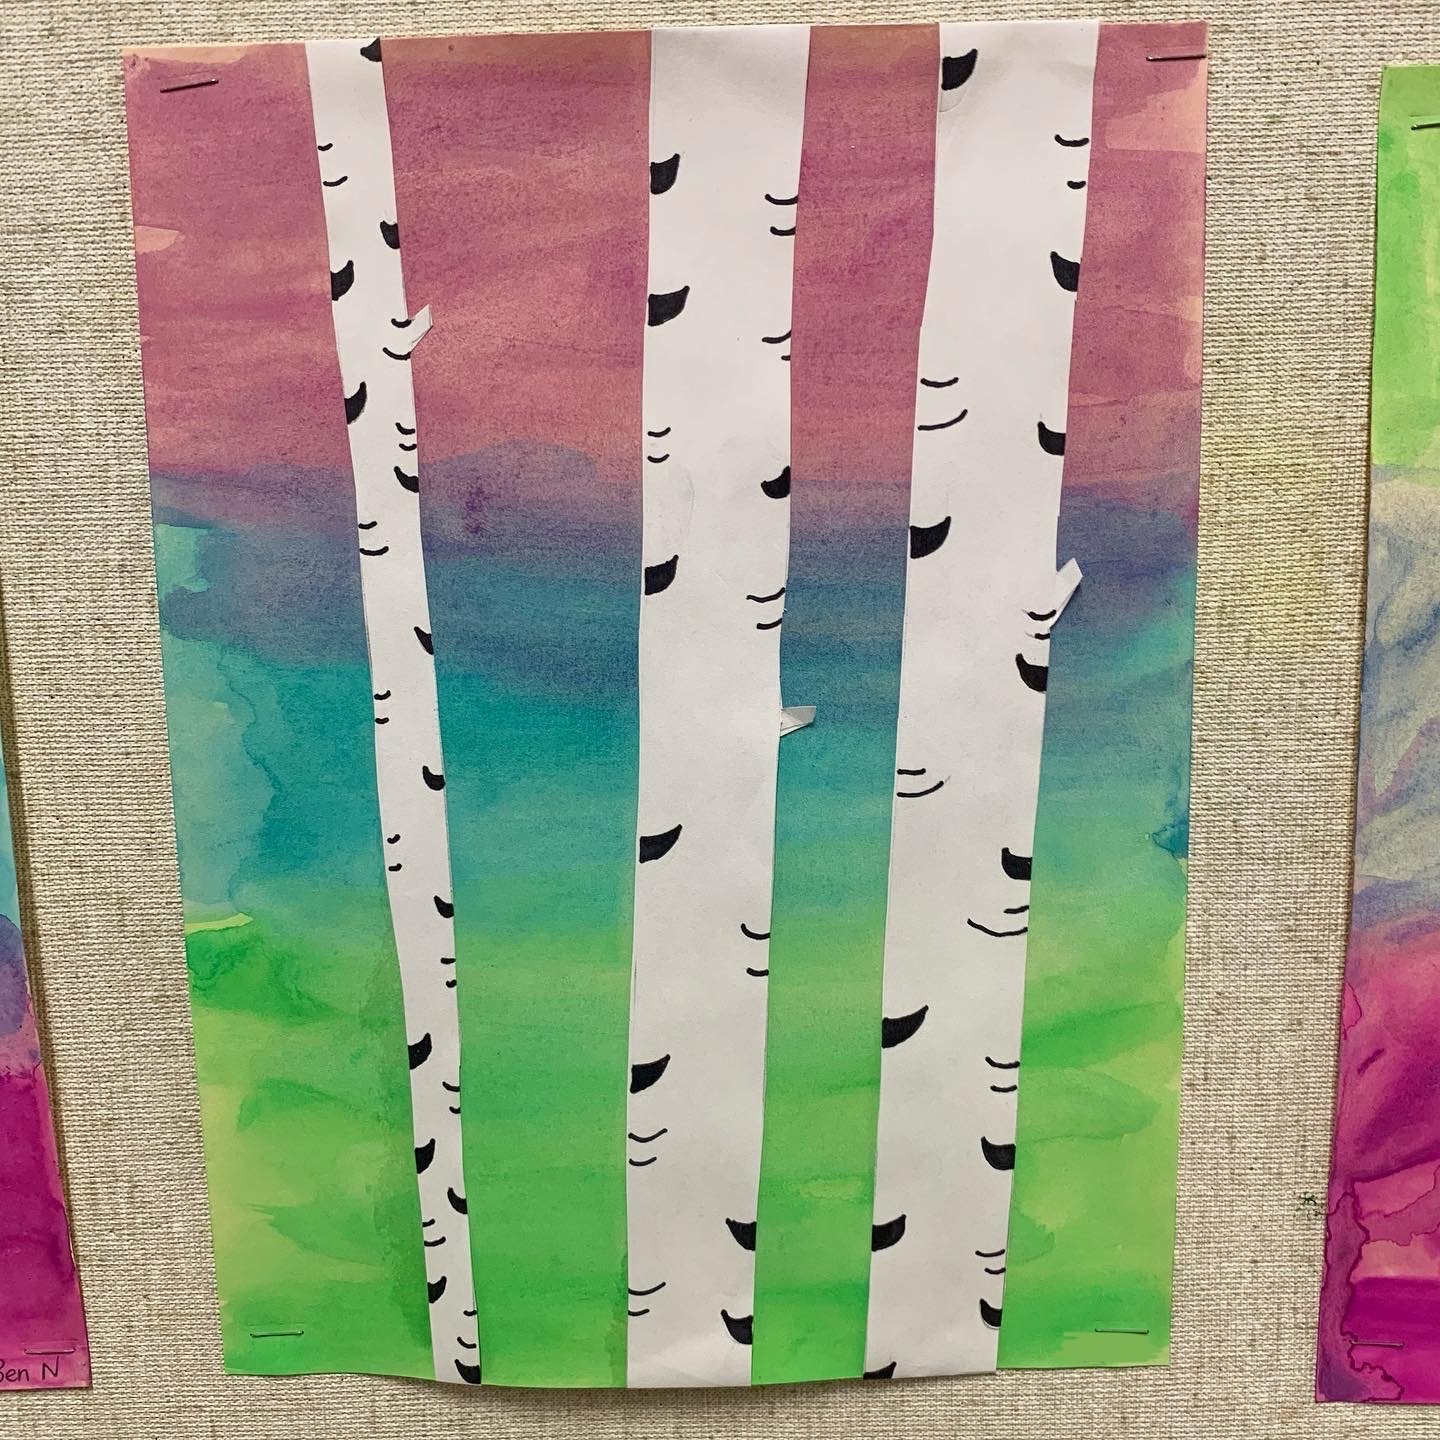
While we don’t have many birch trees in my neck of the woods, I love them and love how their bark stands out against the forest. One of my favourite fall art projects is this birch tree art project. This is also a great project to talk about warm (red, orange, yellow) and cool (green, blue, purple) colours.

Timeline:
This is a multi-day project. You can finish everything in one 45+ minute art period, but if your paint isn’t dry, you’ll need time another day to put it all together.
Materials:
Card stock
Long white paper (legal is best but 8.5 x 11 will work too)
Ruler
Pencil
Thin black marker (thin Sharpie)
Paint (we use tempera paint pucks but you can use any water-based paint)
Scissors
Procedure DAY ONE:
Before you begin, it’s a good idea to look at some pictures of birch trees and talk about what you notice about them, especially their bark.
On the card stock, write your name in pencil on the back, then flip over for the paint. Orient the page vertically.
Choose either a warm or cool colour palette. Using the three colours, make a “sunset” effect with the paints. I tell my students to do about 1/3 of the page for each colour. Blending can be tricky so I suggest getting some water on the brush and moving it along the transition line to make it more blended and less like three stripes.
Set the painted background aside to dry.
For the trees it works best to have a paper that is longer than the card stock. I use legal printer paper, we won’t be painting so no need for it to be heavy weight.
Using a ruler, draw out 3-4 trees that extend the length of the page. Birch trees don’t have thick trunks so don’t make them too wide.
If desired, add little branch nubs.
Add details to the bark by making designs with “swoops” and thin curved lines.
*note: Before you leave for the day, if paintings are dry, I suggest stacking them and tucking them under something heavy. The edges tend to curl a bit so this will help make it flat for day two.
Procedure DAY TWO:
Cut out trees and glue onto sunset.
Since the tree will be longer than the page, you can either glue and then cut off excess or fold the excess over the edges and secure on the back with glue or tape.