

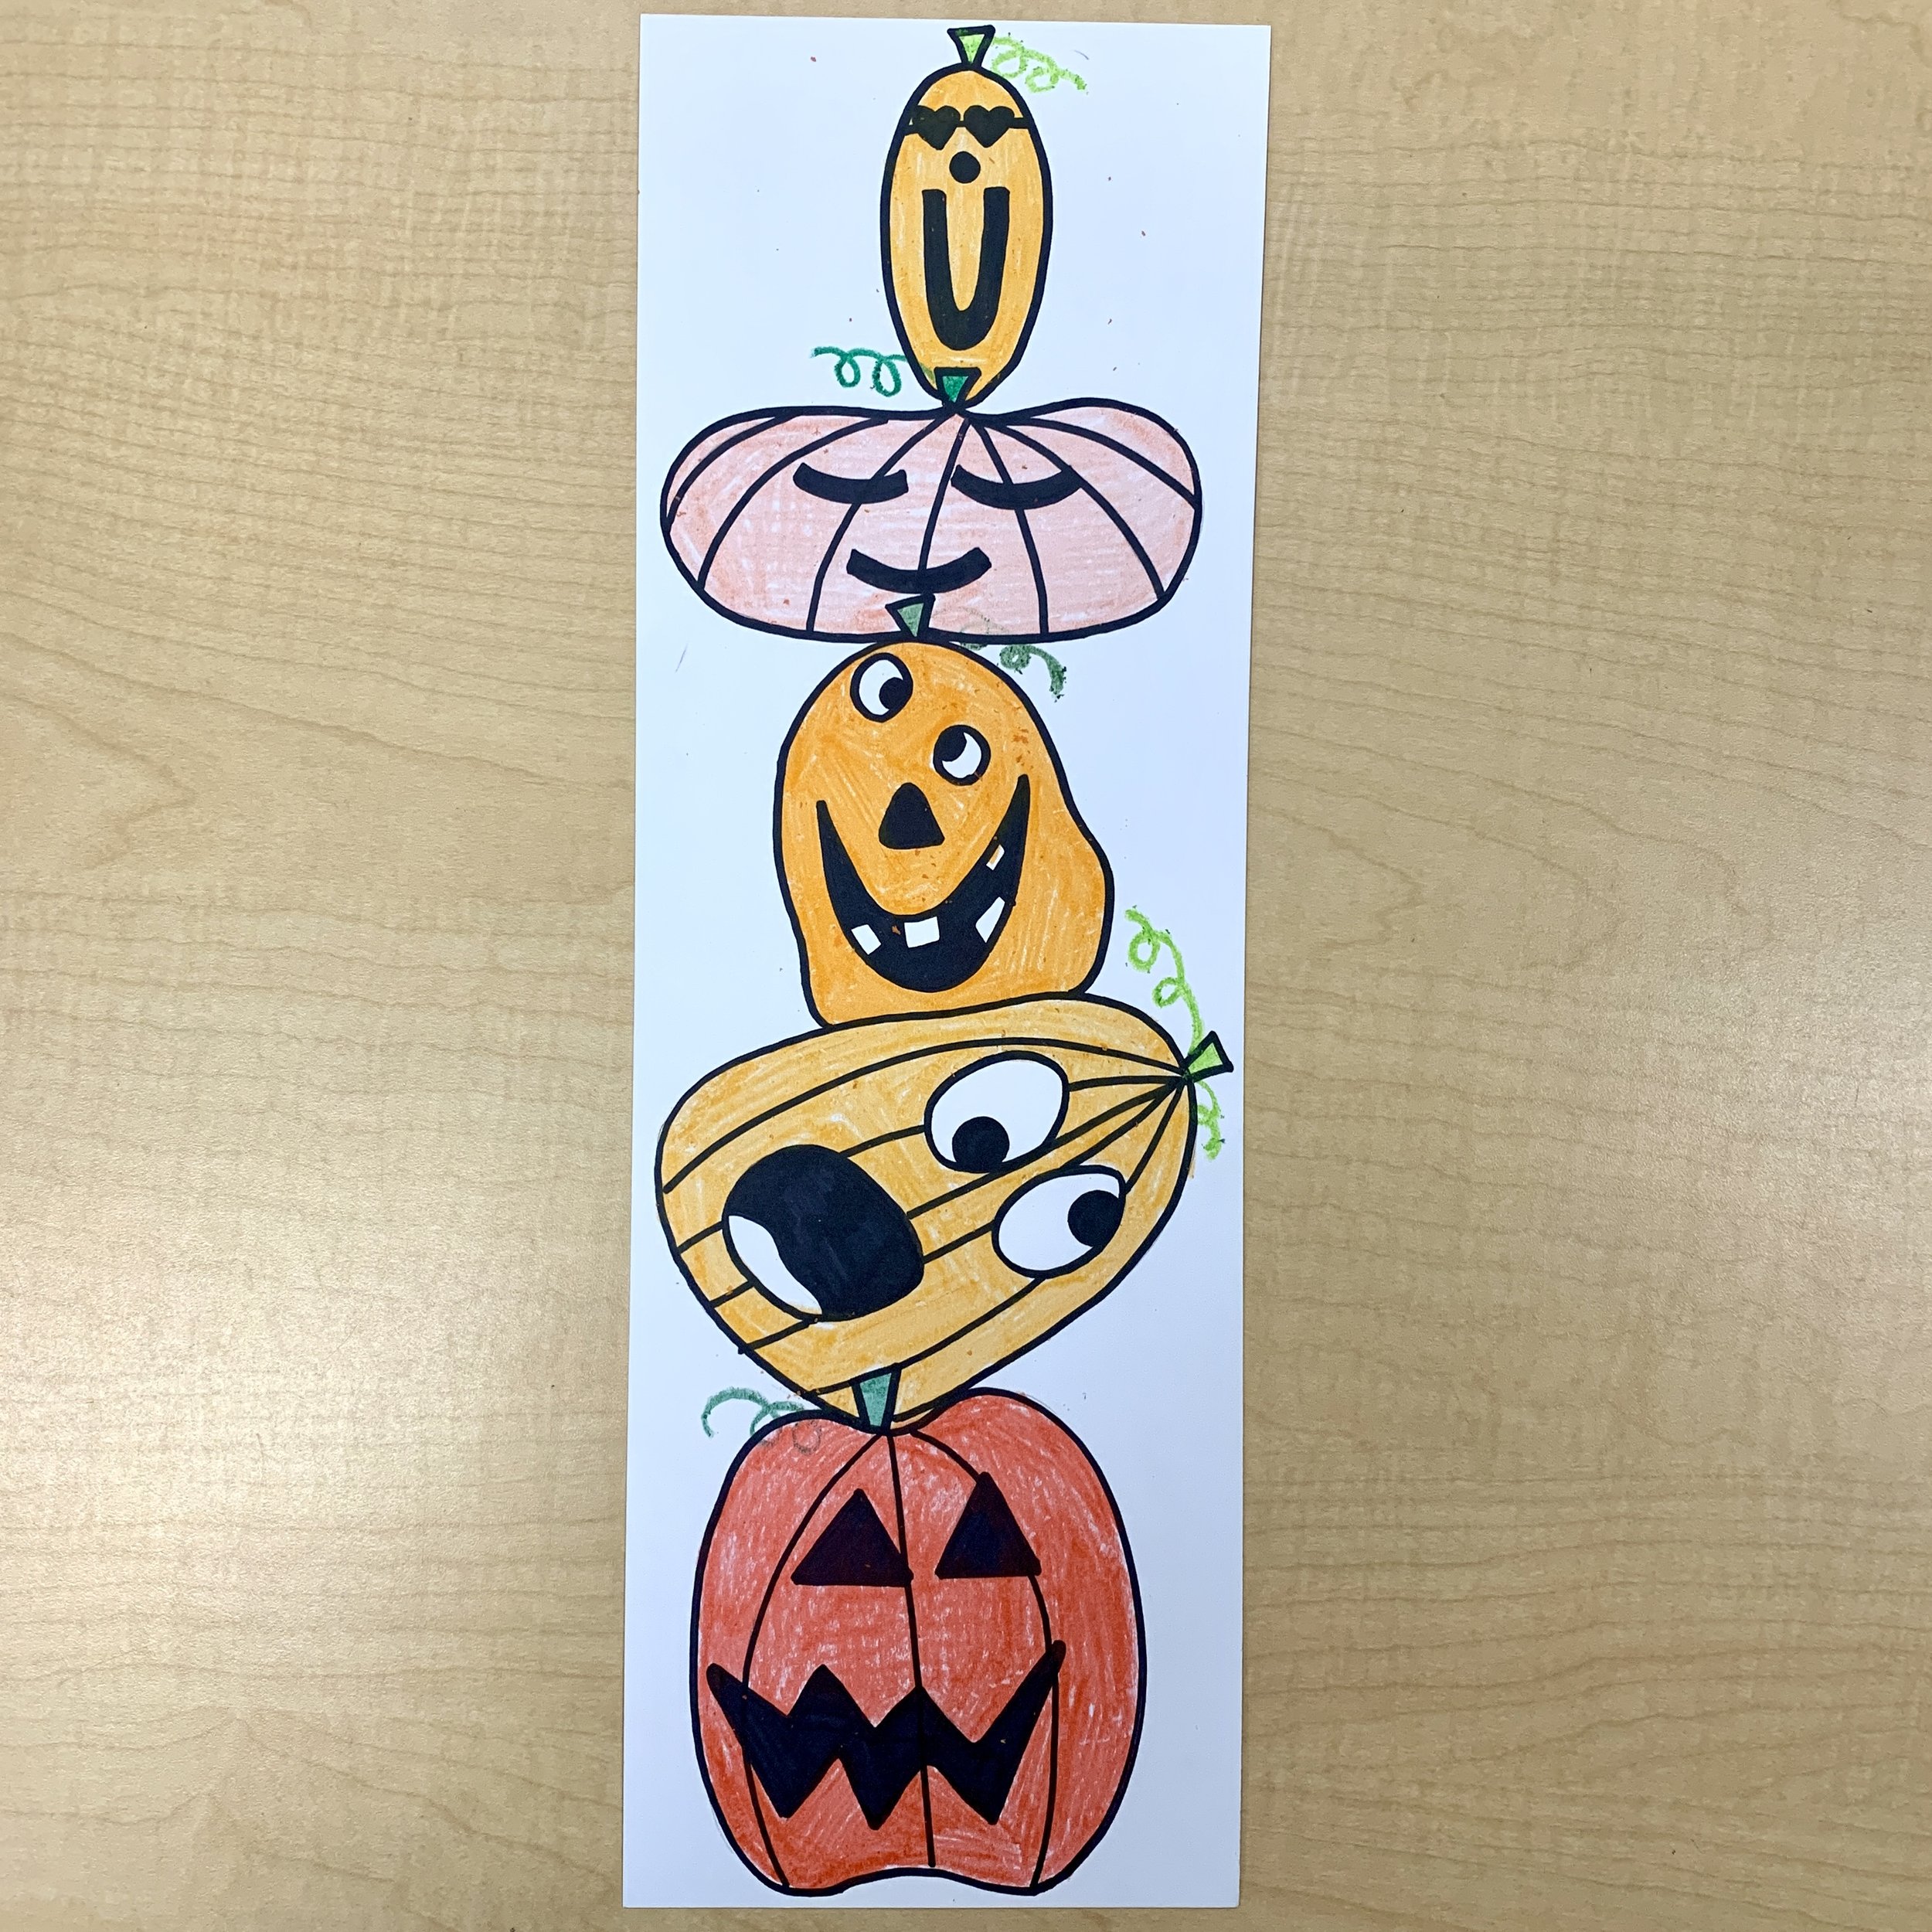
Stacked Pumpkins Art Project
This is a fun project that is perfect for classes in the fall. If you won’t be celebrating Halloween, you can still do this project and make it pumpkins in the fall instead of jack-o-lanterns. Other than cutting the paper, there is no prep involved.

Time required: 45-60 minutes (can be split over multiple periods)
Materials:
11x17 paper cut in half lengthwise (I use card stock but printer weight is fine)
Pencil
Eraser
Sharpie
Orange and green crayons (alternatively use markers, oil pastels or pencil crayons)
Watercolour paint (I use tempera paint pucks)
Teacher prep:
Cut the paper in half, one for each student.
Steps:
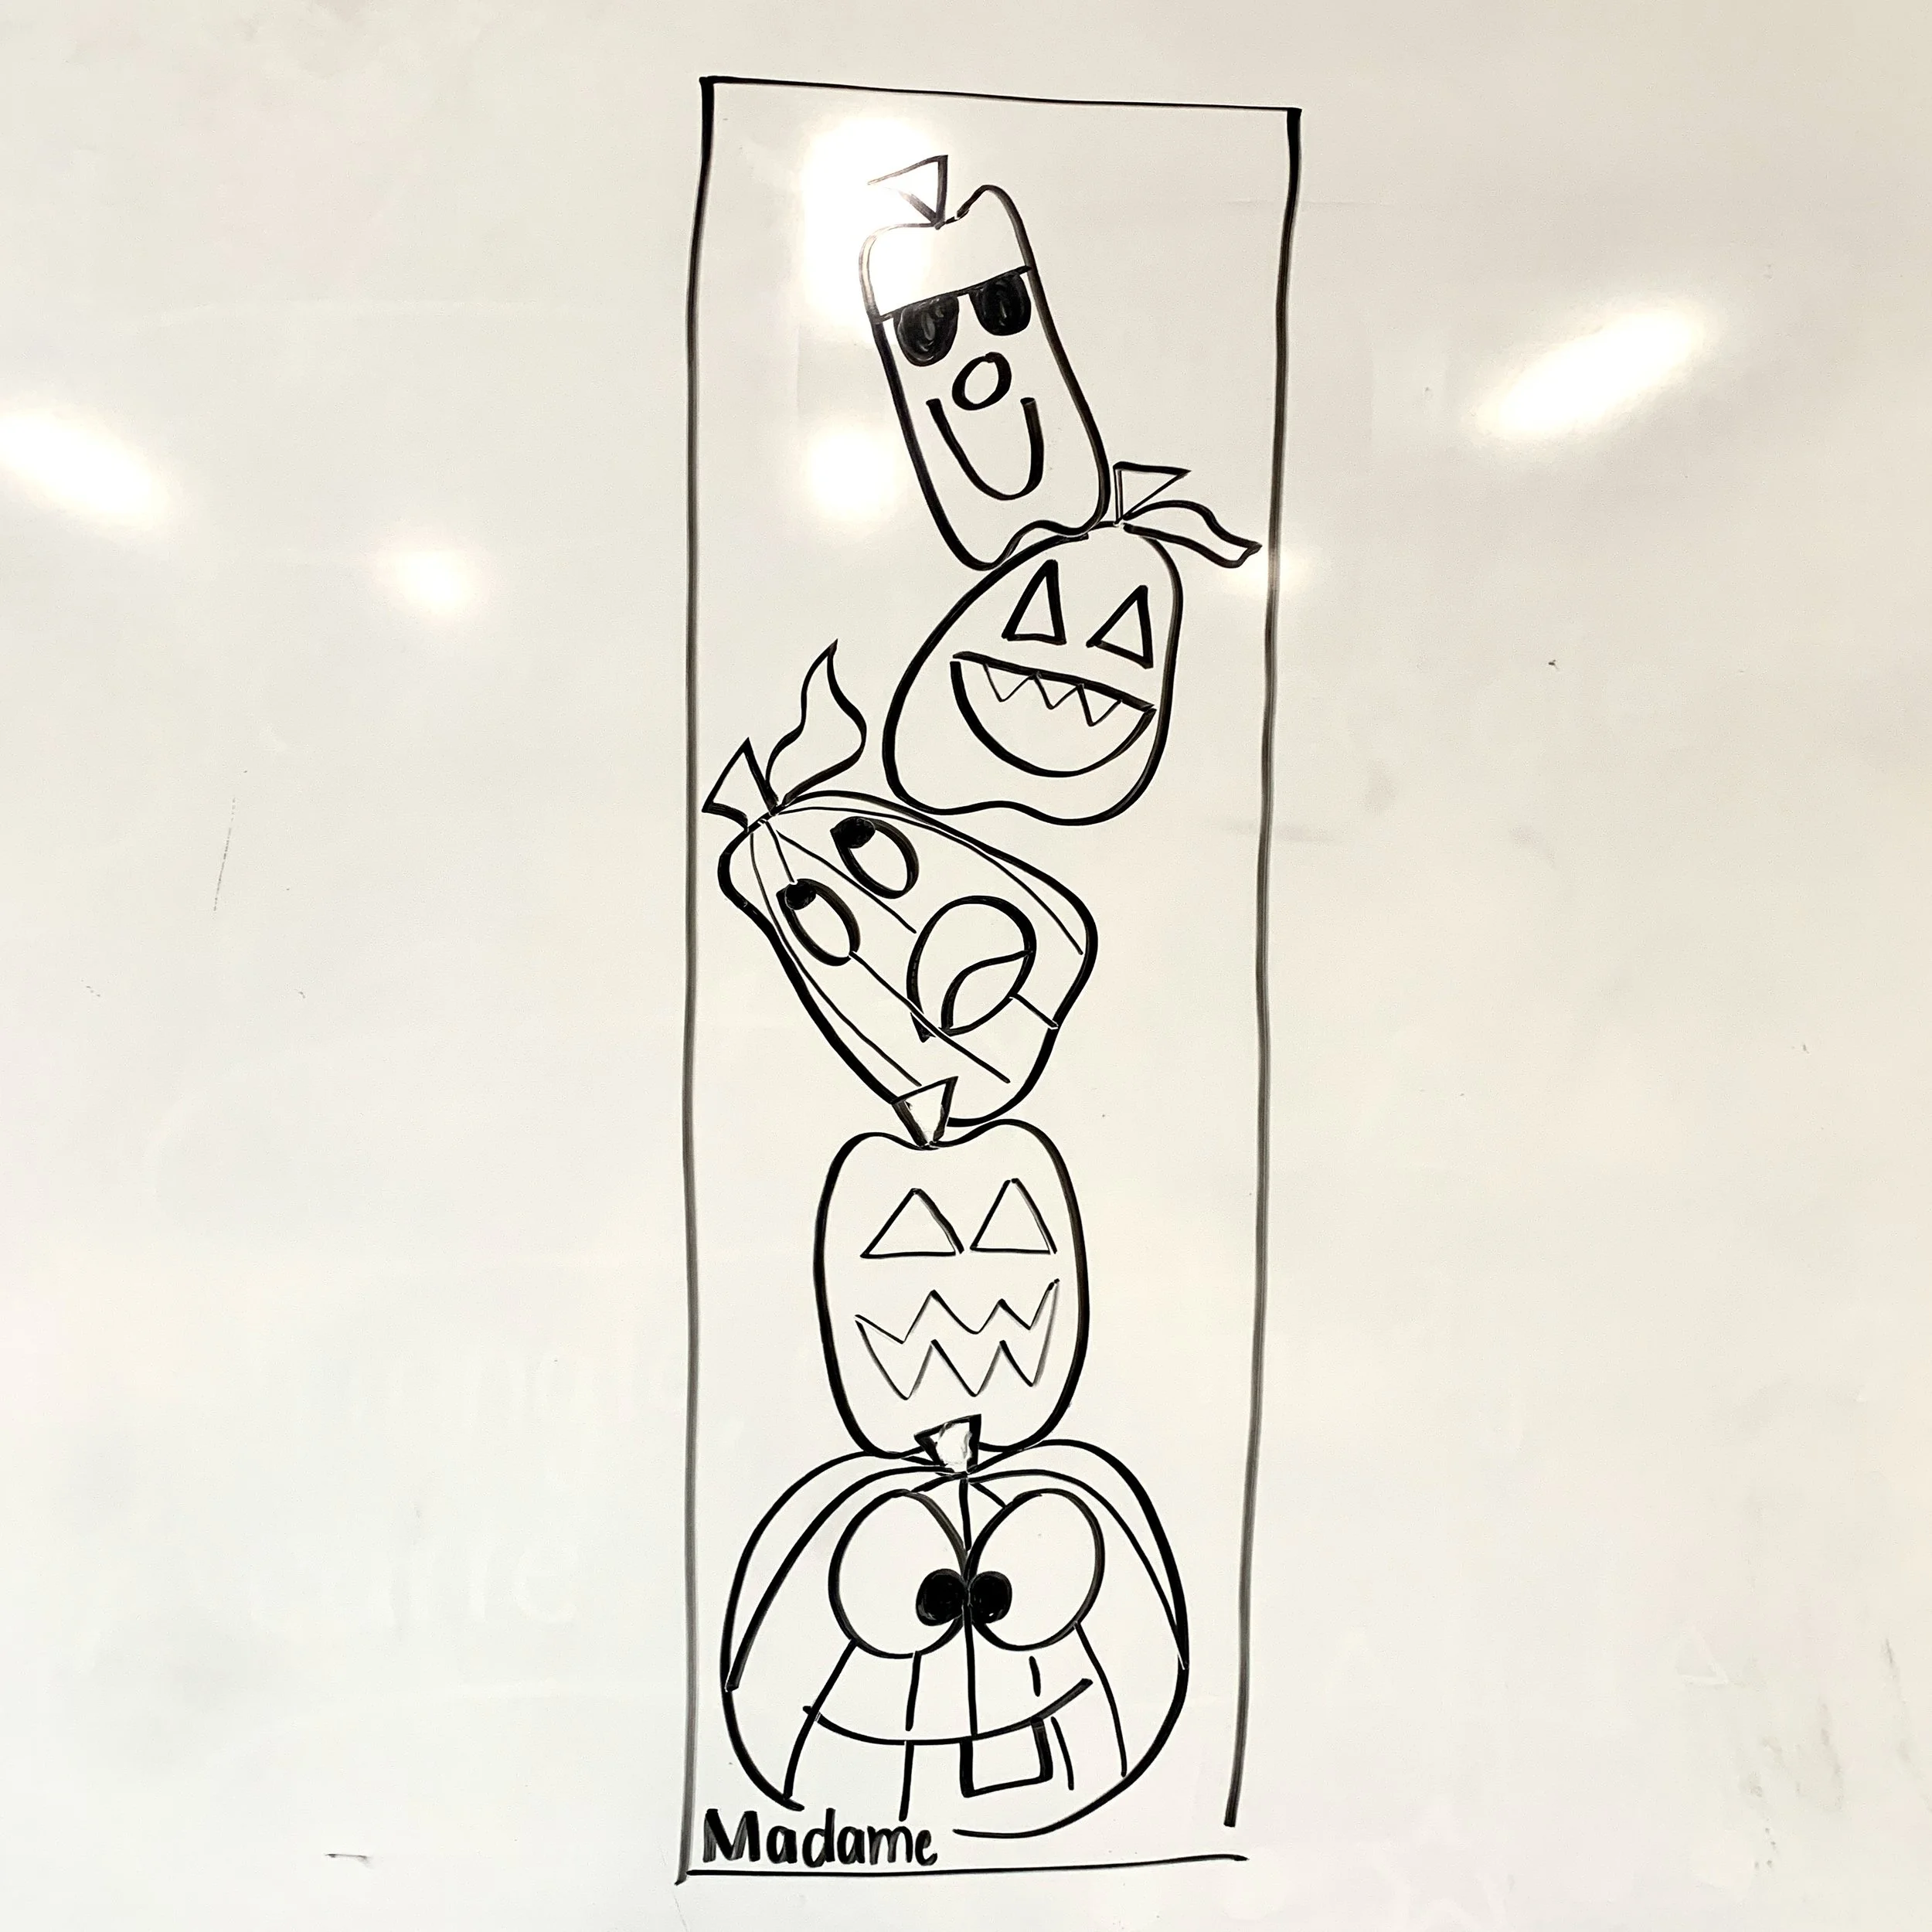
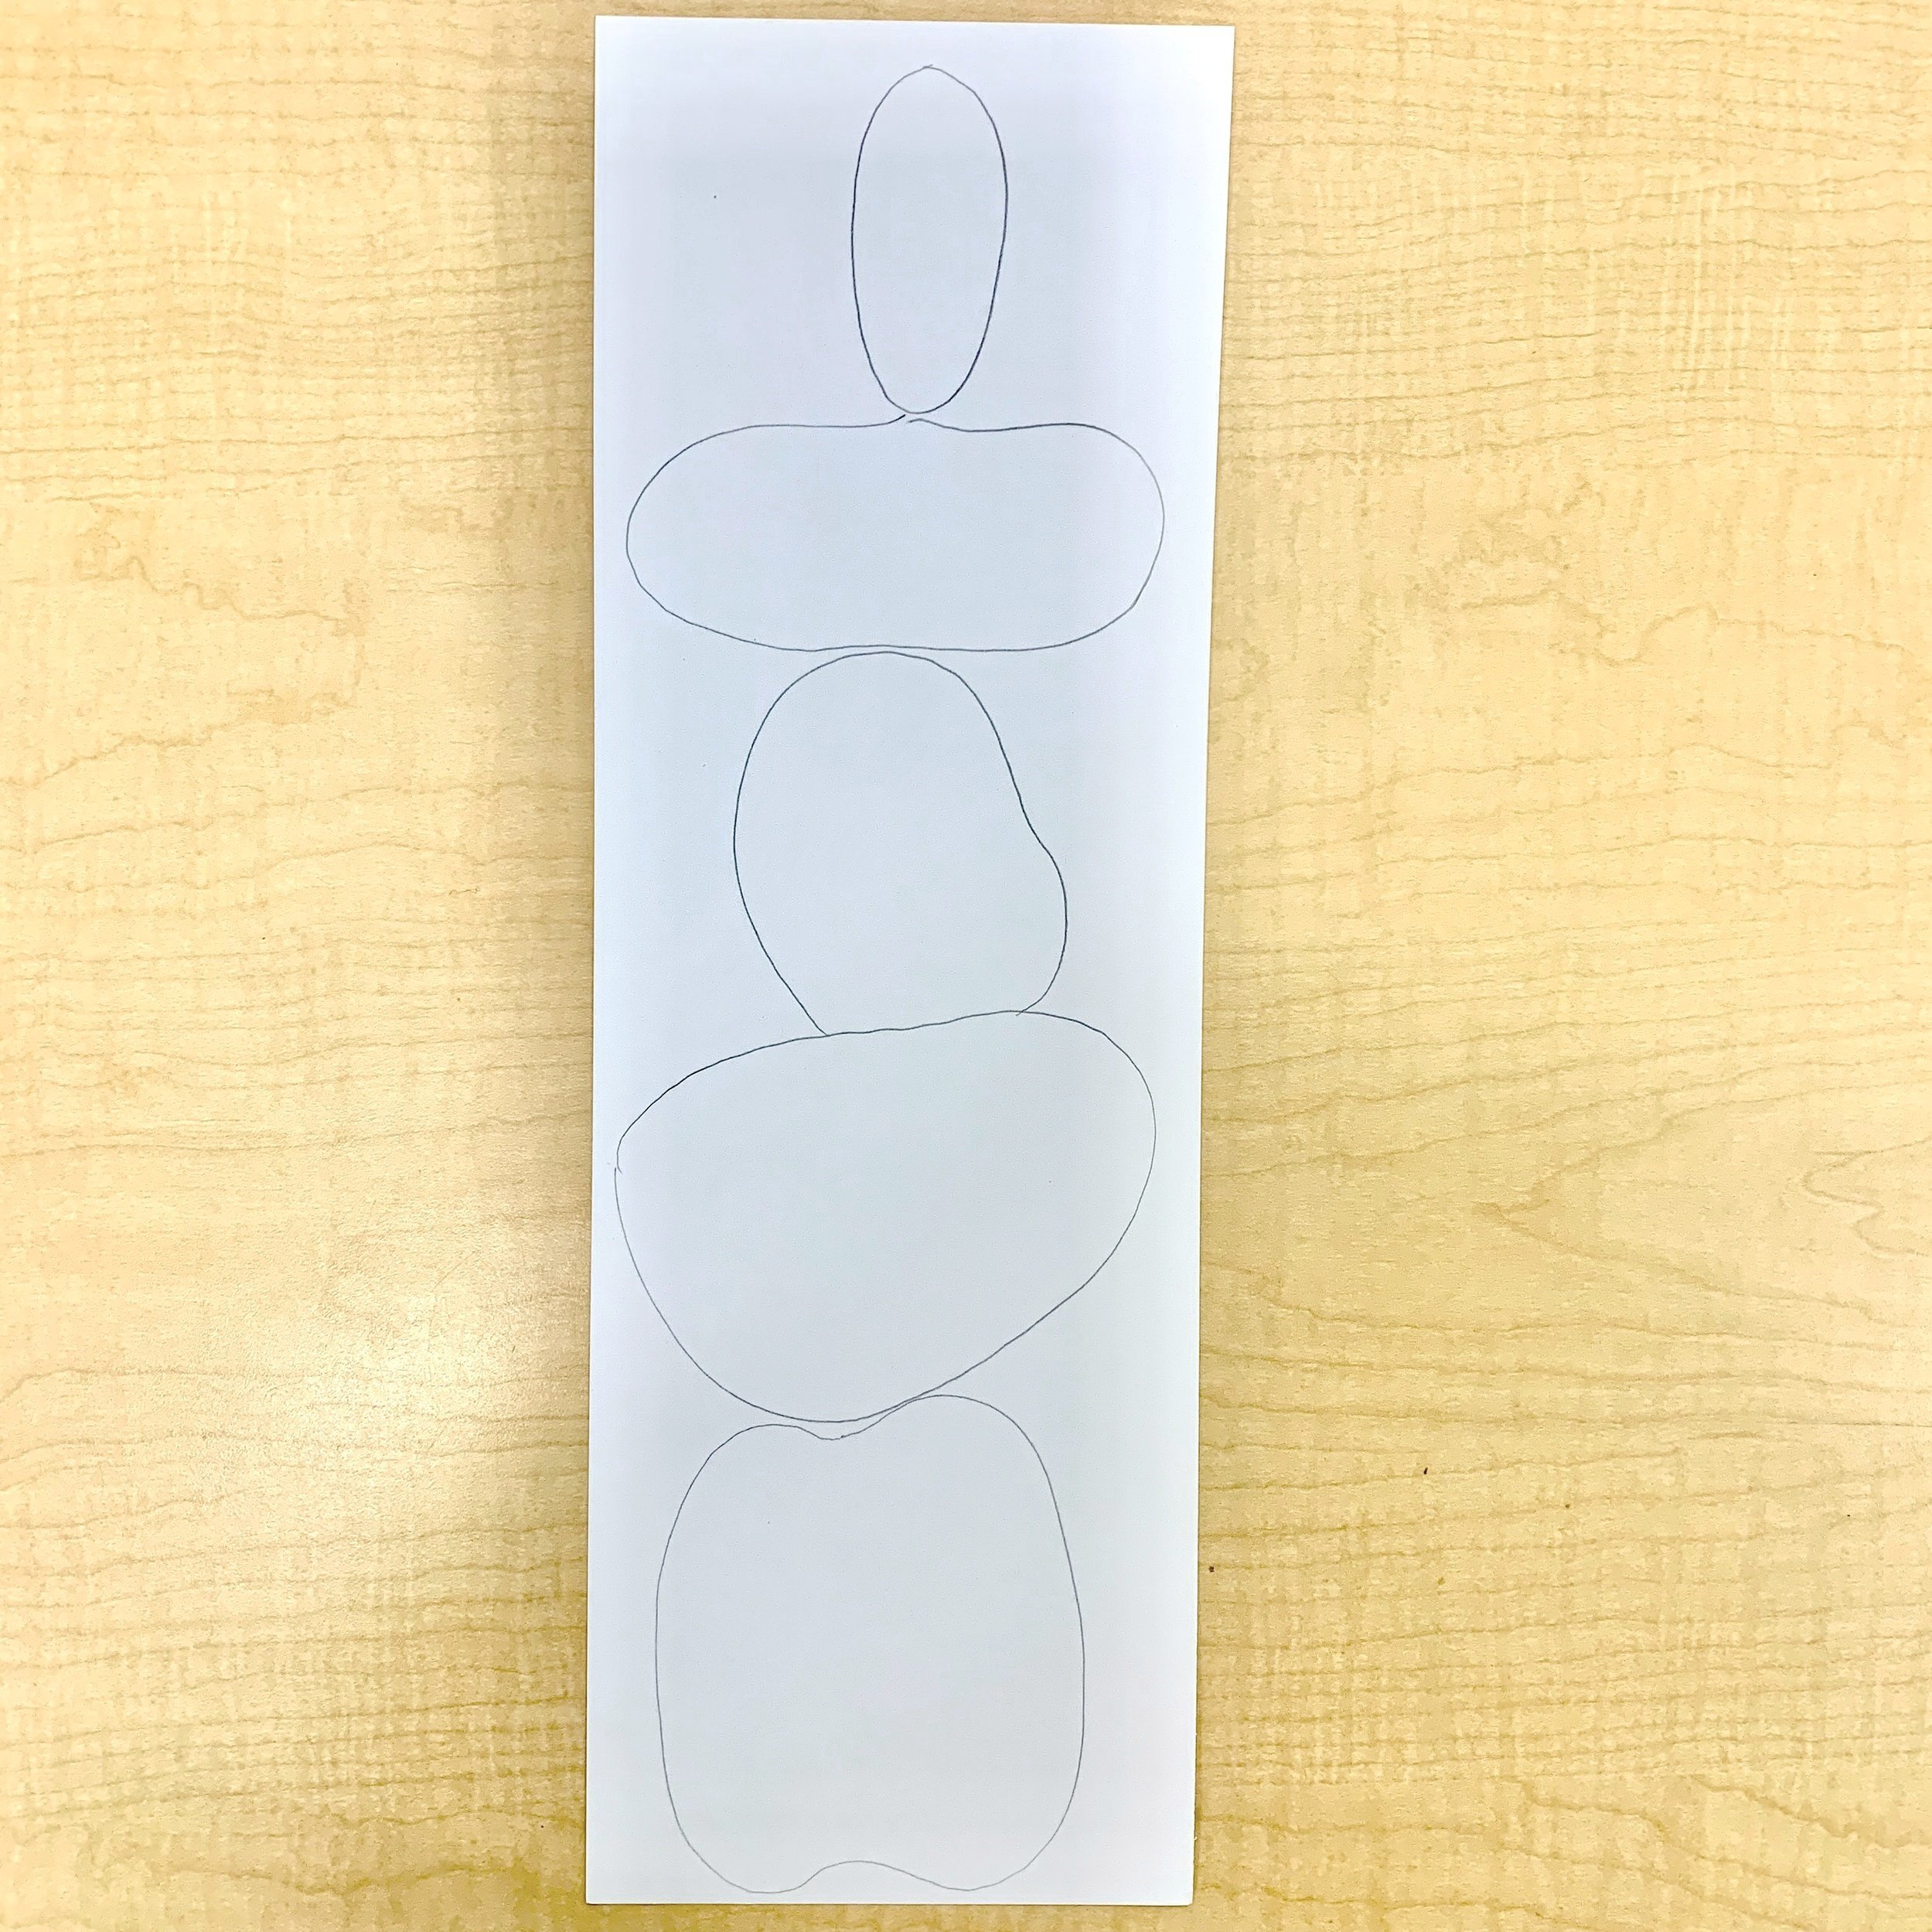
Begin by sketching the pumpkin shapes. I fit five pumpkins on my sheet, but you may fit more or less depending on their size. I like to make them all different shapes.
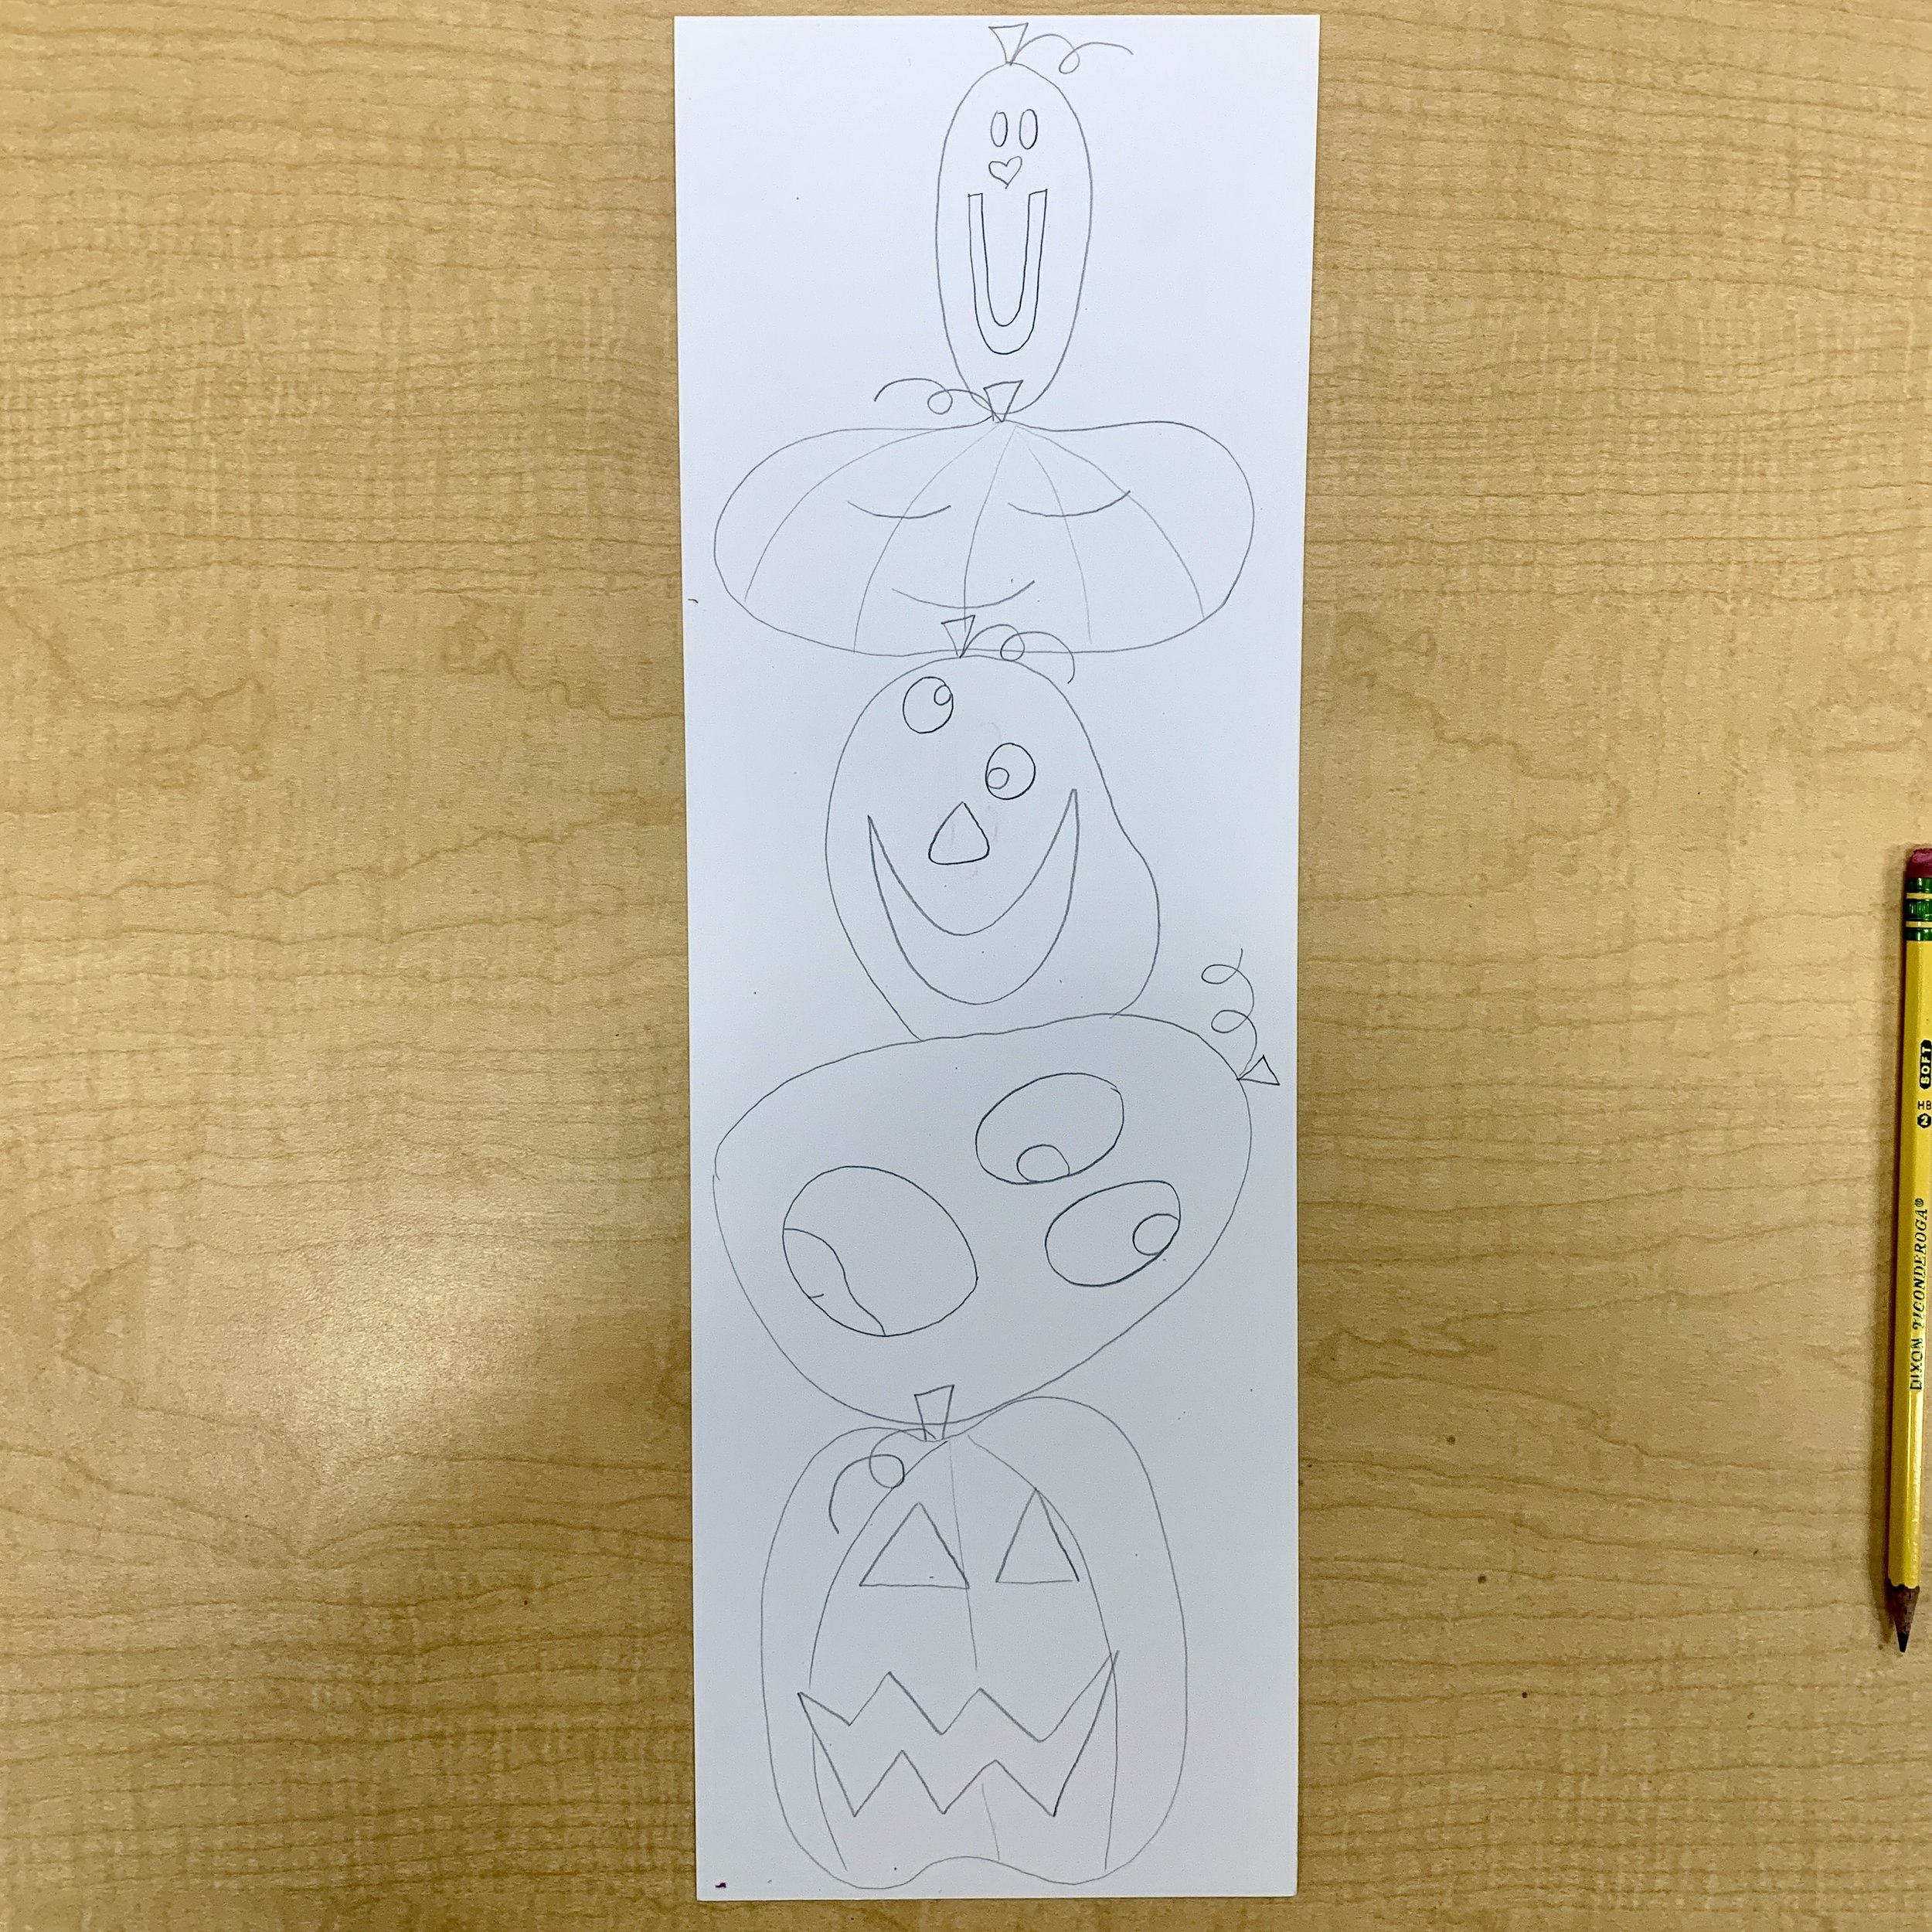
Once you’re happy with the shape, add details to each pumpkin. Give them eyes, a mouth, a nose etc. I chose to add some vertical lines on some, but not all.
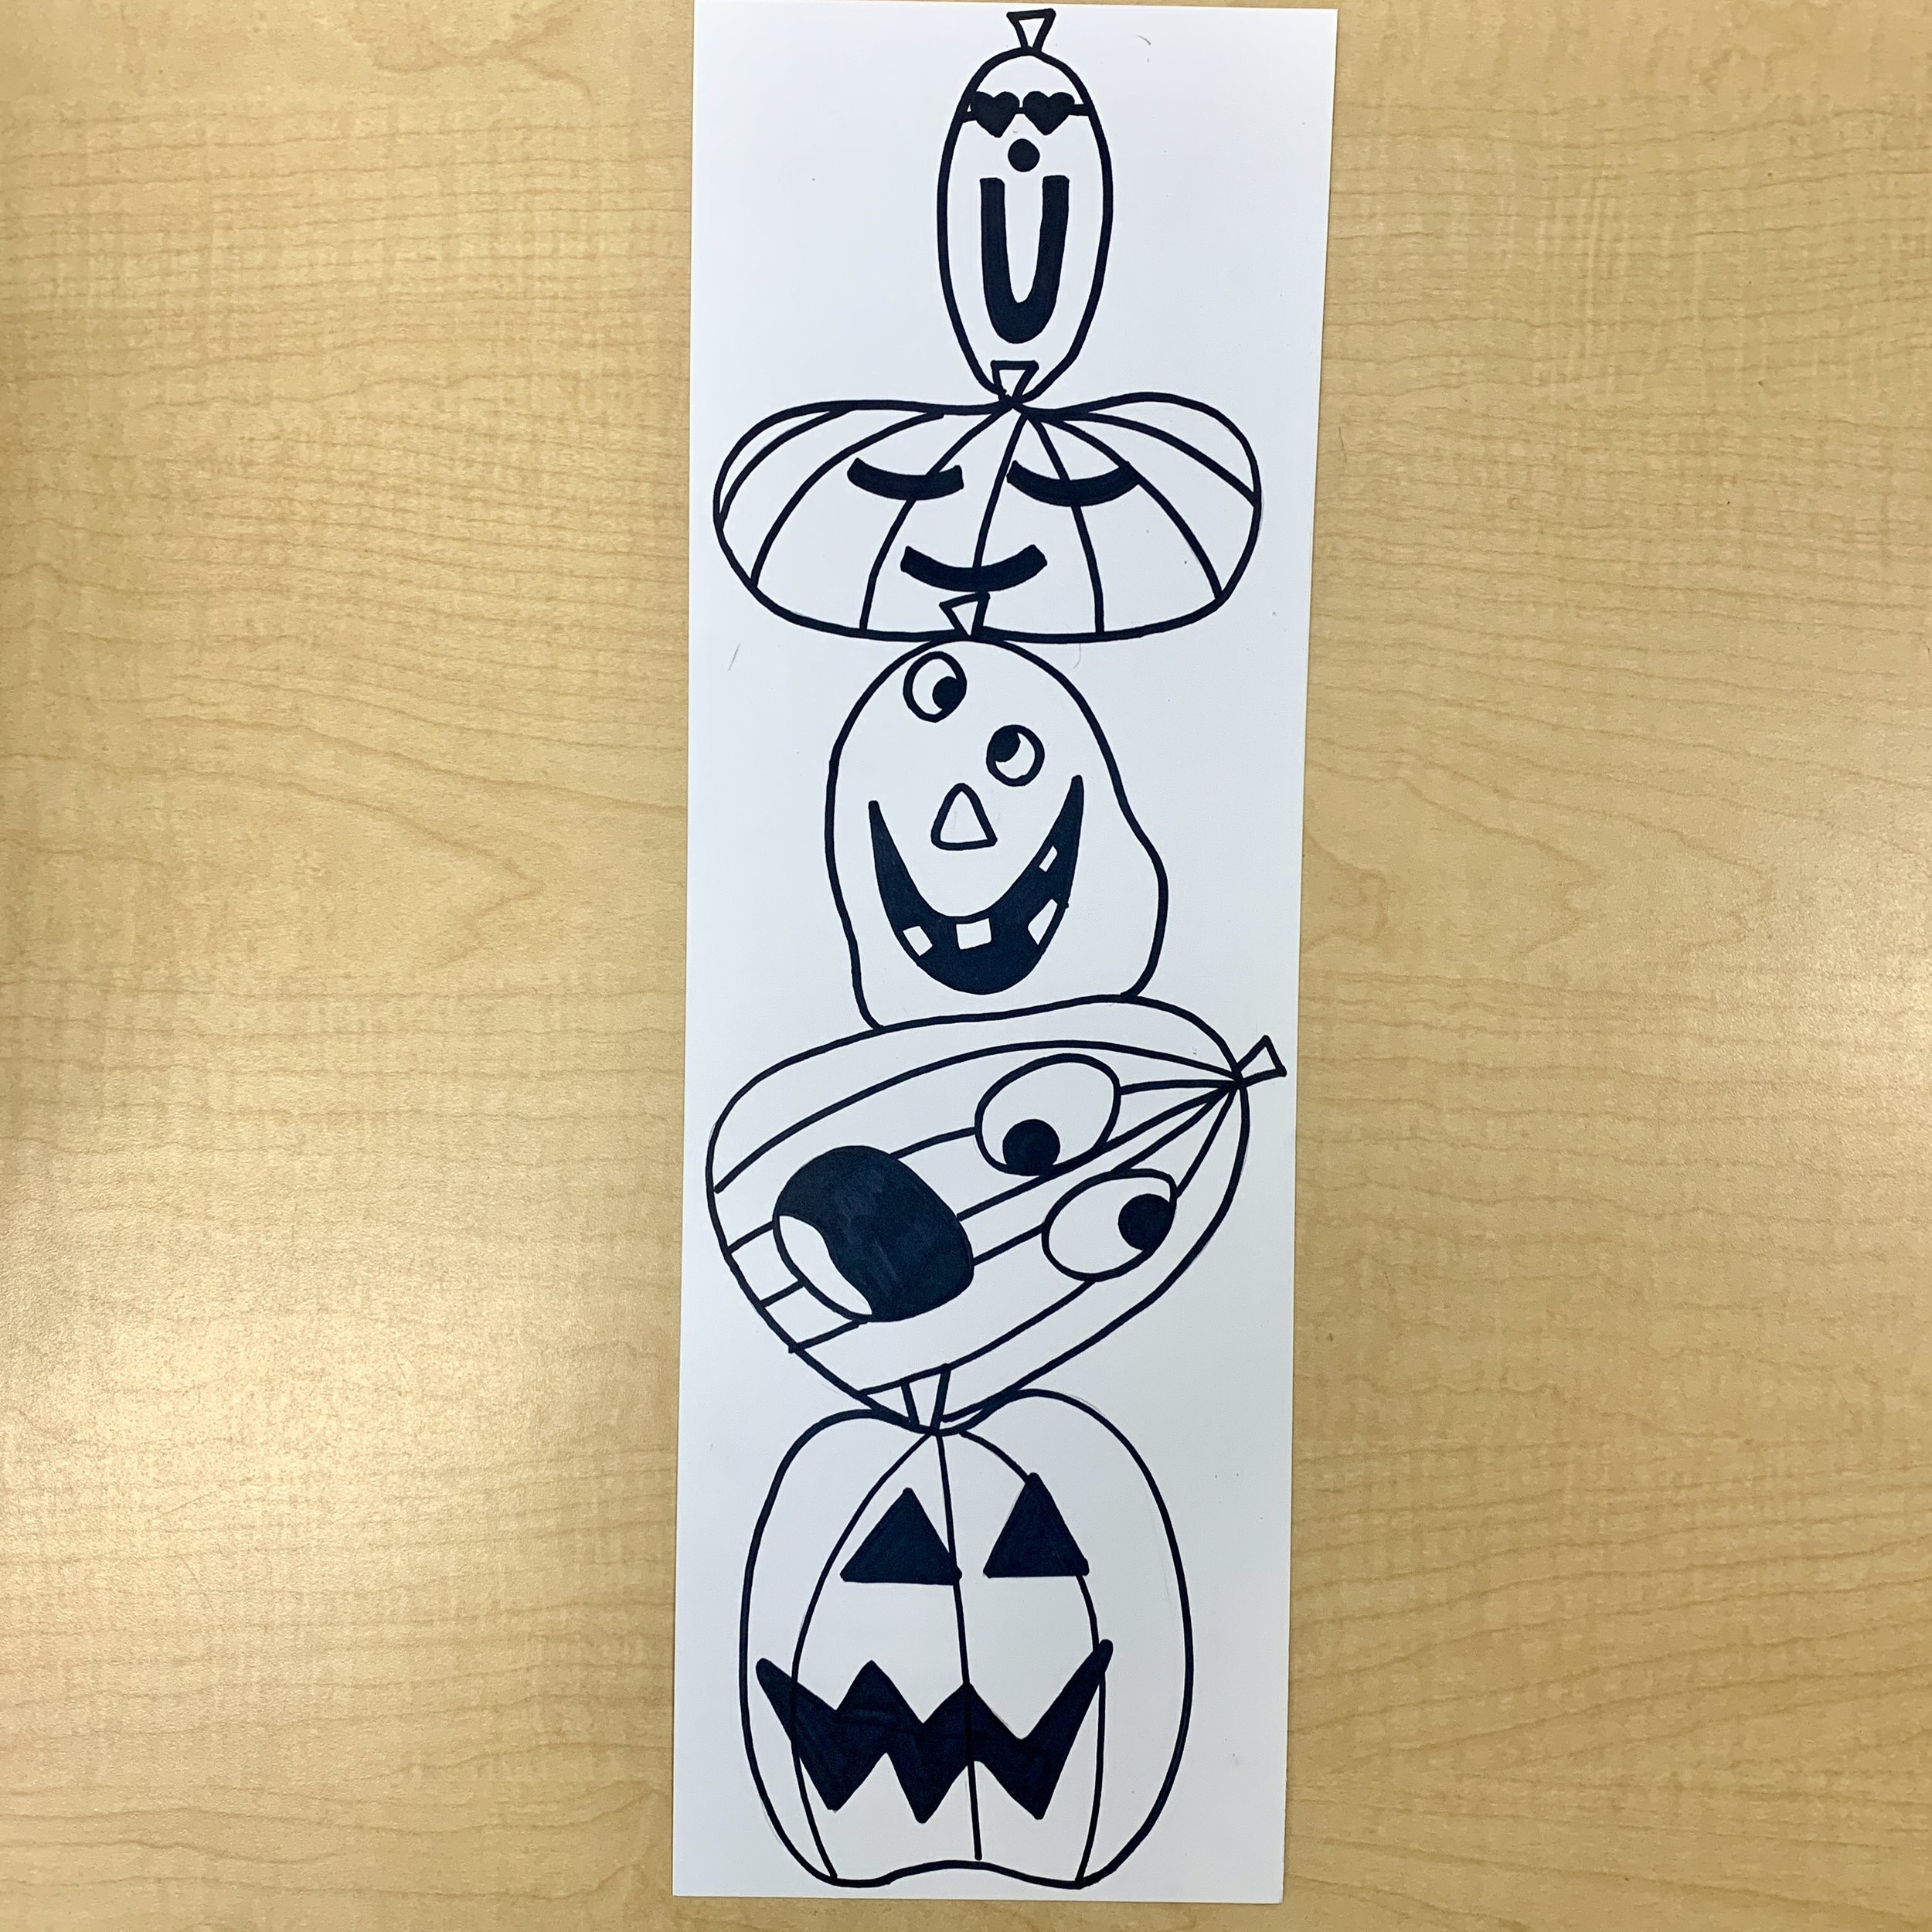
Trace your pumpkins with a Sharpie. Fill in any black parts with the marker (like the eyes or a mouth).
Use the crayons to colour in the pumpkins. I had several shades of orange so I used those to add some variety. Add a bit of green for the stem parts.
Paint the background. I chose blue, but you can choose any colour. I would suggest only choosing one colour so that the pumpkins can stand out against it, rather than getting lost in a busy background.
*If you used printer weight paper, or some card stocks, you’ll want to weigh the projects down with something heavy as they can curl while they dry.

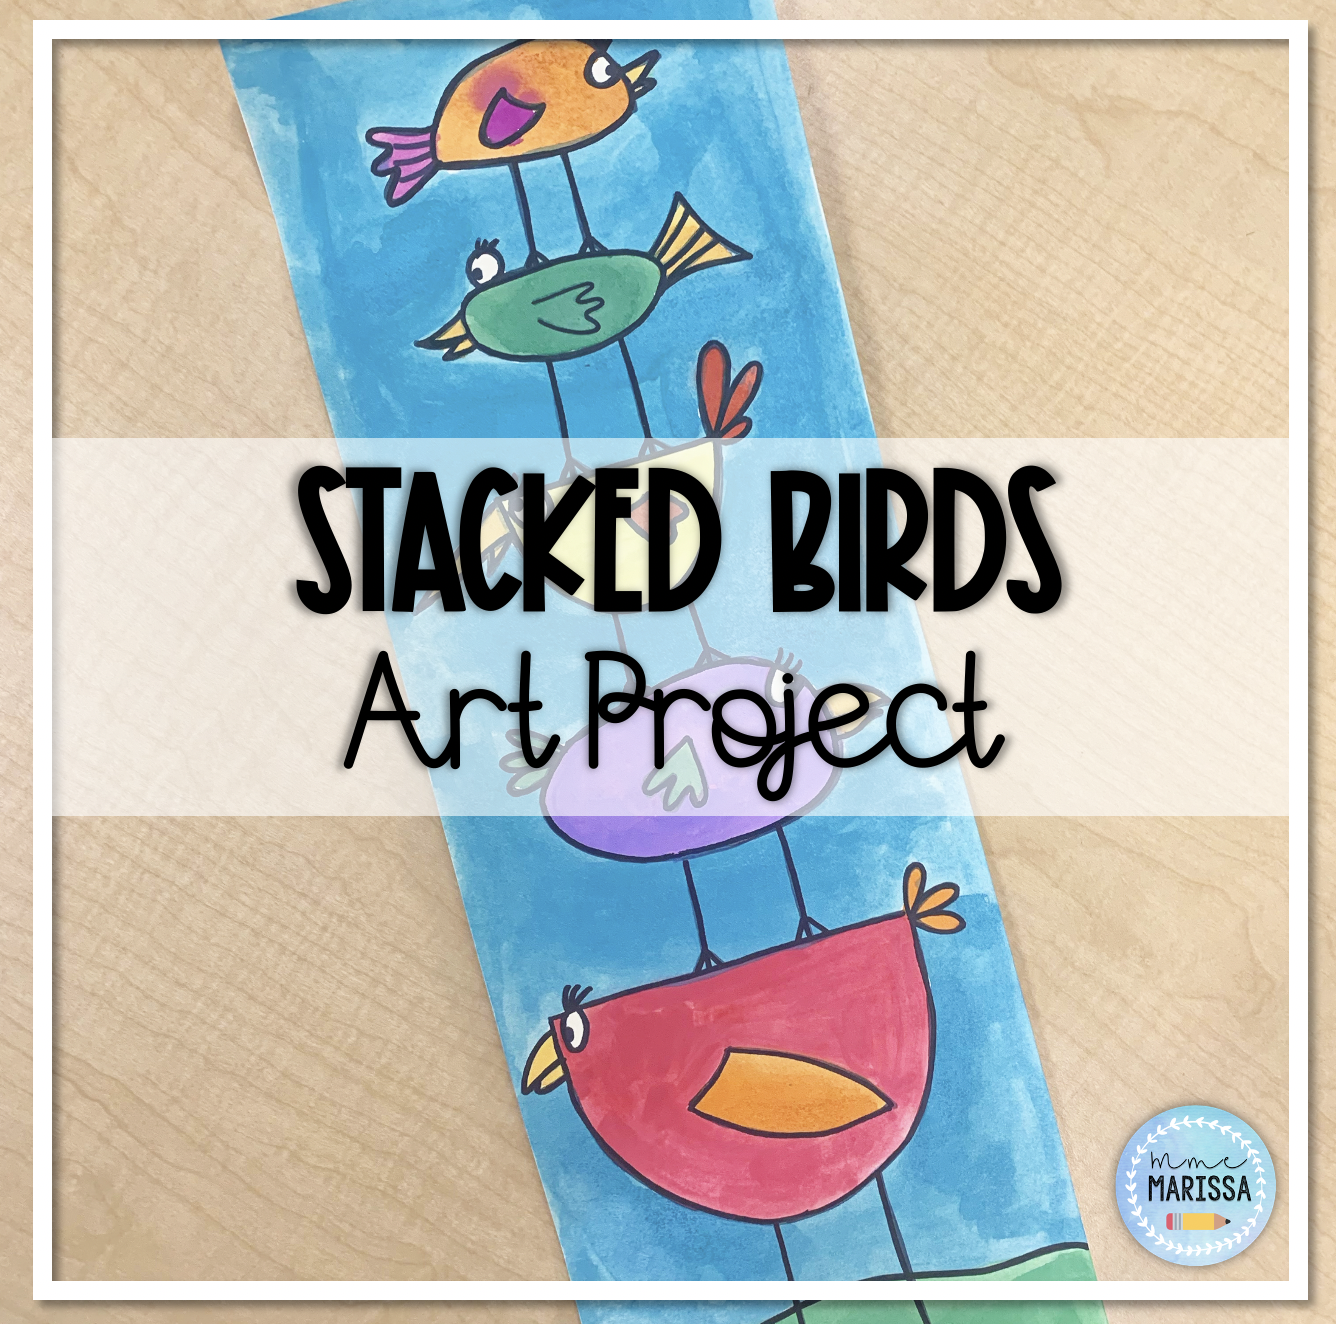
Stacked Birds
Like this project? How about a spring version featuring birds!