

Stacked Birds Art Project

What’s more spring-like than colourful birds? This project will have your students working upwards, rather than across a page. With bright colours and so many shapes, your students are sure to show off their creativity!
Originally found this project here.
Timeline: 60 minutes
Materials:
Paper cut into a long strip (I used an 11x17 cut in half along the long side)
Pencil
Eraser
Sharpie (Thin & Thick)
Tempera paint
Paint brush
Steps:
*Before starting project, cut your paper strips
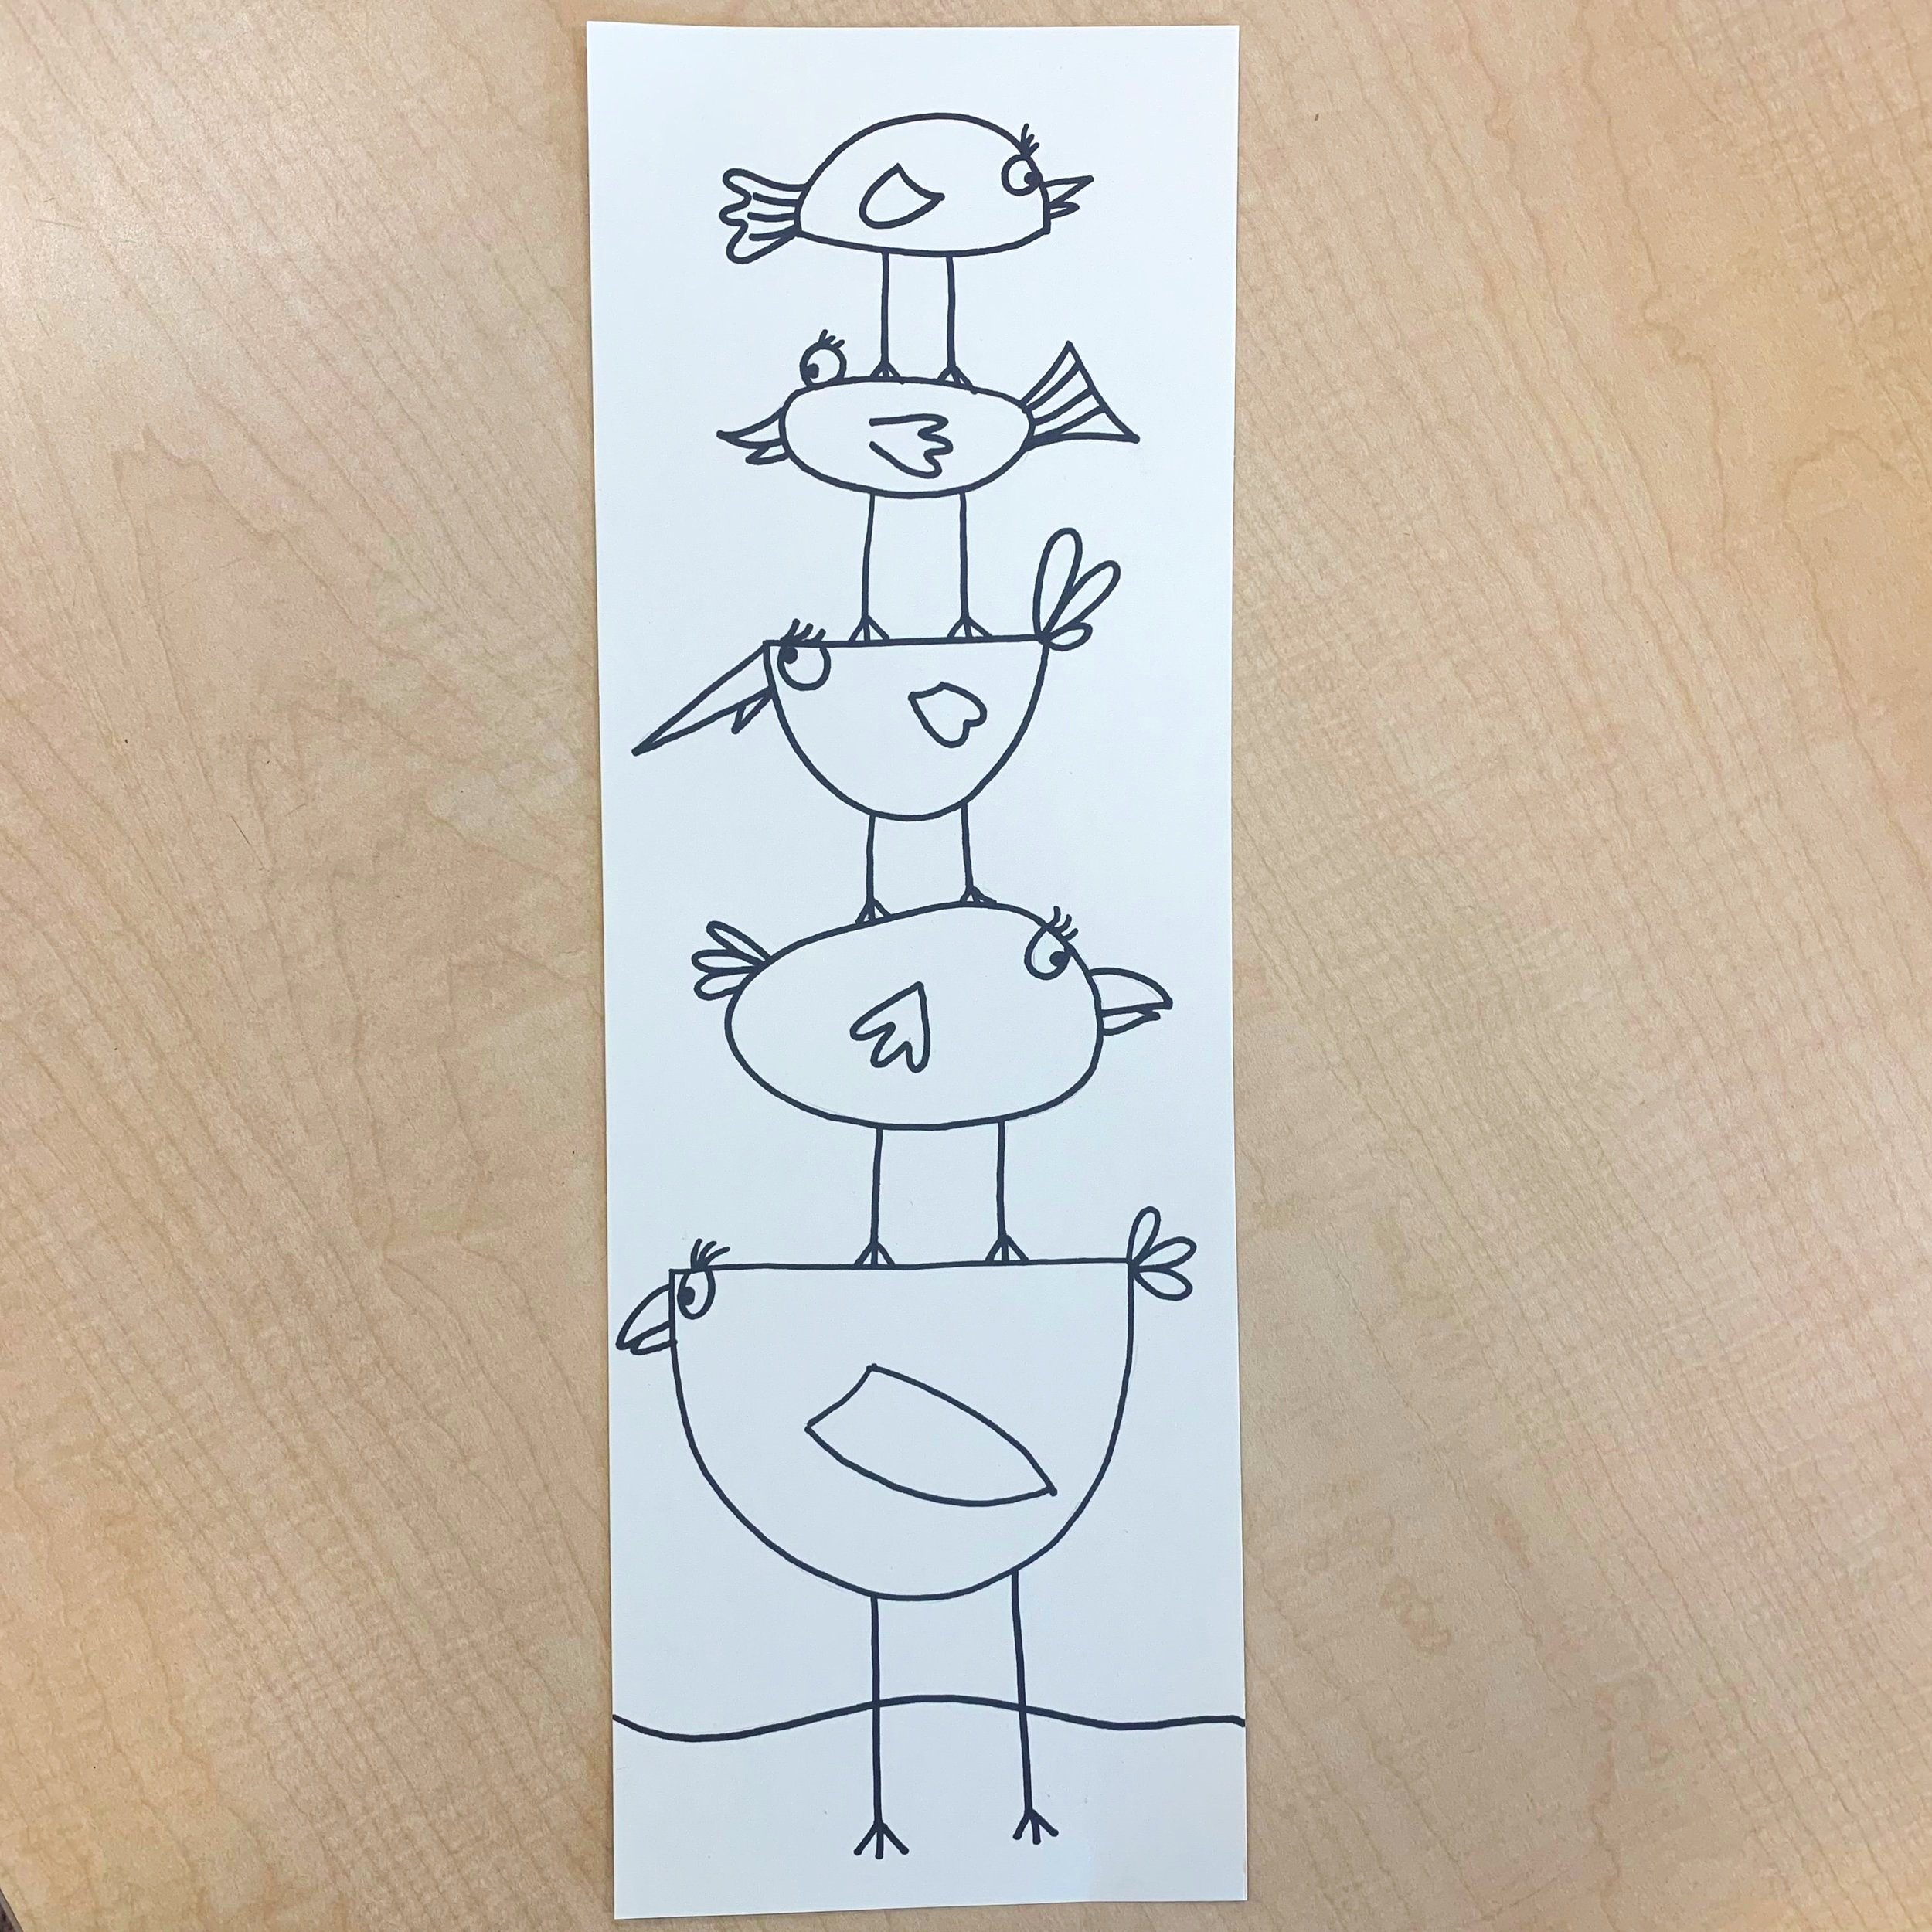
Draw a curved line for the grass with a pencil.
Then, draw the birds, starting with the largest bird on the bottom. Draw the body first, then add a beak, eye, wing and tail feathers. There is no right or wrong way to do this. Students will have complete freedom to design their birds in the shapes they desire!
Don’t make the wings or beaks too small, you’ll have to paint them, so depending how small your paintbrushes are, this could be a challenge.
Continue to draw the birds stacked on each other. You’ll probably have room for 4-5 birds, making each one smaller than the next (like the balls for a snowman).
Use a thin Sharpie to trace their pencil lines and then erase the pencil.
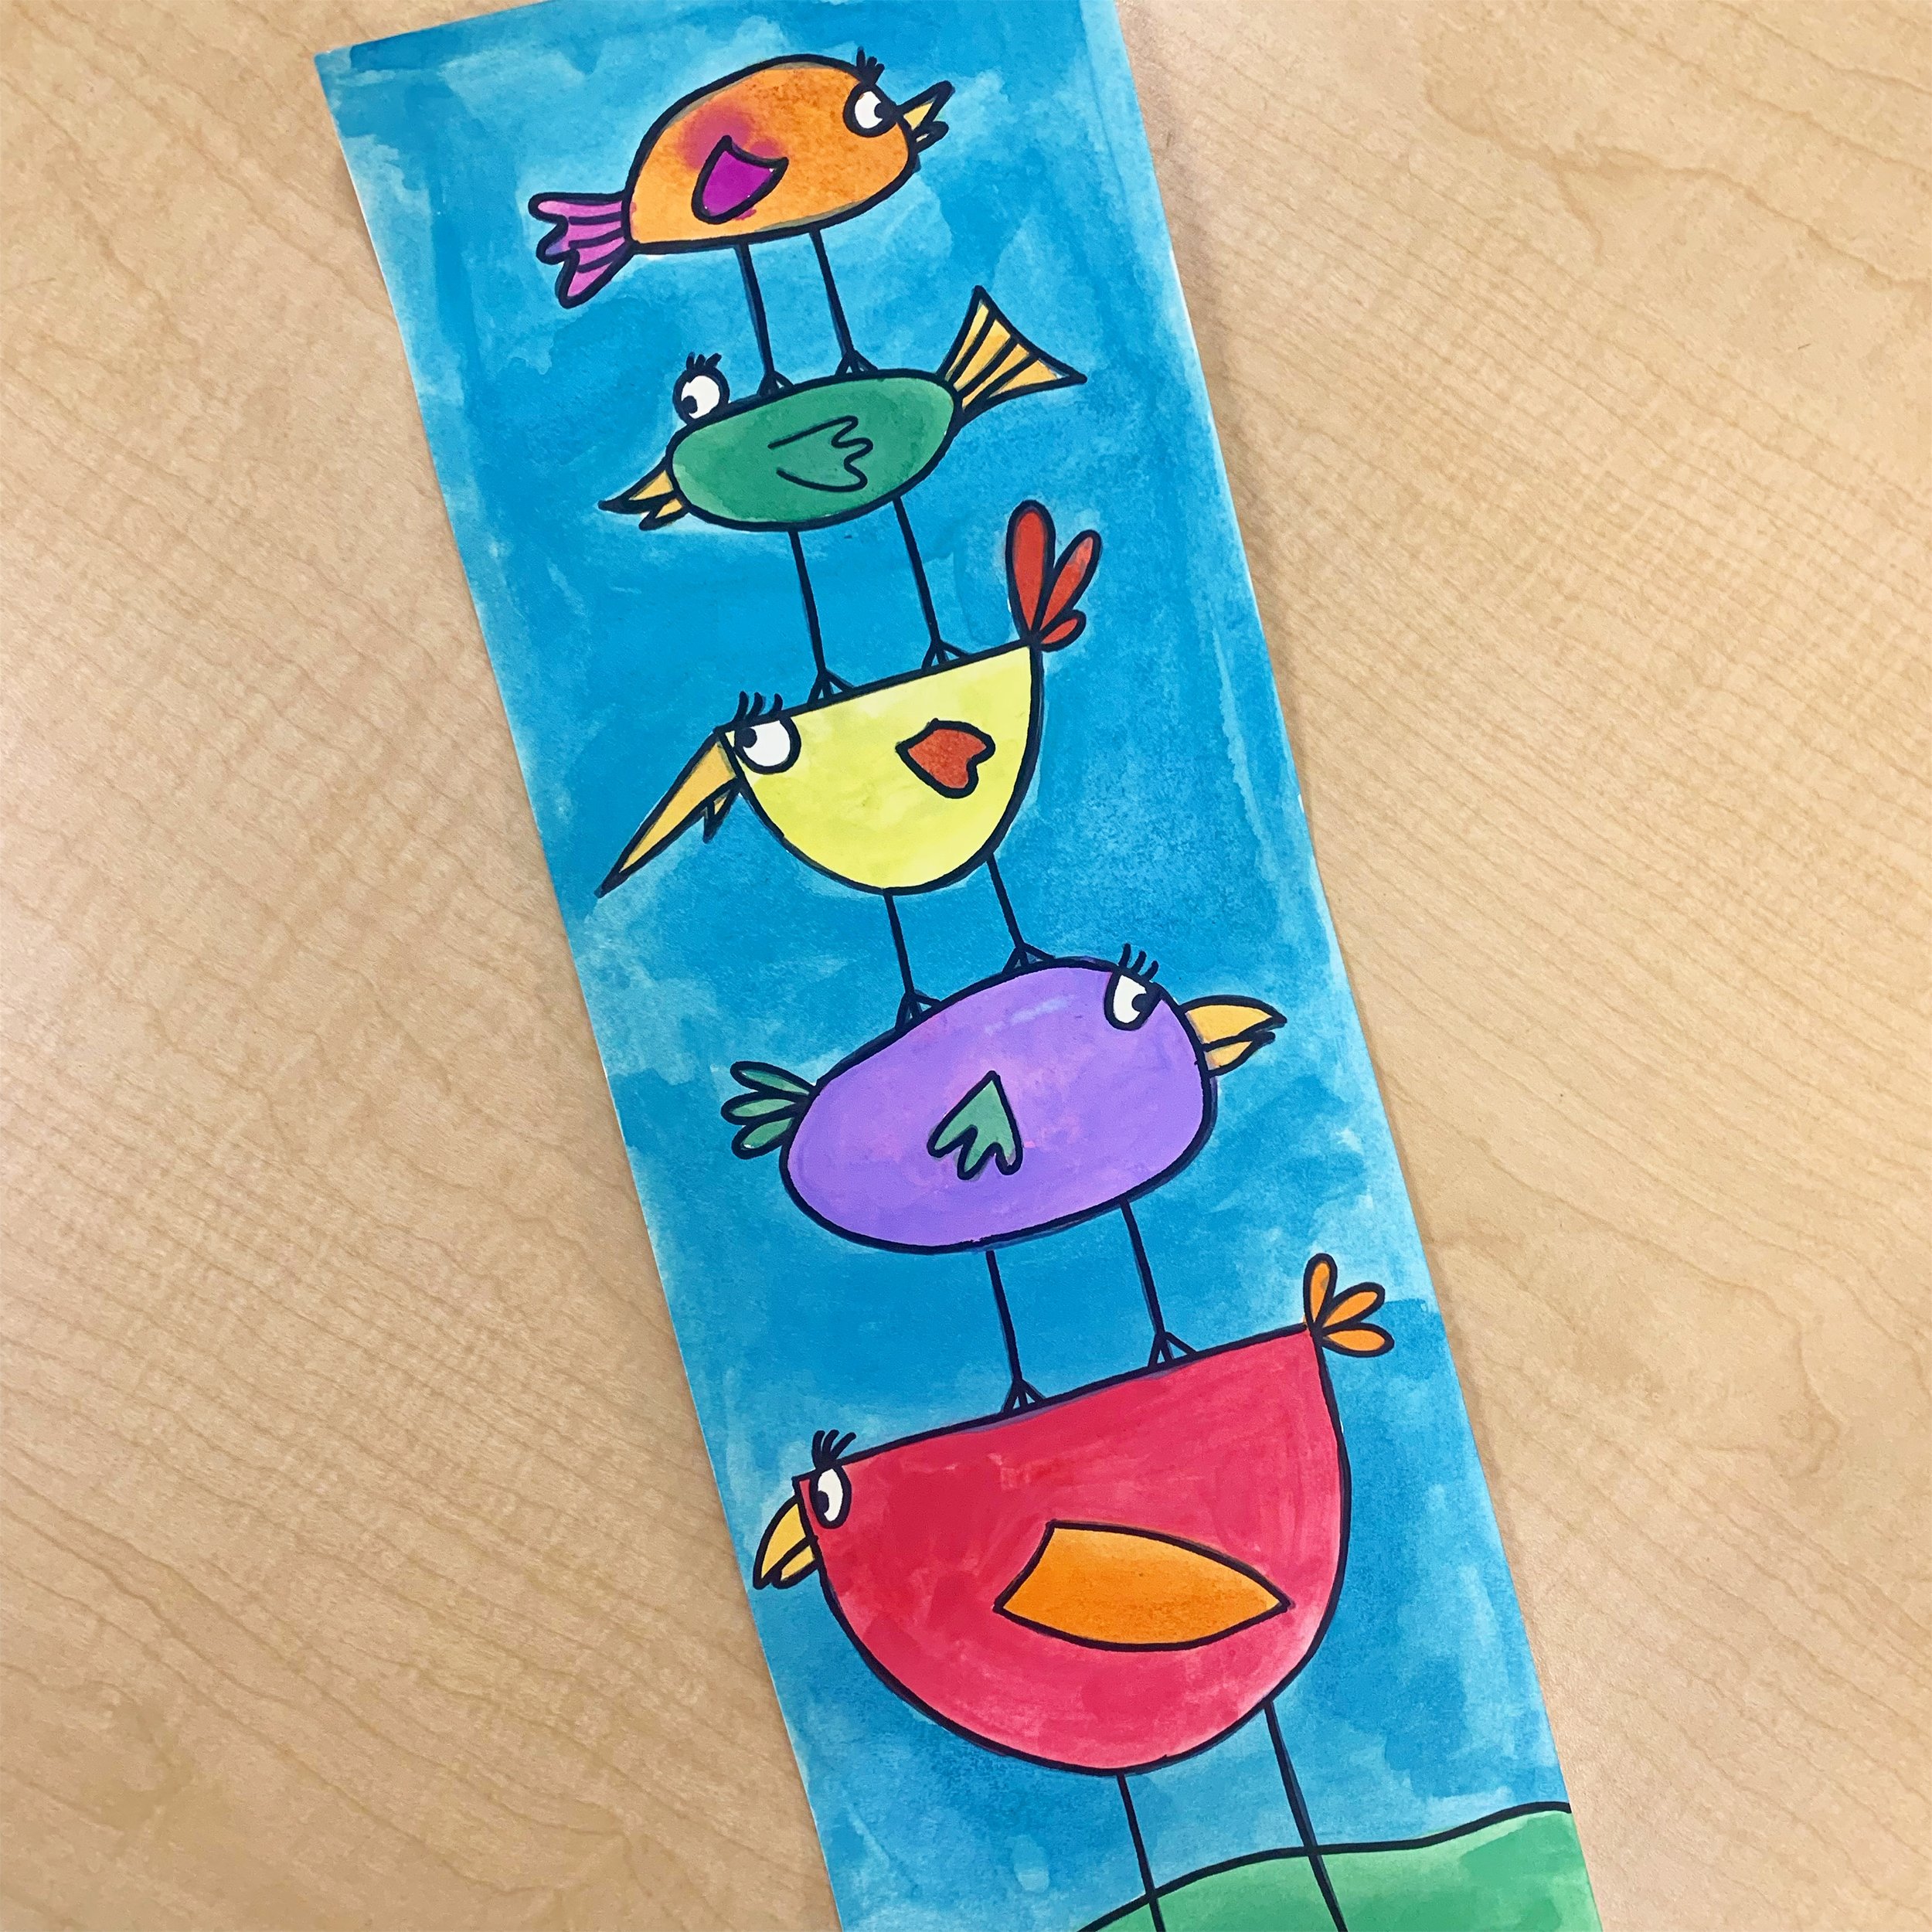
Paint the birds.
Think about the colour of your sky. If you are going to use a light blue paint, don’t paint one of the birds the same light blue.
Paint the sky.
Make sure the birds are fairly dry before starting the sky, you don’t want the colours to bleed.
Once the paint is dry, use a regular Sharpie to trace over the black lines again since they’ll be slightly covered up now by the paint.