

Grade 3 Landform Science Projects
In BC, part of the grade 3 science curriculum is about local landforms. We’re lucky that we have so much diversity in our landforms around here. Within our unit, we did two projects. First we did a landform flip book. Next we did a clay scene with landforms.
ACTIVITY #1 - Landform flip book (~1 class, some needed additional time)
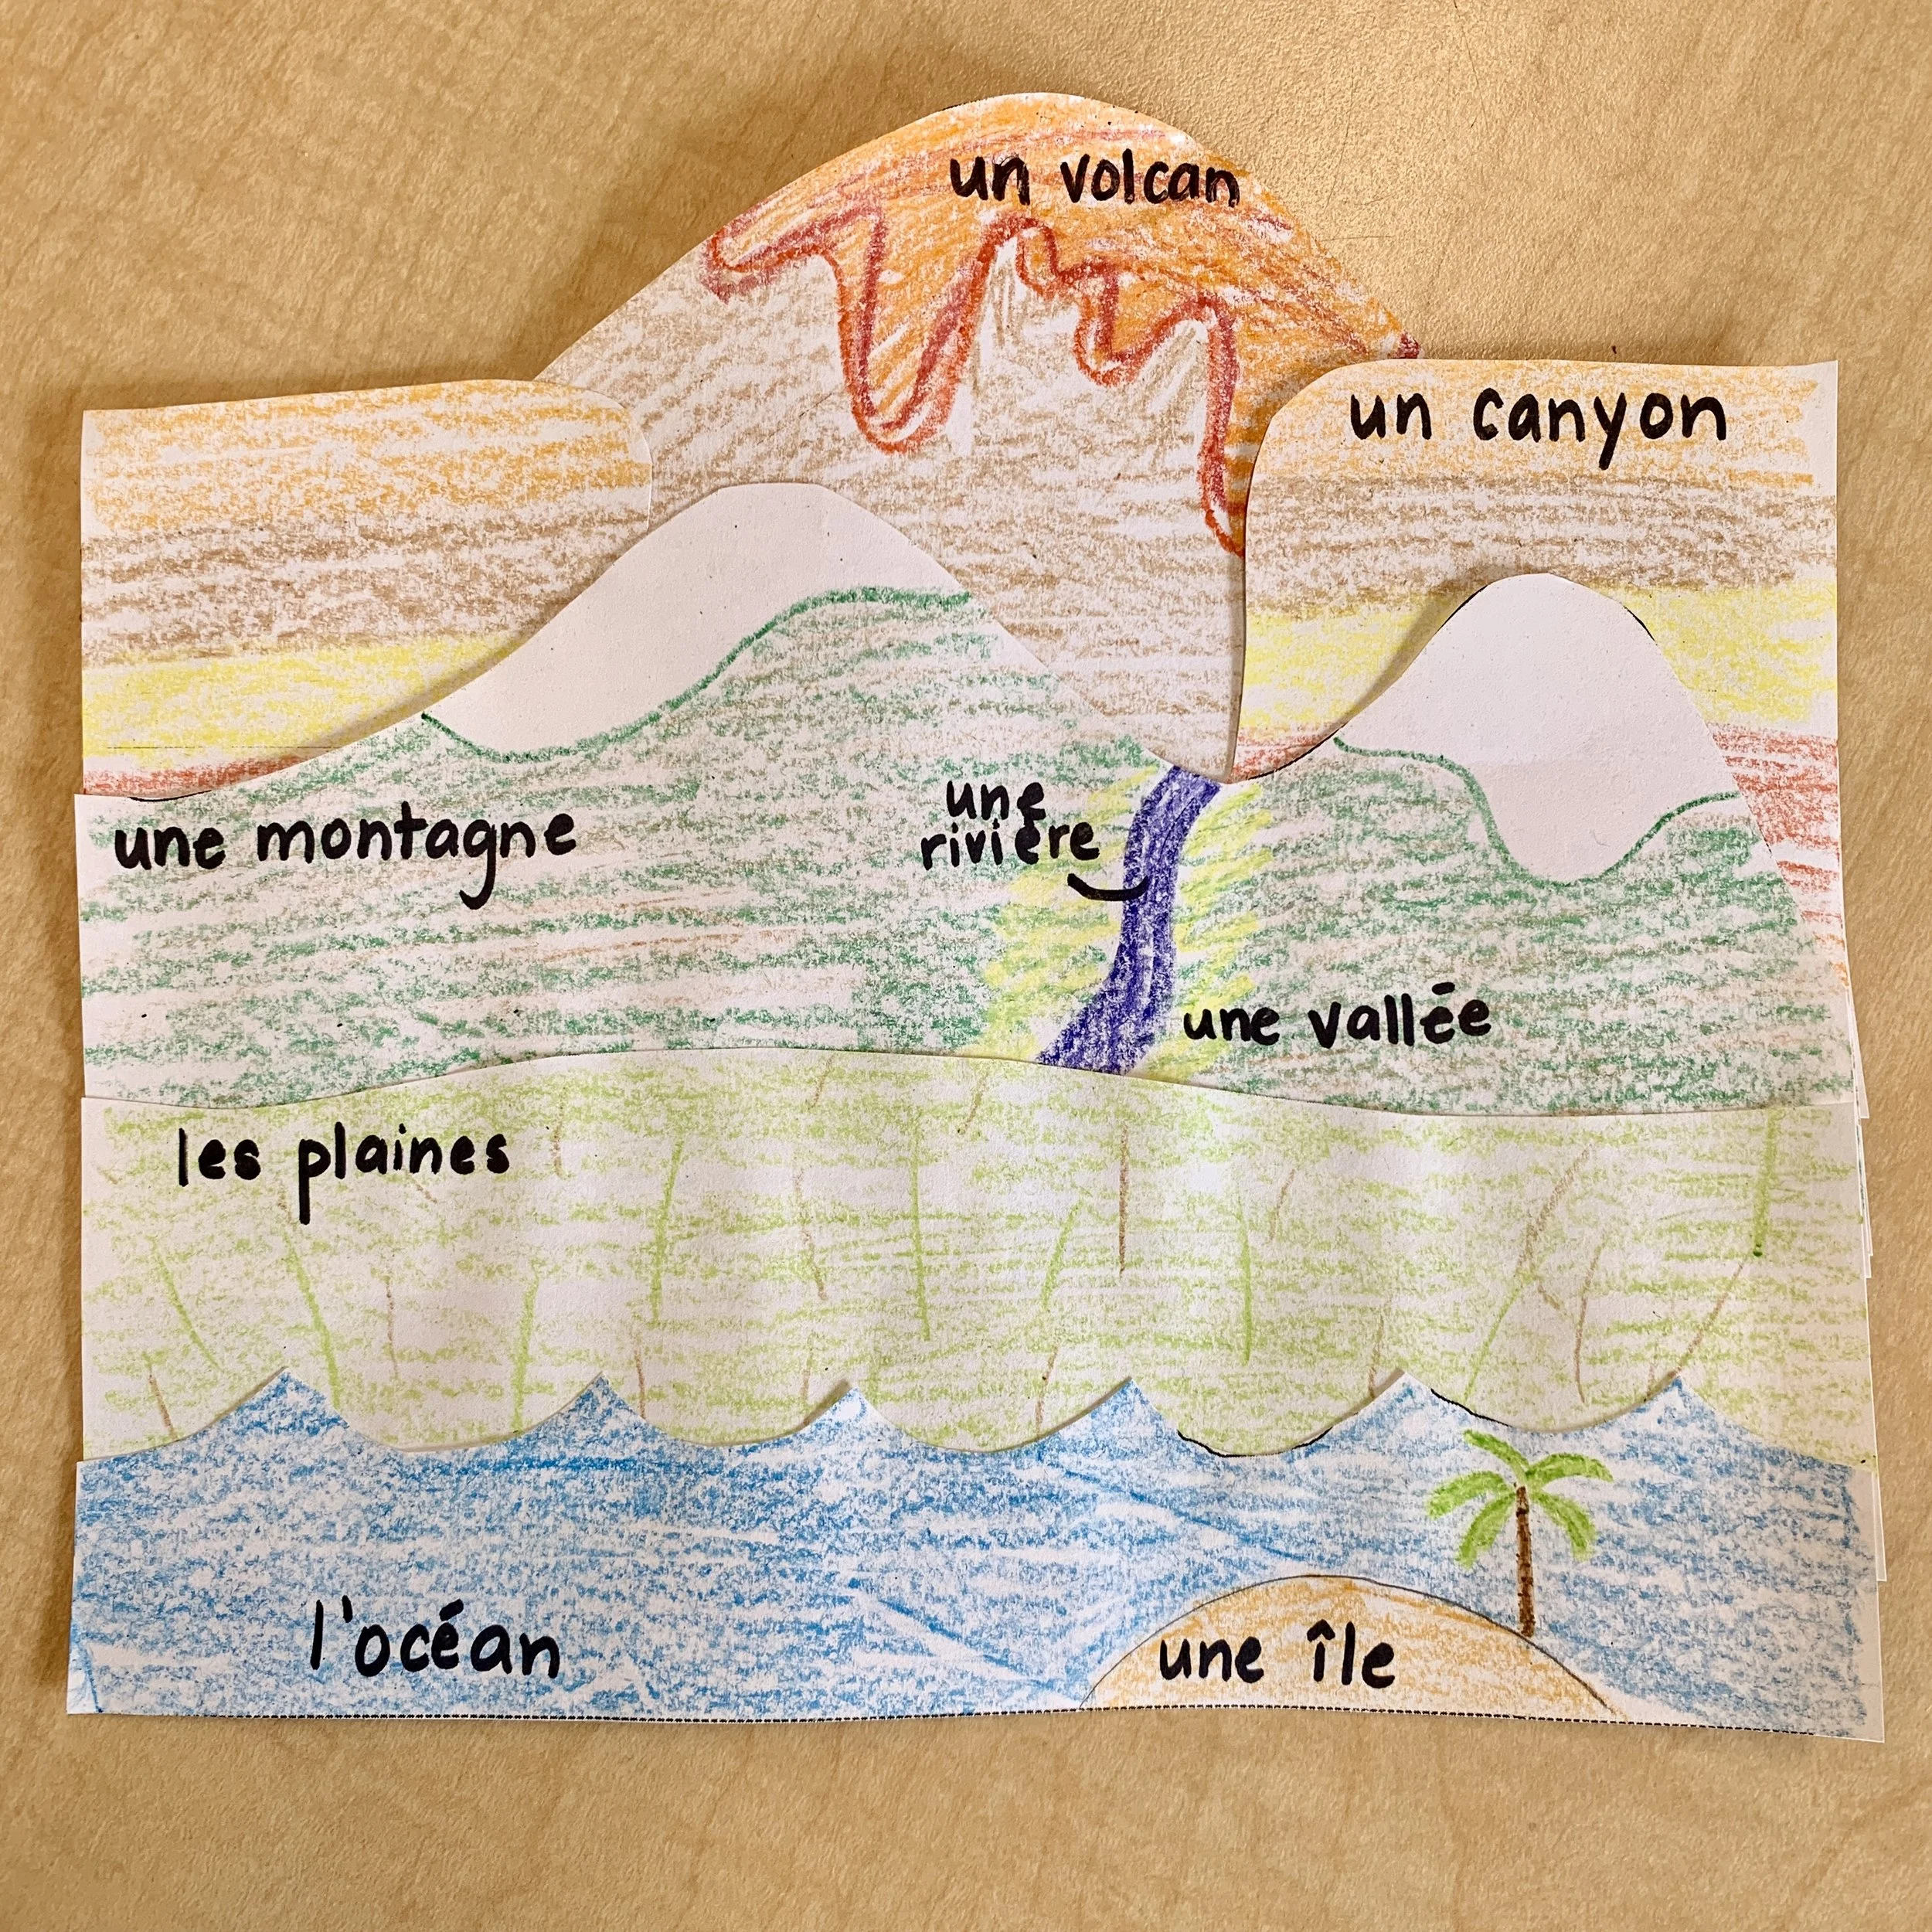
The flip book project comes from Ginger Snaps. You can find the blog HERE. There’s a free download that has all the pieces you need. There are words on each piece but they’re in English so if you teach French like me, just white them out. I had my students write their words, so a little practice doesn’t hurt. On some pieces you will need to draw a landform, like an island on the ocean part.
We used crayons to colour them as they have quite a bit of ground to cover and crayons are easy to cover a lot of area without a lot of effort. You can use any colouring tool.
We just arranged them and glued them together, but you could do a true flip book style that would have some writing under each flap about that type of landform.
Once they were finished they wrote the name of each section with a Sharpie.

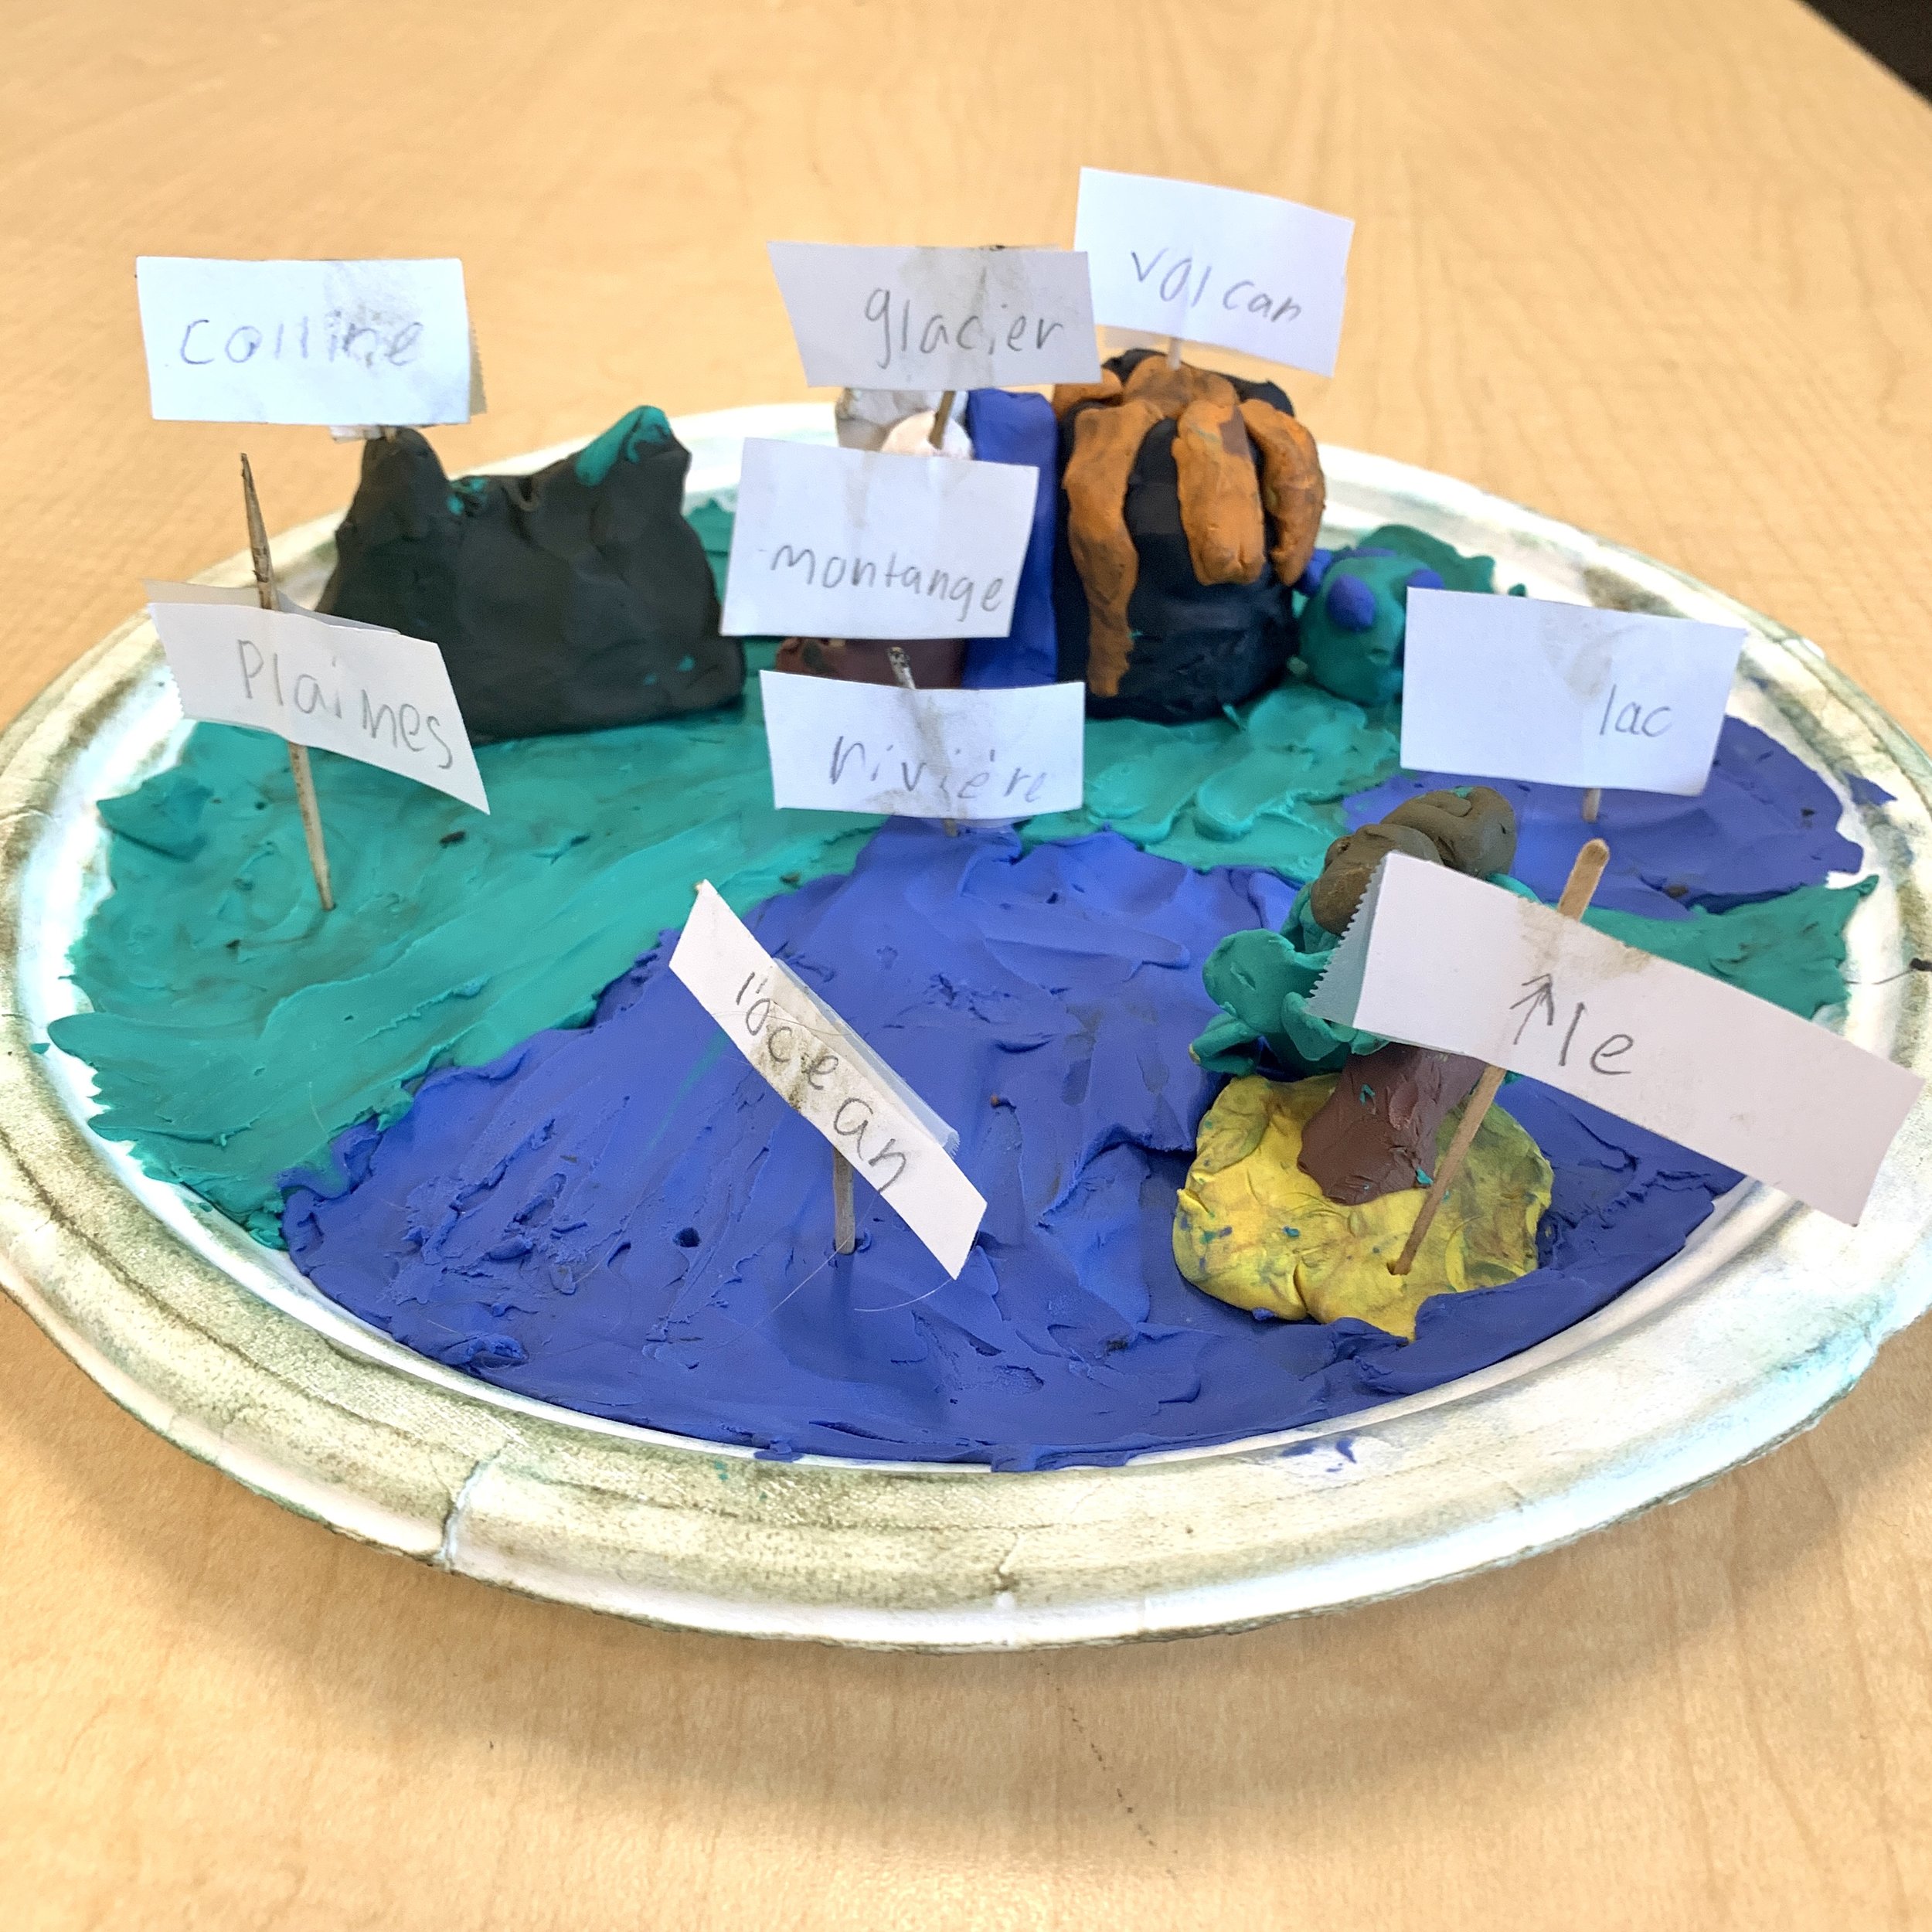
ACTIVITY #2 - Landform plate scene (~2 hours. We did about 4 sessions)
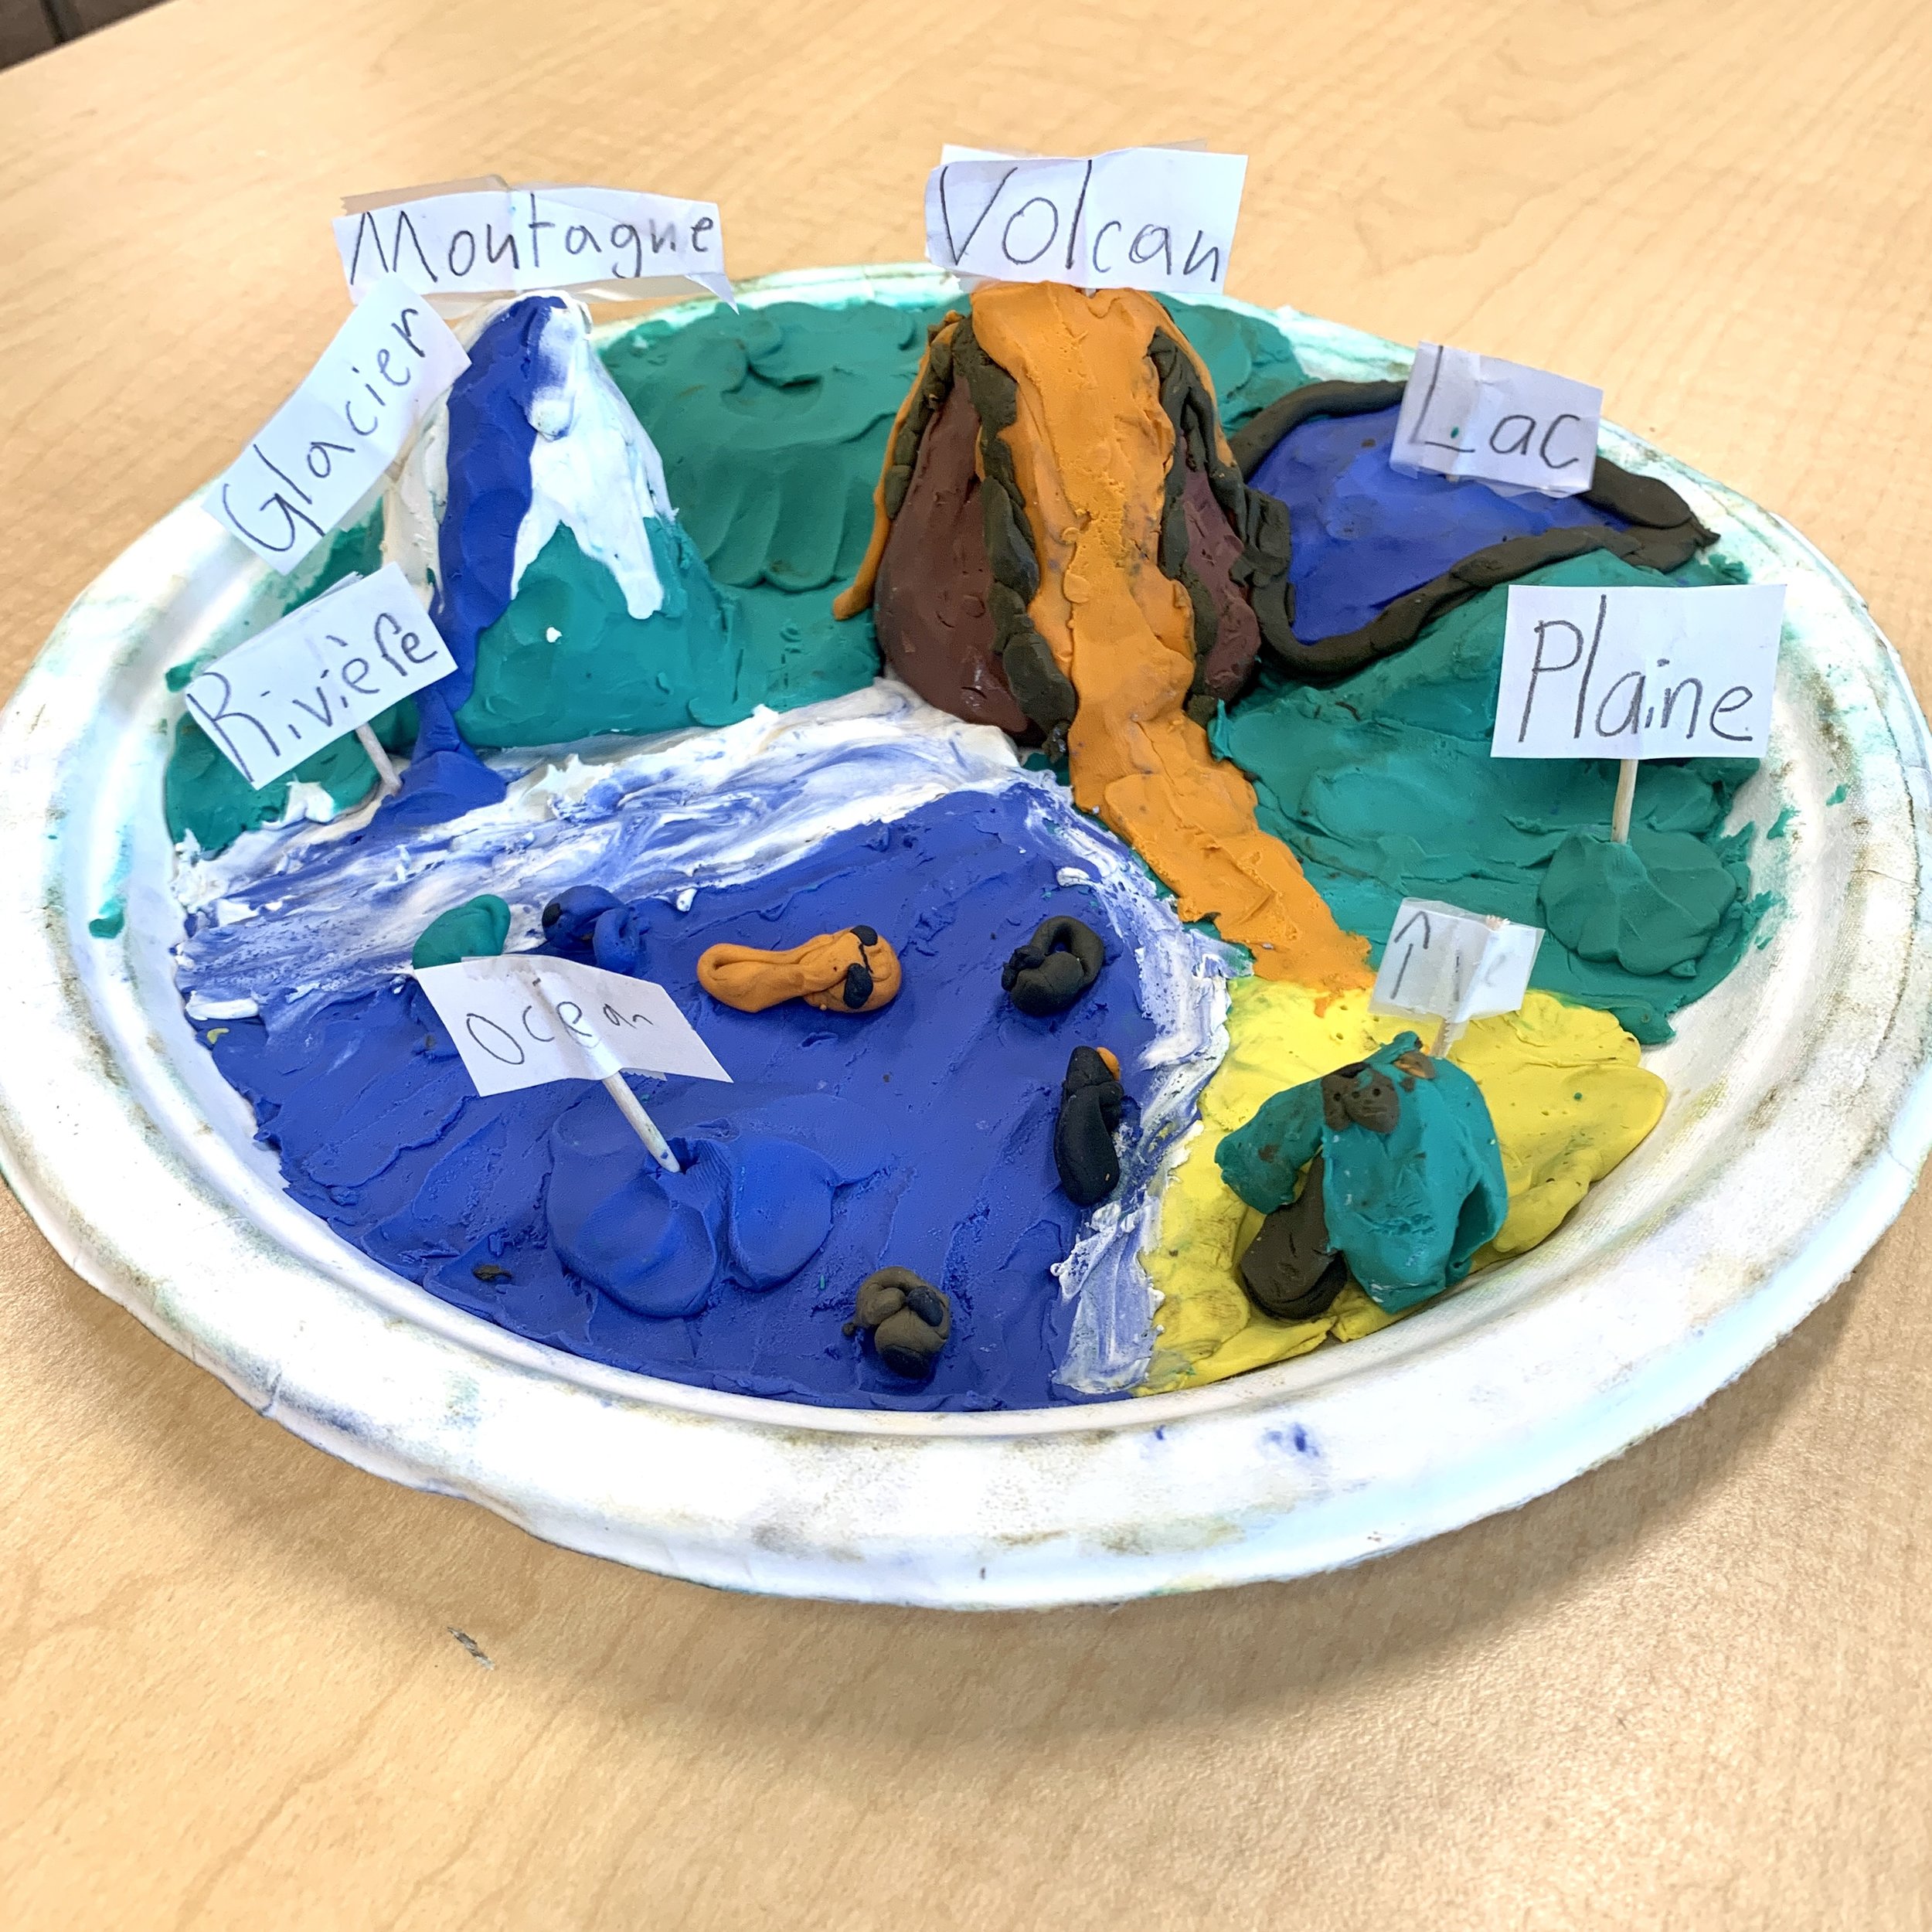
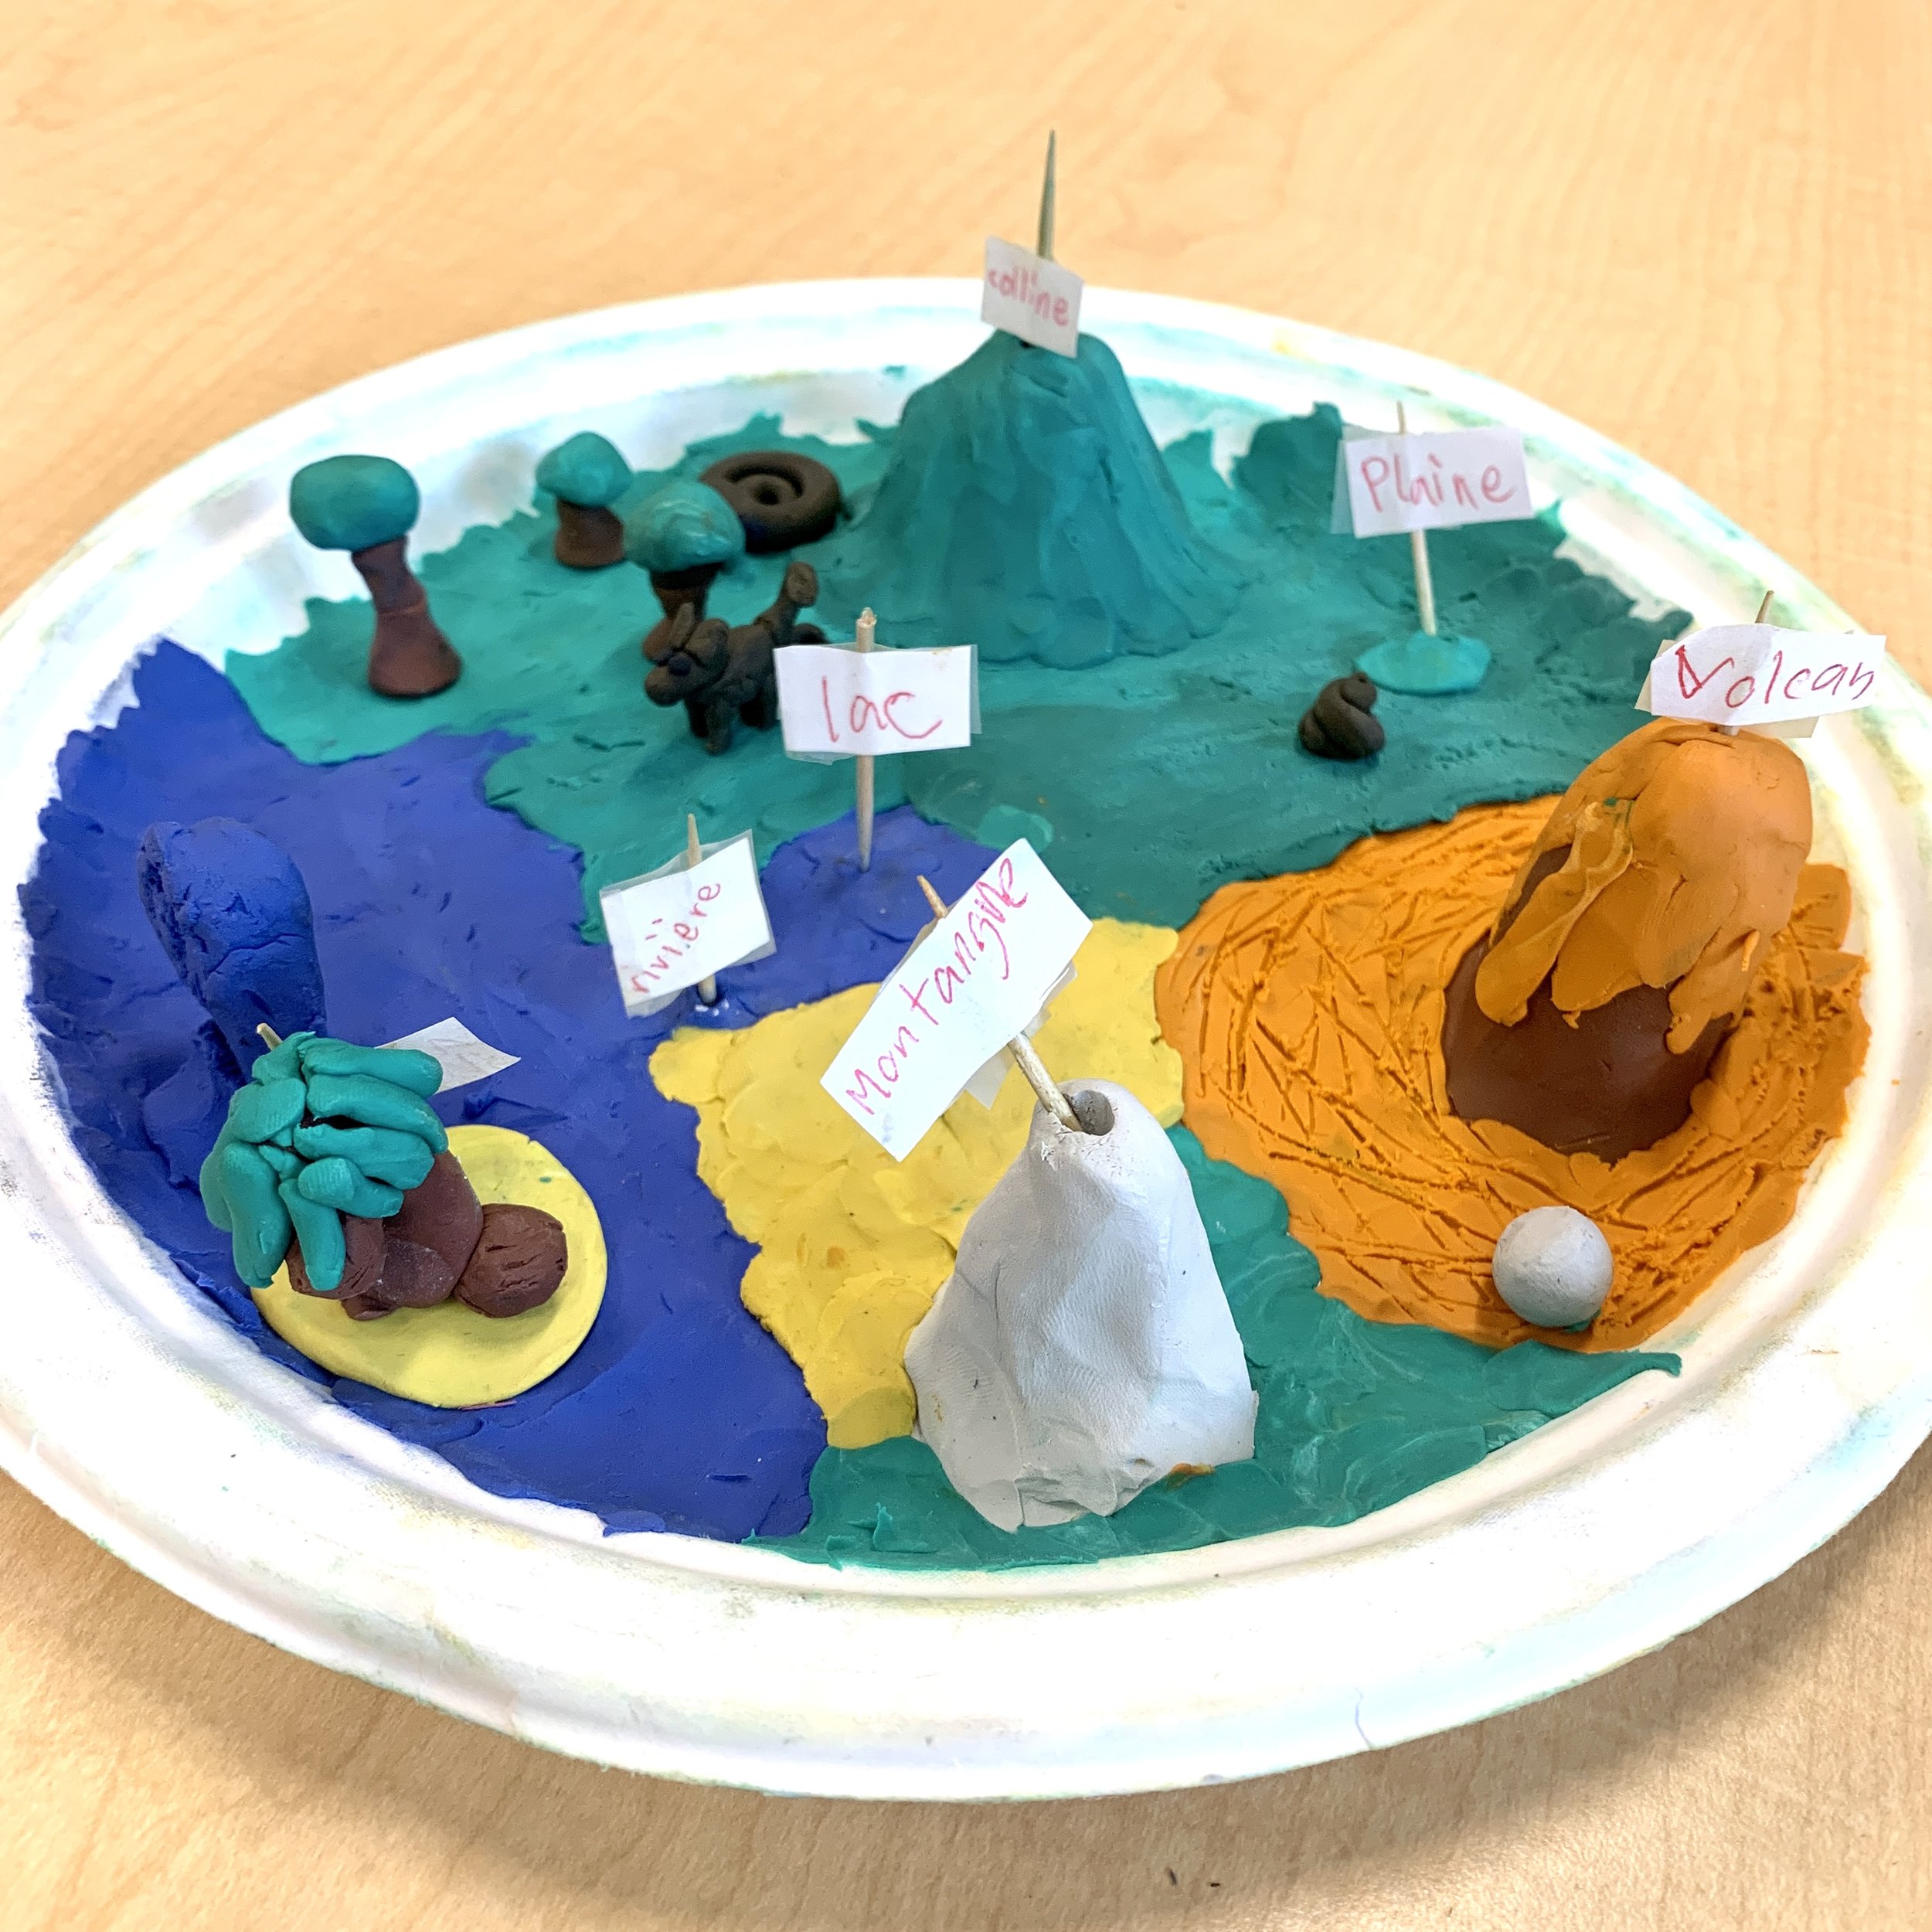
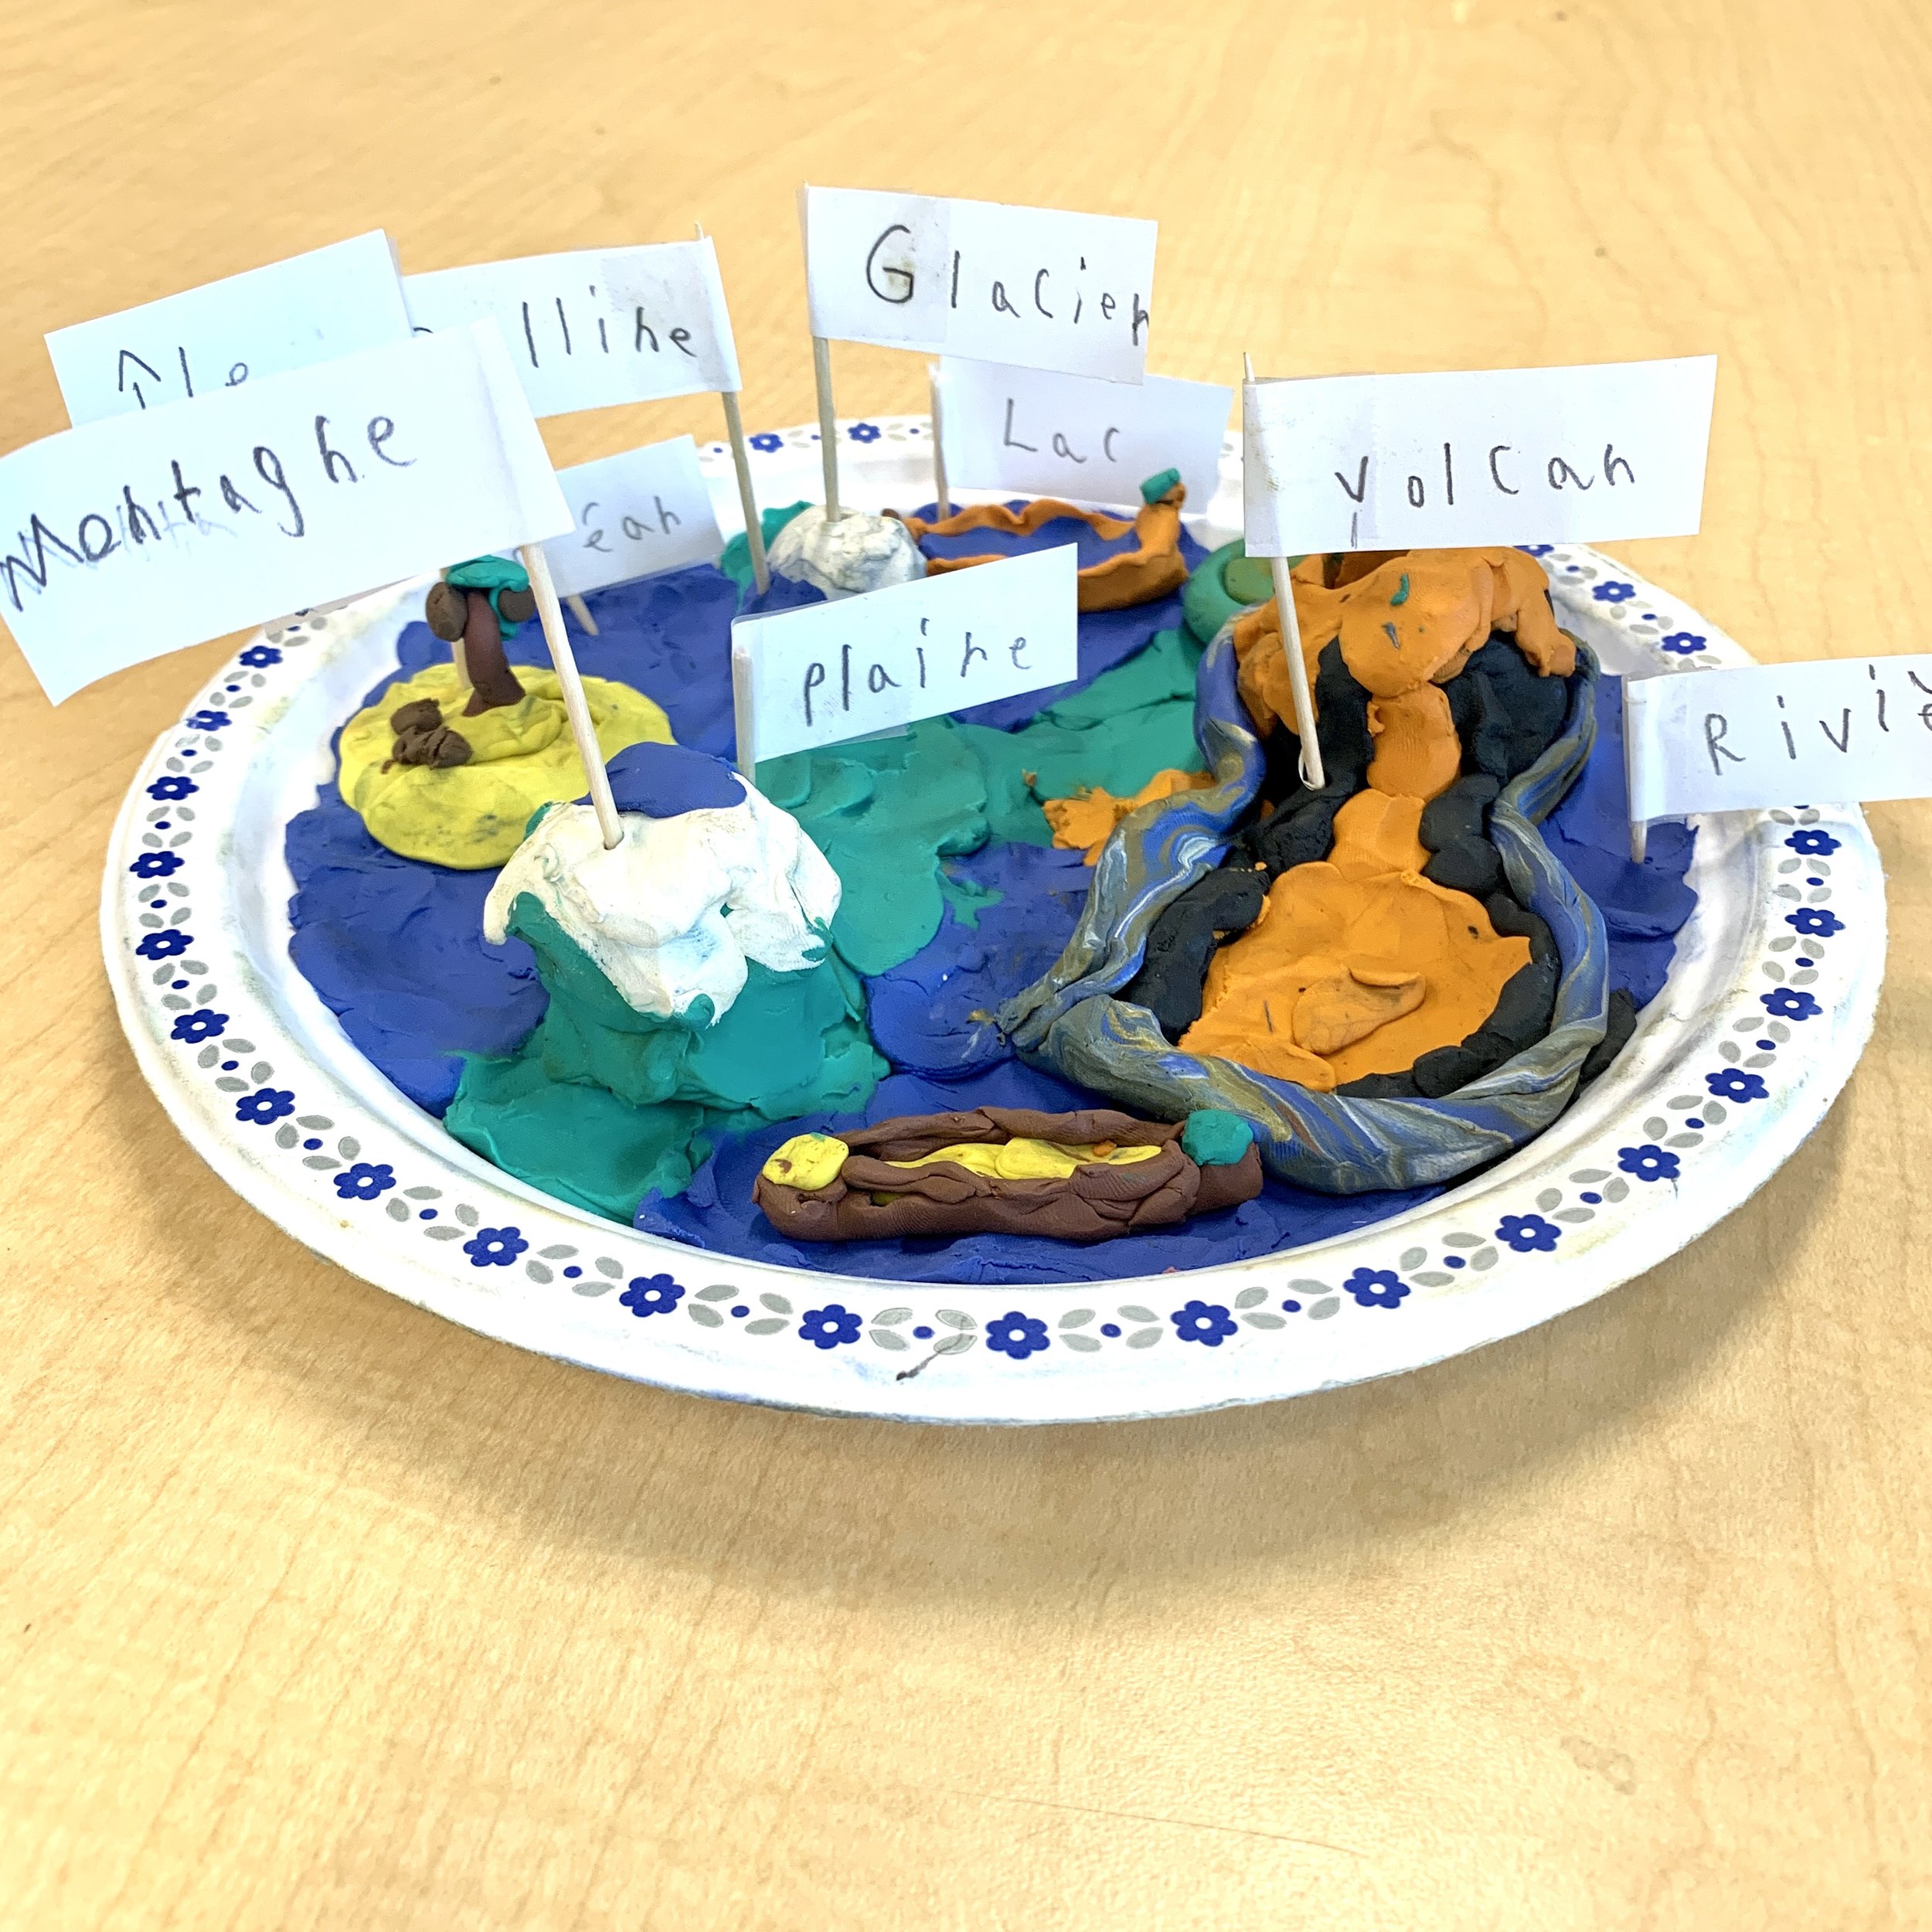
This project was done in small groups. My group size varied from 2-4. I wouldn’t suggest going any bigger than that or else it’s hard for everyone to work on it together.
Each group received a paper plate, some clay and some directions.
The task: Fill the entire plate with your landforms. They needed to include at least one of the following: volcano, mountain, glacier, hill, island, plains, ocean, river, lake.
*I realize not all these things are in that close of a proximity to each other but…oh well!

Step 1 - Plan
I had students make a plan of their design on paper first. This way they would make sure they were including all necessary landforms.
Step 2 - Build
We used large, sturdy paper plates for this. The clay is heavy so you want it to be able to hold the weight.
Clay colours: green, grey, white, blue, yellow, brown, black, red
(We didn’t have any red so we just used orange for the lava).
Using their plan, students will work together to create each landform and arrange it on their plate.
Many groups added additional features or added texture.
Step 3 - Label
Groups need to label each landform with a bit of paper. They used toothpicks cut in half, white paper and some tape to make their flags.

Here is my French criteria sheet. There is an English version available too. It is not editable but you’re welcome to take inspiration if you’d like to make your own.