Winter Toque Art Project
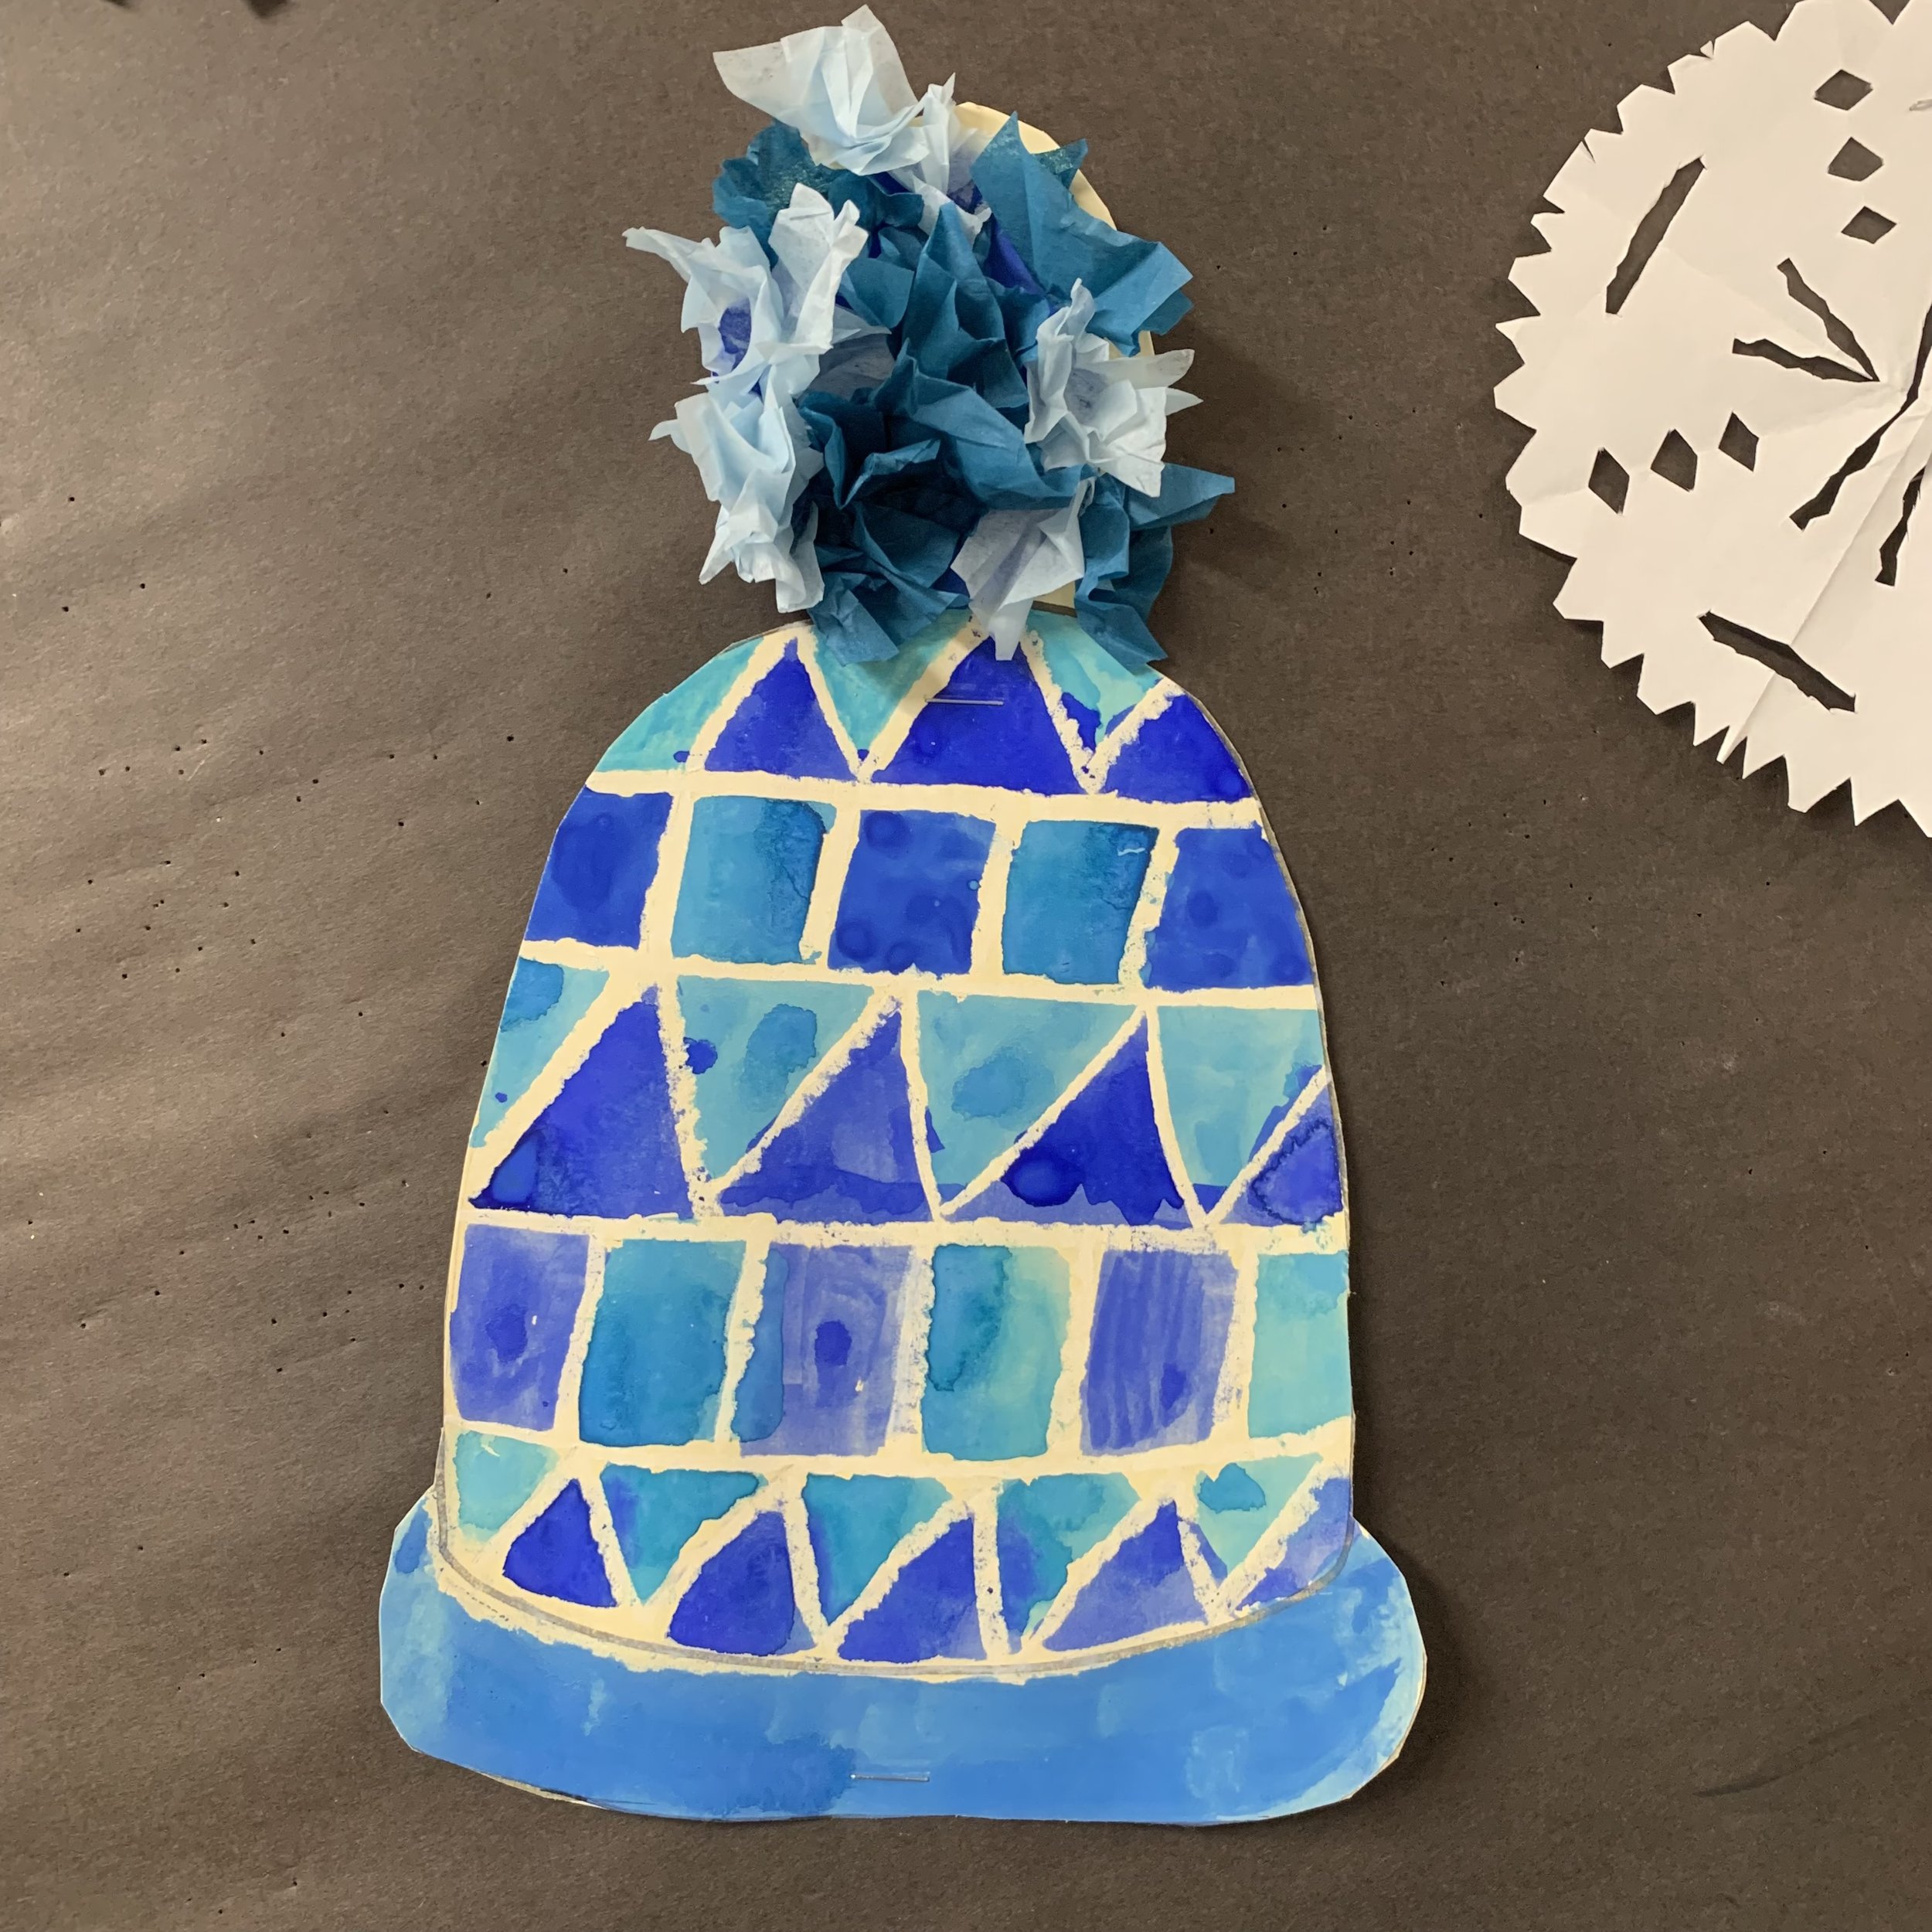
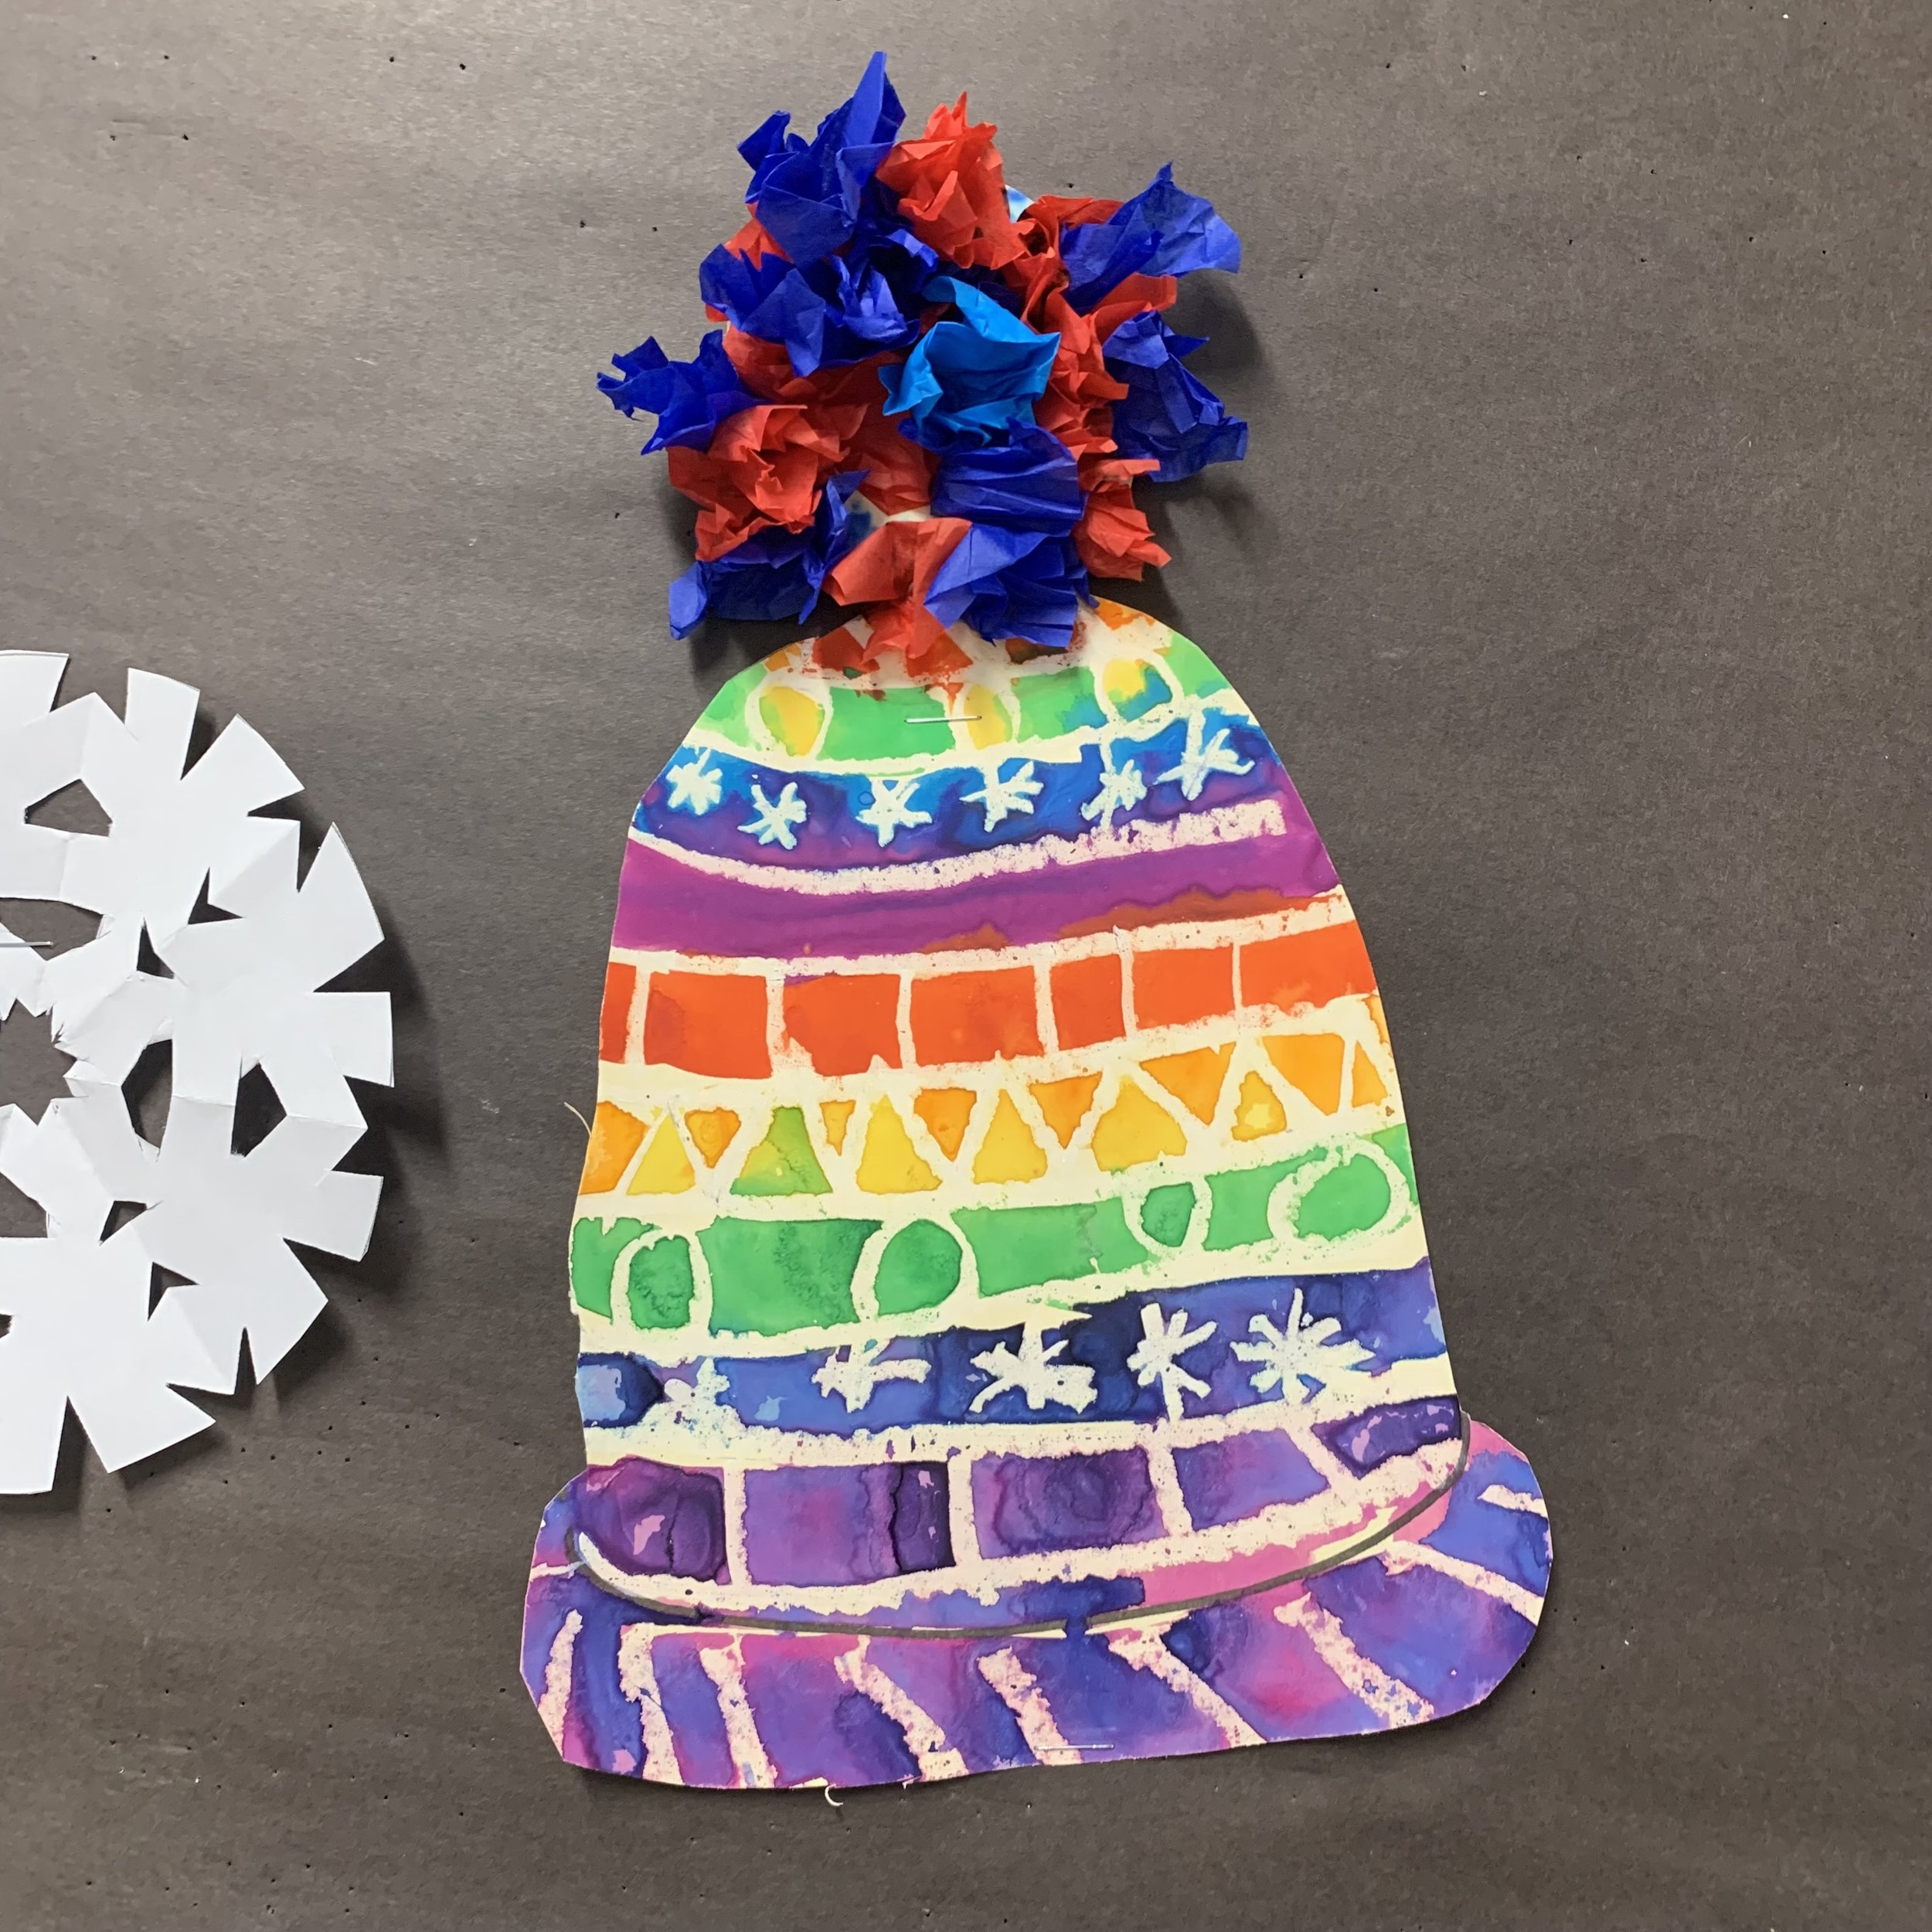
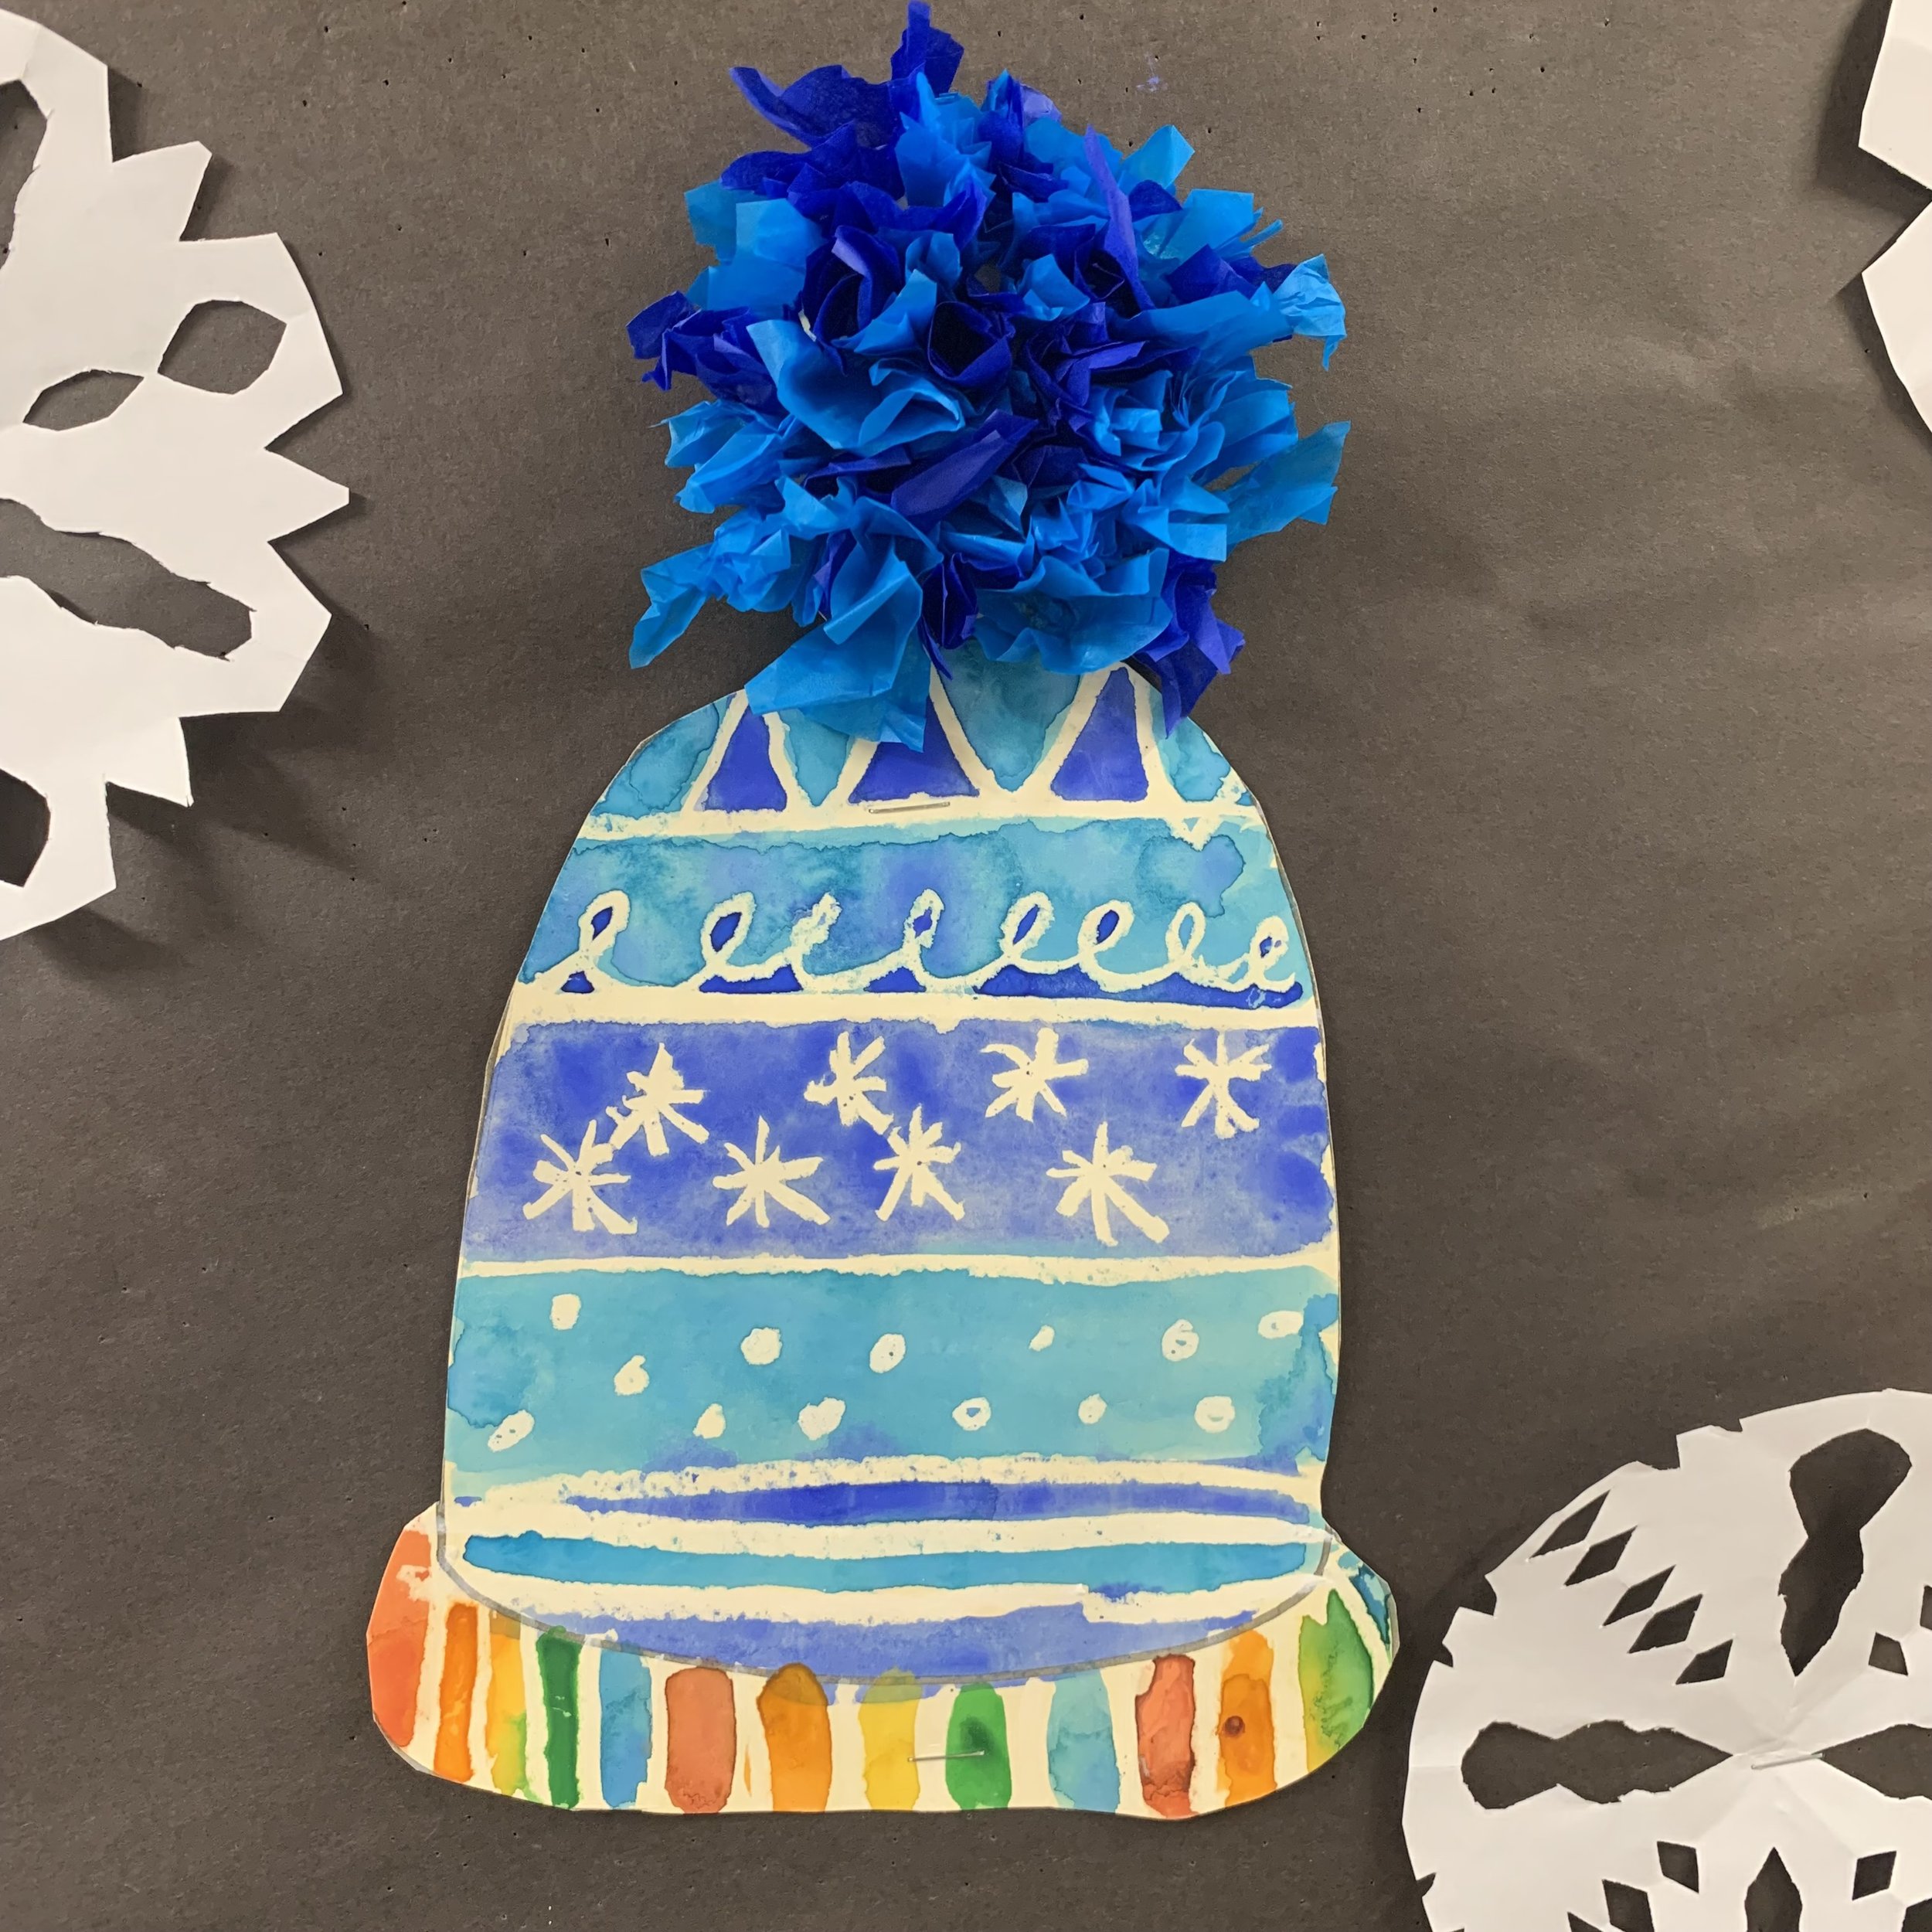
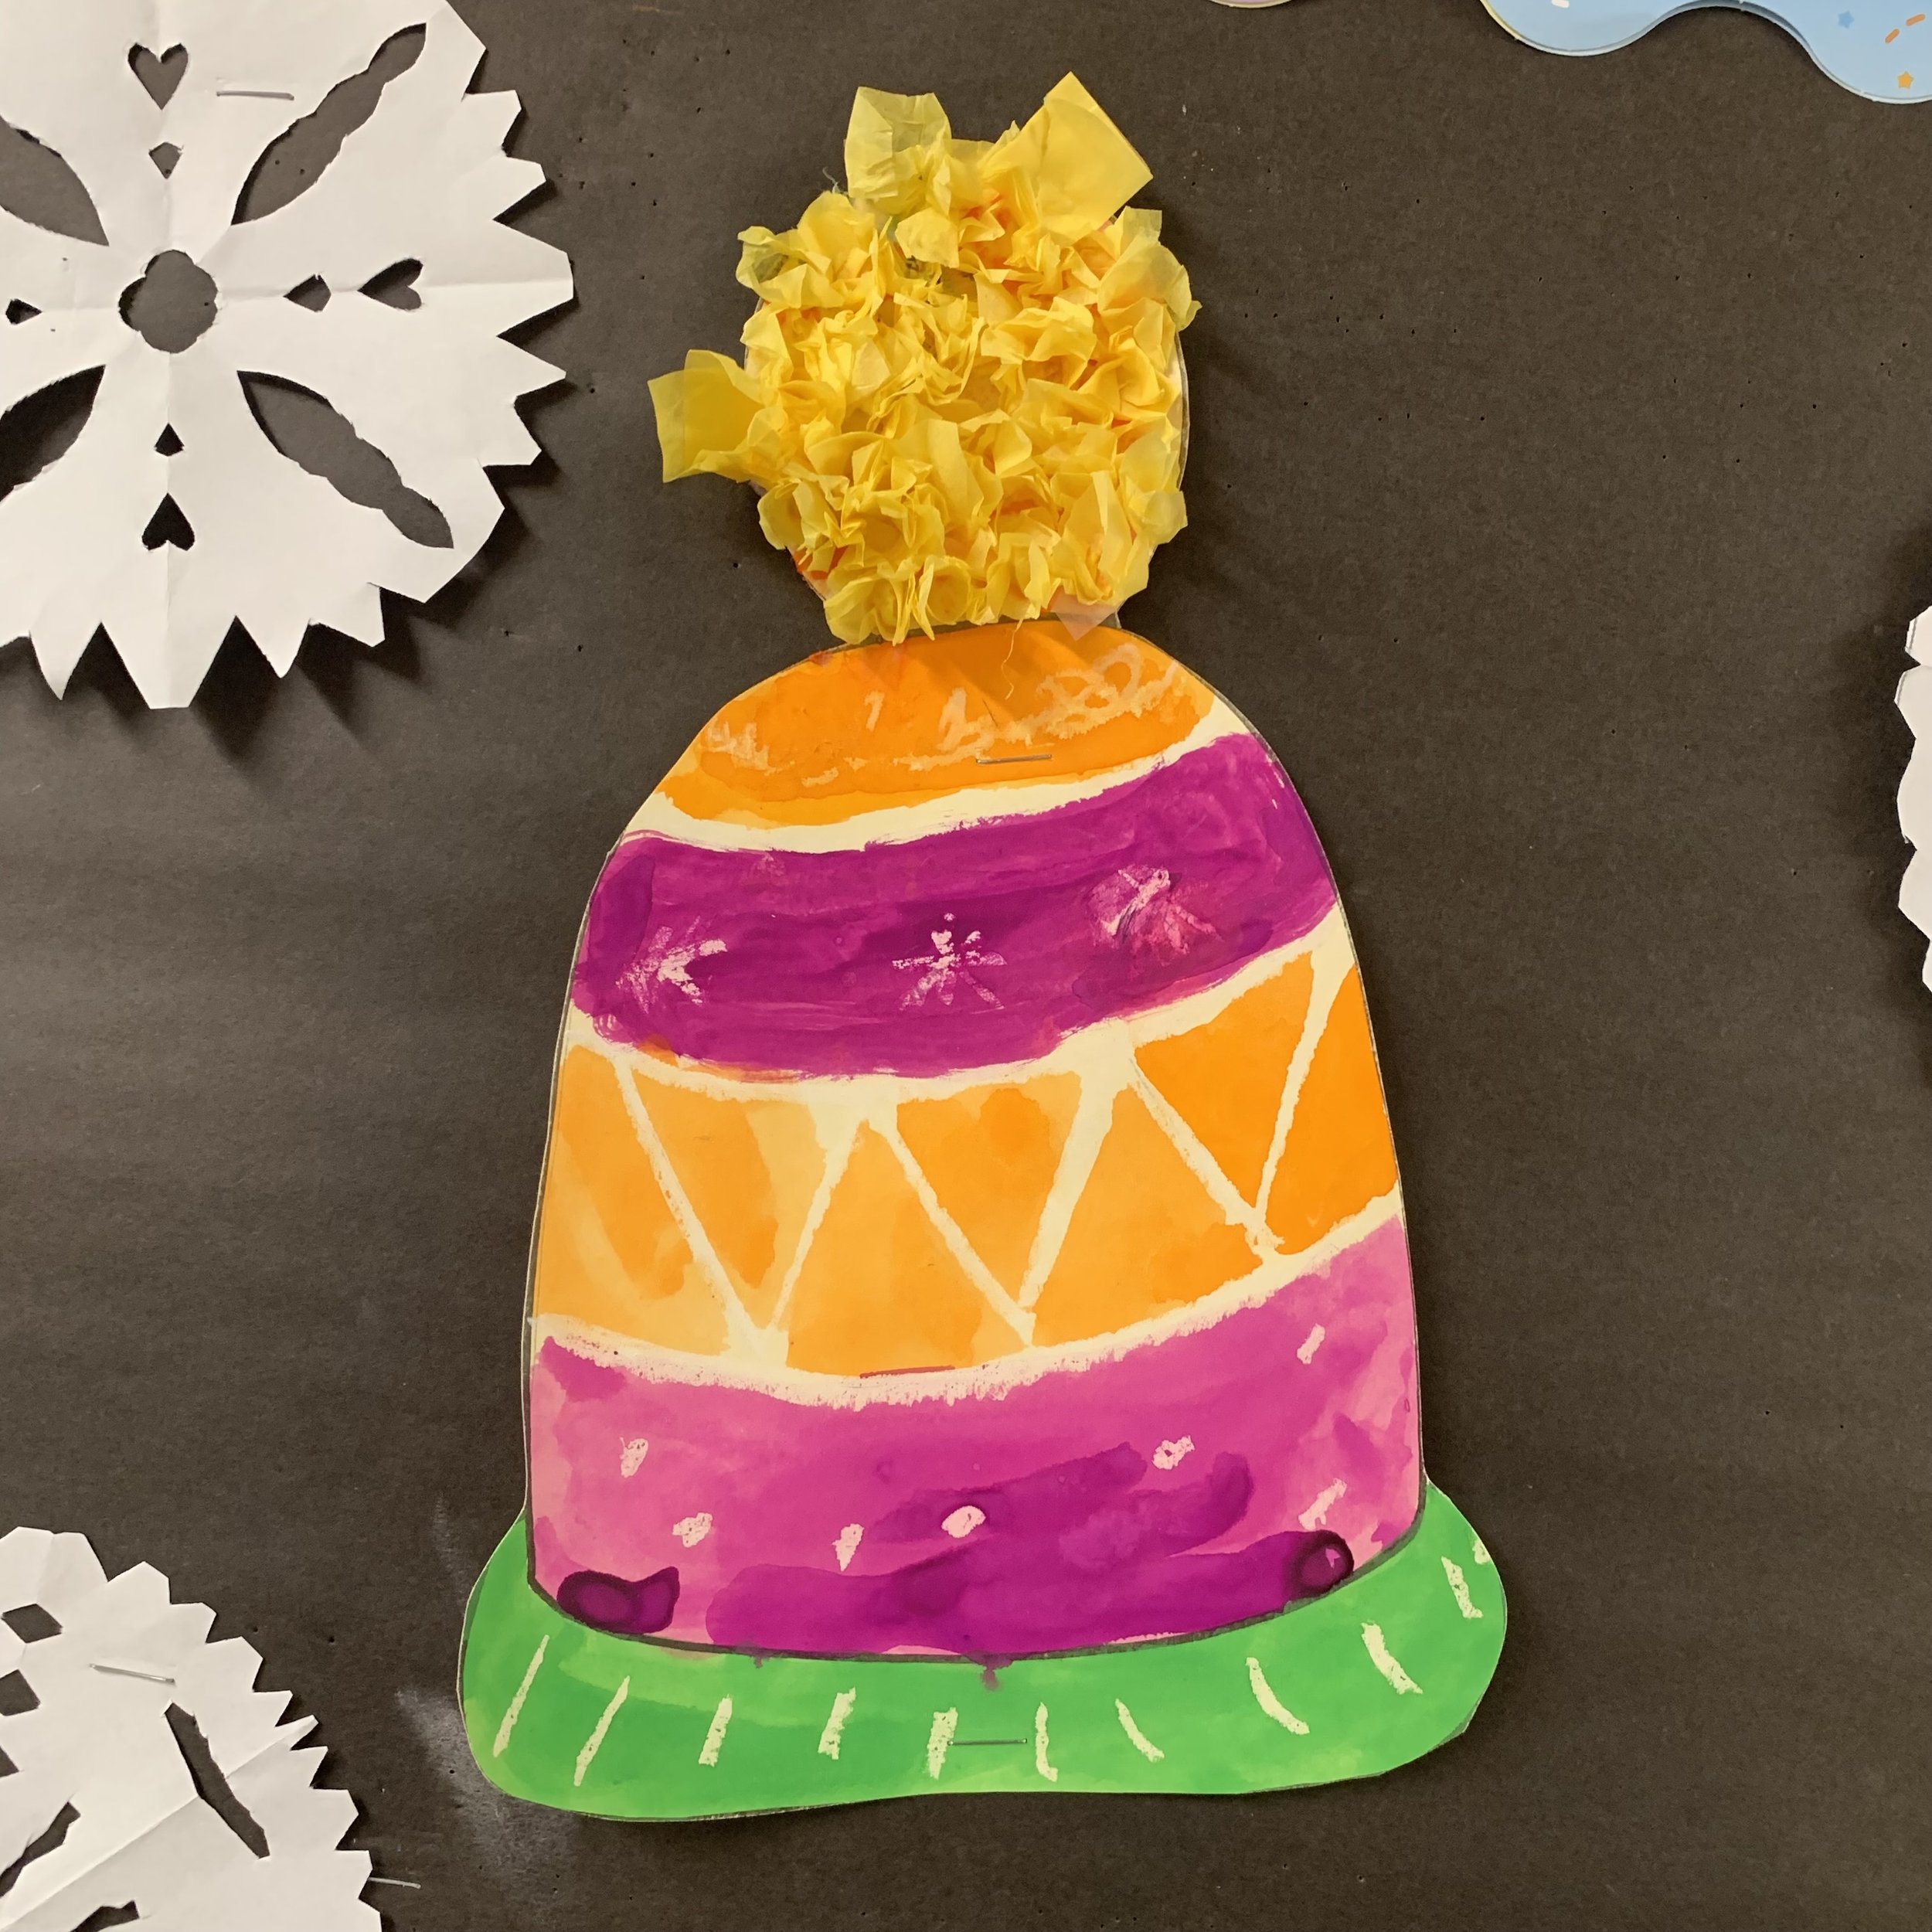
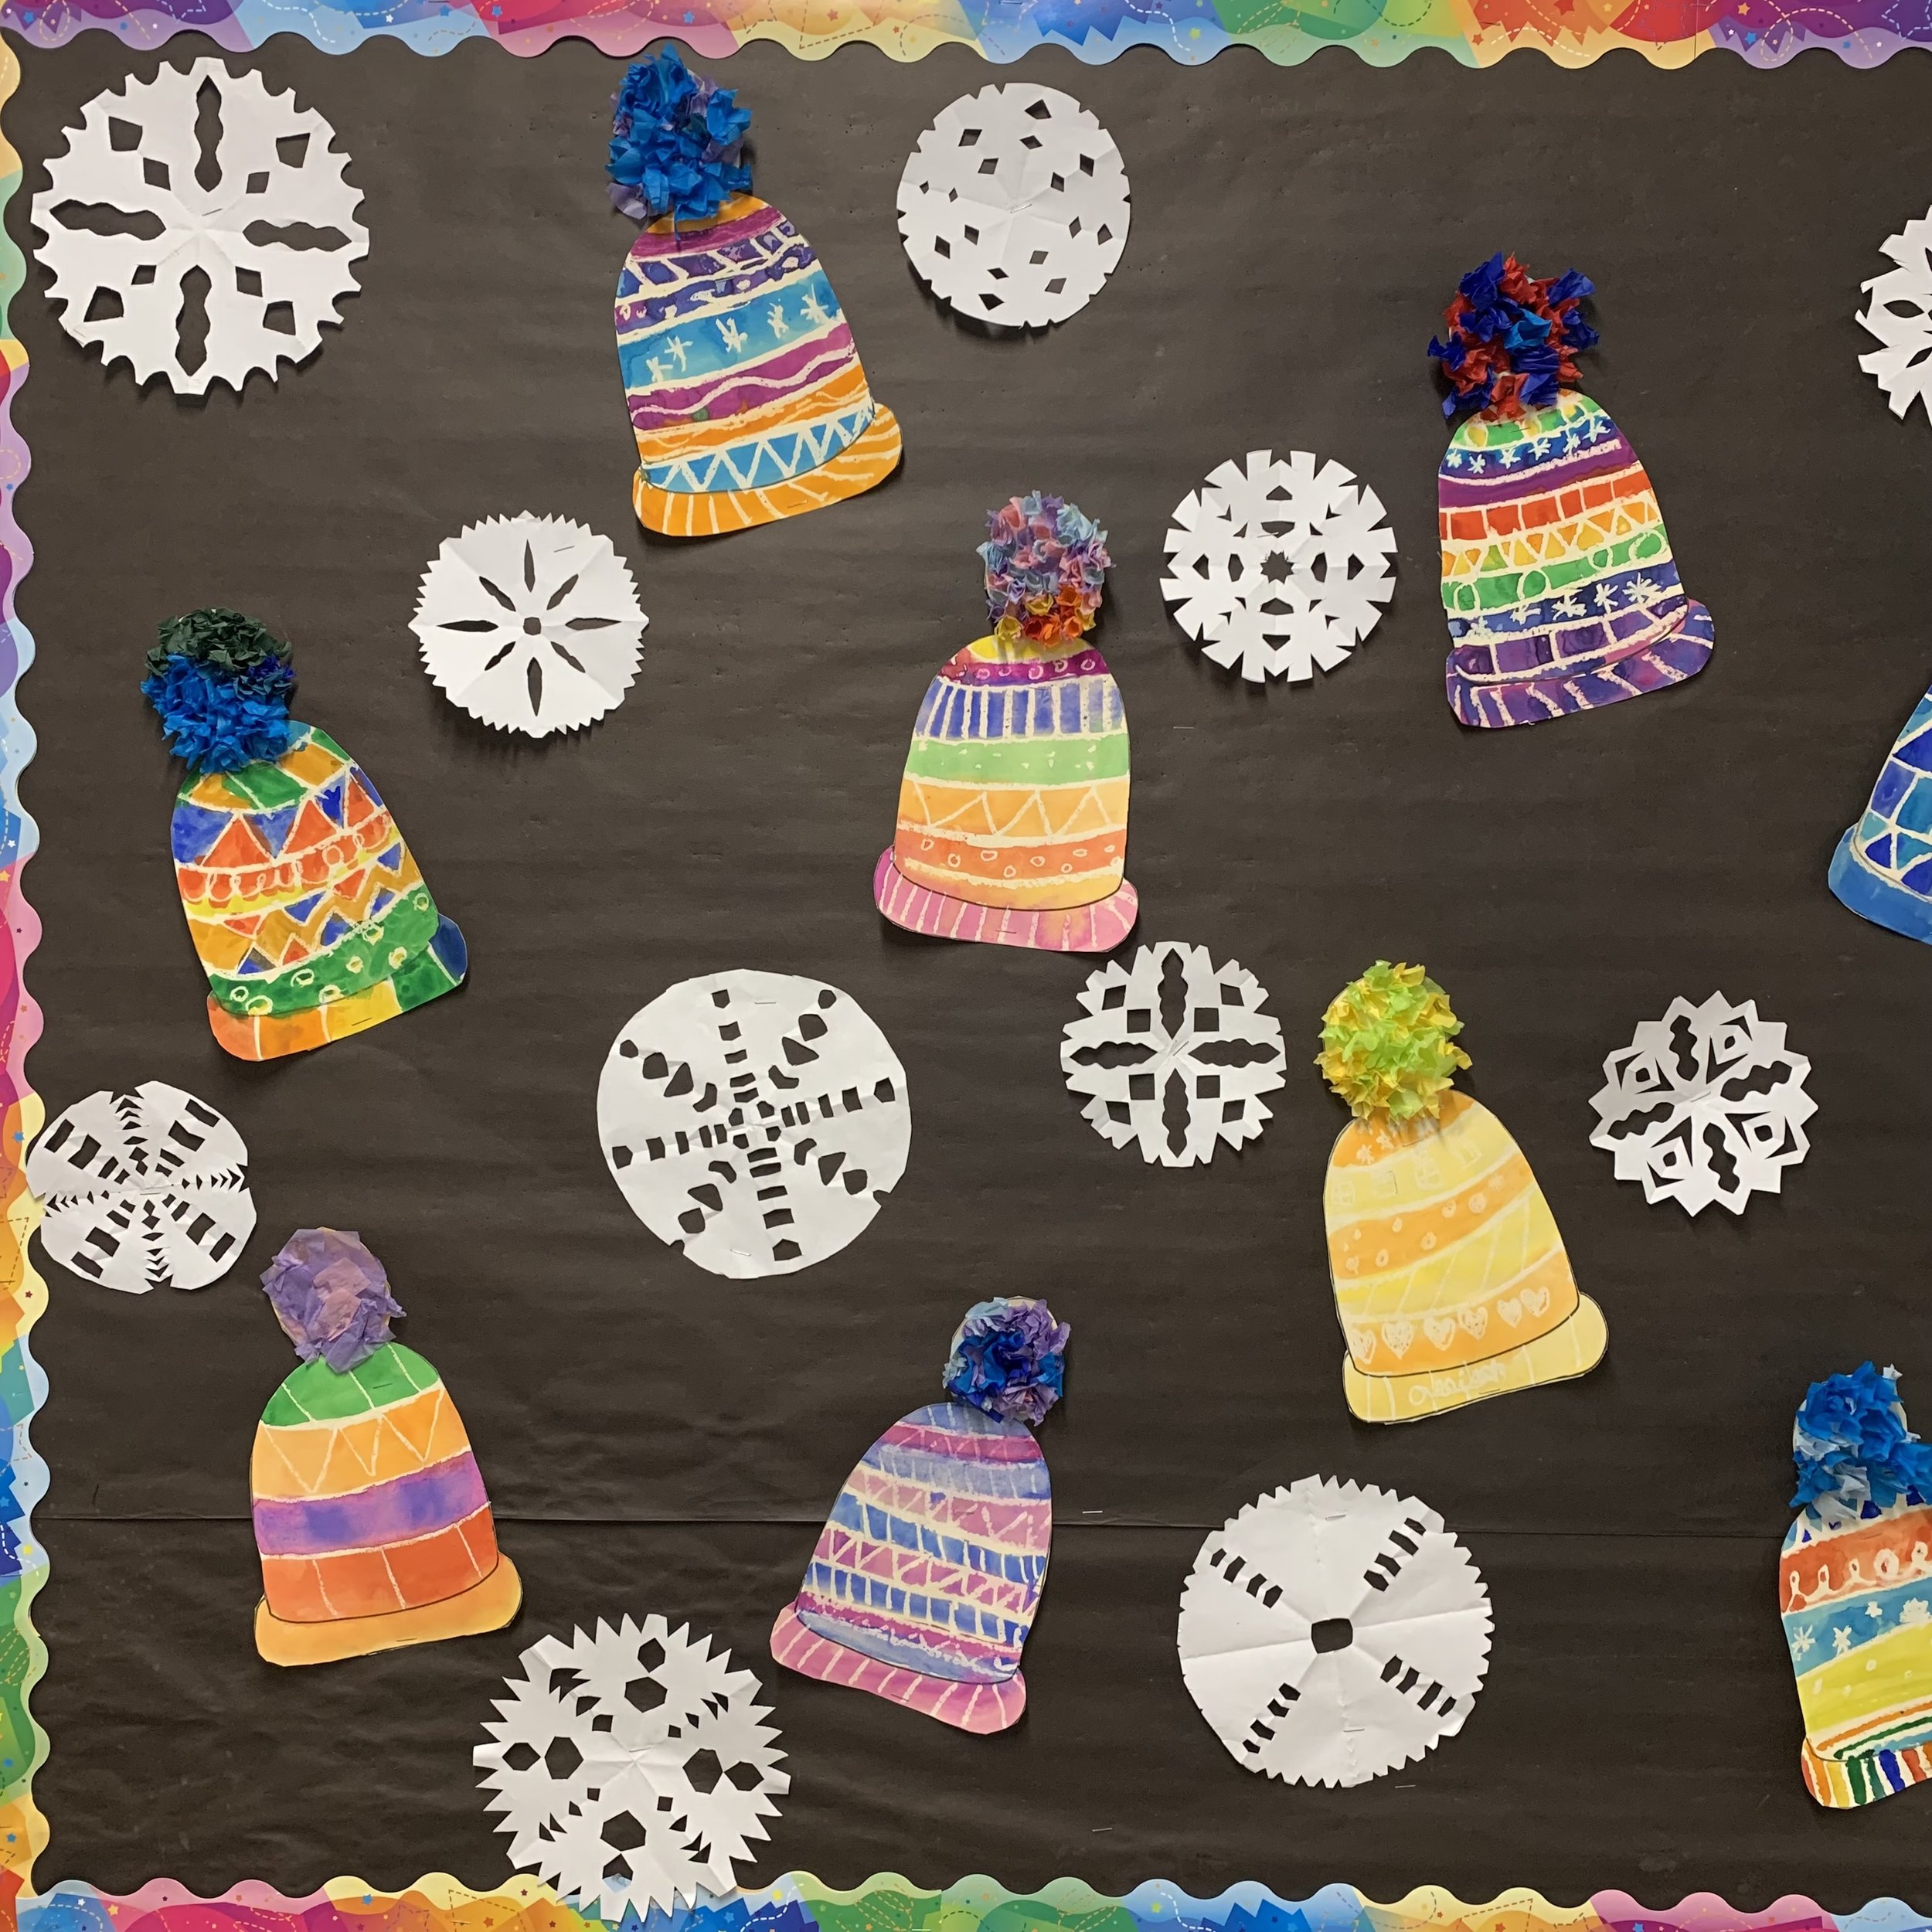
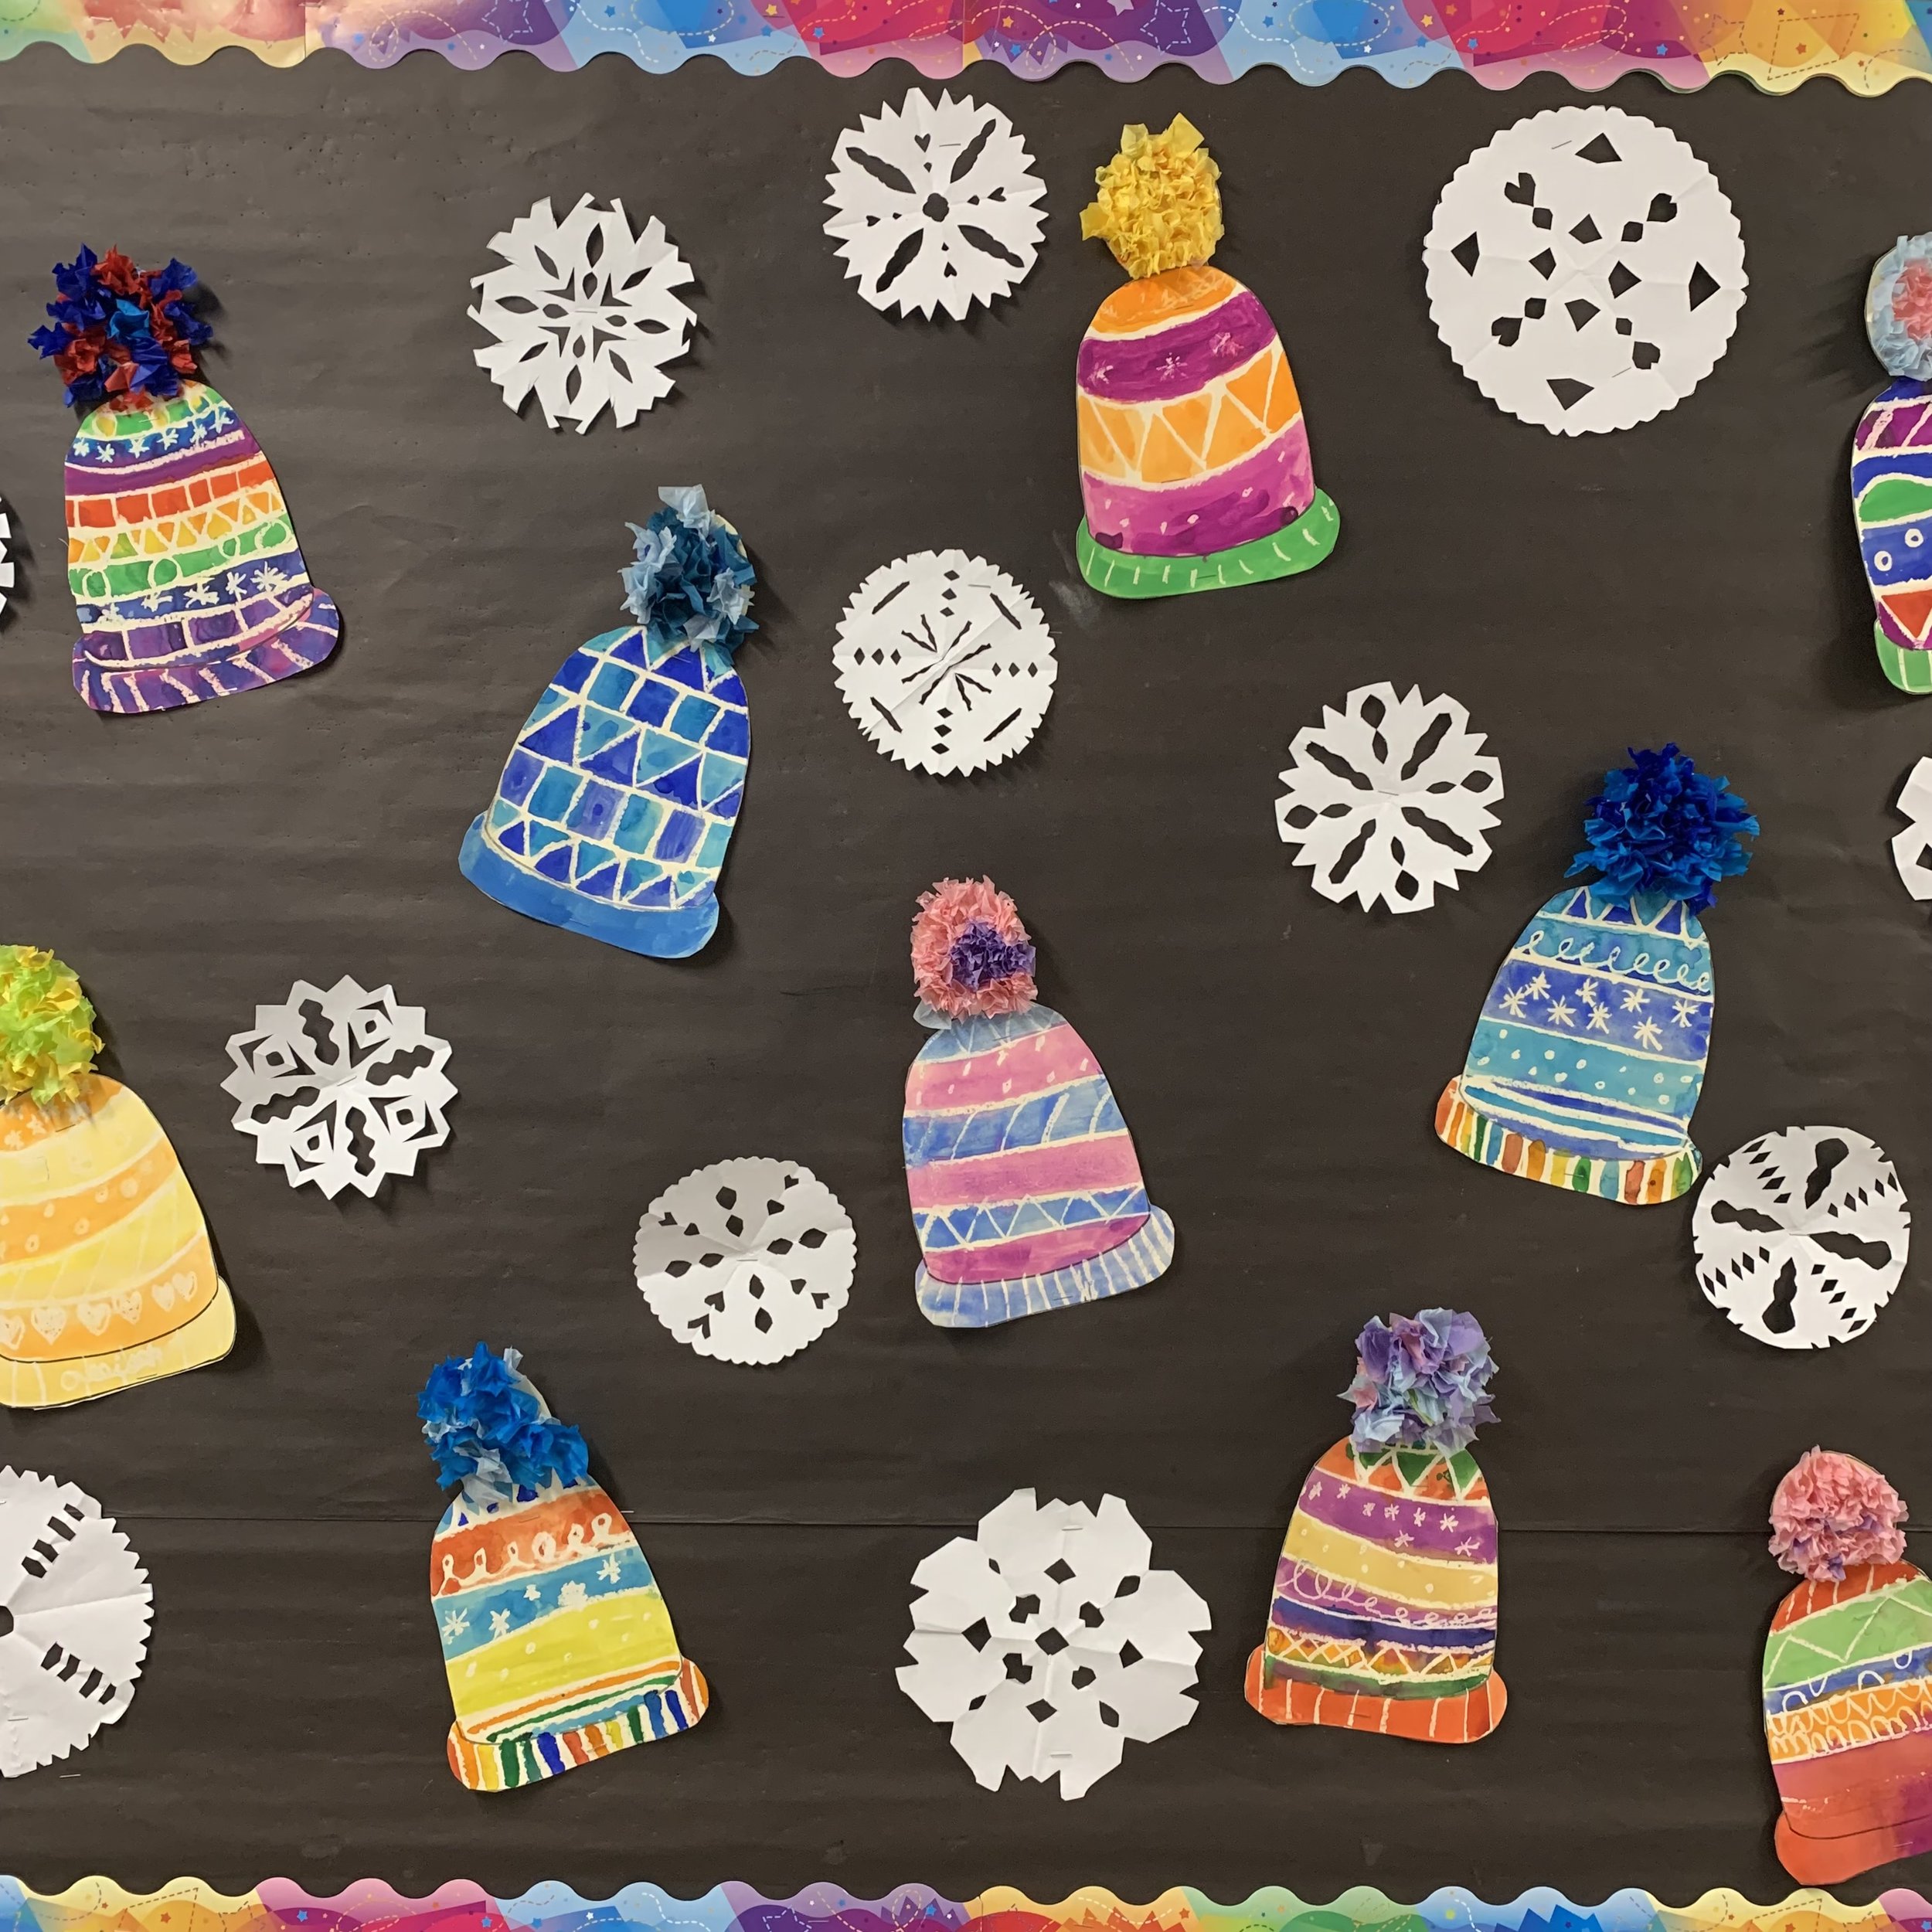
This is a classic winter project in my class. I’ve done it with K-3 students so you can adapt it to your group as needed. It’s a paint resist project with a tissue pompom! What could be more fun? For our display we also made snowflakes, no pattern there, just fold and cut away.

Time: 2 classes needed due to dry time (1 - 30 minutes, 2 - 30 minutes)

Materials:
Card stock tuque template
White oil pastel
Tempera paint (we use paint pucks)
Pencil (optional)
Tissue paper (cut into squares)
White glue
Procedure day one:
I copy the toque shape onto card stock (using the photocopier). If you can’t do that, you could have students draw their own tuque or you could have them trace a stencil.
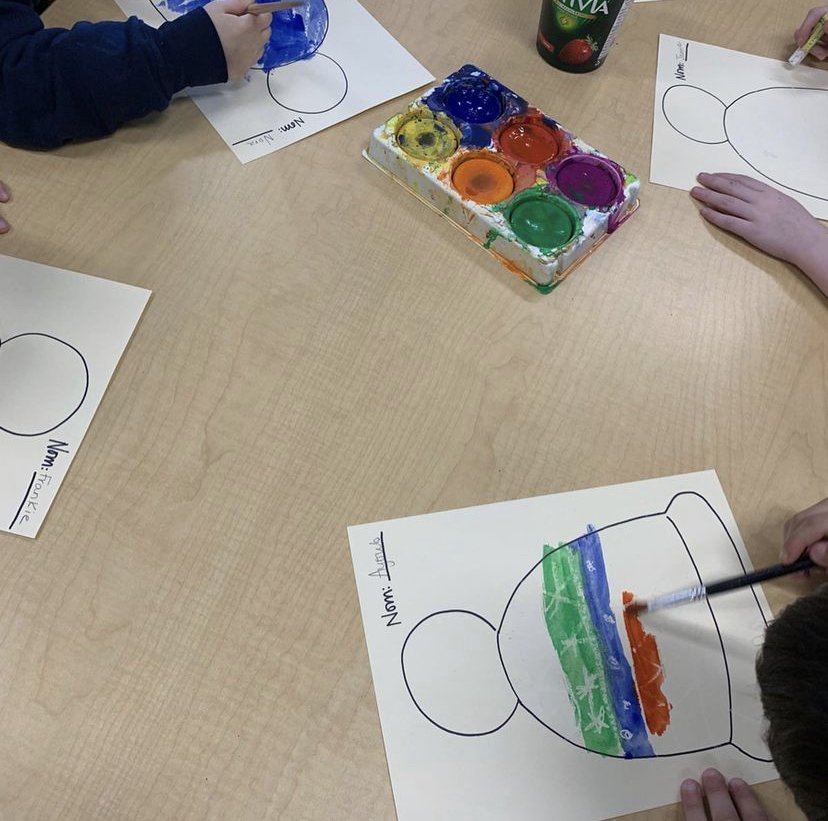
Use the white oil pastel to draw curved lines across the tuque. Don’t draw with pencil first, it will show through the white pastel.
In between each section, draw a pattern. It’s important to not make them too intricate. Big, clean patterns show up best. The pastel should be thick, that will help with resisting the paint.
Paint each section in desired colours. Make sure the paint has enough water in it. If you use paint pucks and it’s really dry, it will just cover up the pastel. You need it to be watery enough so that the water will be pushed away from the oil pastel.
Leave to dry
*at this point we made snowflakes to round out our art block
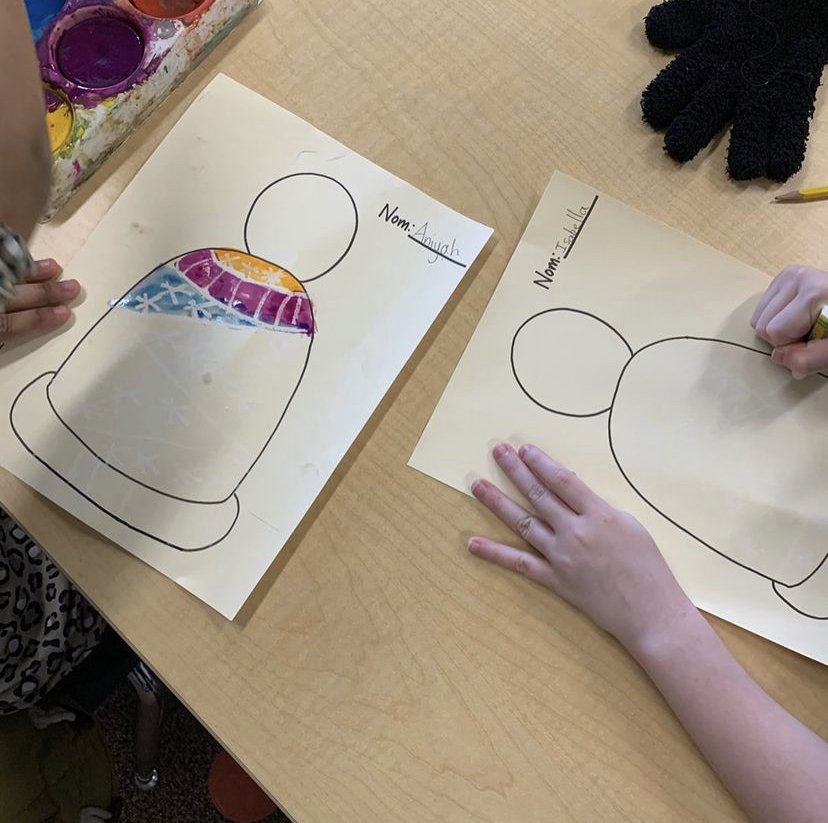
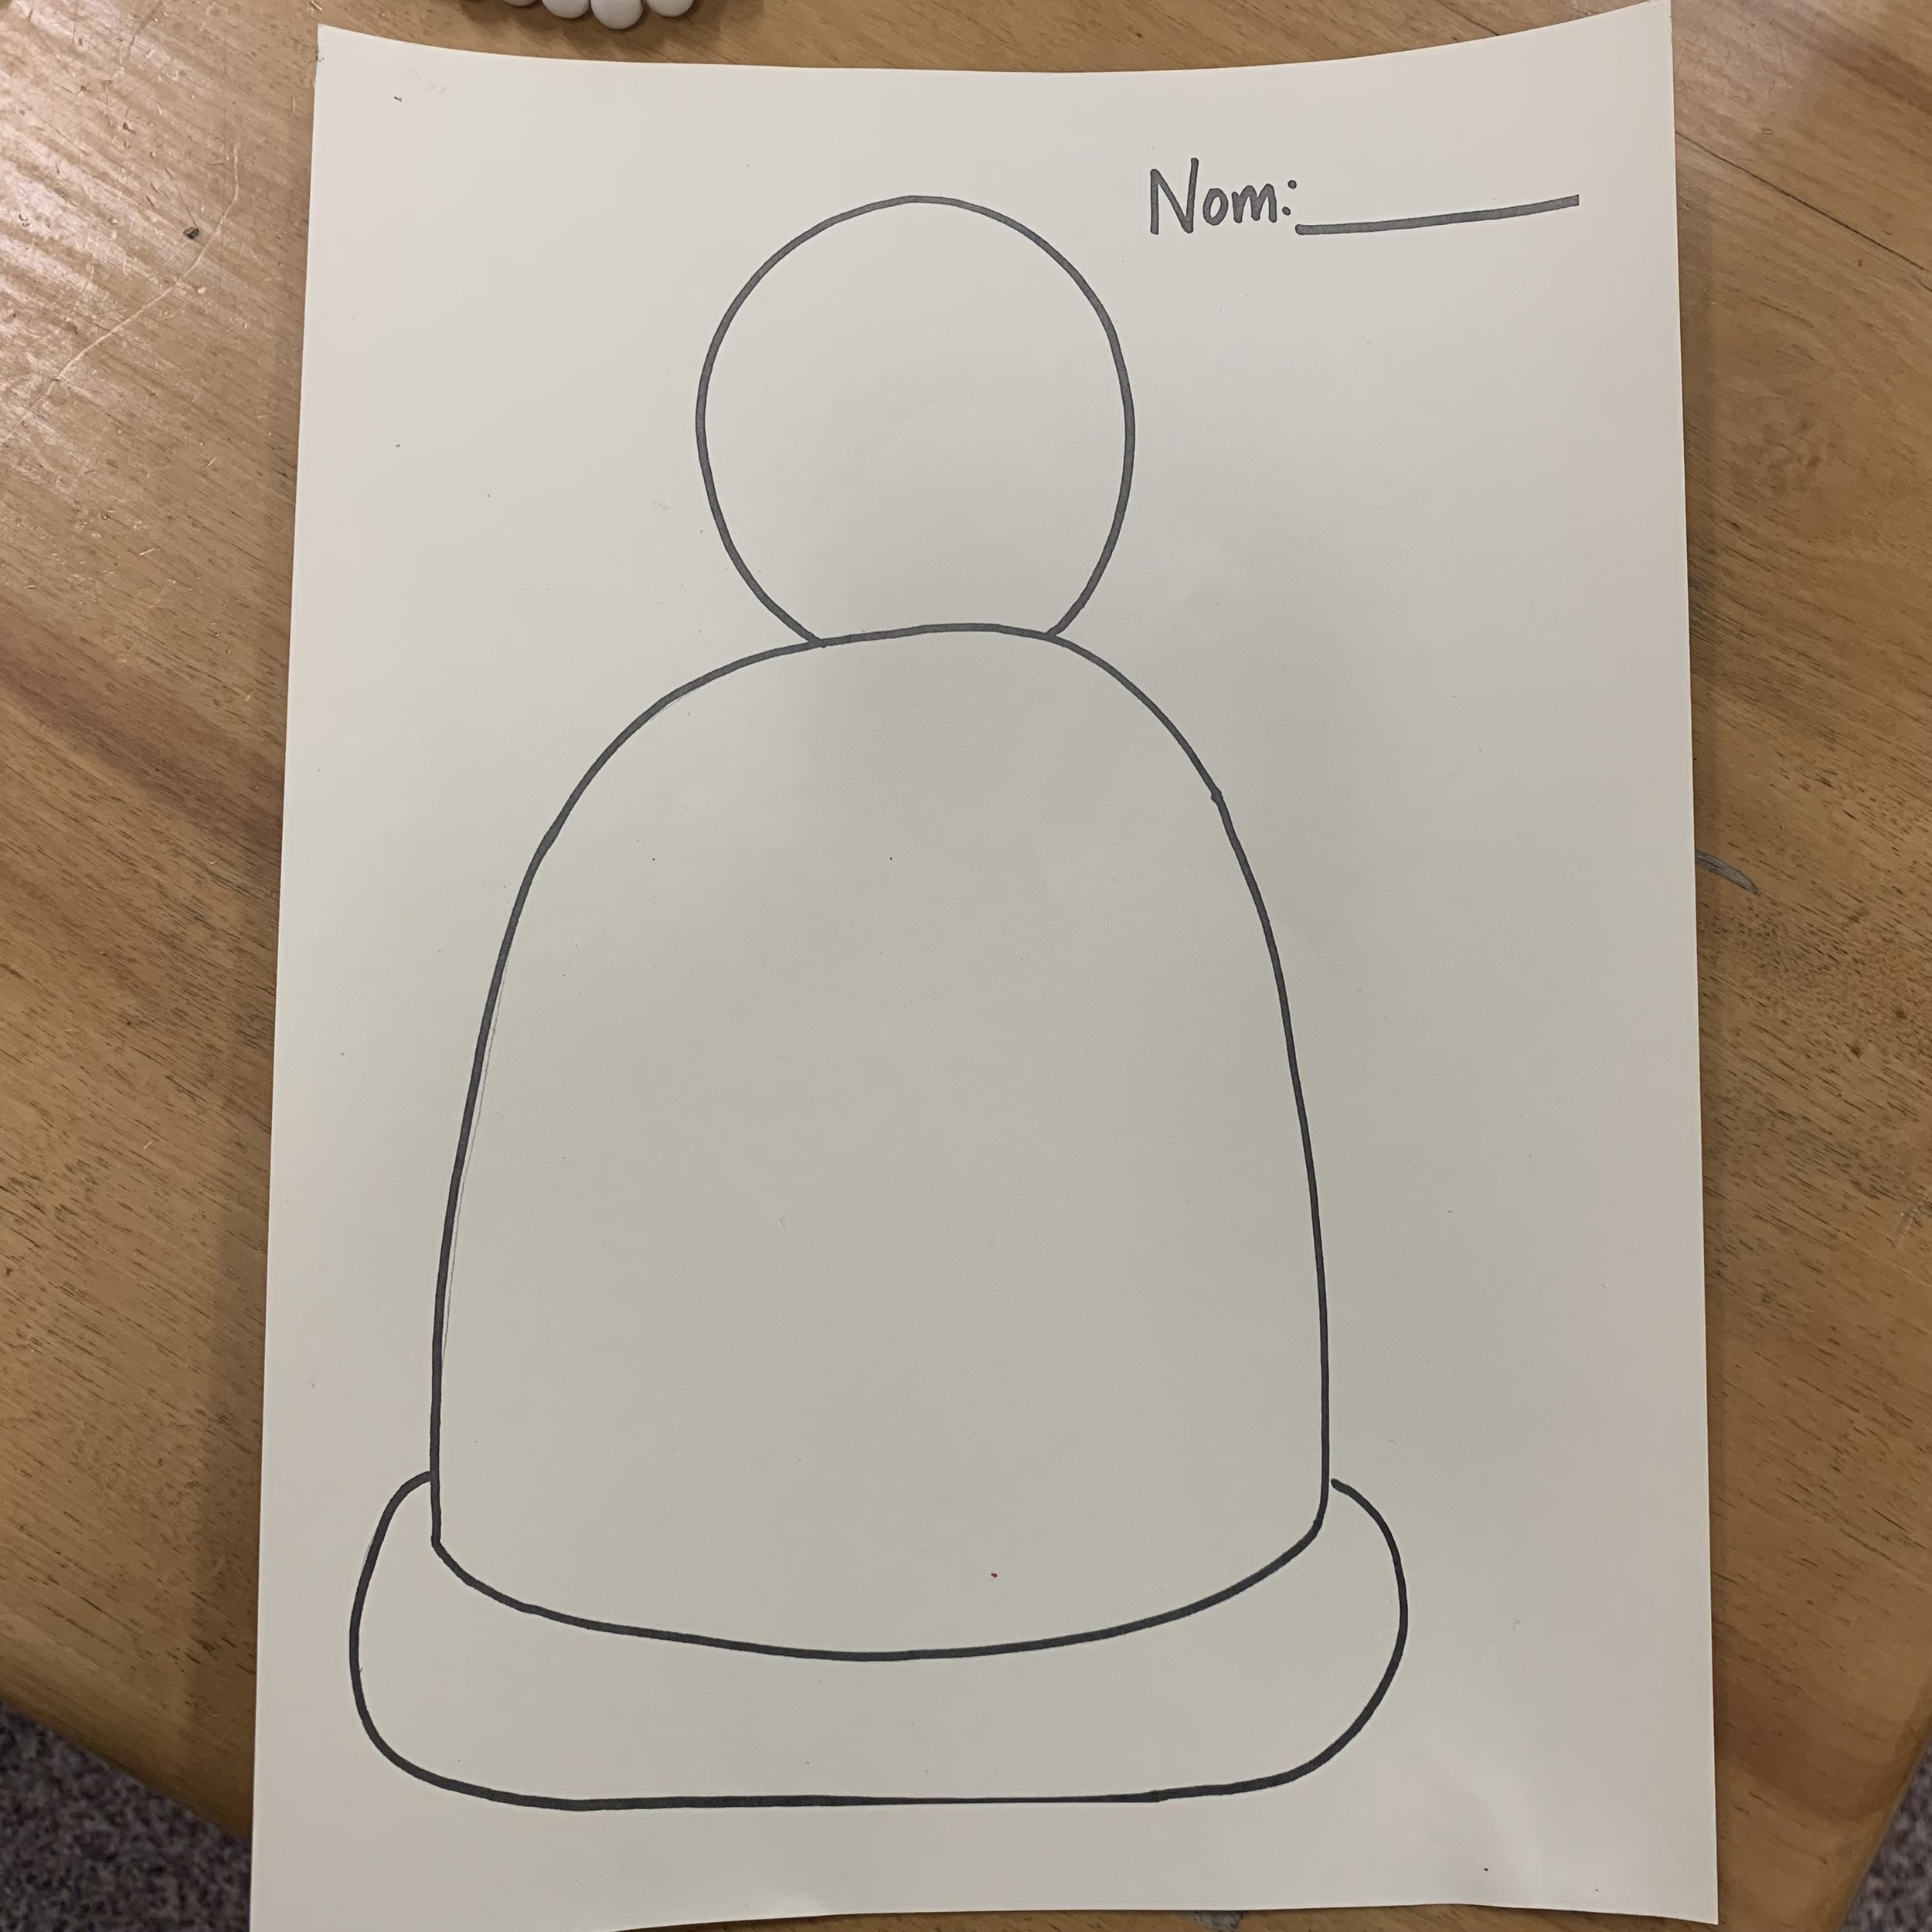
Template printed on card stock. It’s manilla coloured, but it doesn’t matter because we’re going to cover it all up. I just hand drew it so it’s not perfect by any means.
Click the button below to download the template.

Procedure day two:
Once the paint has dried, cut out the toque
Use squares of tissue paper dipped in white glue to create a fluffy pompom.
*Optionally, you can wrap the tissue around a pencil and use that to dip in the glue and then stamp onto the paper.