Flower Doodle: Spring Kids Art Project
I found this project on Pinterest with a variety of background options.
In these instructions, we’ll use paint but you can do any background with any material.
Consider a tissue paper background like in these Zentangle leaves.
Time required: 60 minutes
You could do these on separate days, or one longer block. Our backgrounds dried in time to glue the flowers down.
Materials step 1:
White paper
Watercolour paint (we use tempera pucks but you can use liquid)
Large paint brush
Water cup
Materials step 2:
Background from step 1
White paper
Sharpie
Scissors
Glue stick

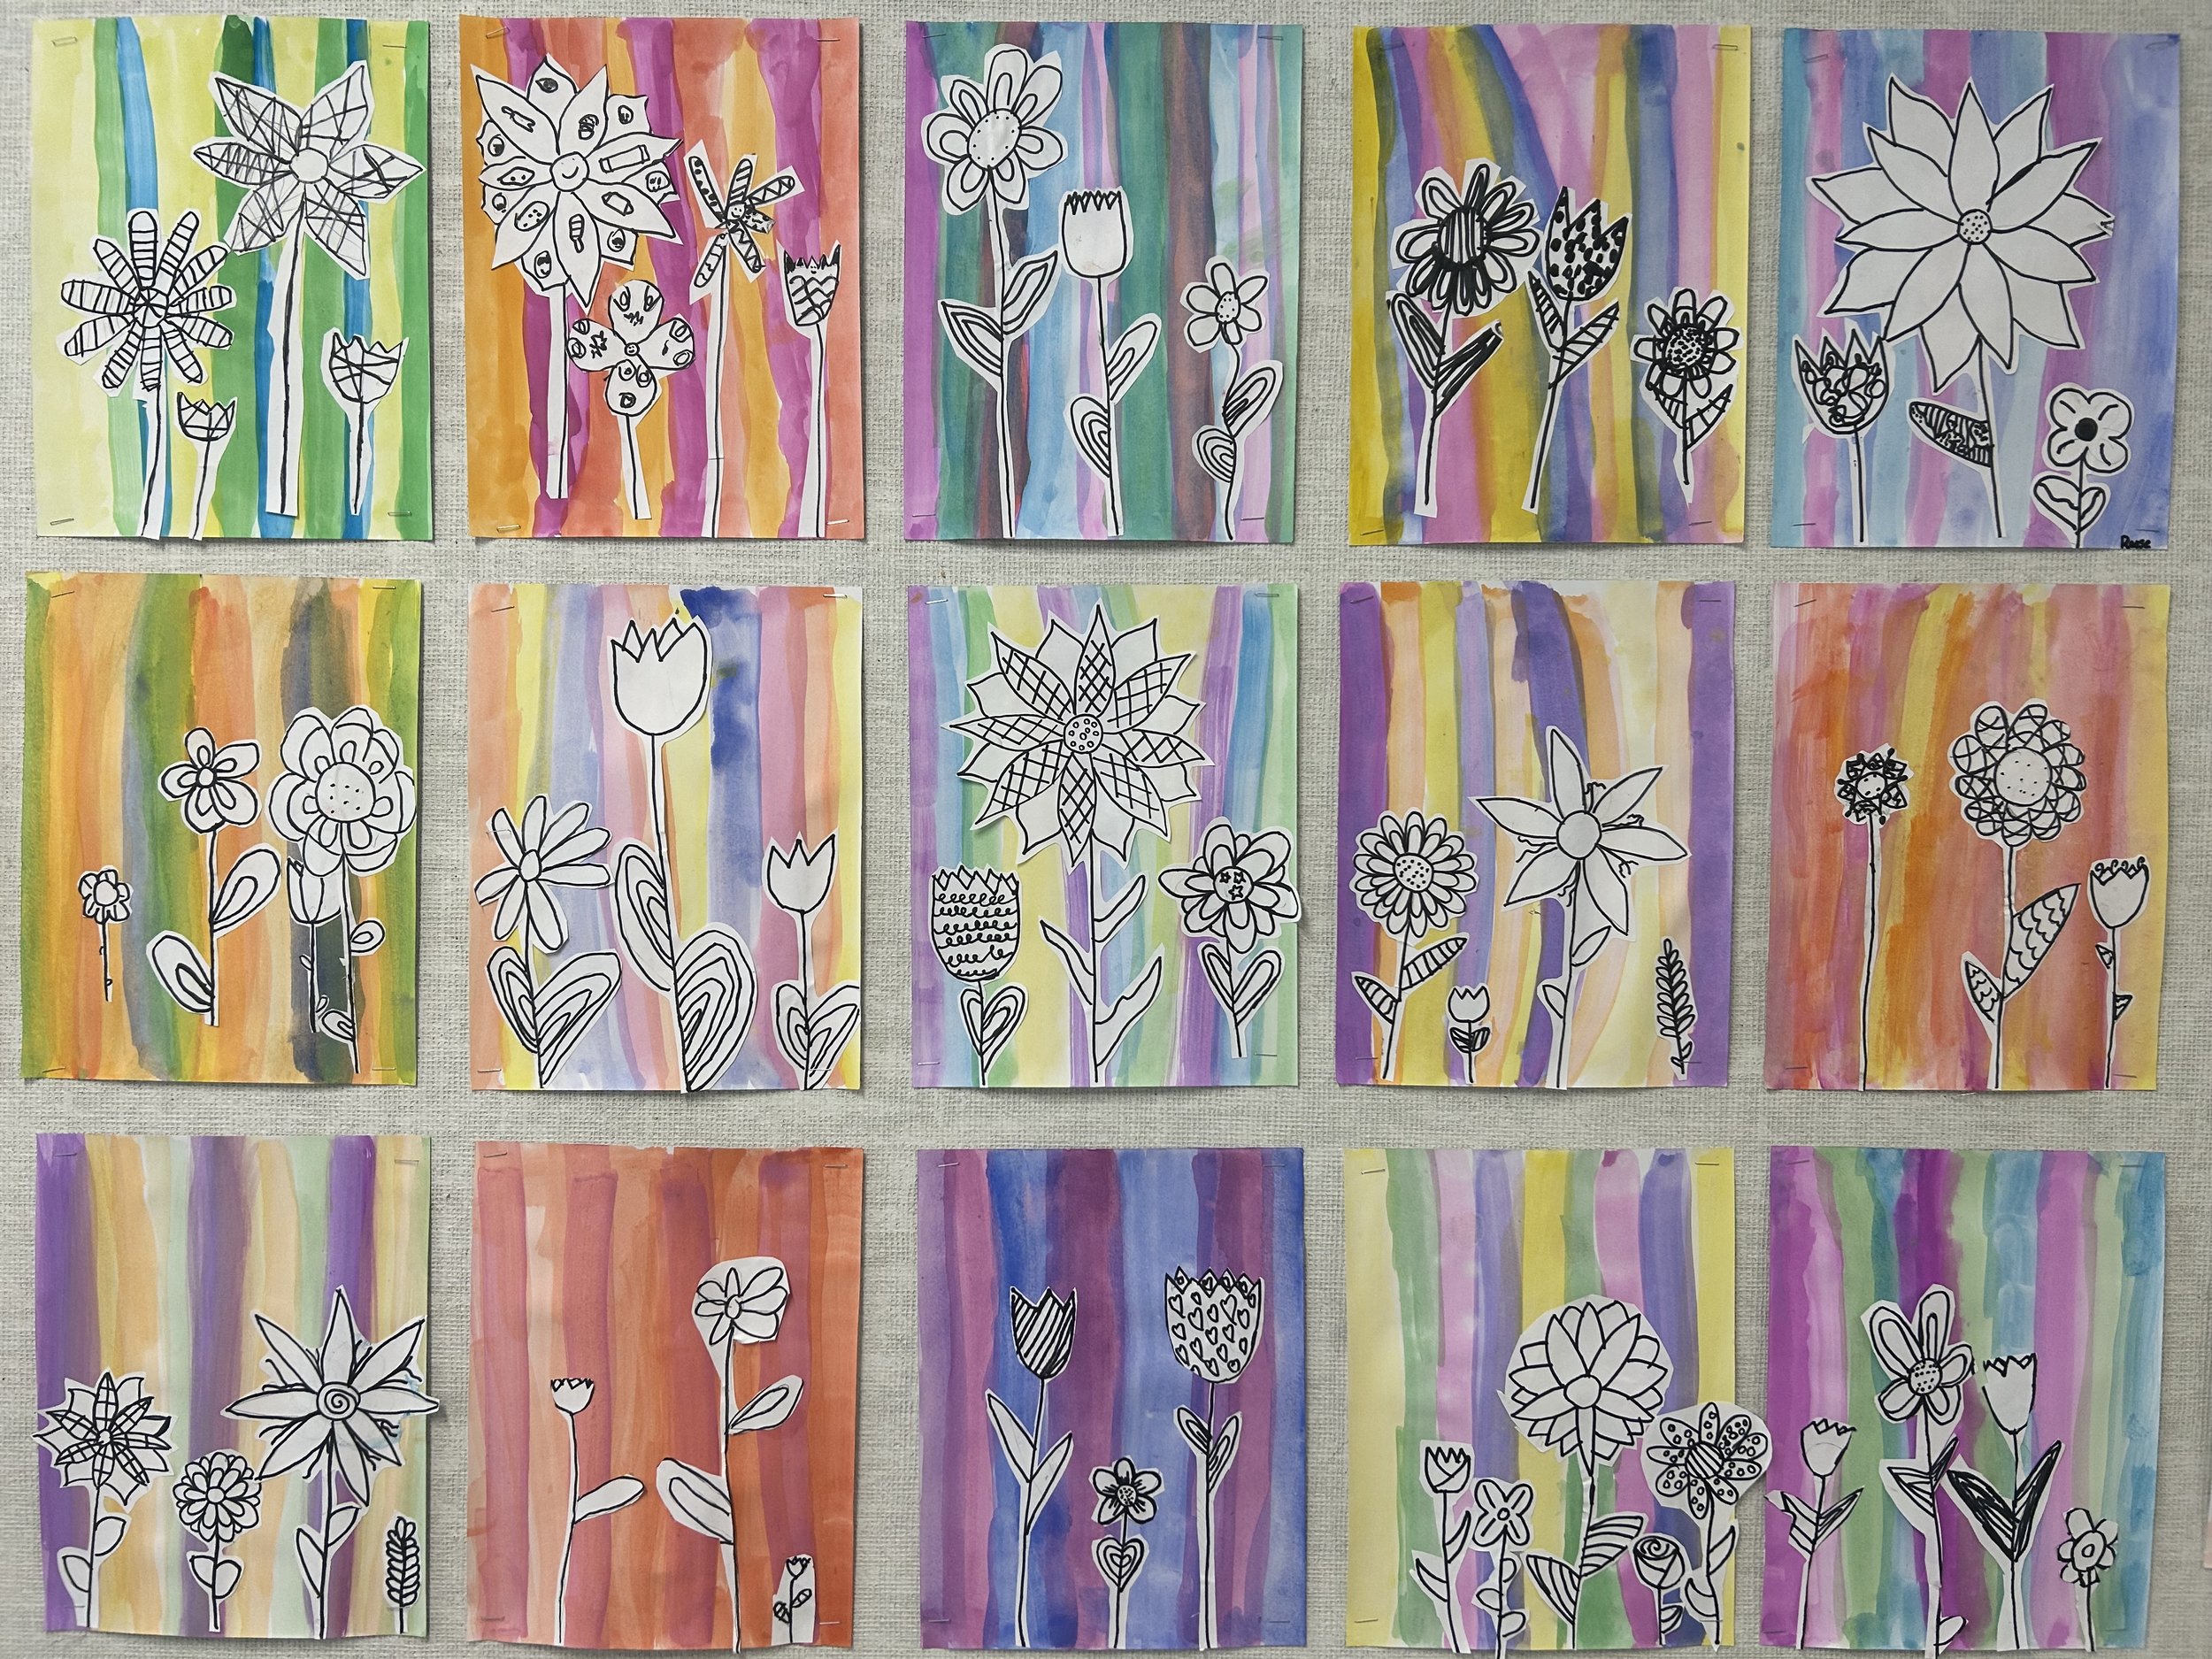
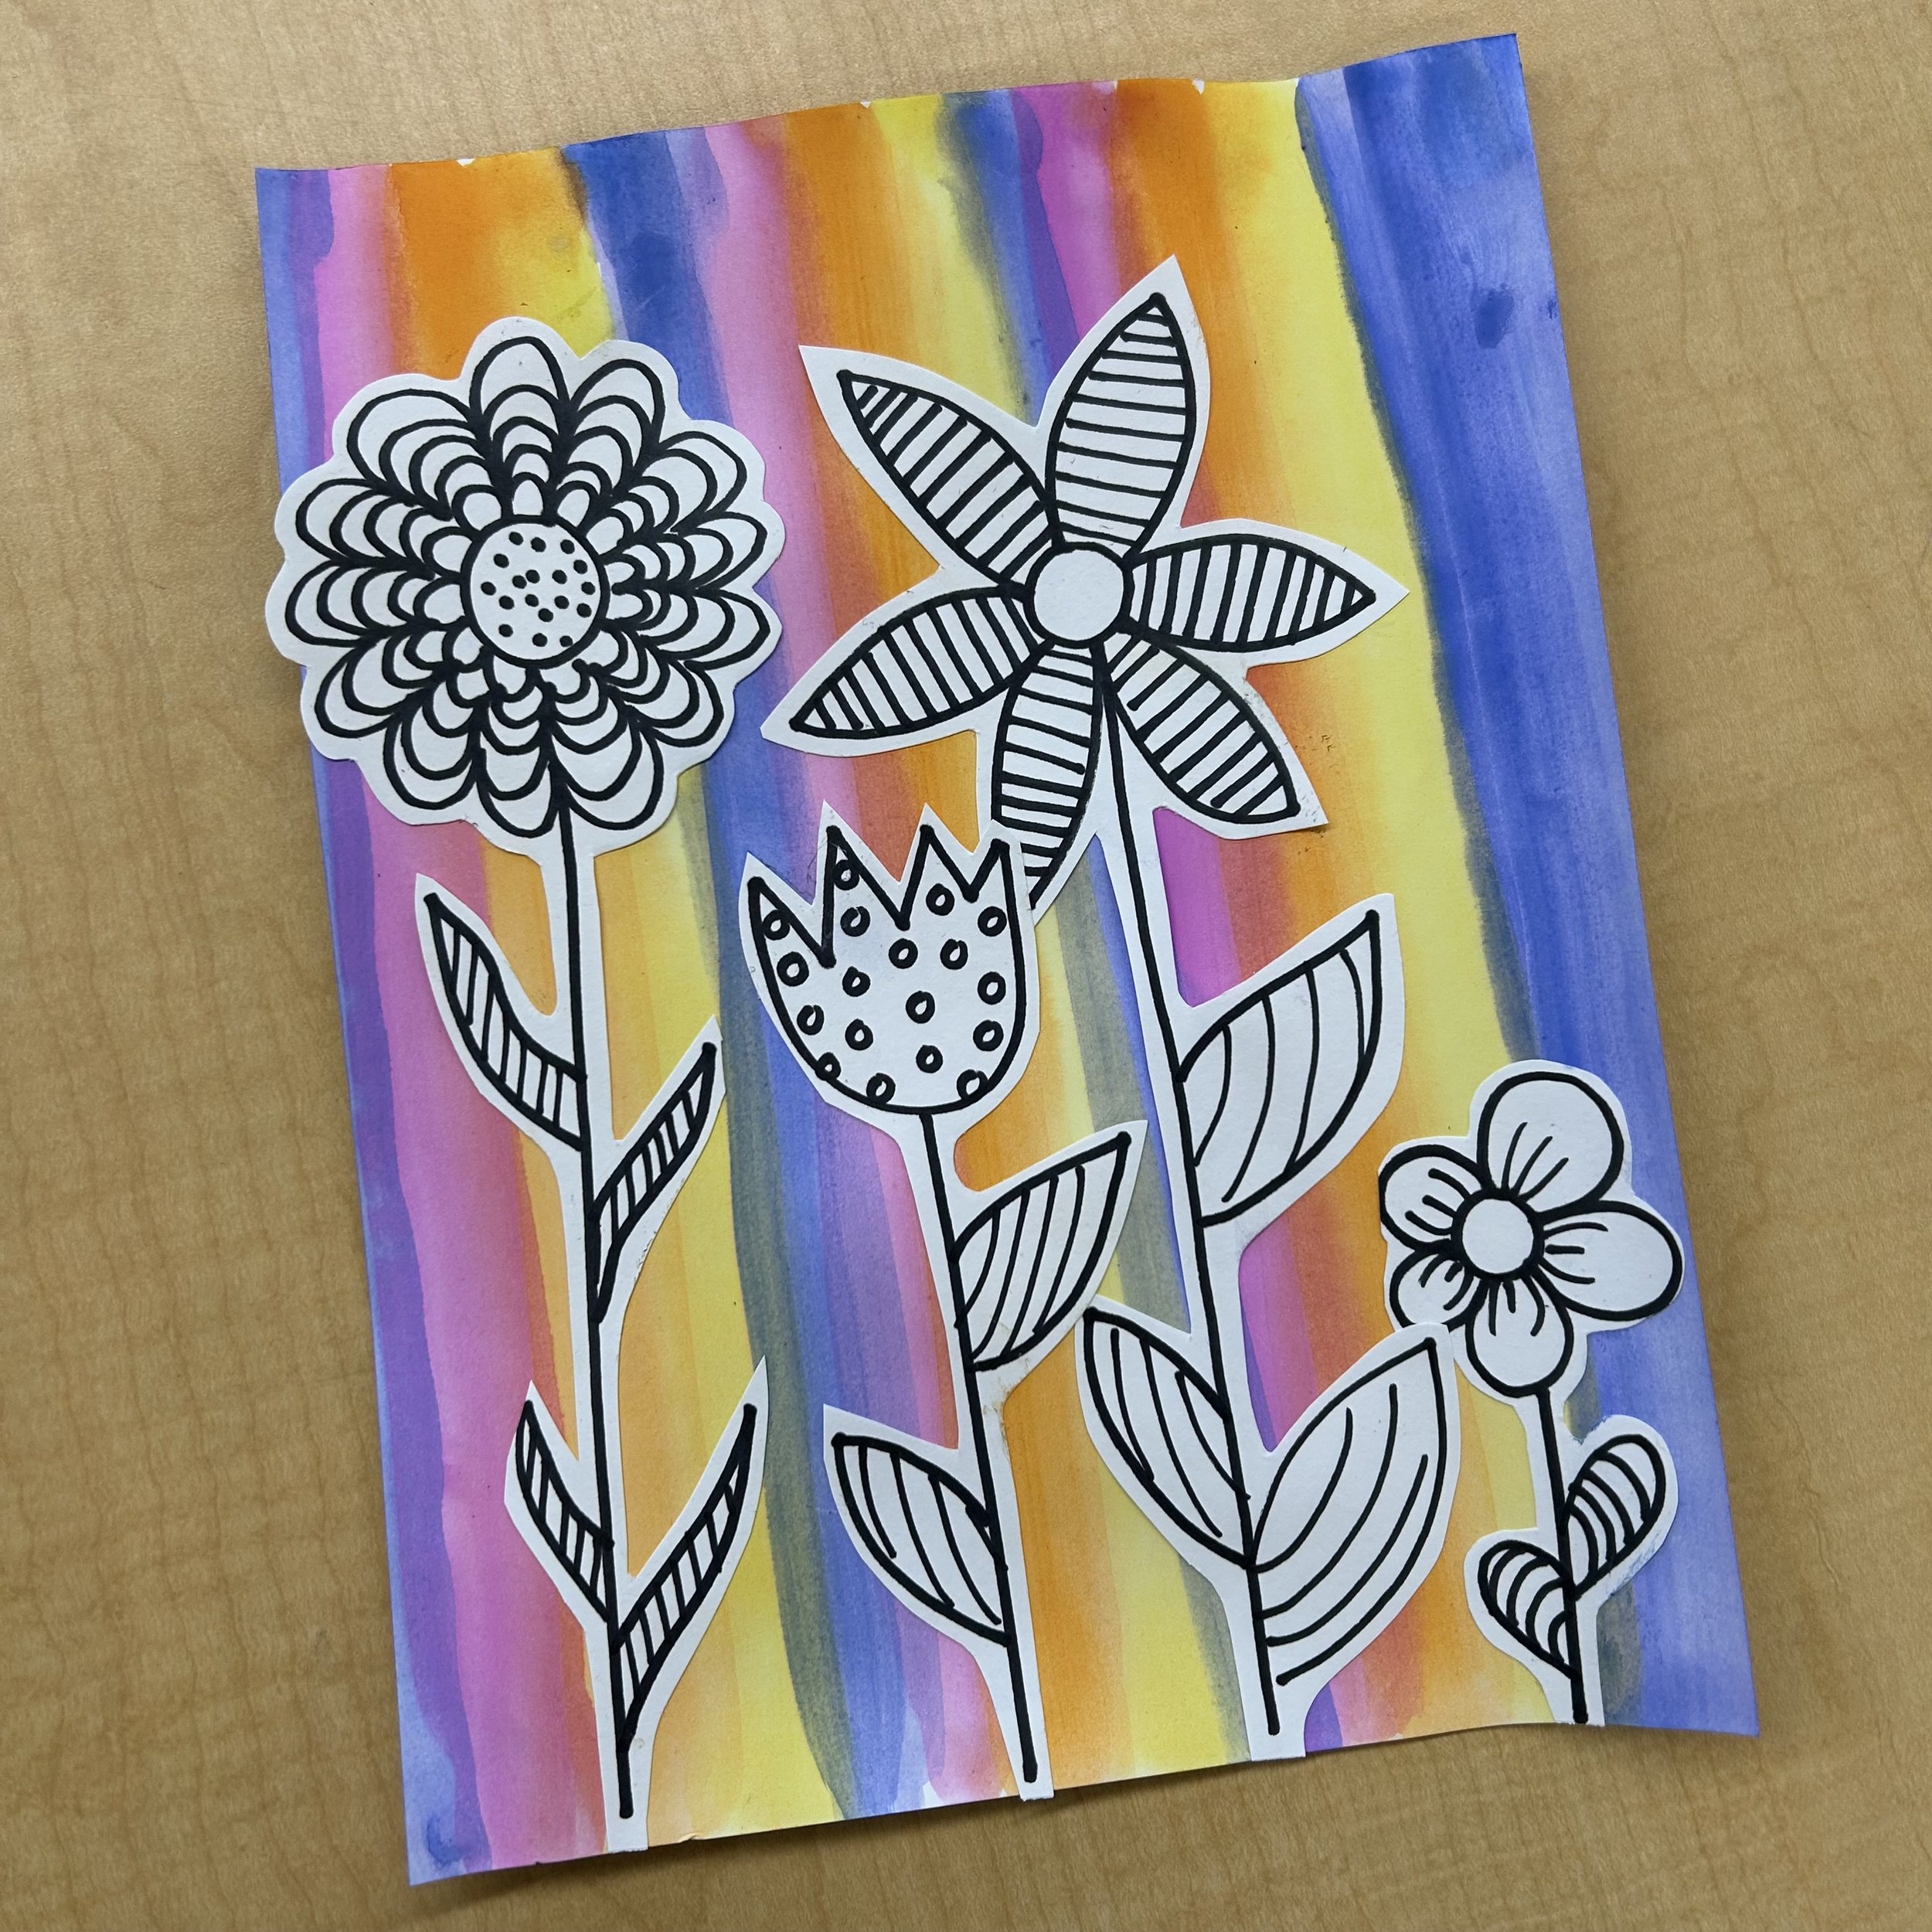
Step 1 (background):
Paint the background by creating vertical stripes along your paper.
Students got to choose their colours. I suggested 3-4.
I also suggested that instead of cleaning their brush every time to change colours, they would do all the yellow (leaving gaps), then all the orange (still leaving gaps)…until their page was full of colour.
See image below for example of students using this technique.
Set aside to dry.


Step 2 (flowers):
With a pencil, draw 3-4 doodle flowers with designs in the petals and leaves.
Trace the flowers with a black Sharpie.
You can make these into zentangles with little doodles or patterns inside the leaves or petals.
Cut out the flowers, leaving a white edge. This is especially important around the stem.
Glue the flowers onto the background.