Spring Chicks Card Art Project
We all love spring! The birds are chirping, the flowers are blooming and the days are getting warmer.
This easy spring card is great as a spring or Easter card for students to gift their families.

Time: 30 minutes
Materials:

Construction paper (yellow, orange, green, plus any colour for background)
White paper
Craft feathers
Scissors
Pencil
Glue
Hot glue
Black marker
Markers/pencil crayons etc (optional)
**PREP PAPER AHEAD OF TIME
PREP BEFORE CLASS:
You need to cut your paper into smaller chunks.
Yellow - half sheet/student
White - half sheet/student
Orange - small square/student
Green - cut in half along short side, then make strips (size should cover the bottom of the card)
Steps:
**See a how to video on Instagram
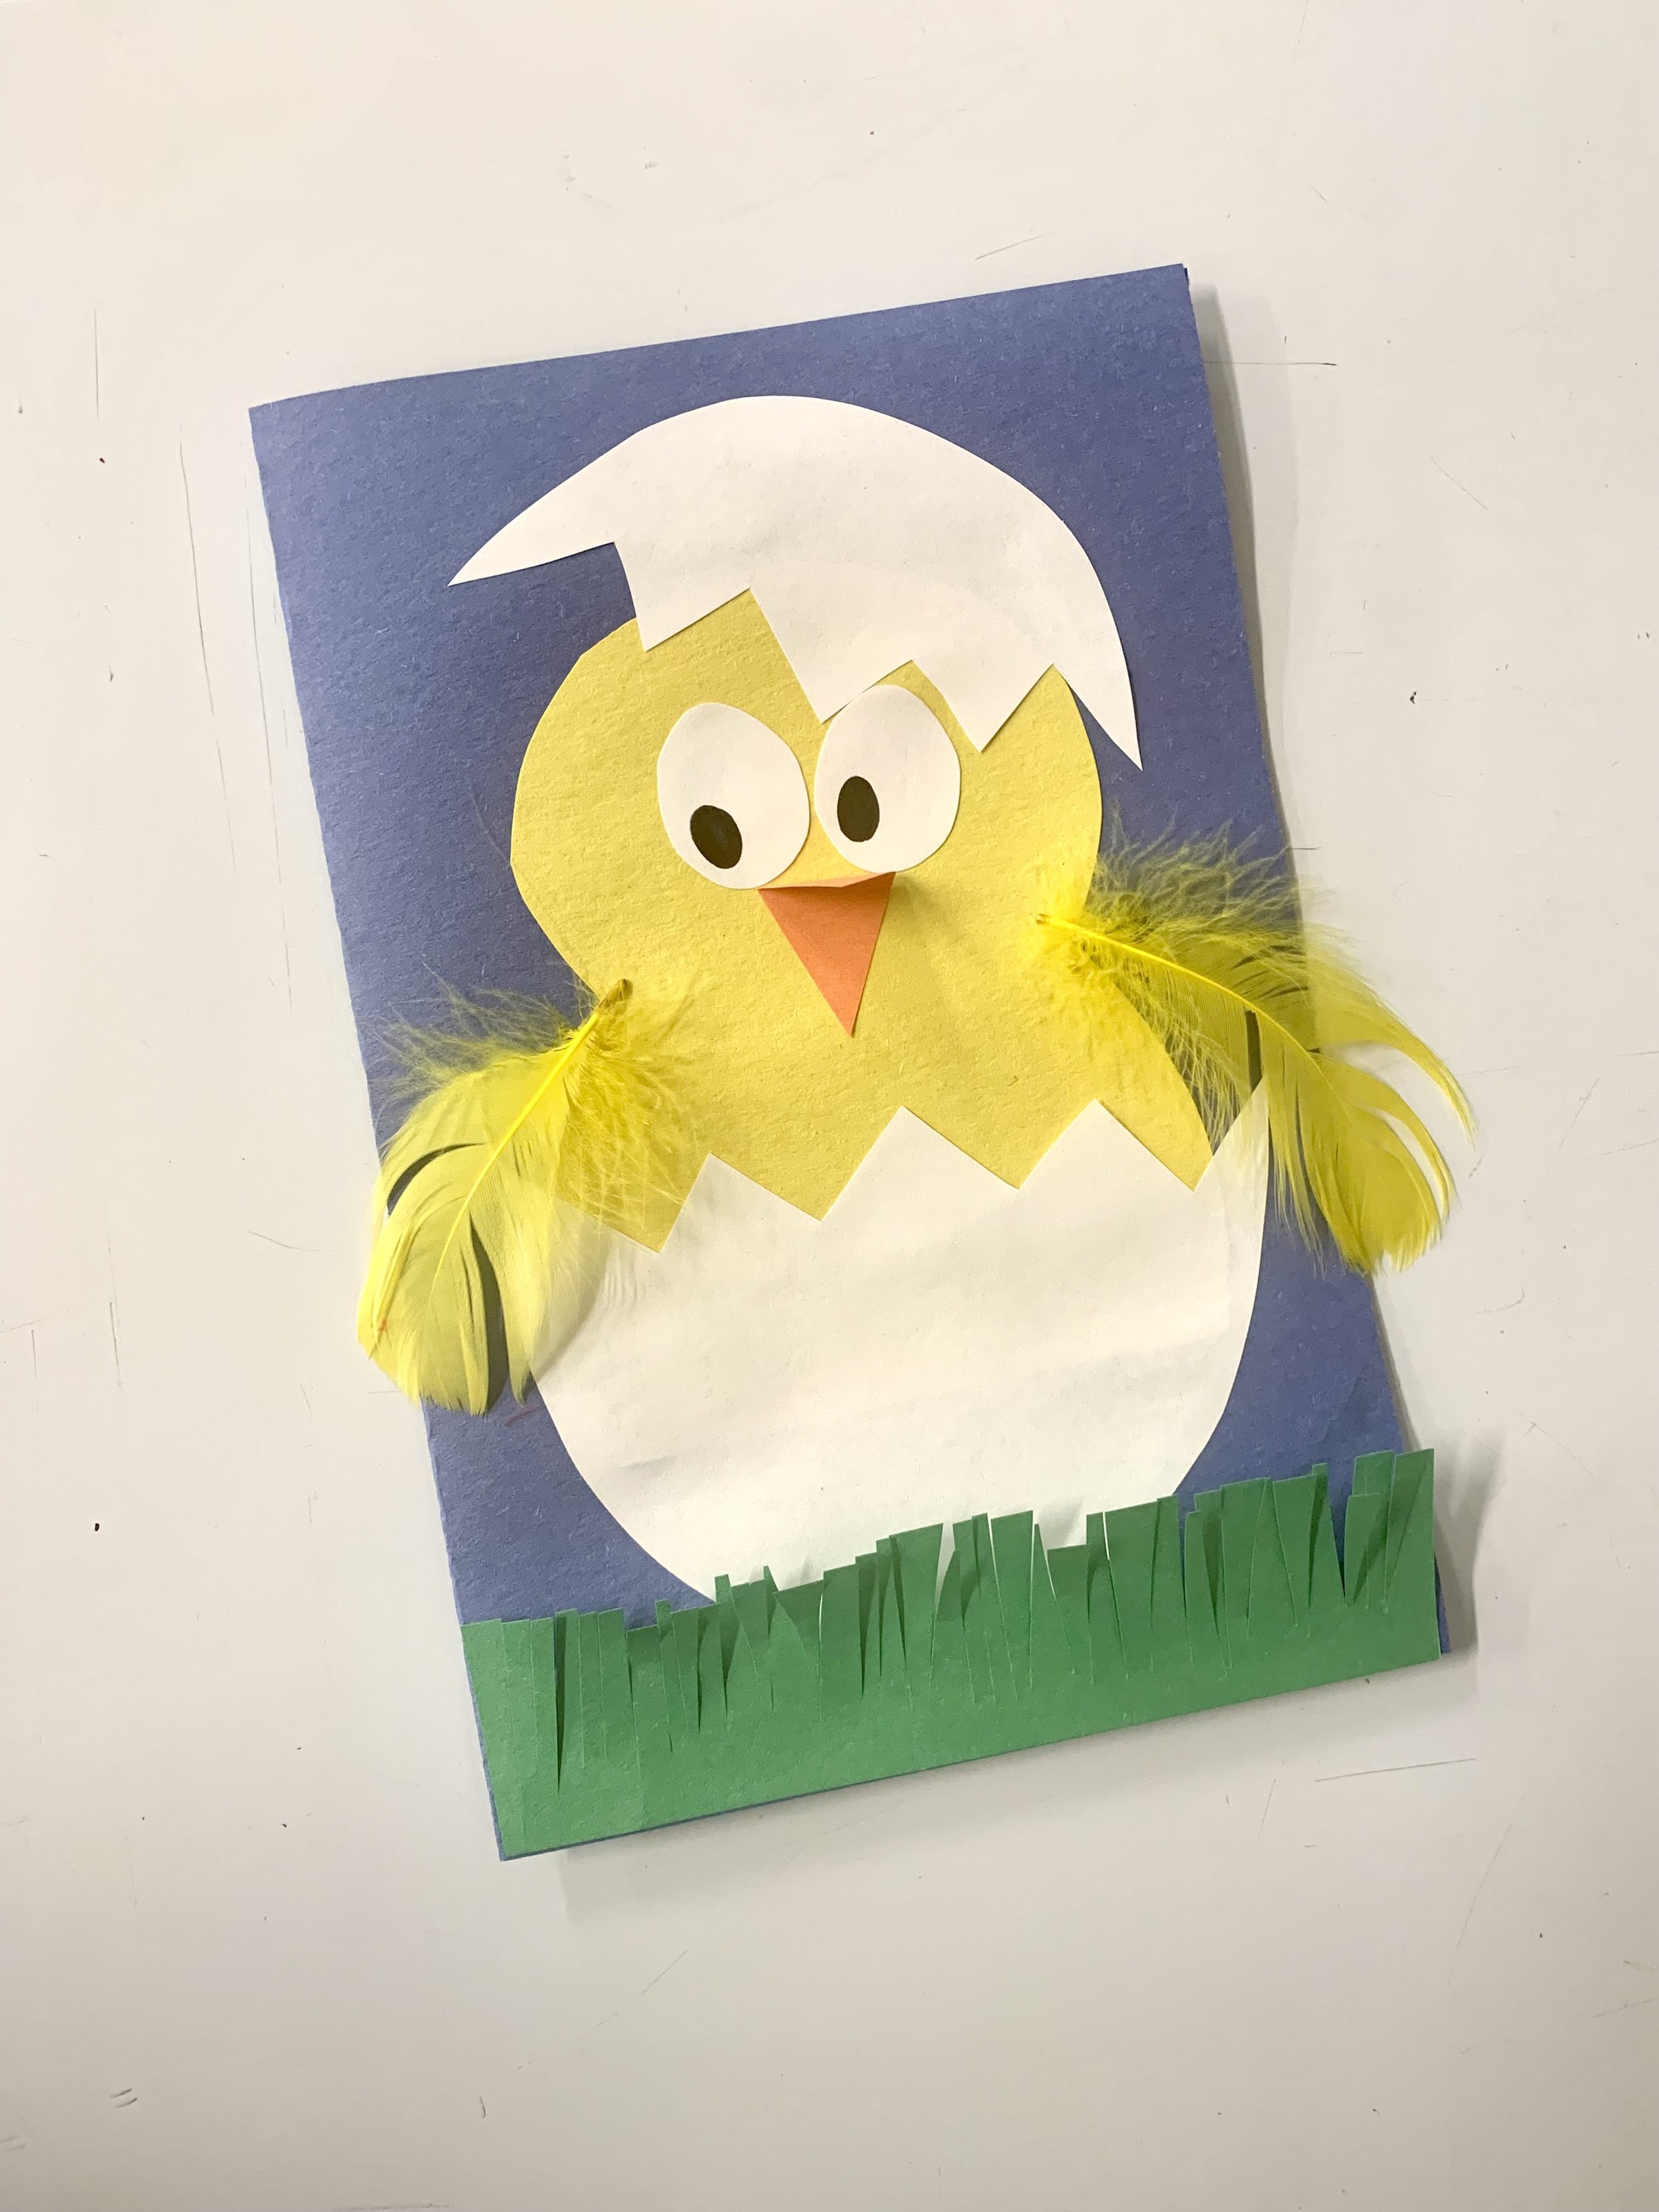
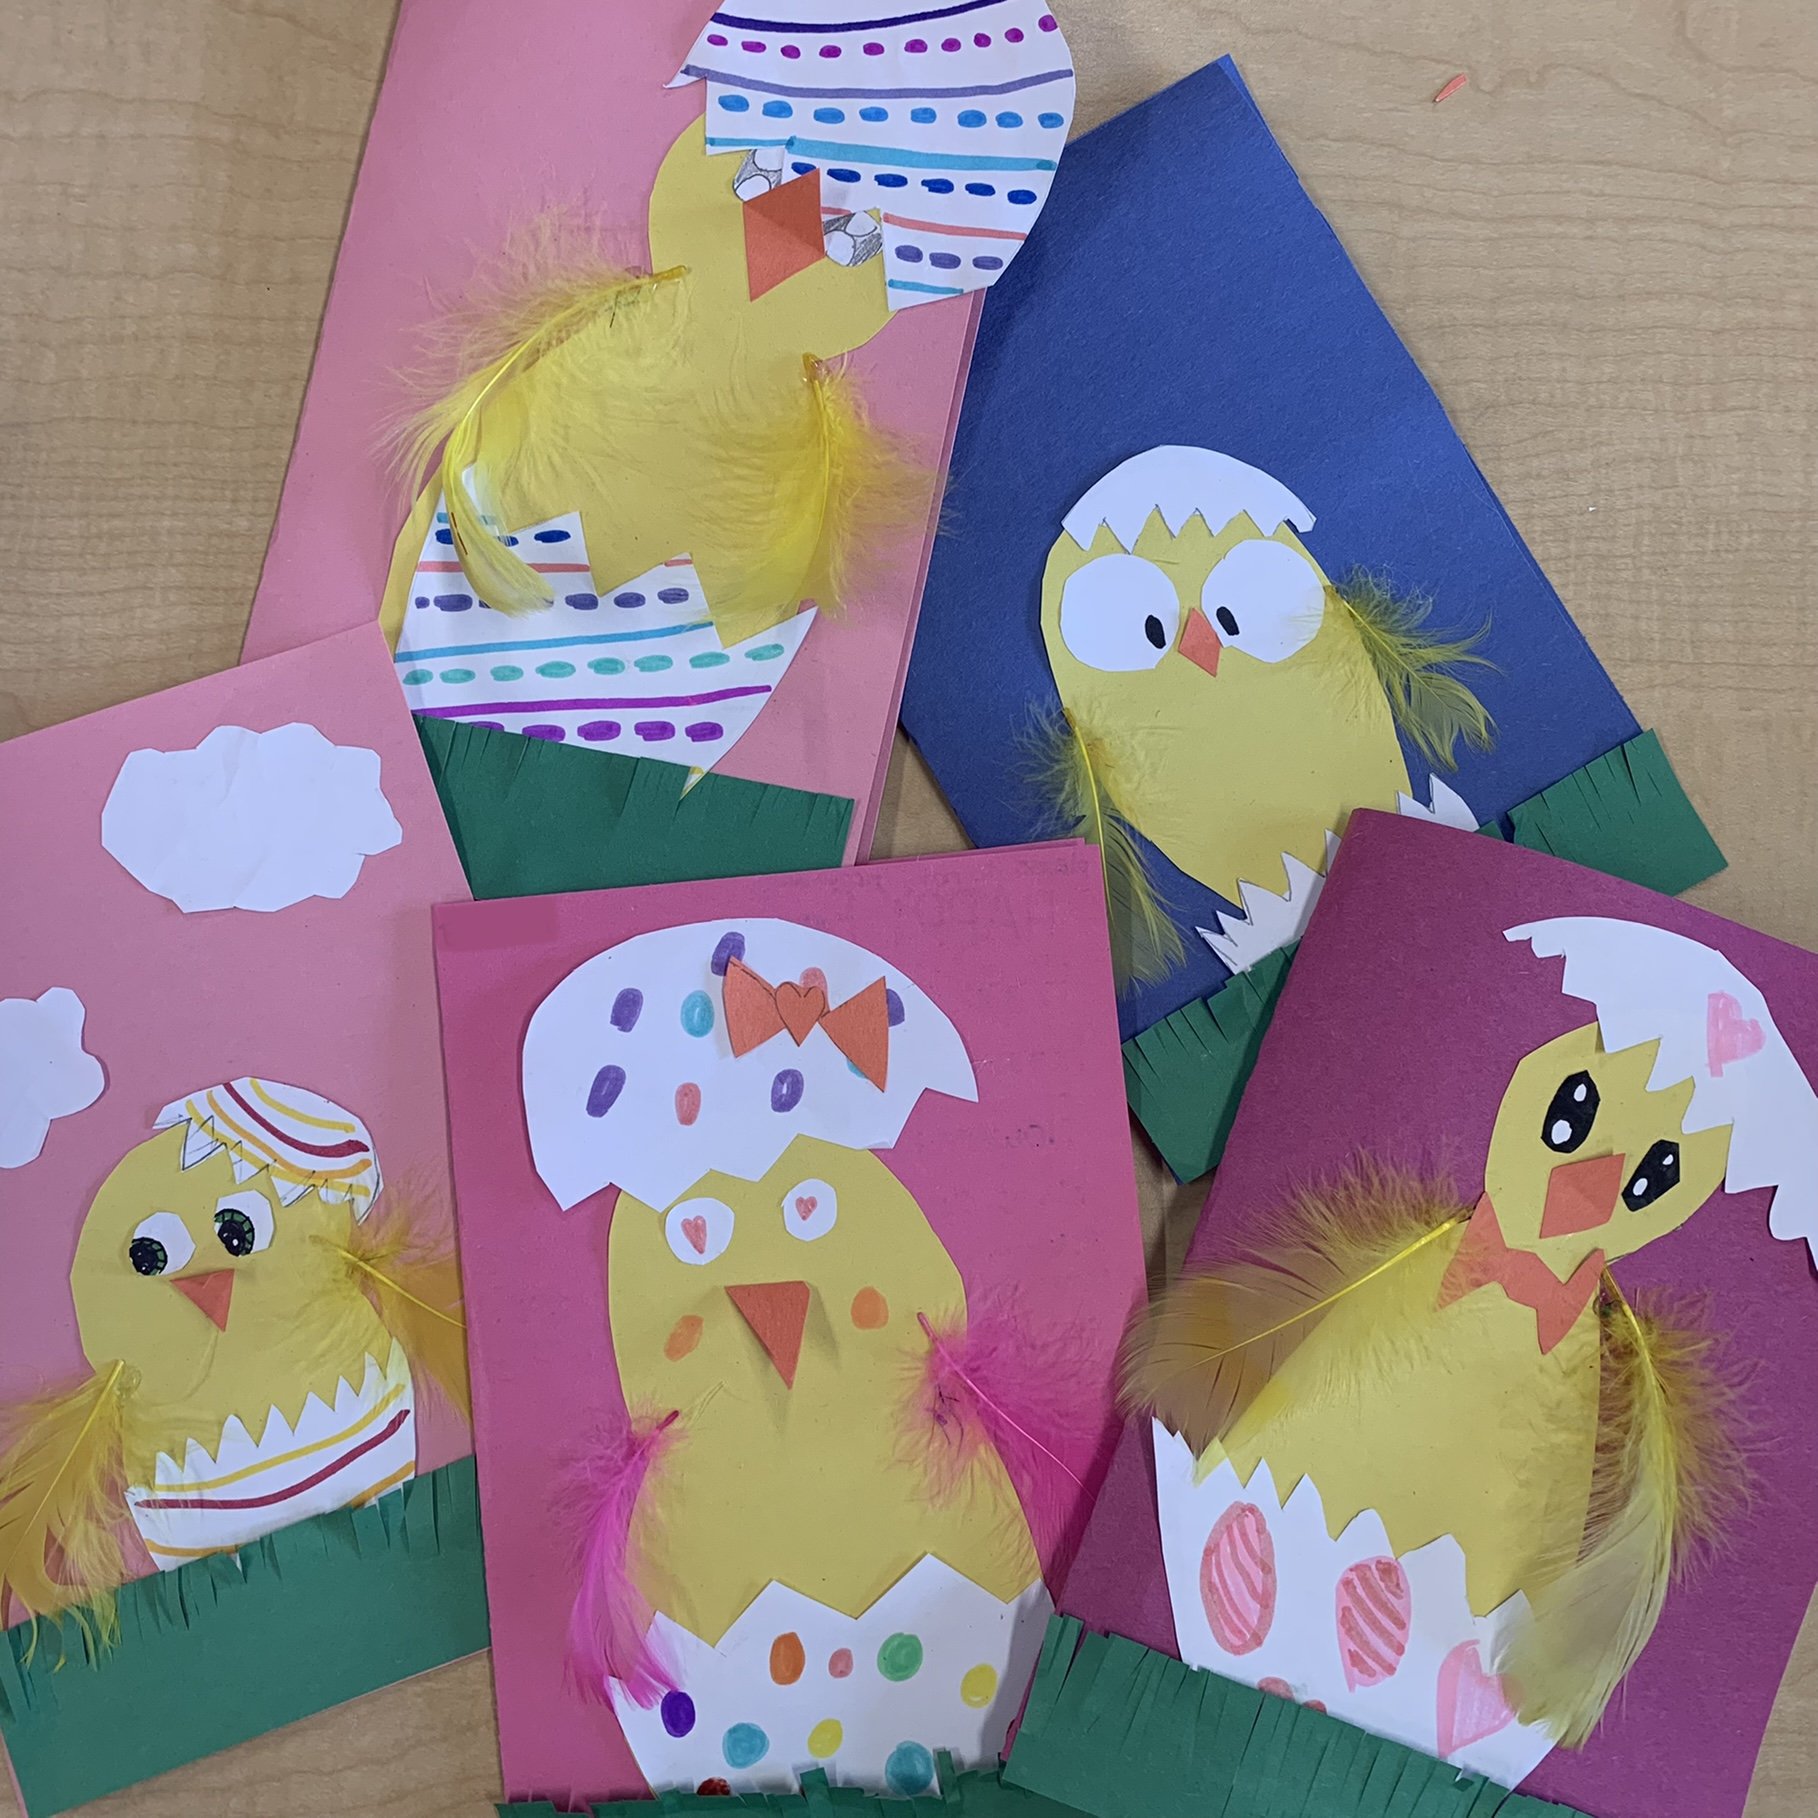
Cut a chick shape (head and body)
Cut an egg shape big enough to cover the base of your chick, then make diagonal cuts for the egg to crack open
Fold the card construction paper in half, then glue the chick and egg to the front
Using the extra white paper, cut two eyes and use the black marker for pupils
Use the orange paper to make a beak. Only glue one side so that it opens
Use your scissors to make cuts in the green strip for the grass. Be careful not to go all the way down. Fan it out a bit to create some texture.
Attach the feathers using a hot glue gun
Write your spring or Easter message inside
*Optionally, some students wanted to decorate their egg. Use any coloured pencils or markers for this.