Smiling Snowman Art Project
This is a great project for younger students. I did it with Ks and grade 1s.
Time required: one block ~30-40 minutes
Materials:
White paper (printer weight is fine)
Construction paper (blue for background, orange for nose, various colours for scarf)
White pencil crayon or crayon
Sharpie
Glue stick
Pencil
Scissors
Optional - something round to trace/round tracer
Steps:
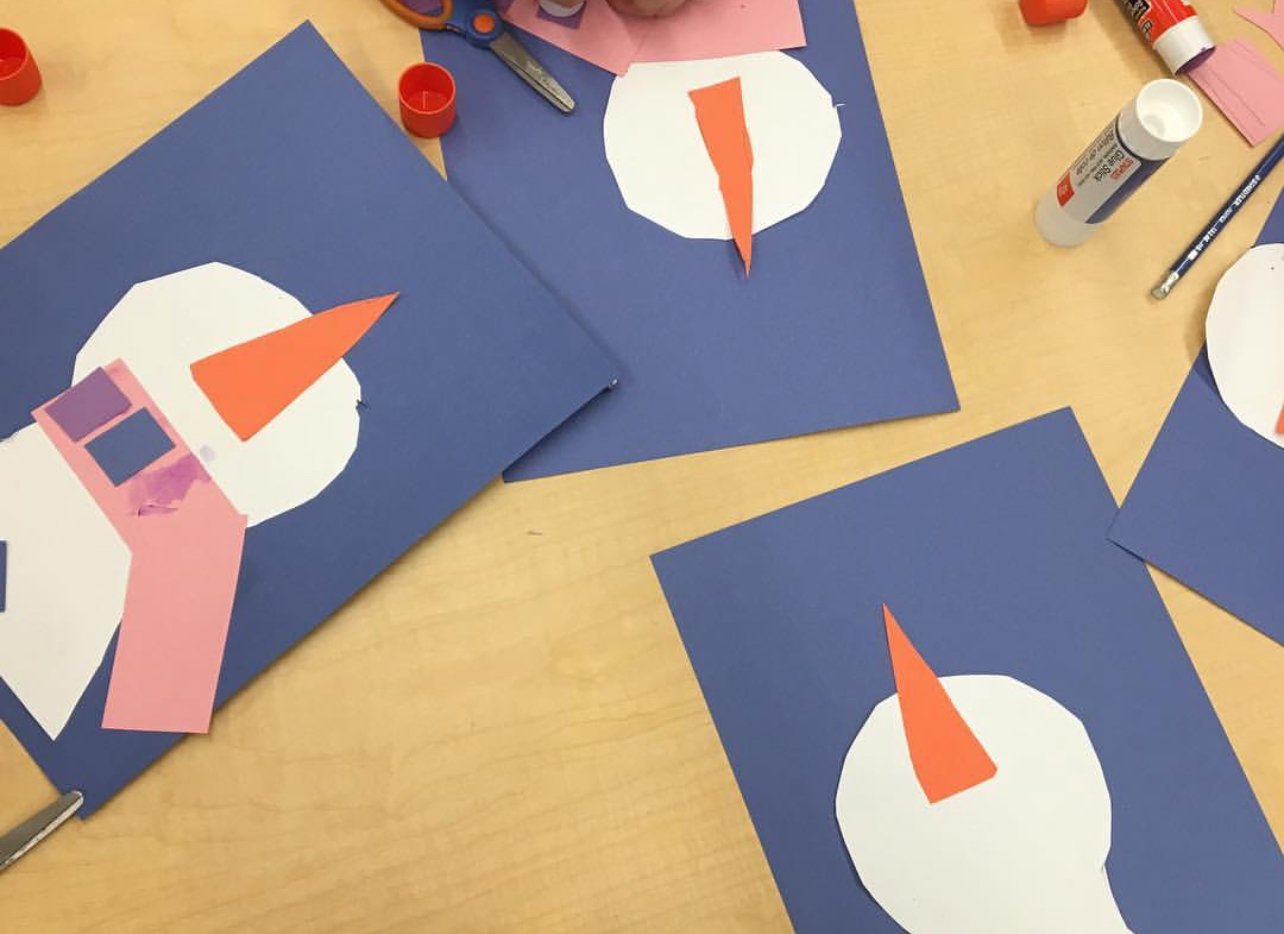
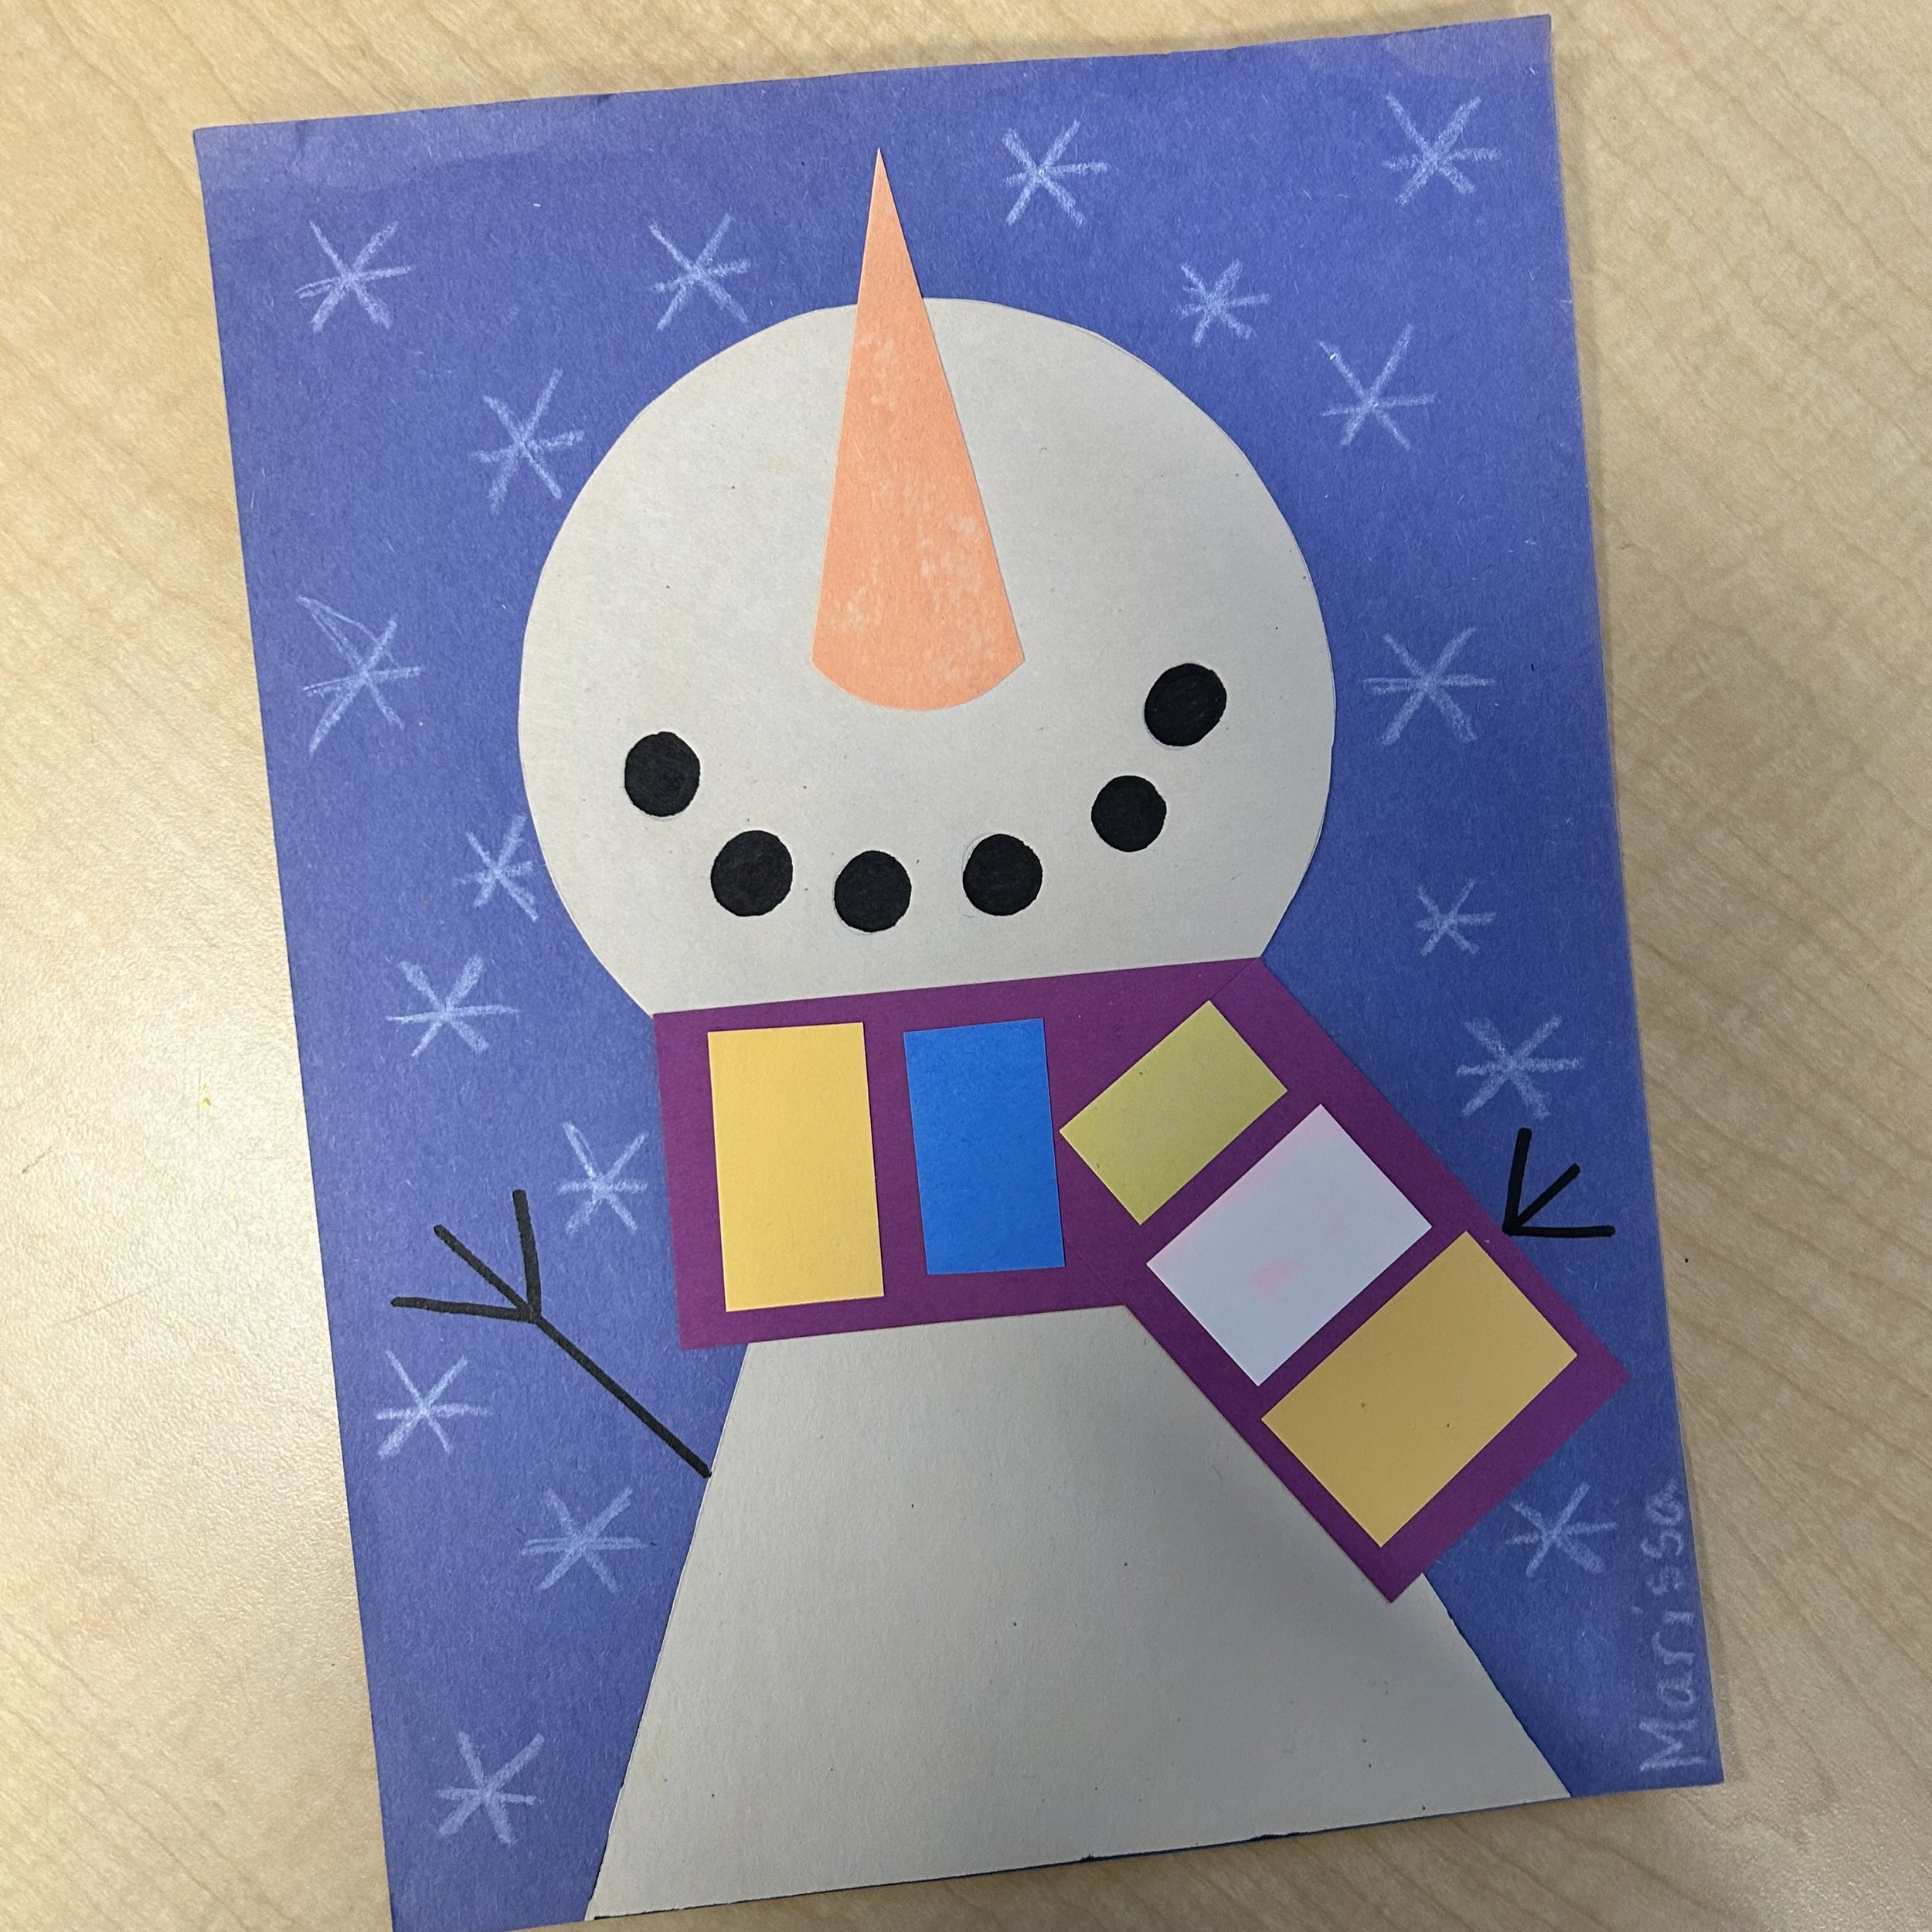
On the white paper, draw a circle for the head and a triangle for the body.
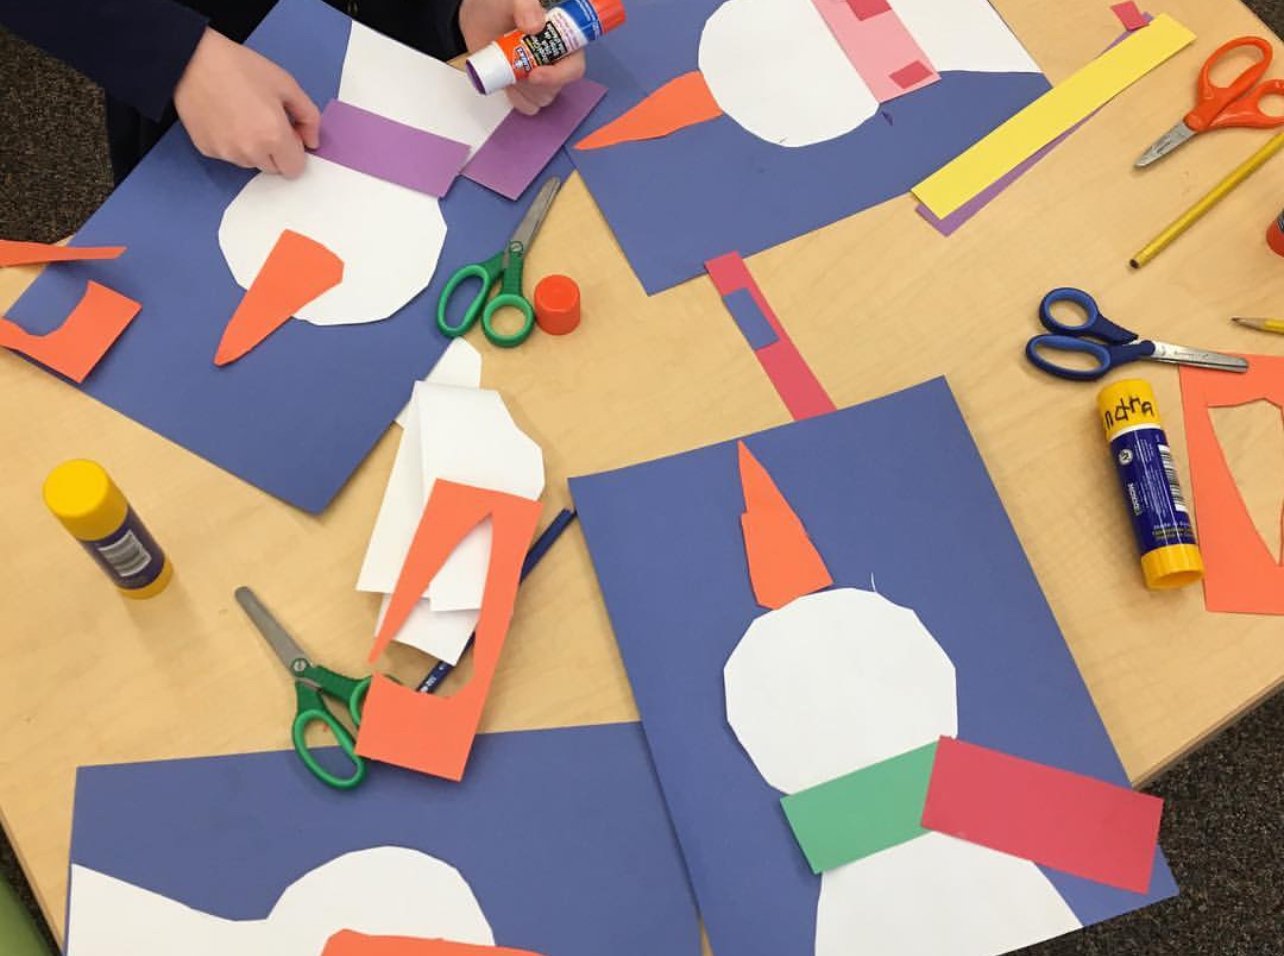
Cut out the body parts and glue them on the blue construction paper. Put the triangle down first, touching the bottom and glue the head on top.
Cut a nose from the orange construction paper. It should also be a triangle. Glue it pointing straight up, like the snowman is looking up and his nose is to the sky.
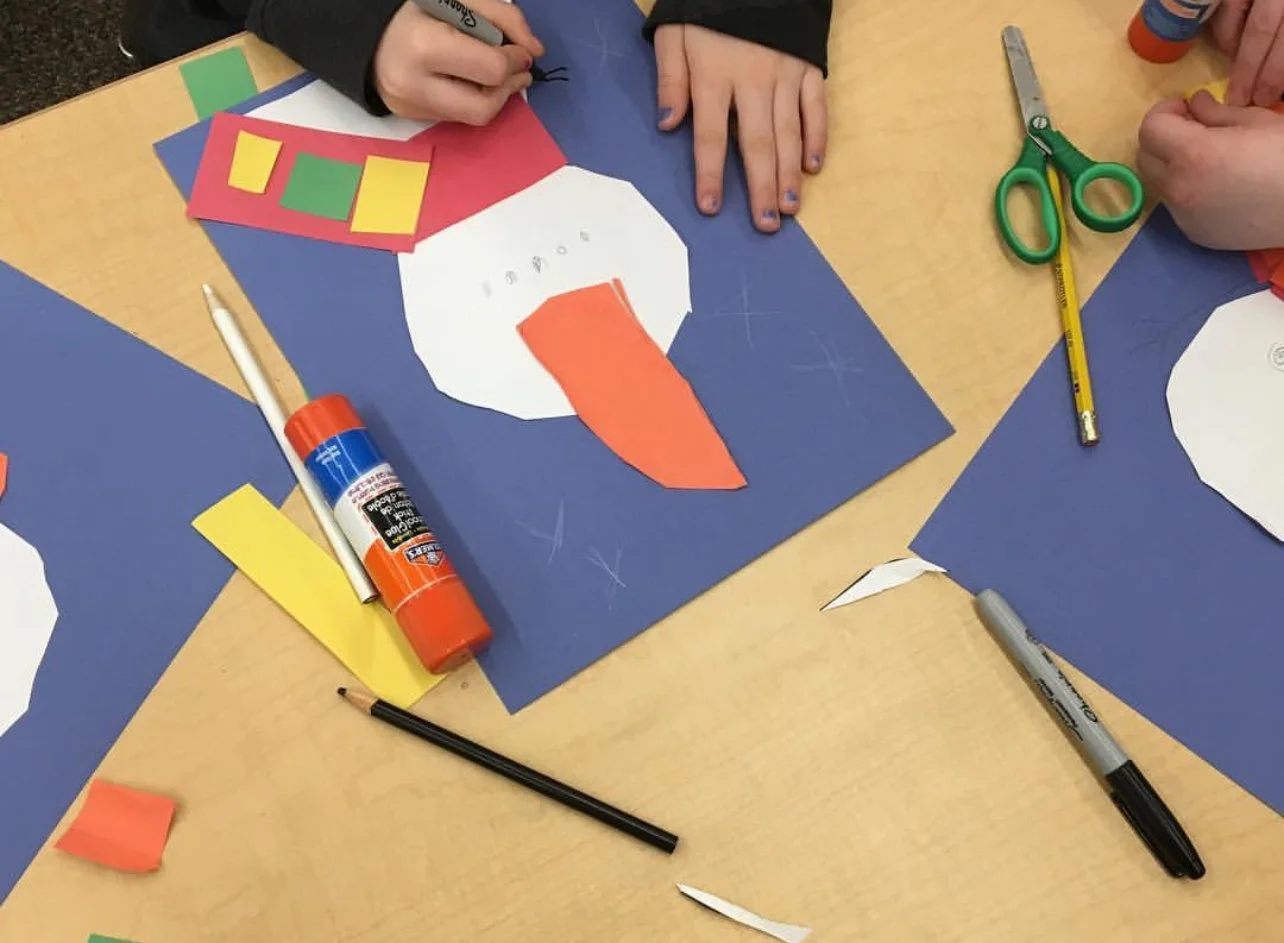
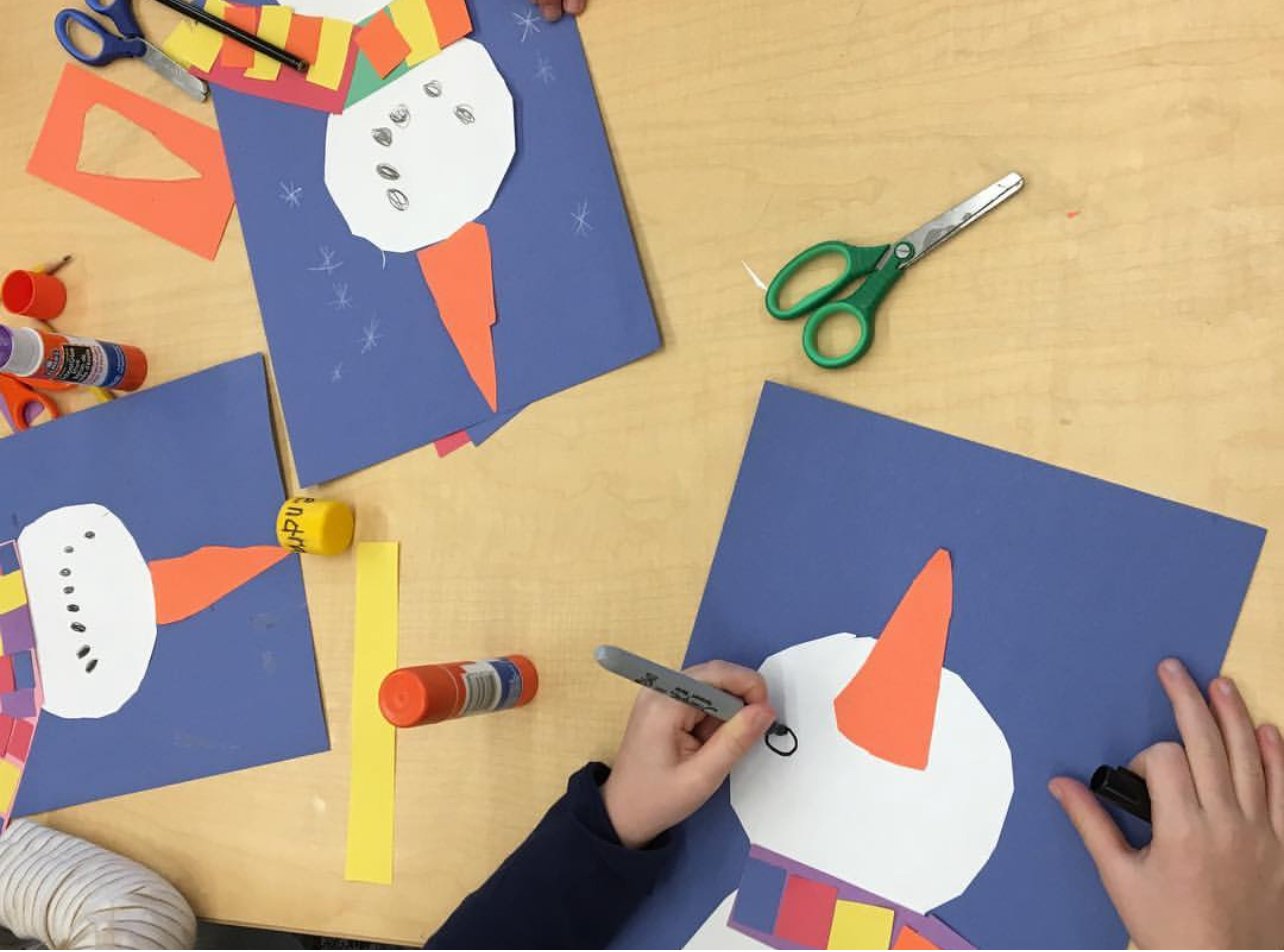
Make the scarf by cutting two rectangular shapes out of construction paper. Glue one horizontally on the neck and glue the other vertically or diagonally coming away from the neck piece.
Use small squares or rectangles to add some pattern with construction paper. Glue these onto the scarf.
Use a Sharpie to add black stones for the mouth (make it a smile!) and add some buttons.
Using a white pencil crayon or crayon, draw some snowflakes around the snowman on the blue paper.