Lunar New Year Lantern Sun Catcher Kids Art Project
Time required:
Overnight dry time is required between sessions.
Part 1 - 30-40 minutes
Part 2 - 15-20 minutes
Materials:
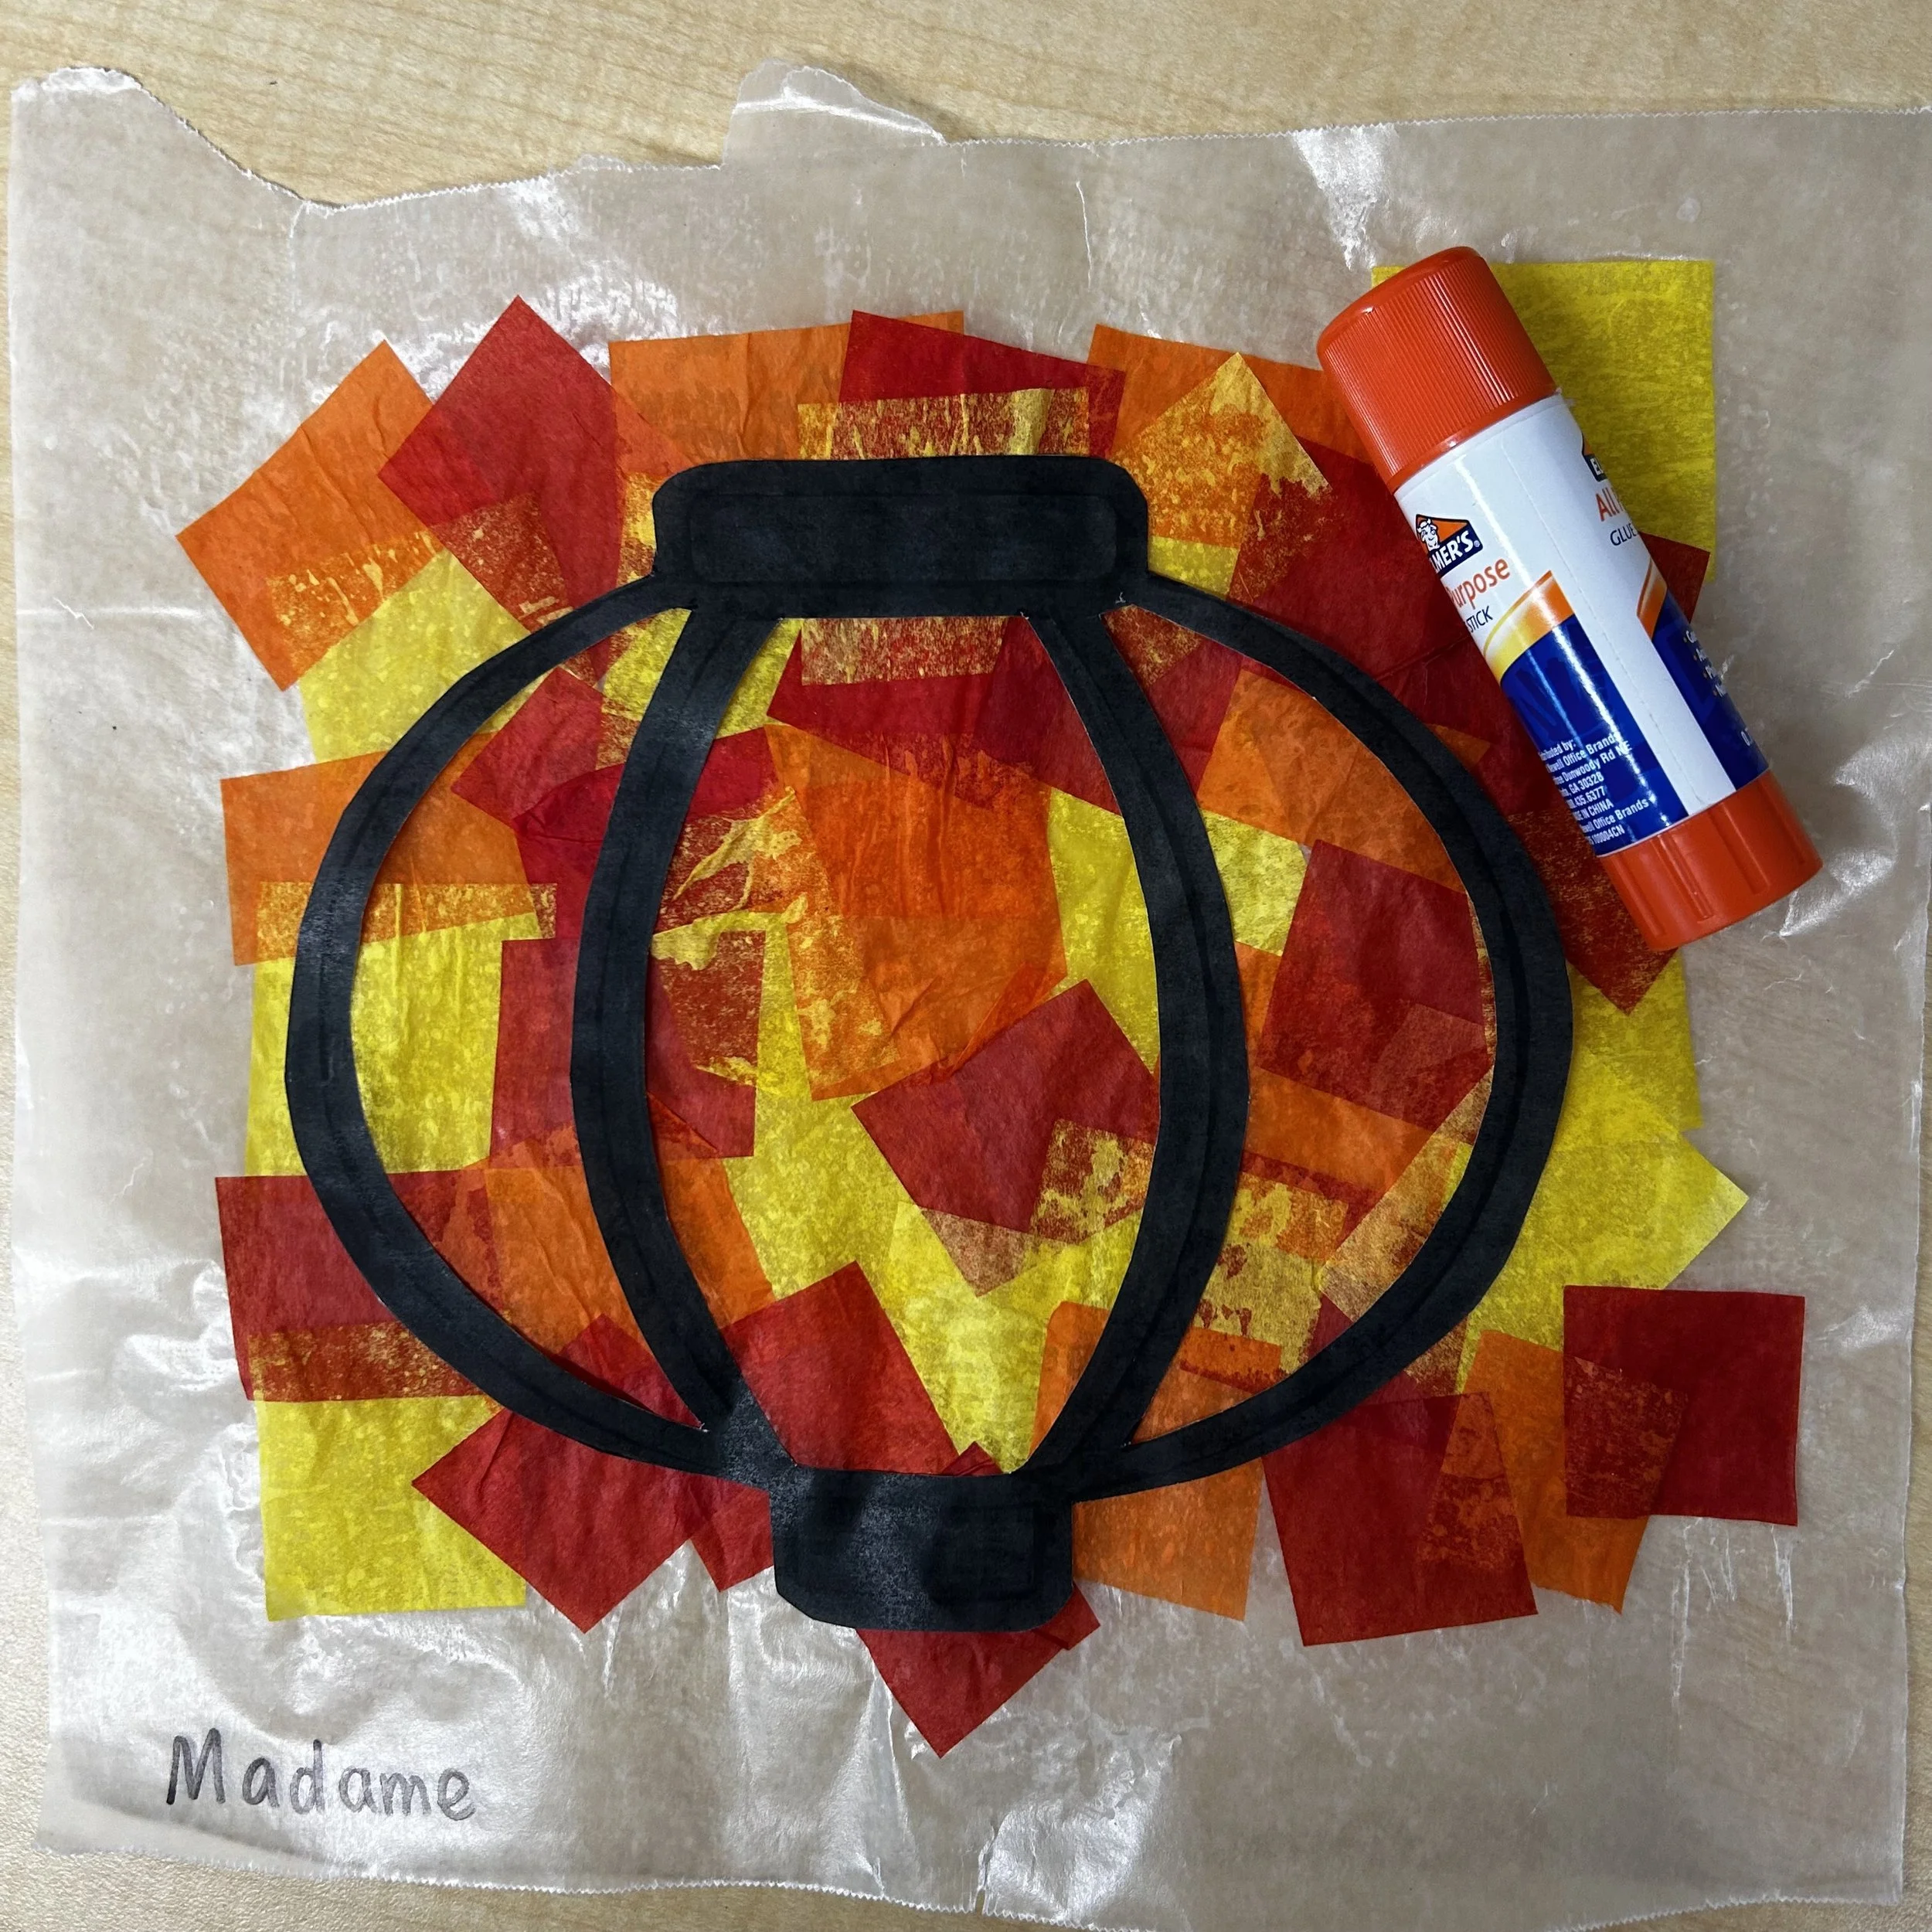
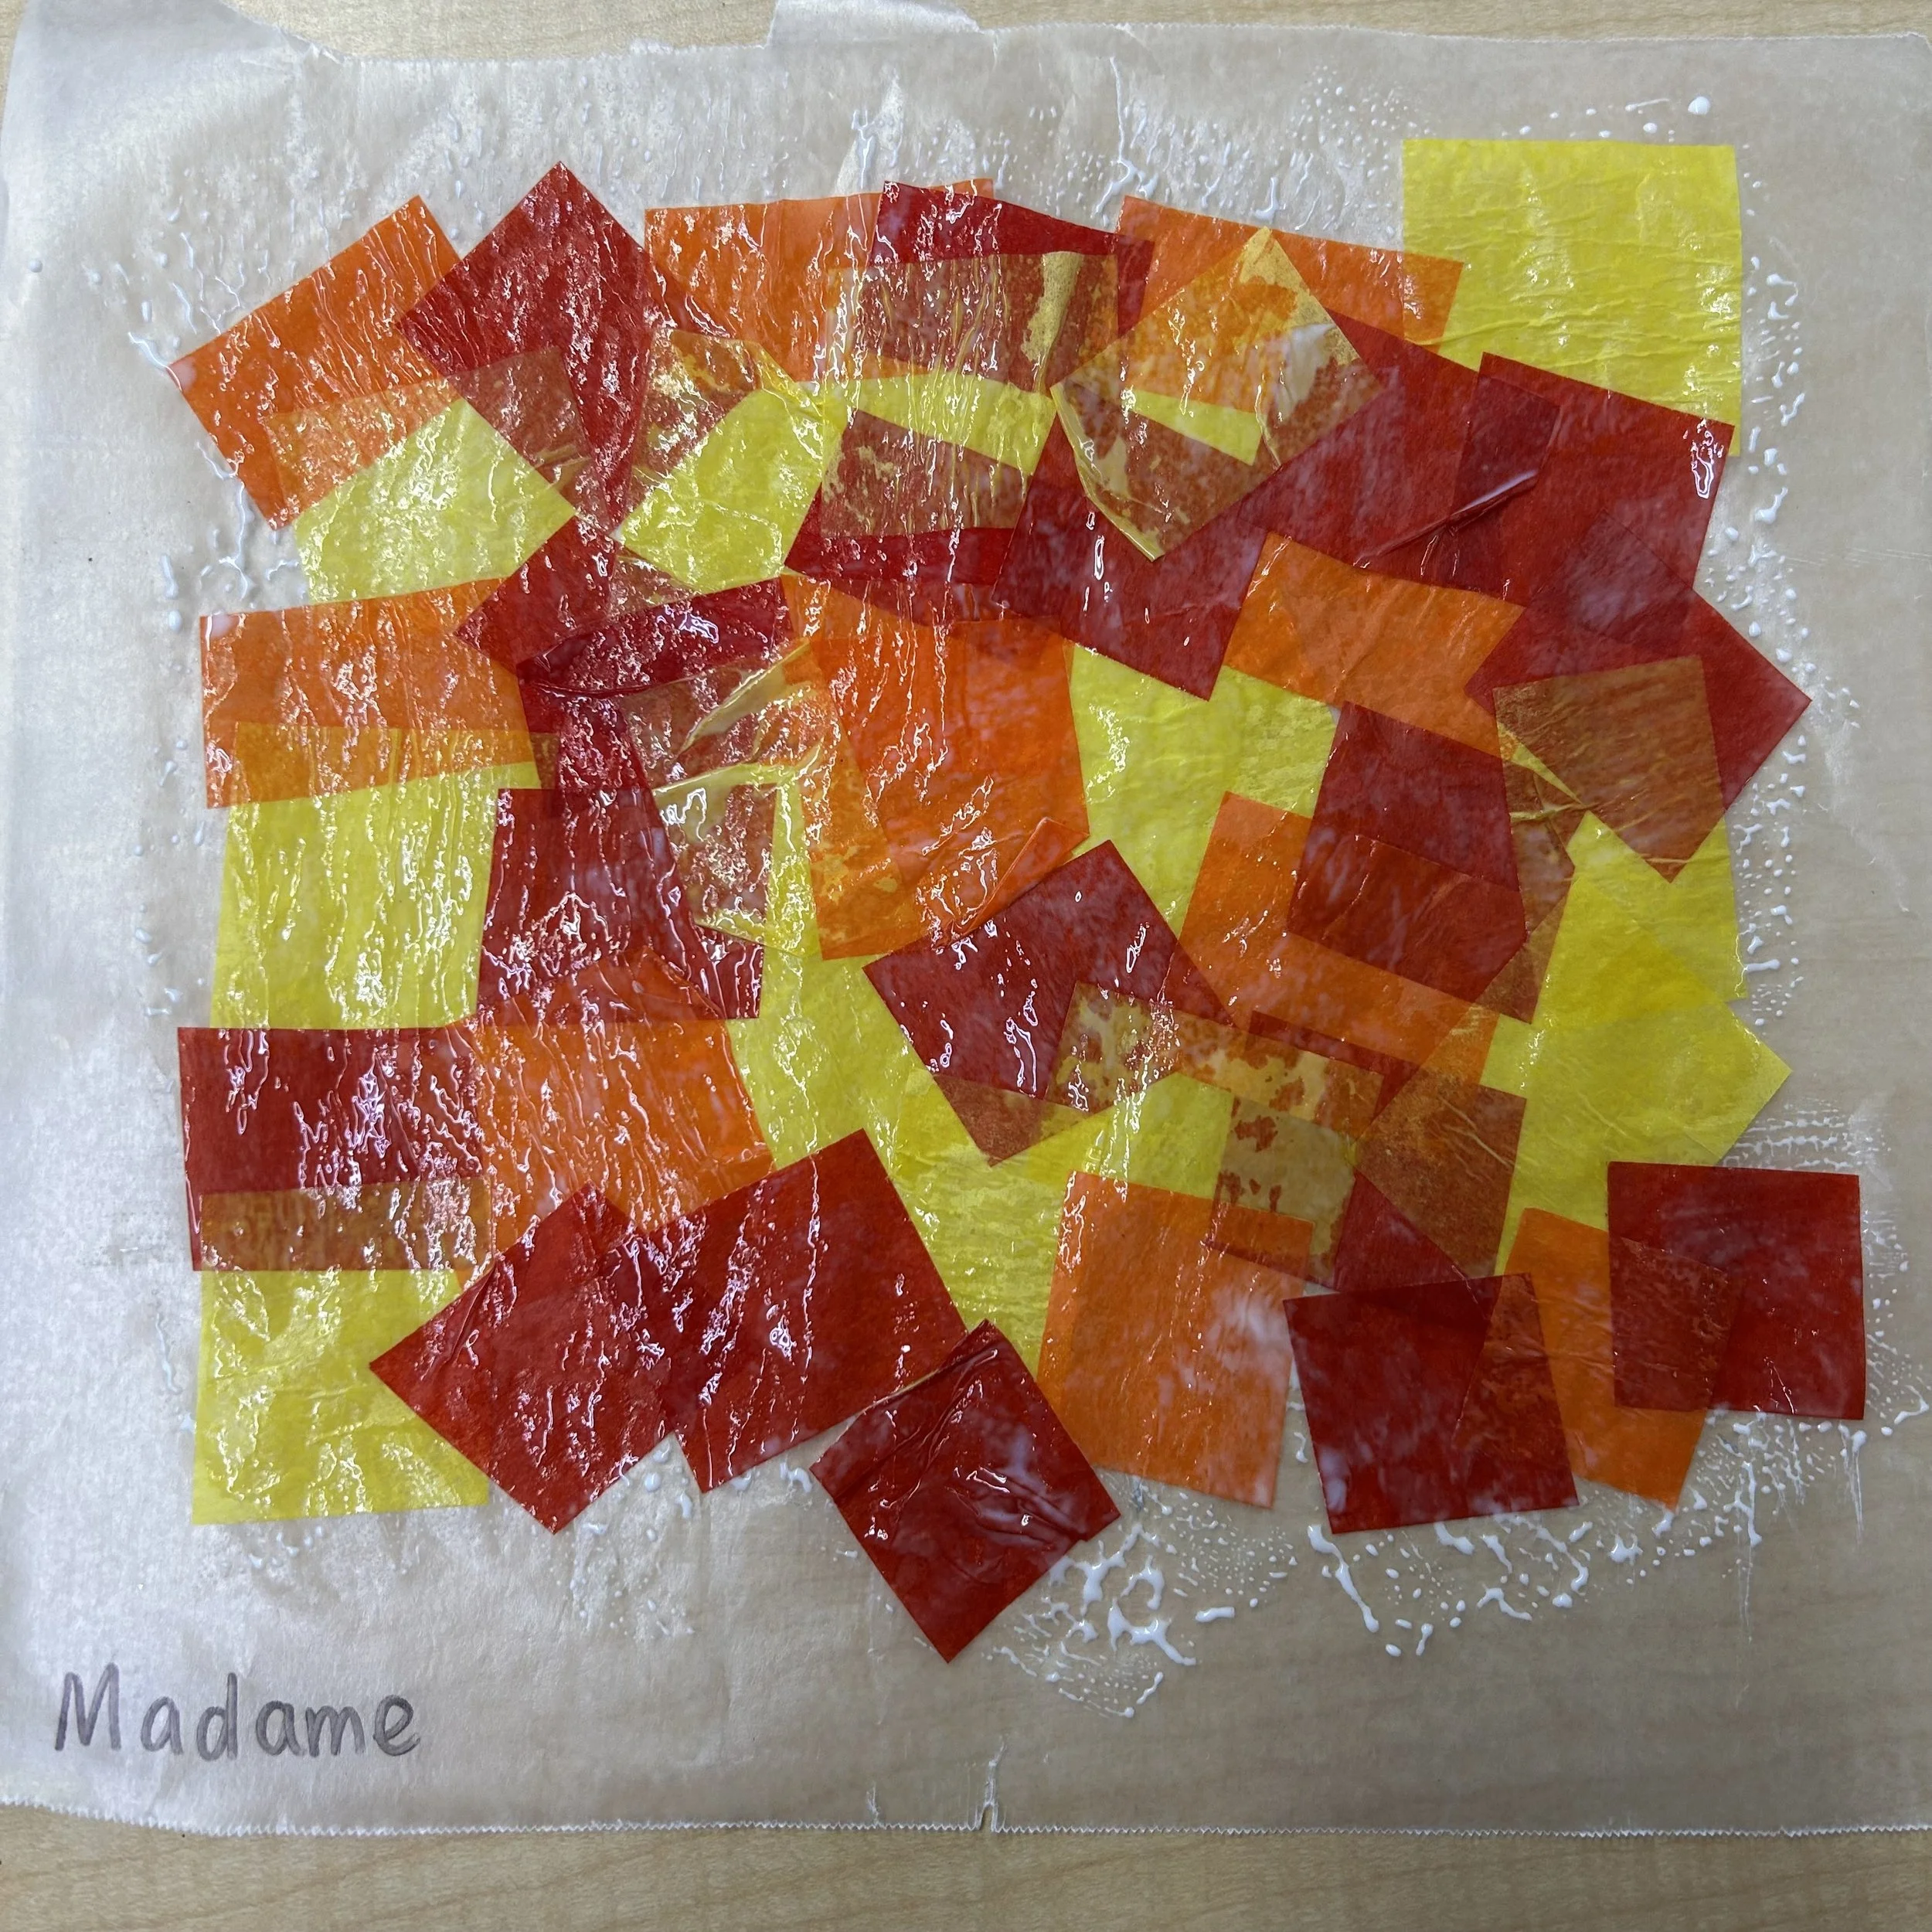
Tissue paper cut into squares (red, yellow, orange)
Wax paper (one sheet per student)
Glue + water or Modge Podge
Foam brush
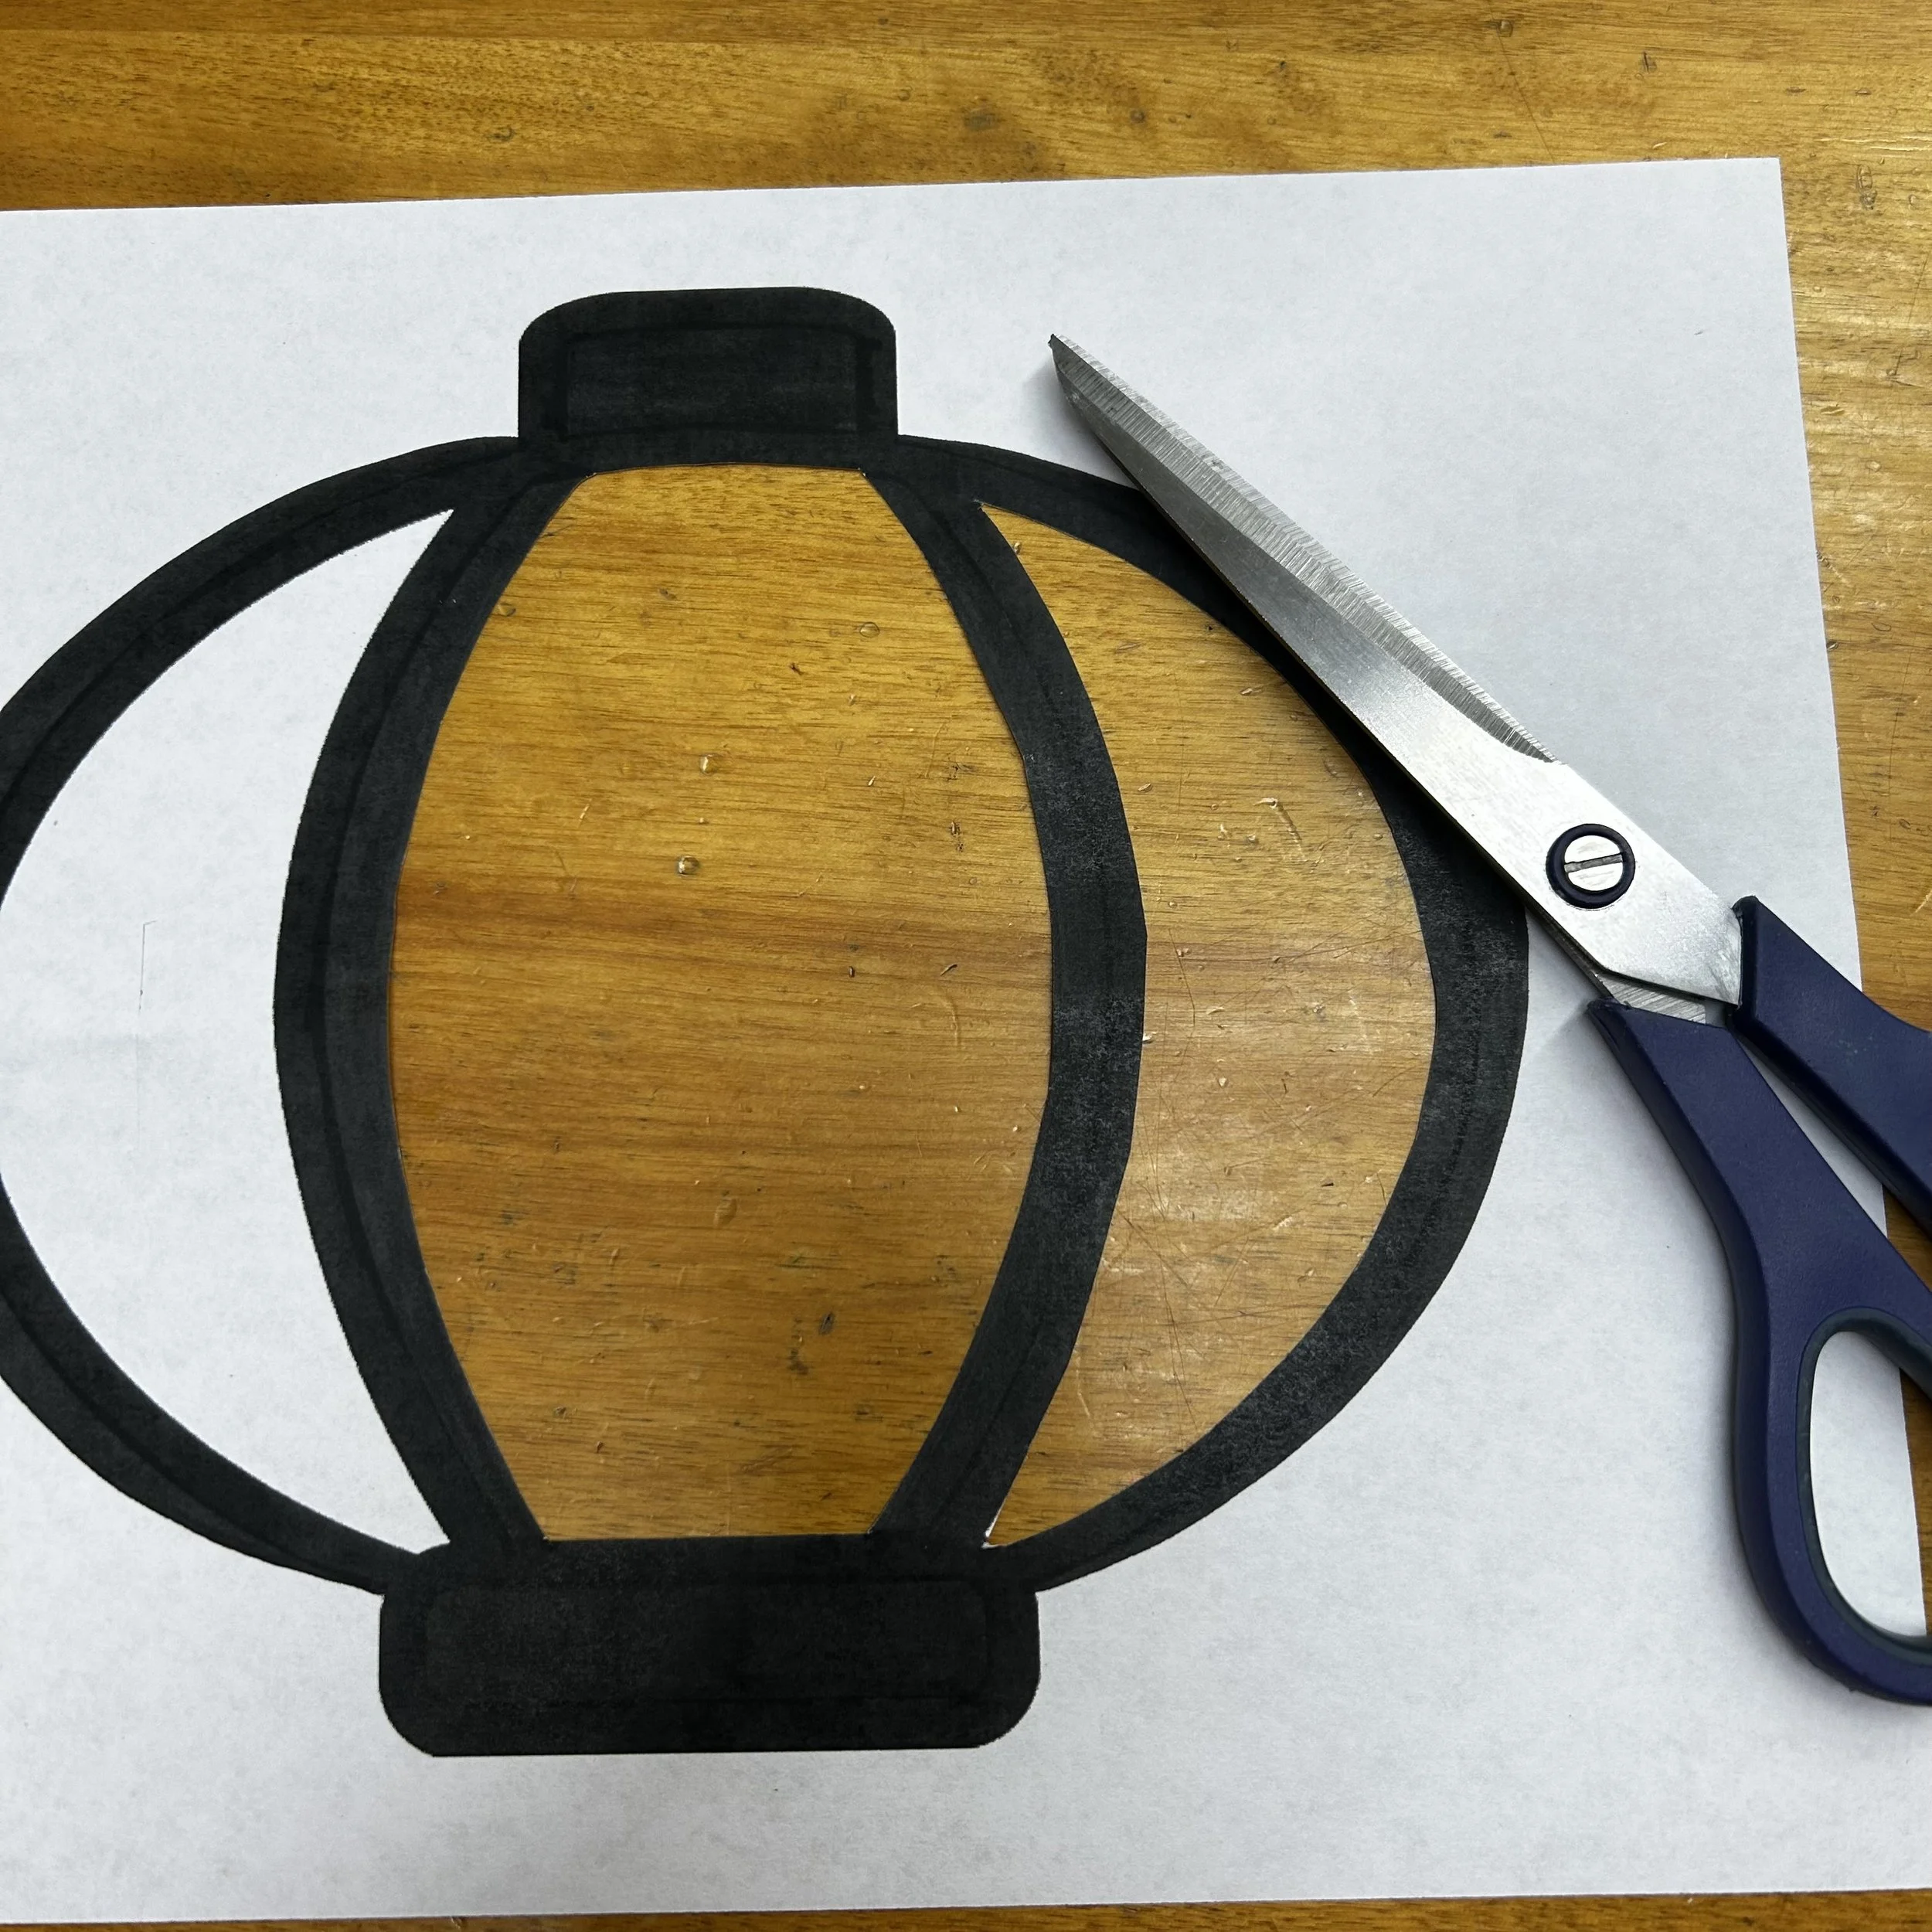
Lantern template (link below)
Scissors
Glue stick
Steps Part 1:
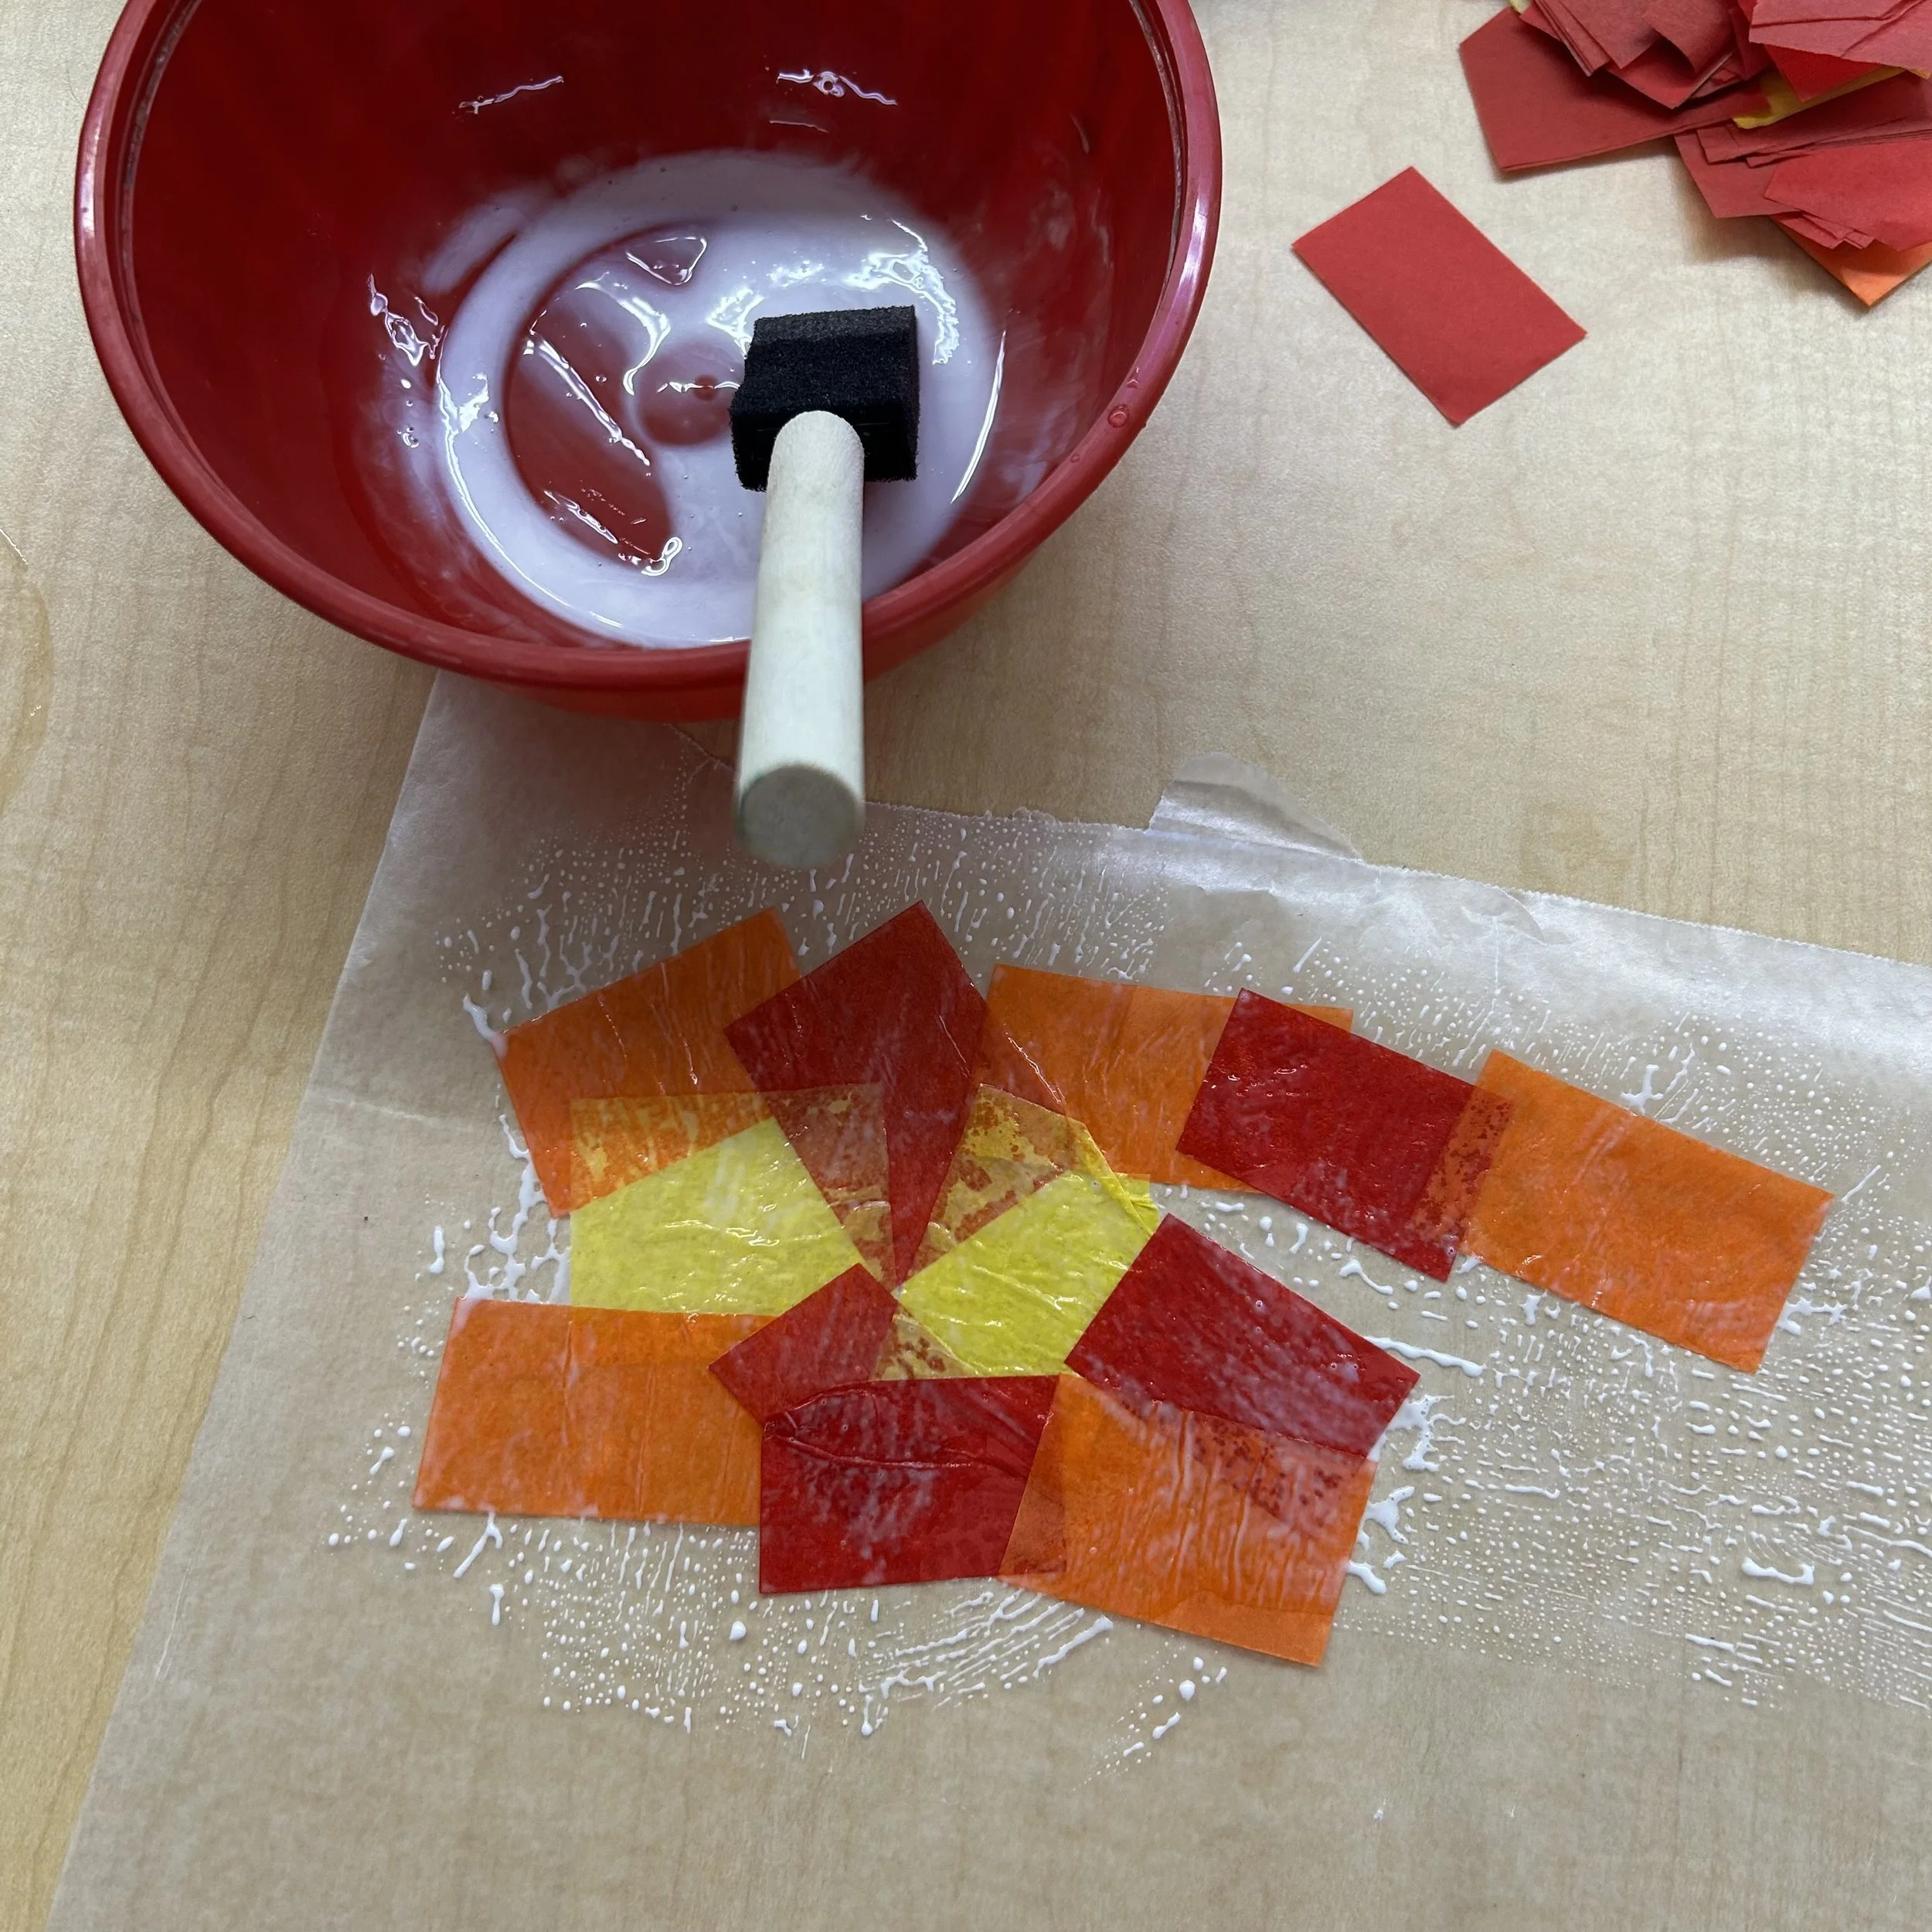
Mix a small amount of water into white glue to make a paste.
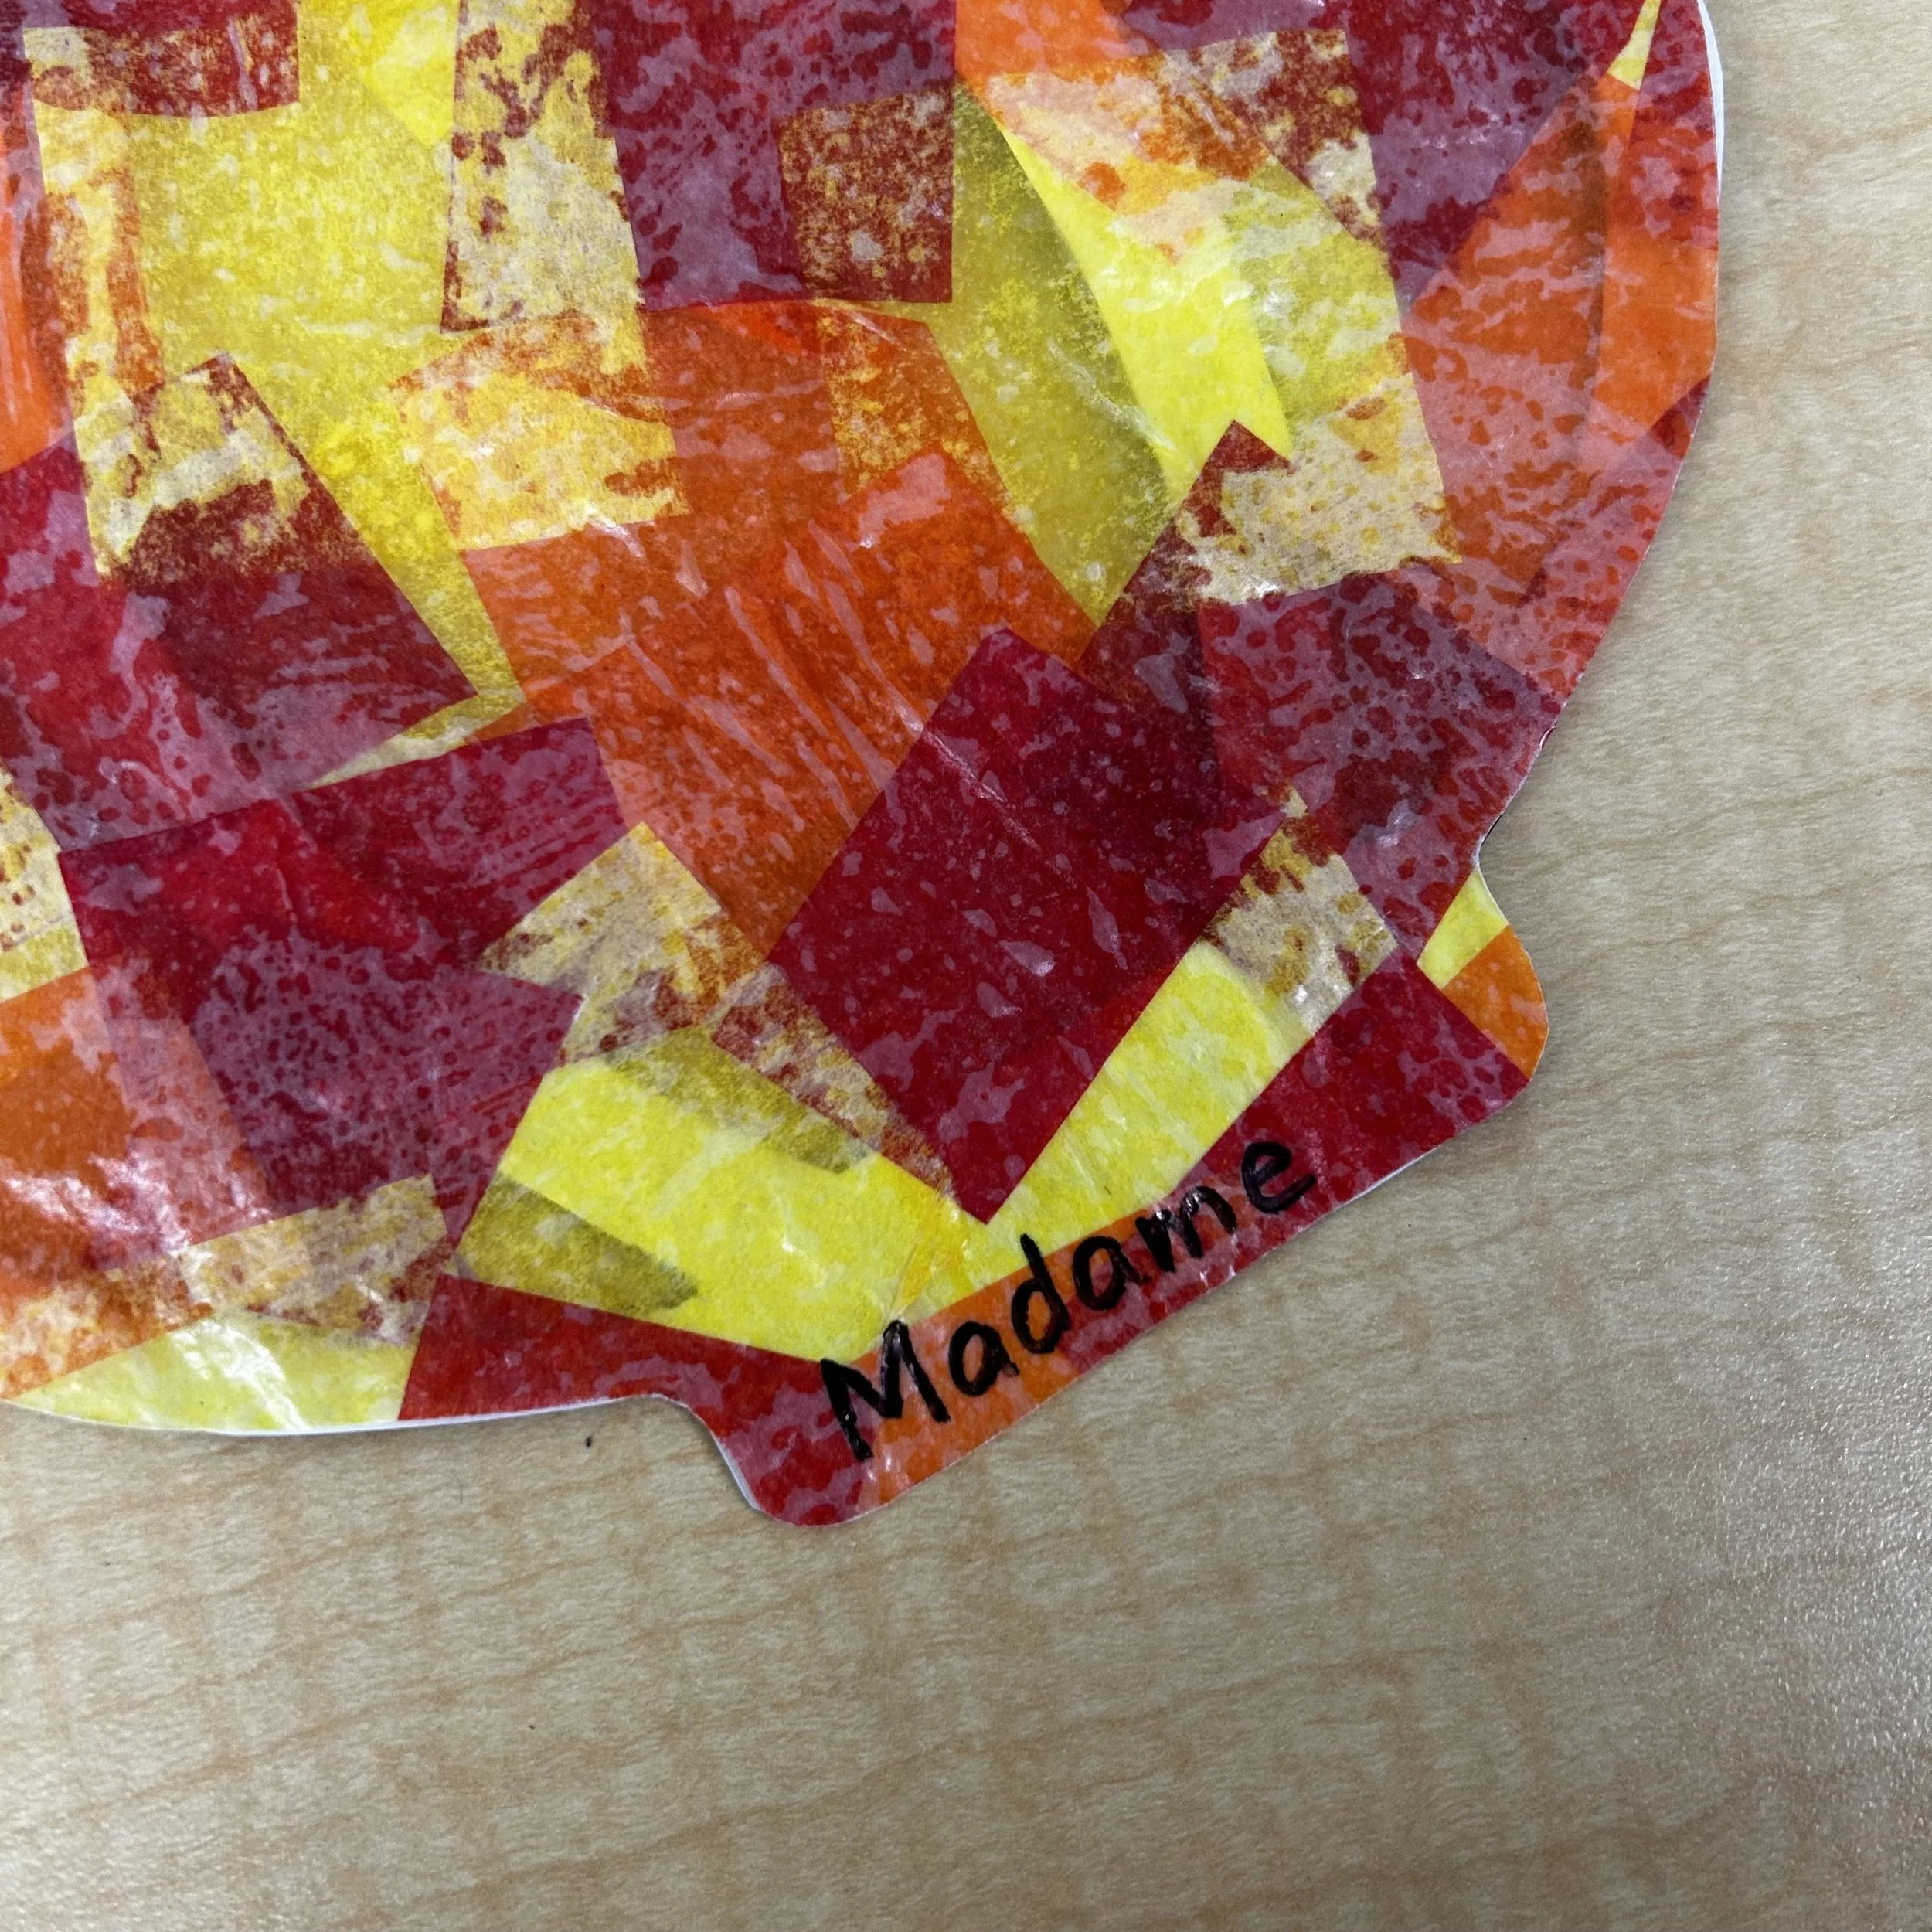
Use a Sharpie to write student names in the corner of the wax paper.
Use a foam brush to spread the glue mixture over an area on the wax paper.
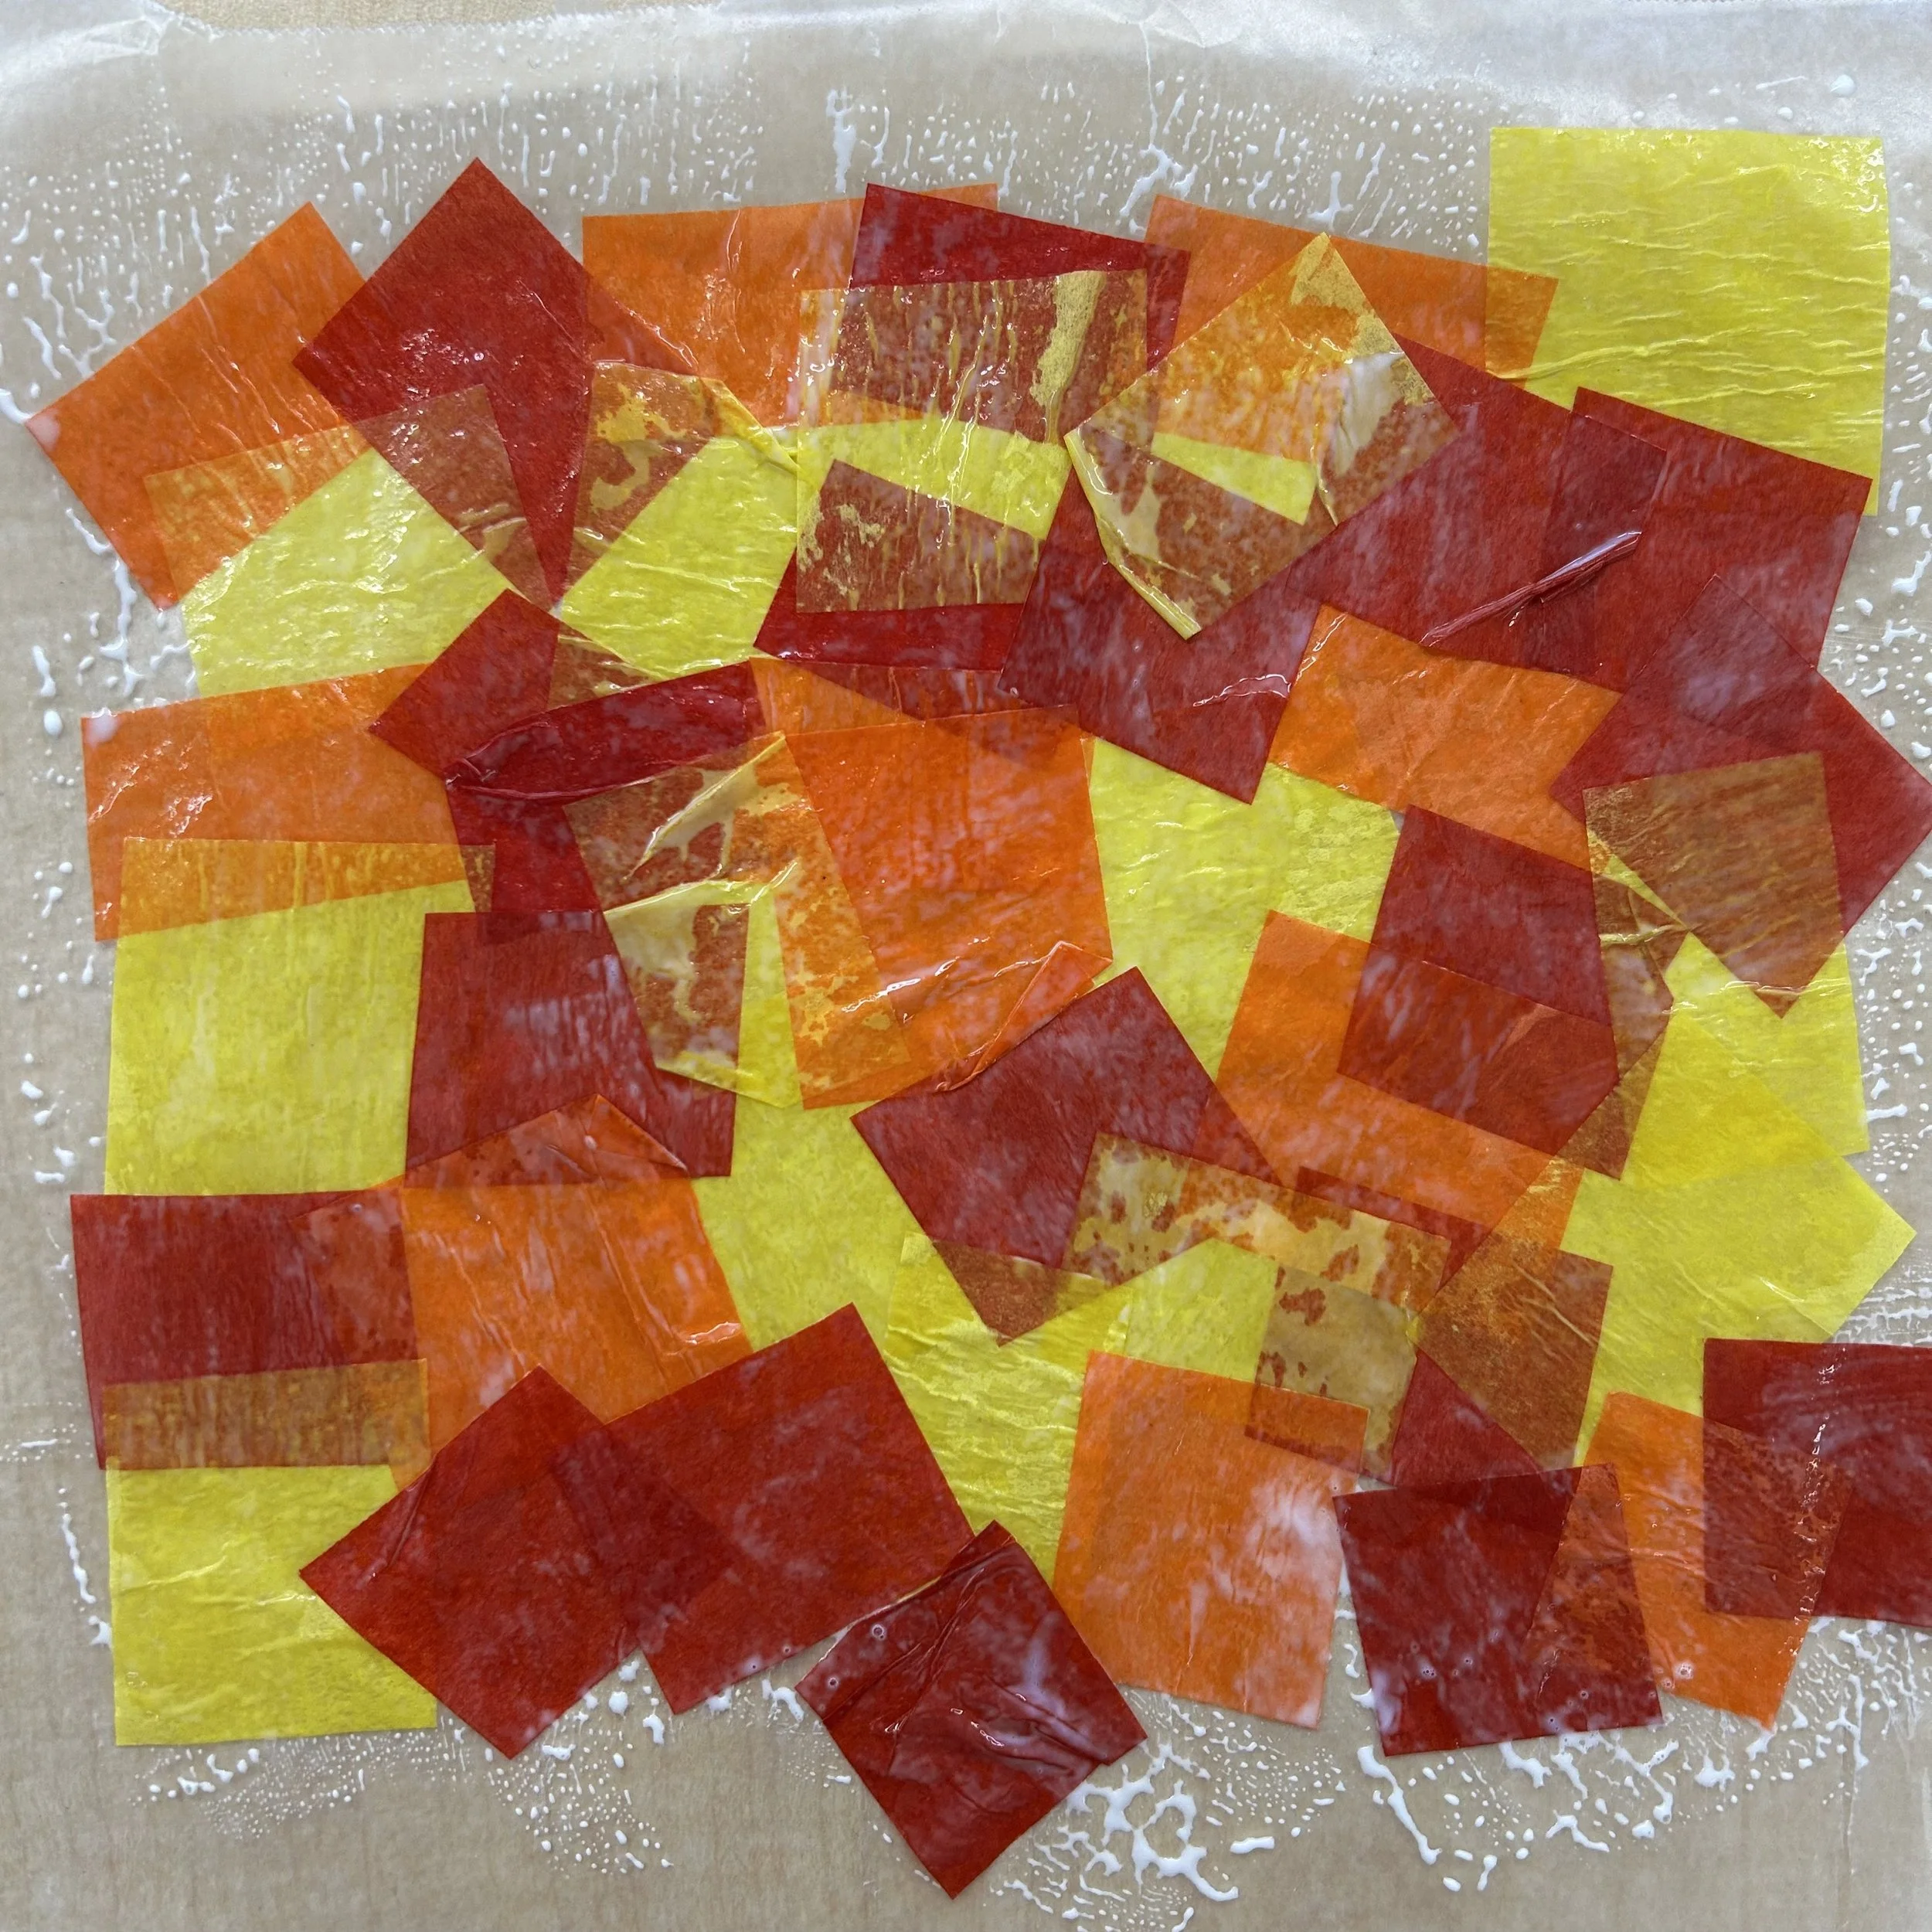
Place tissue squares over the glue section.
Carefully paint more glue over the tissue paper to seal it down.
Repeat process until you have covered an area large enough for your lantern. Set aside to dry.
Steps Part 2:
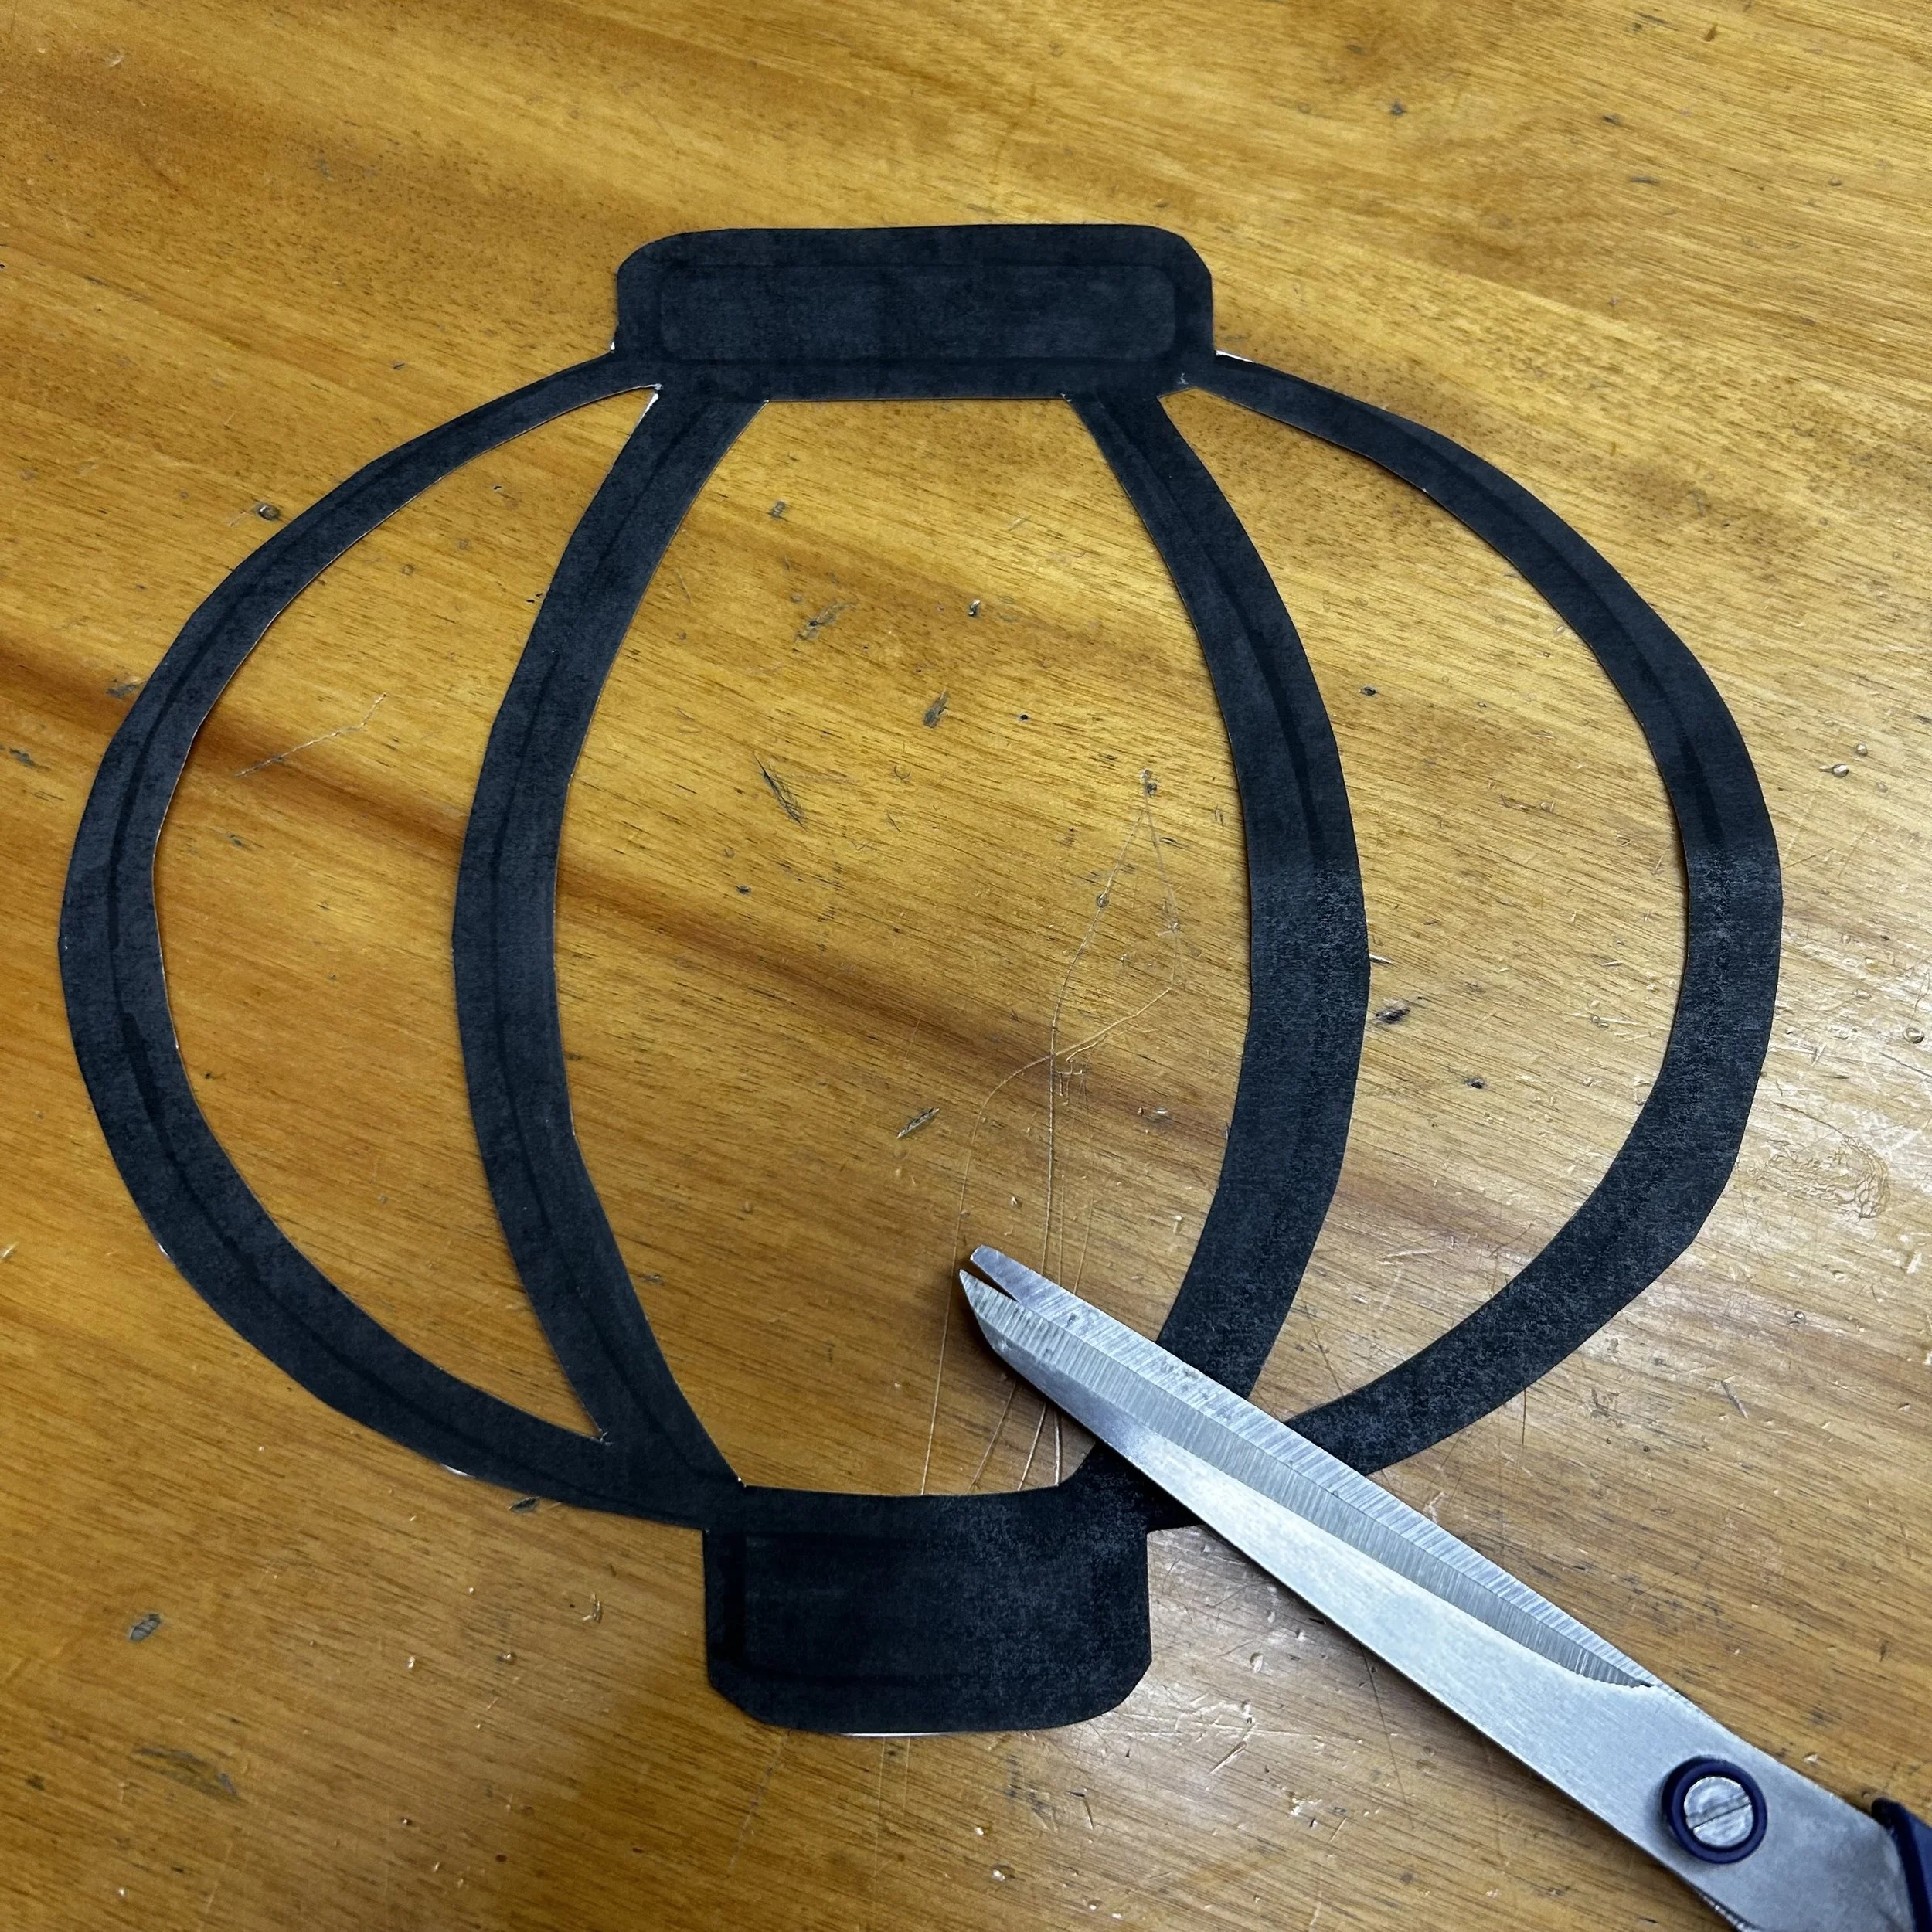
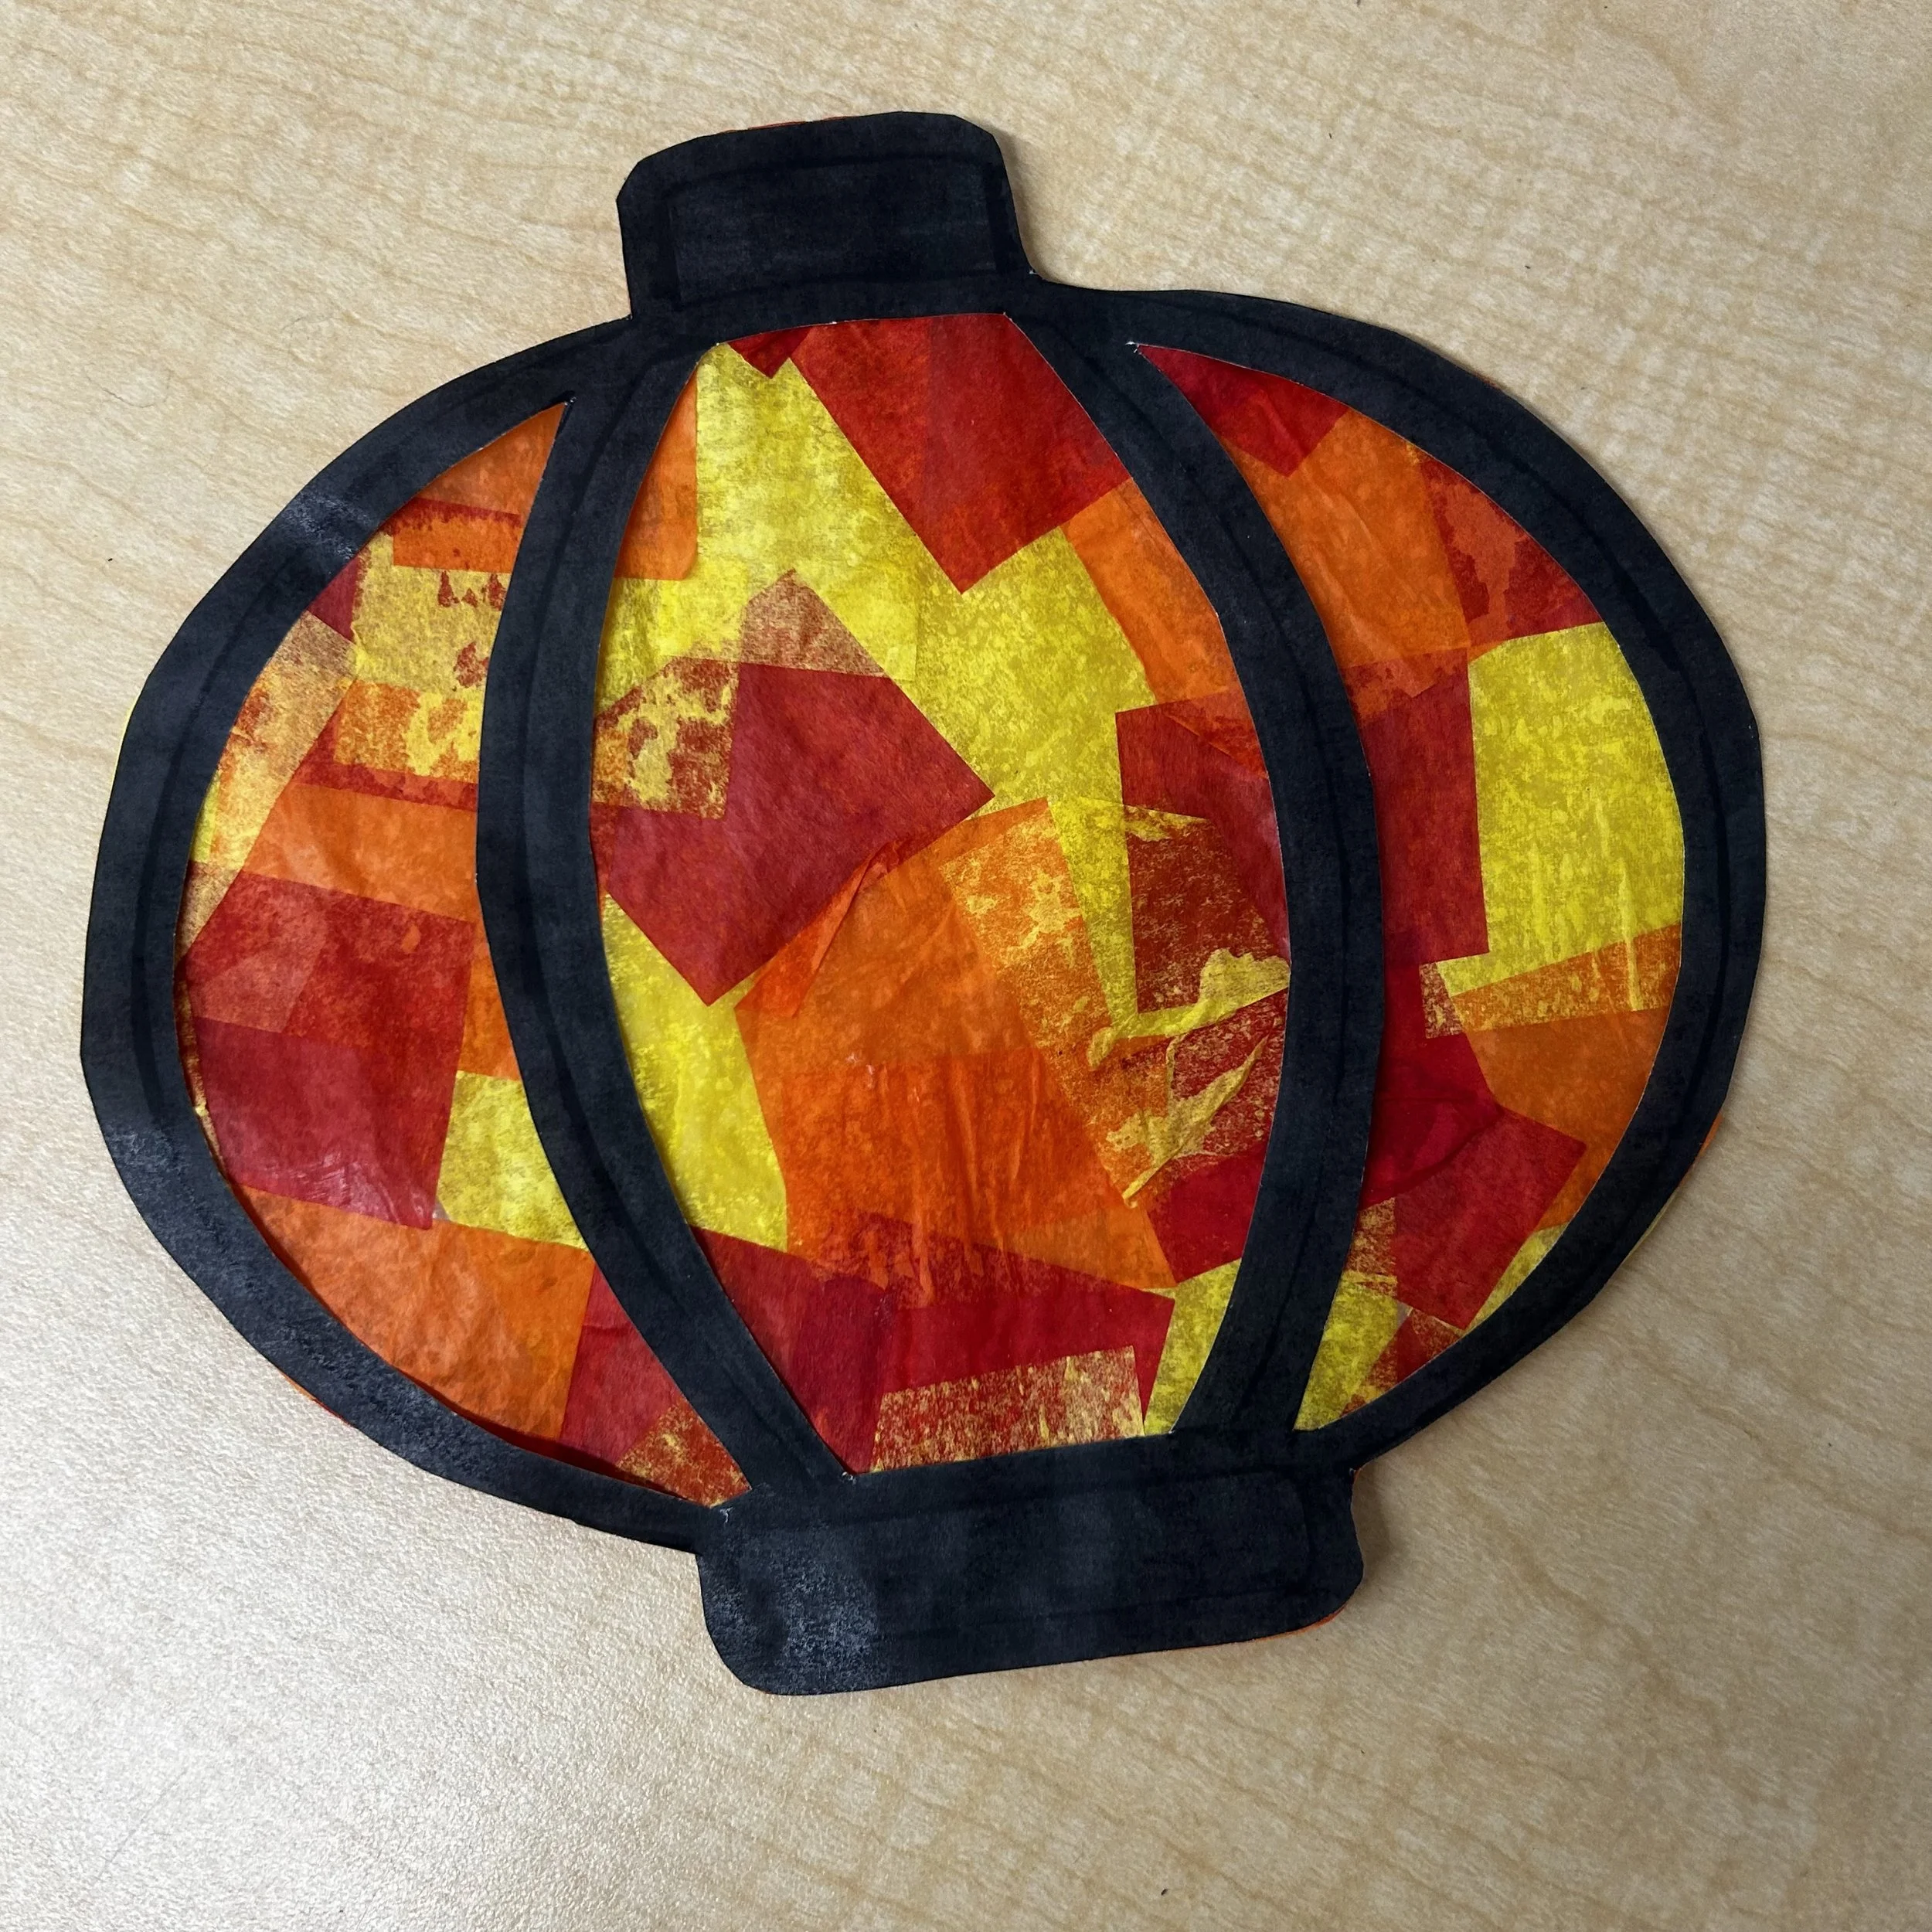
Cut out the lantern shape so that you only have the black outline. Model for students the process to cut out the middle sections (fold the paper and make a cut, then use that to go around the inside)
We need this to be black only, no white so you can either cut off any excess white or offer students a Sharpie to clean up their edges to ensure only black shows.
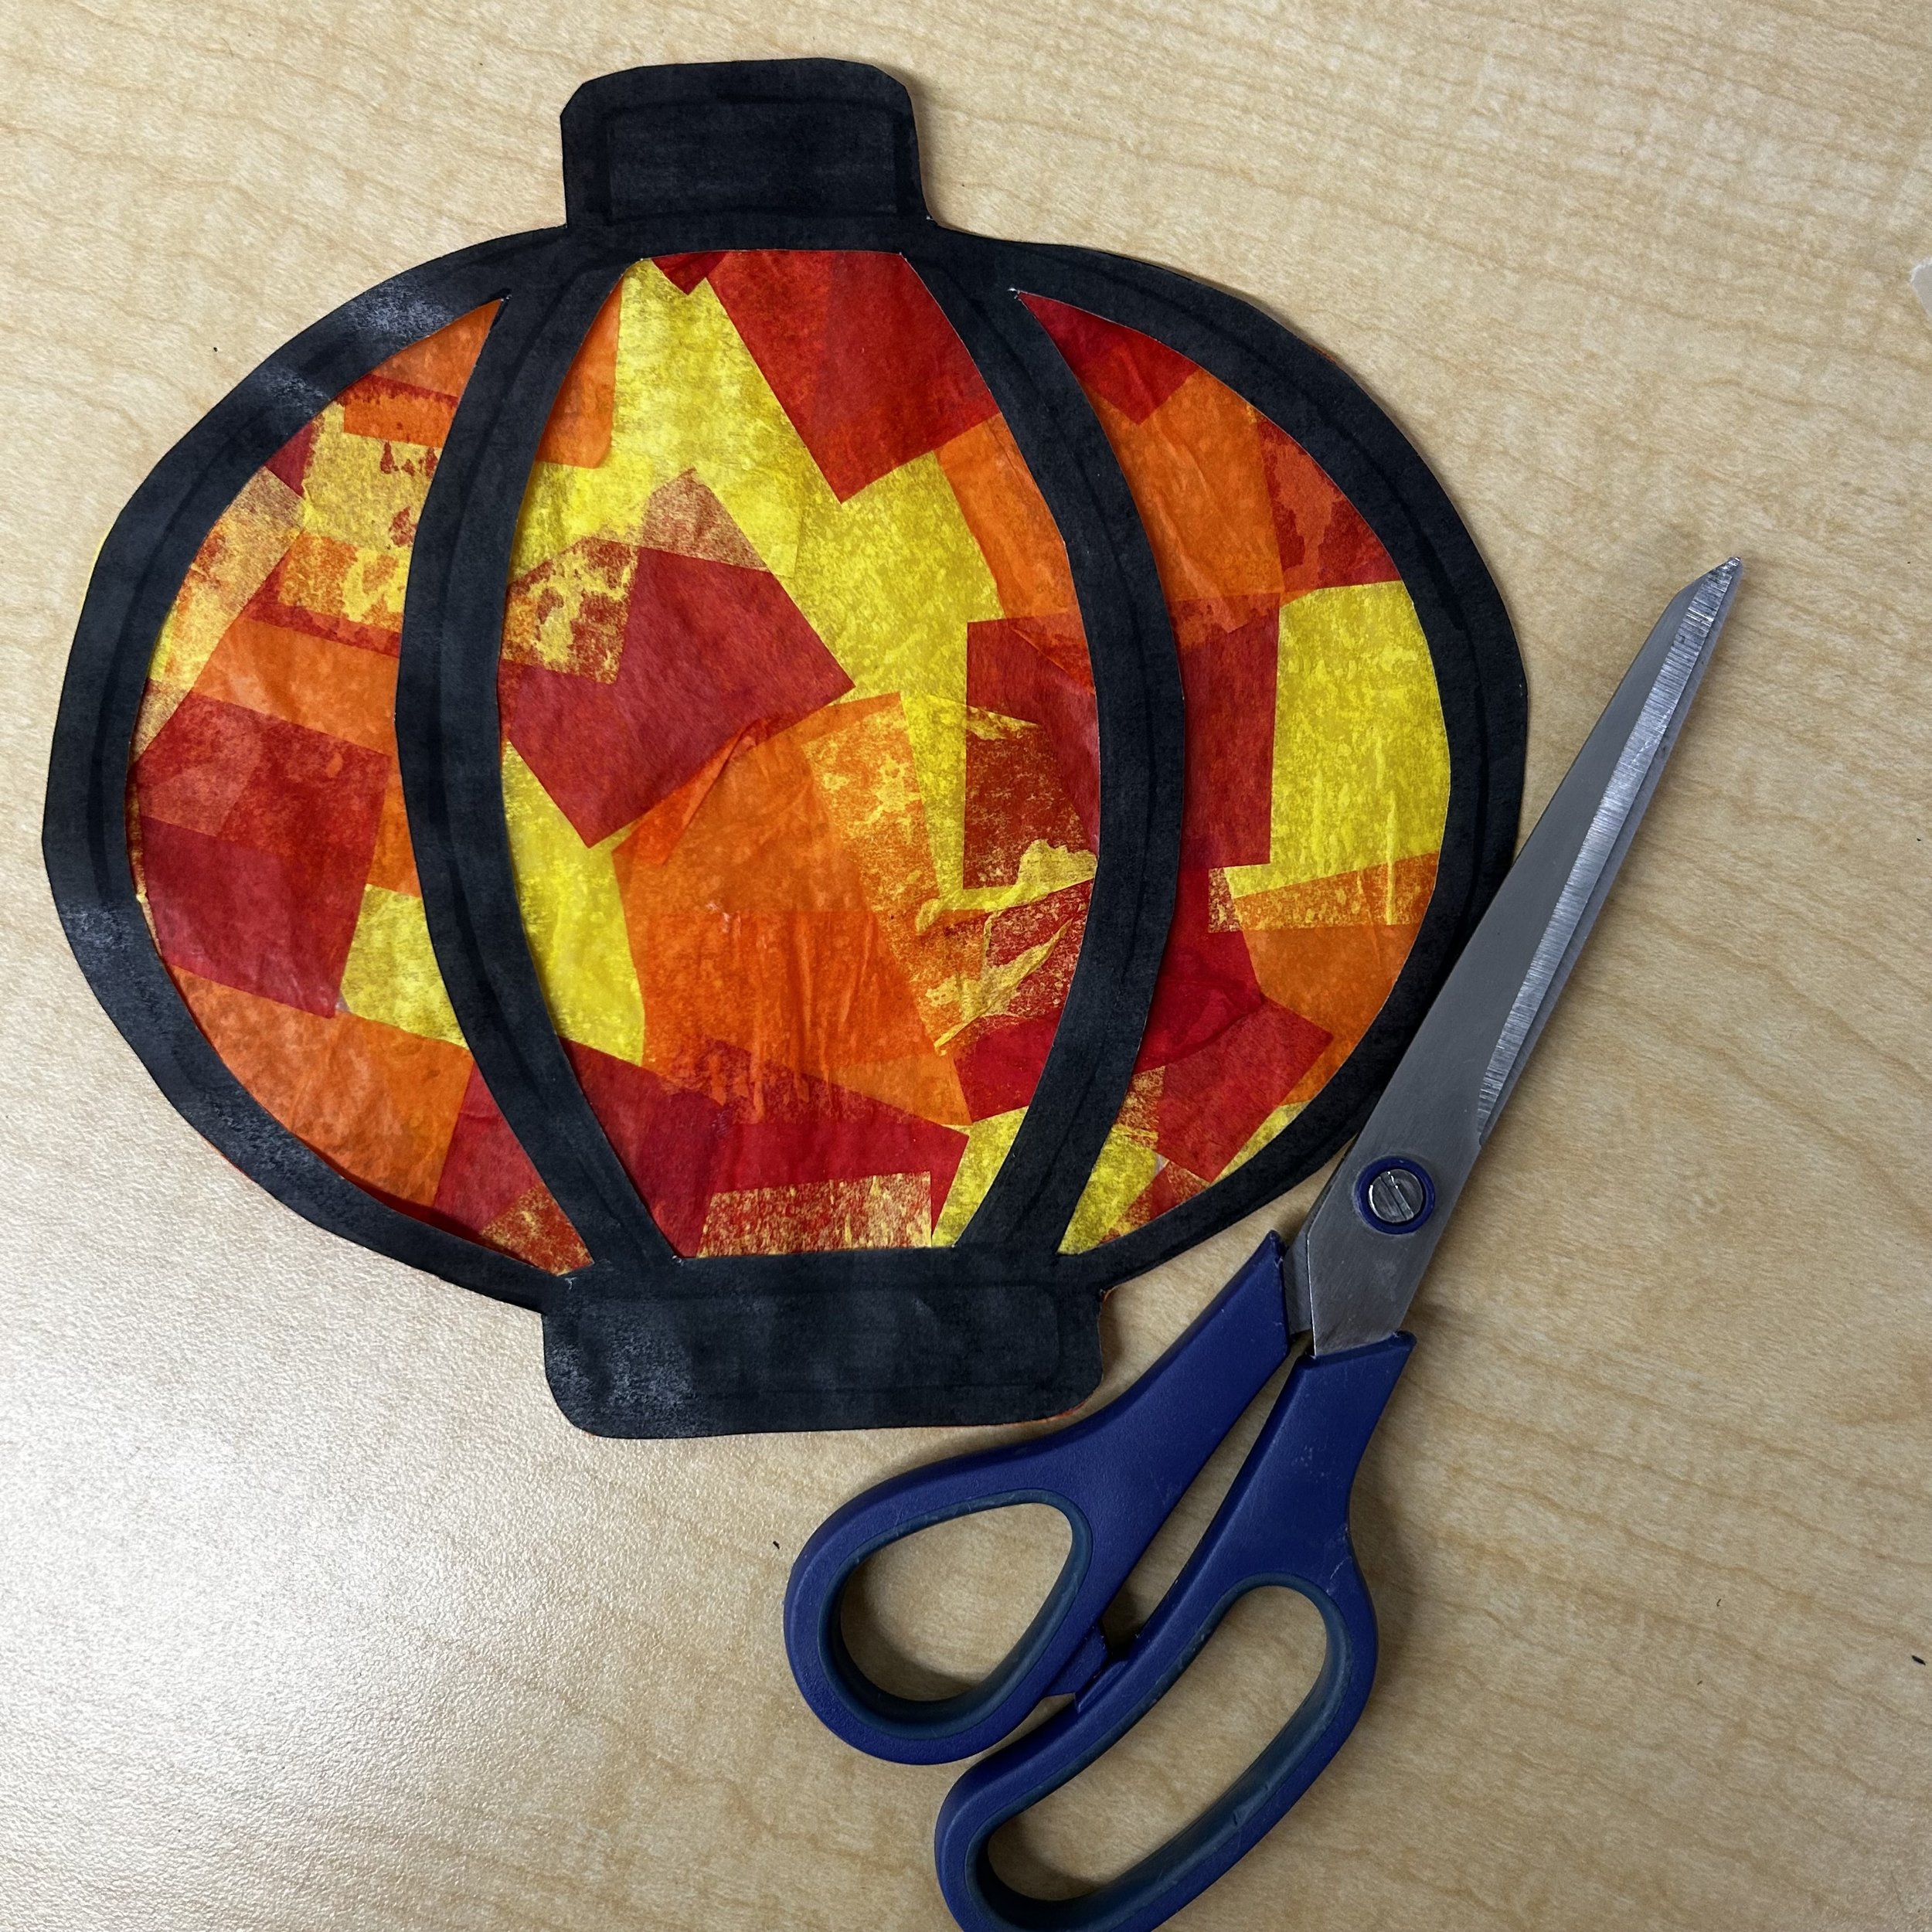
Glue the lantern shape onto the front of the dried tissue paper from day 1.
Cut around the outside of the lantern.
Write the name on the back along where the black would be.
These are meant to be sun catchers so if you have a window, that would be idea. If not, your bulletin board will be just fine!