Glowing Holiday/Christmas Lights Art Project

Time required: 1 hour (could be split up)
Materials:
One sheet black construction paper (per student)
One 1/2 sheet black construction paper cut on long edge (per student)
Light tracer
White pencil crayon
Oil pastels - various colours (plus white & black)
Chalk pastels - various colours (plus white)
Scissors
Glue stick


Steps:
Note: This can be a very messy project so I encourage students to go slow and wash hands in between if needed to avoid getting oil or chalk pastel in places that they don’t want it.
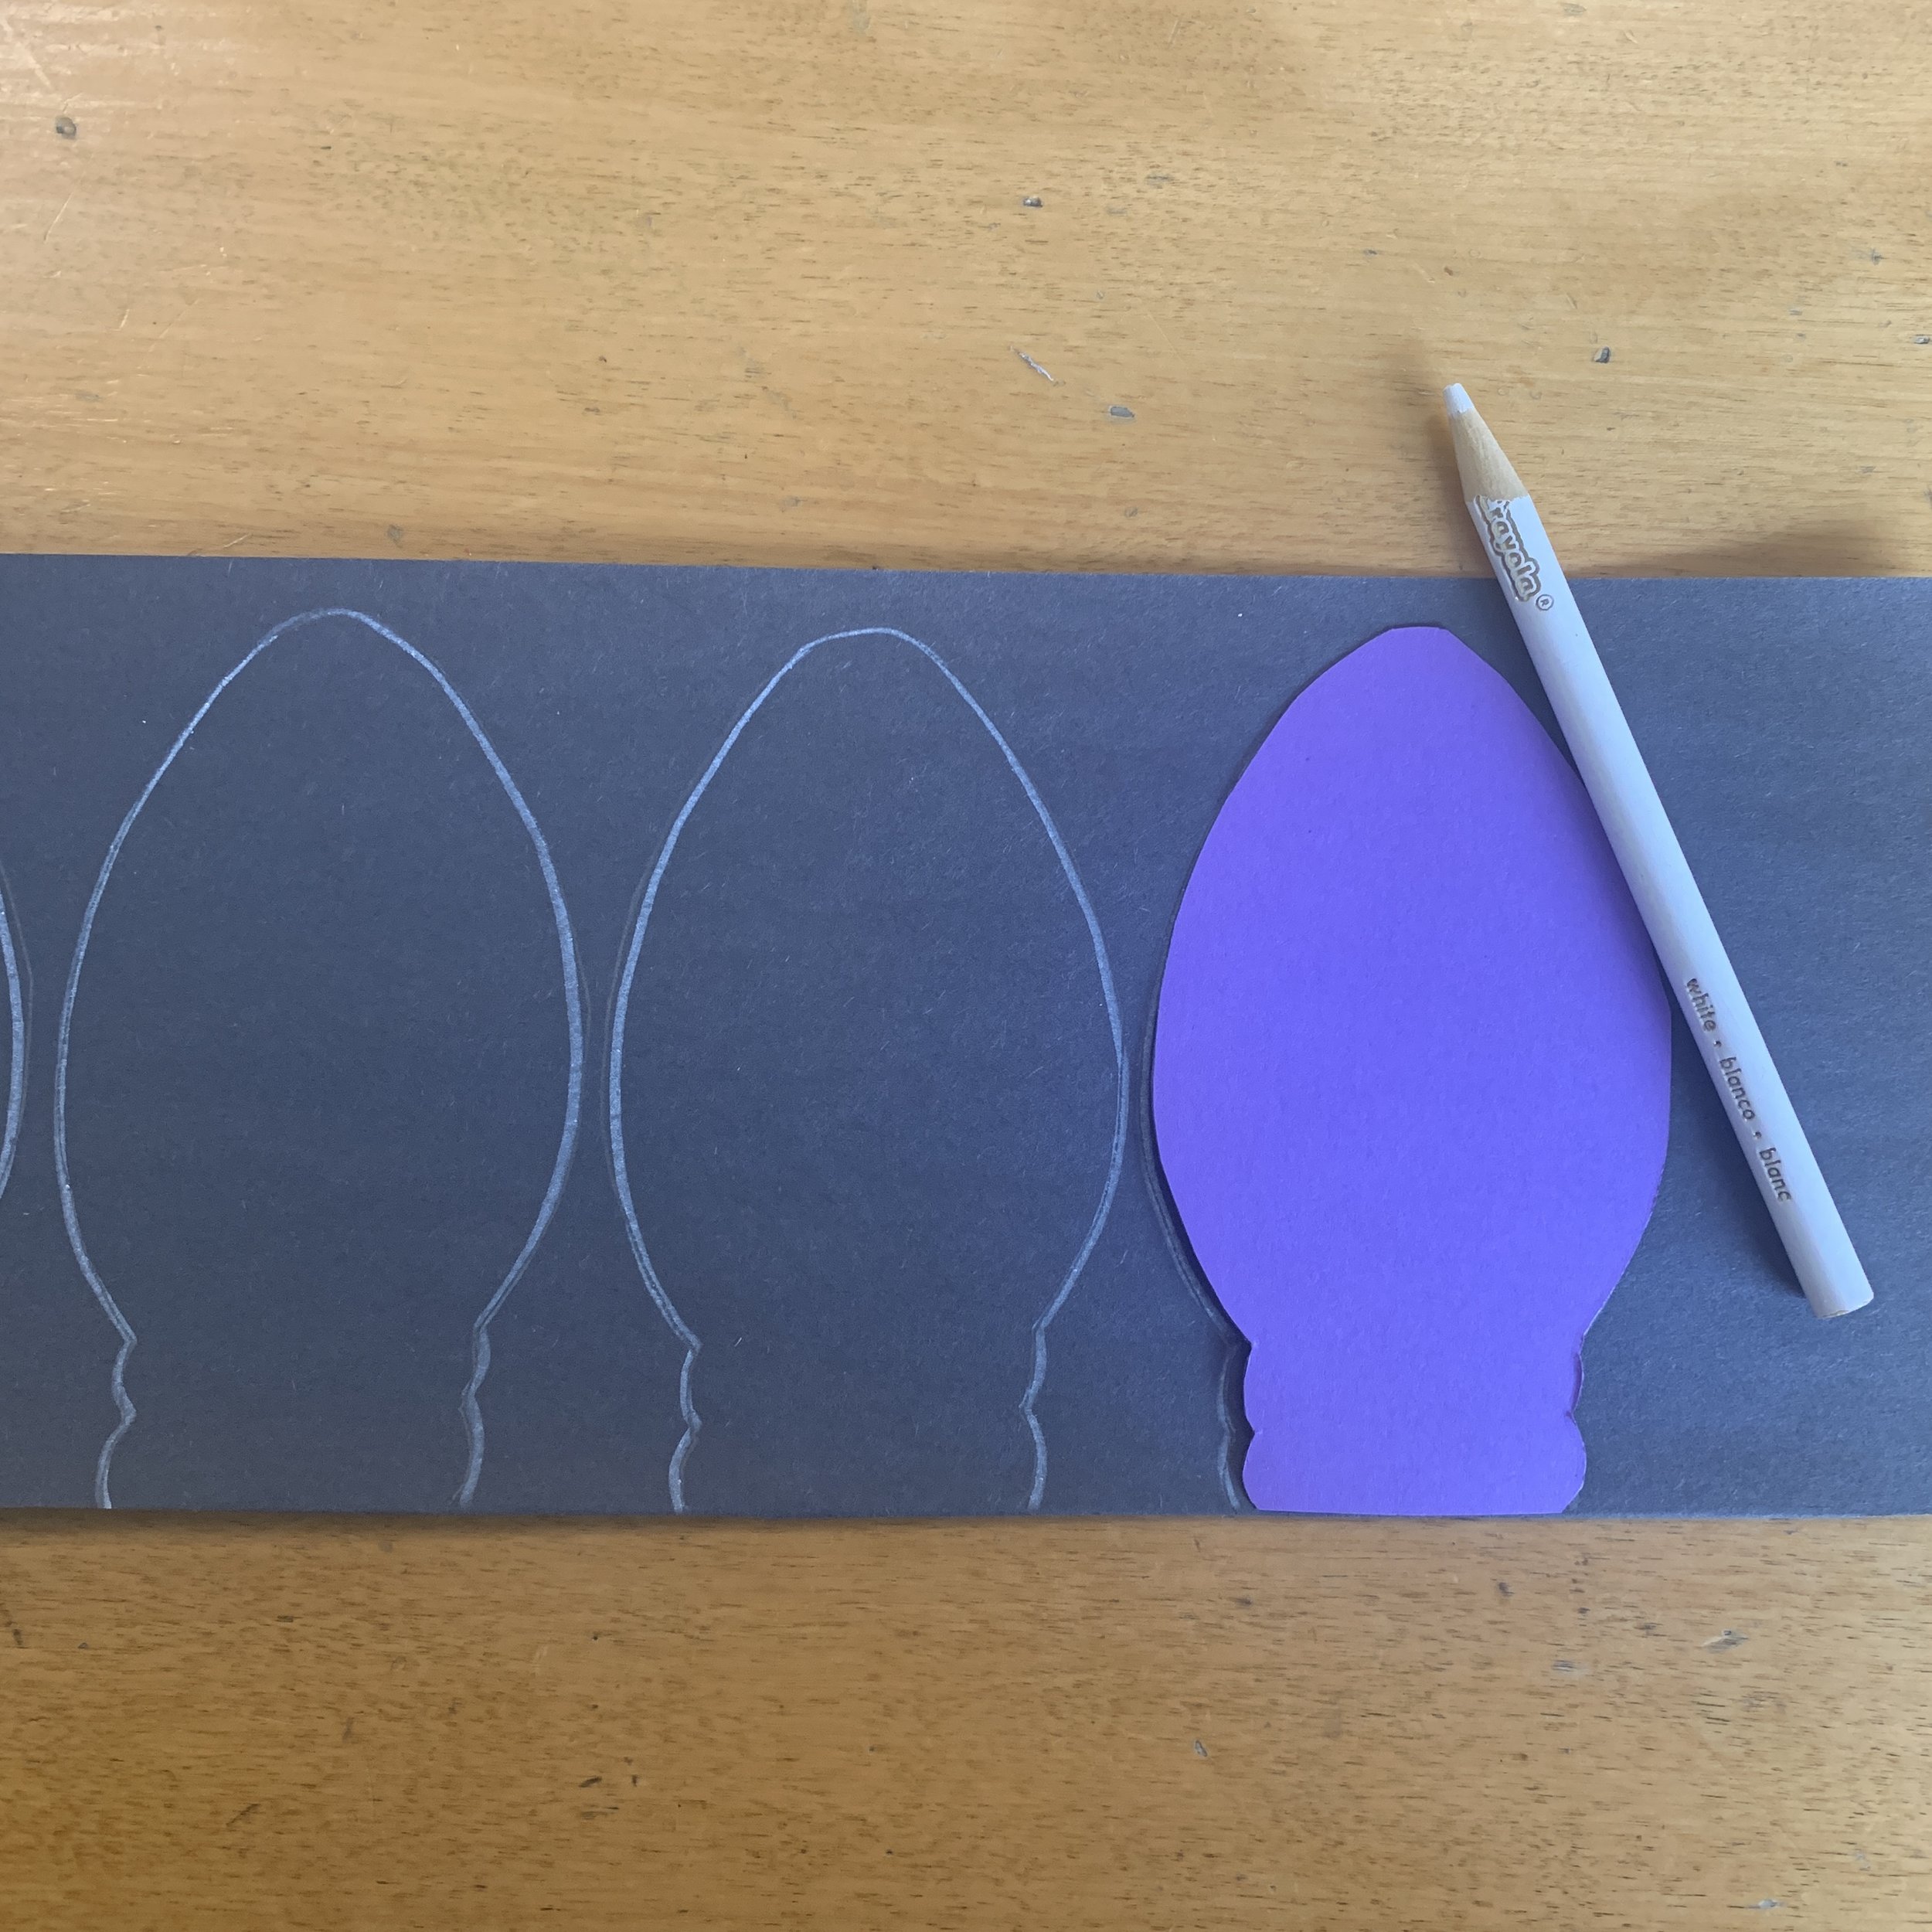
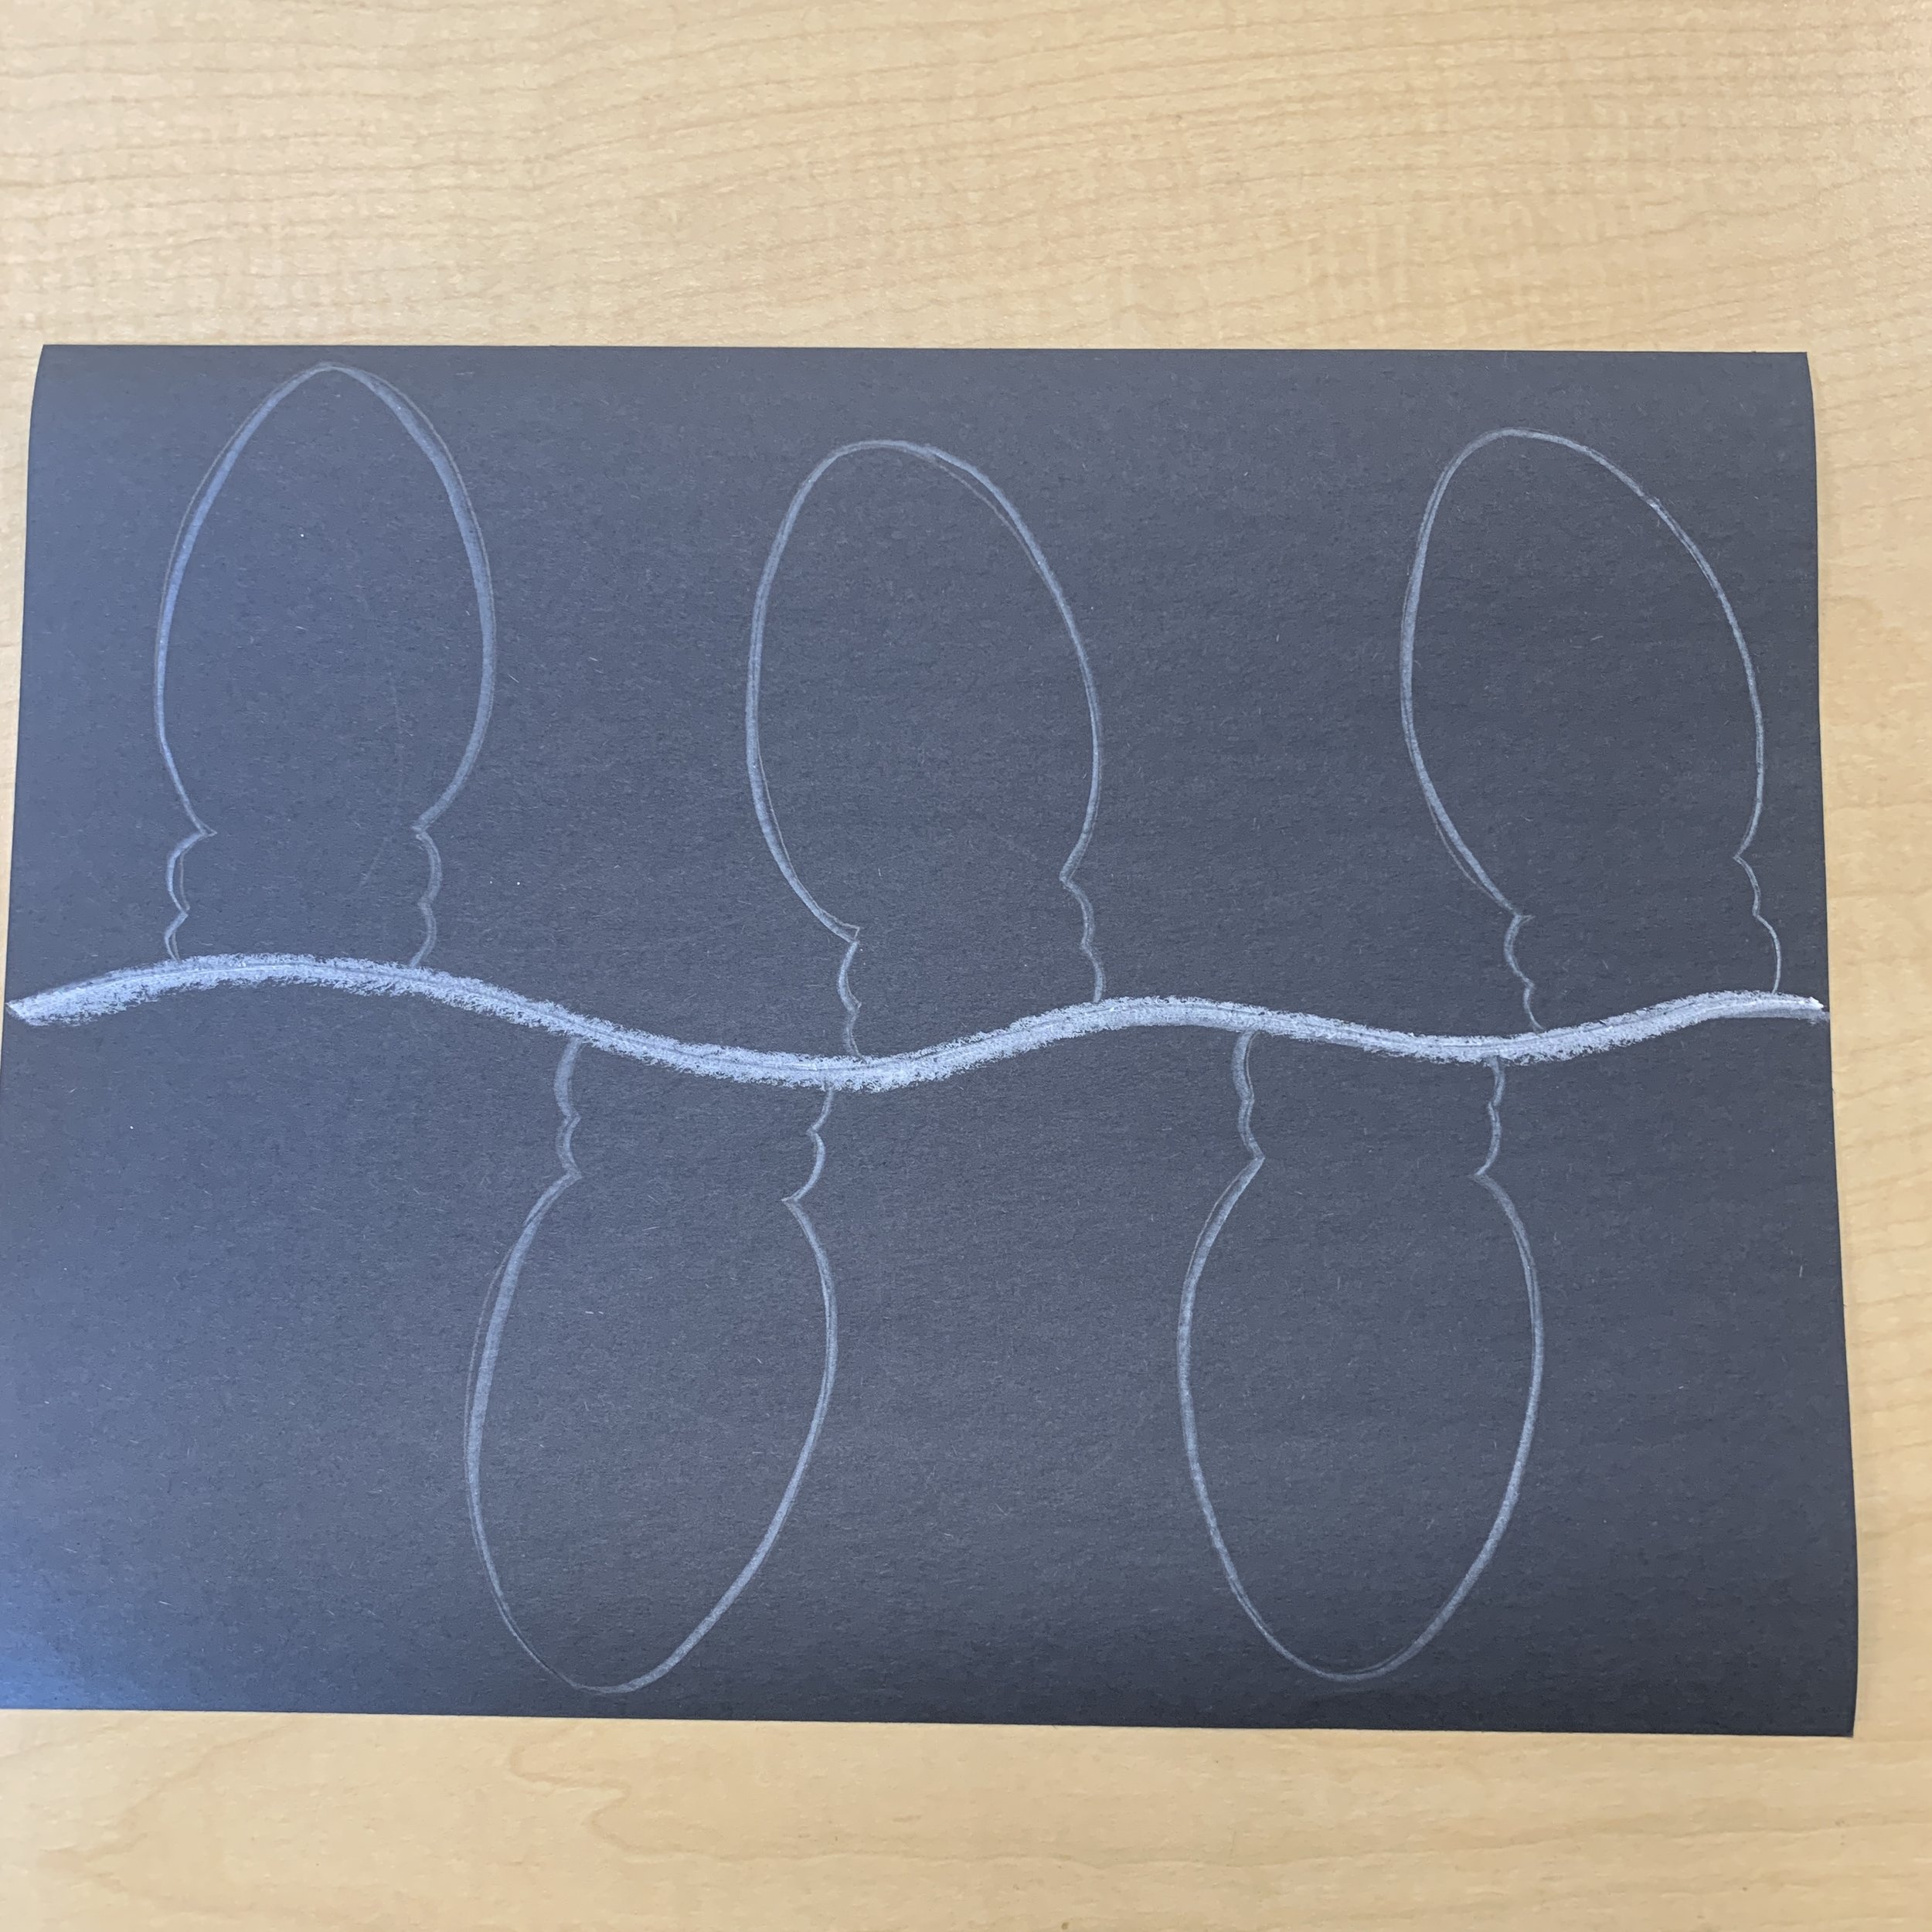
Trace the light shape onto the 1/2 sheet of black construction paper with a white pencil crayon.
On the full sheet of black construction paper, draw a wire and trace as many lights as you did on the first sheet.
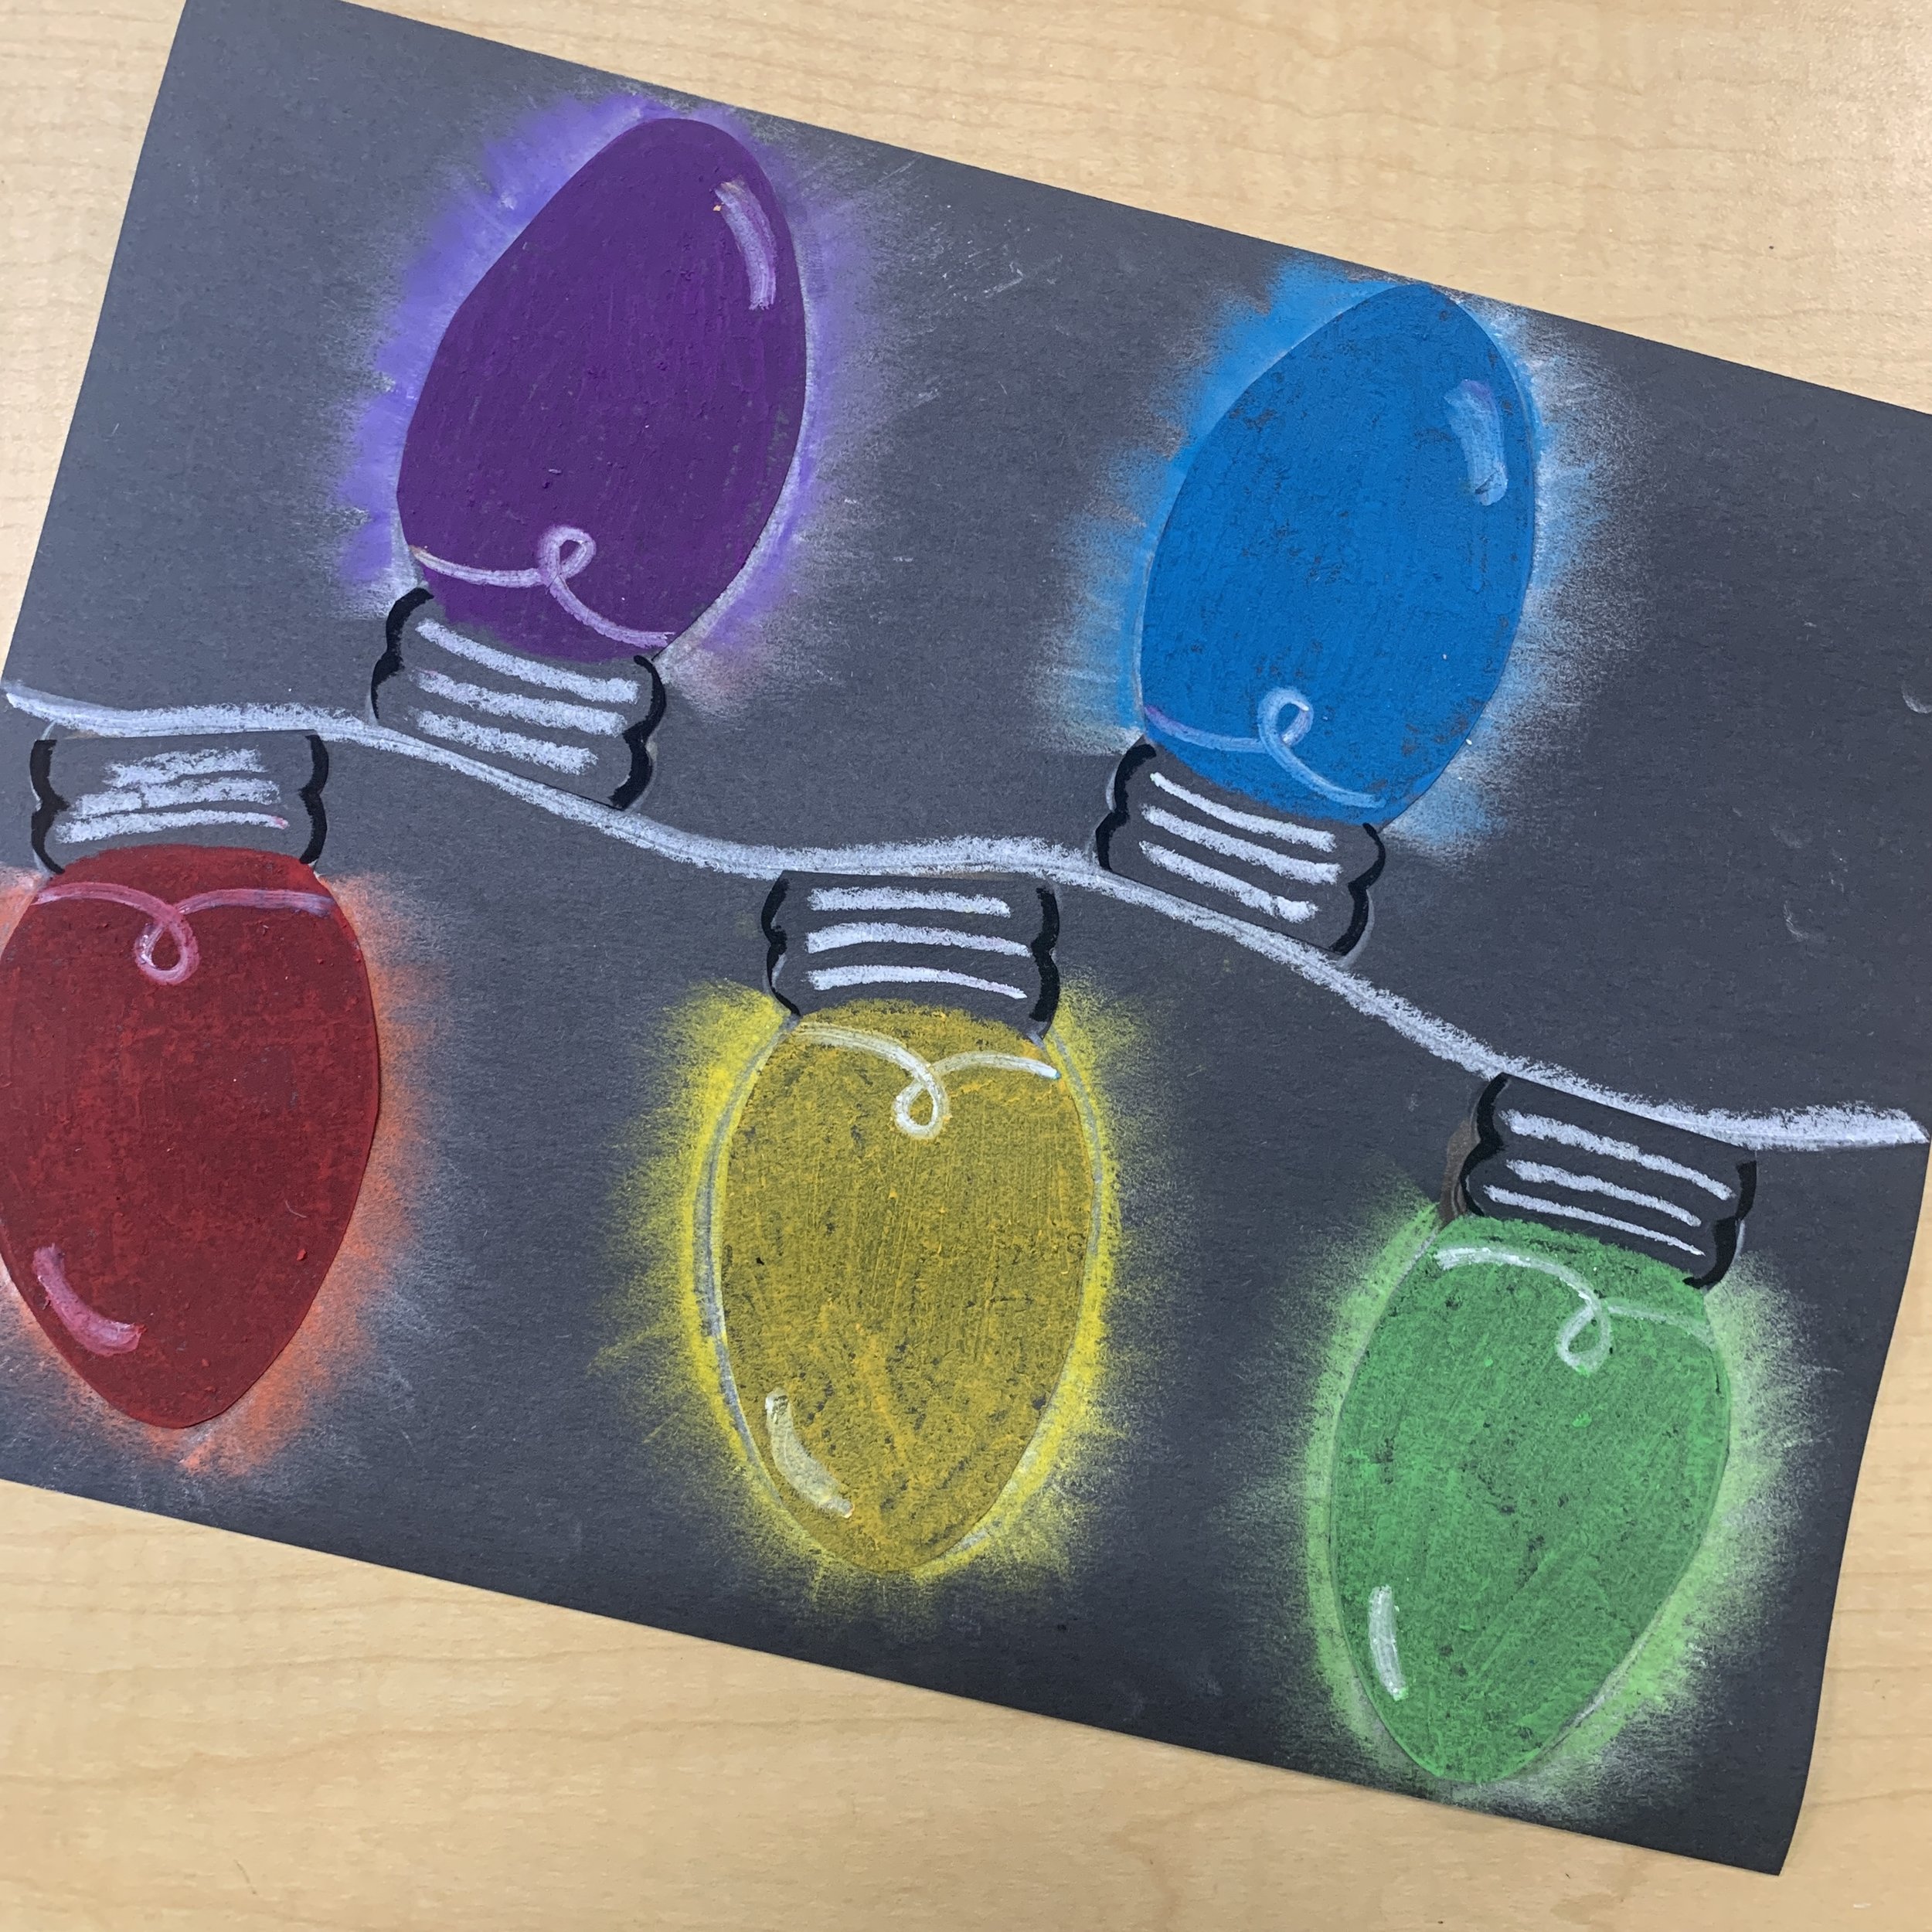
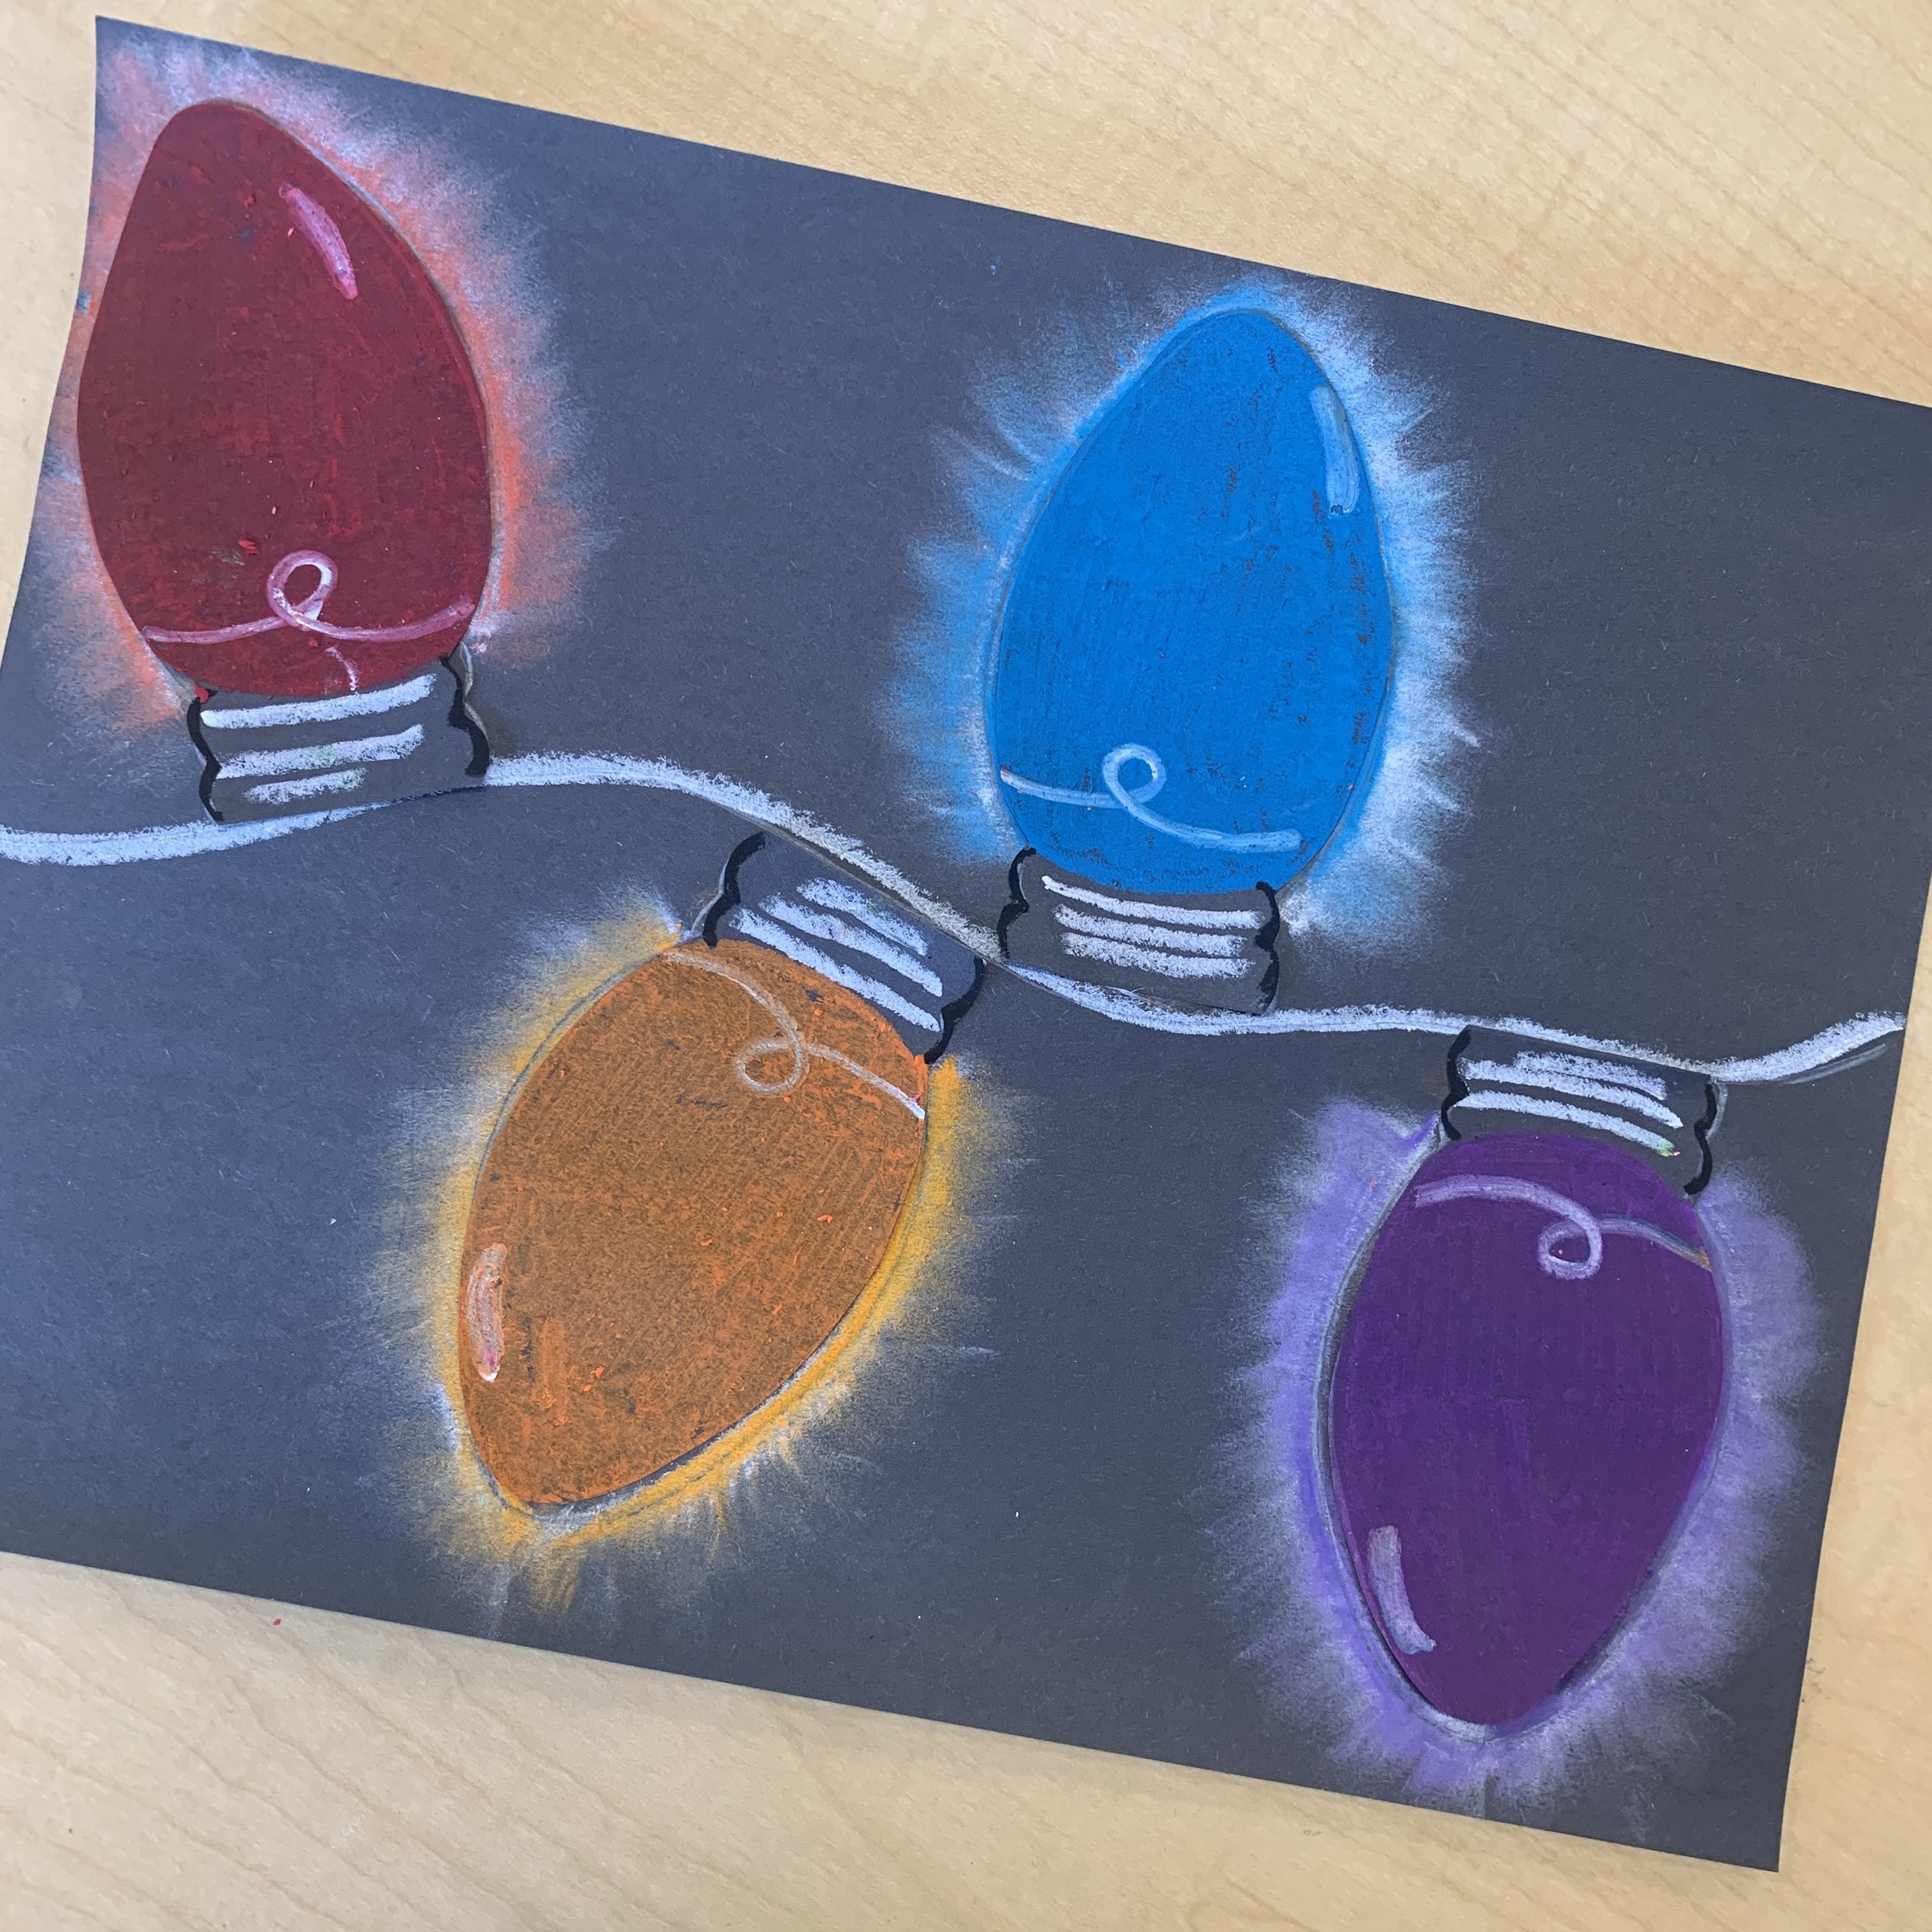
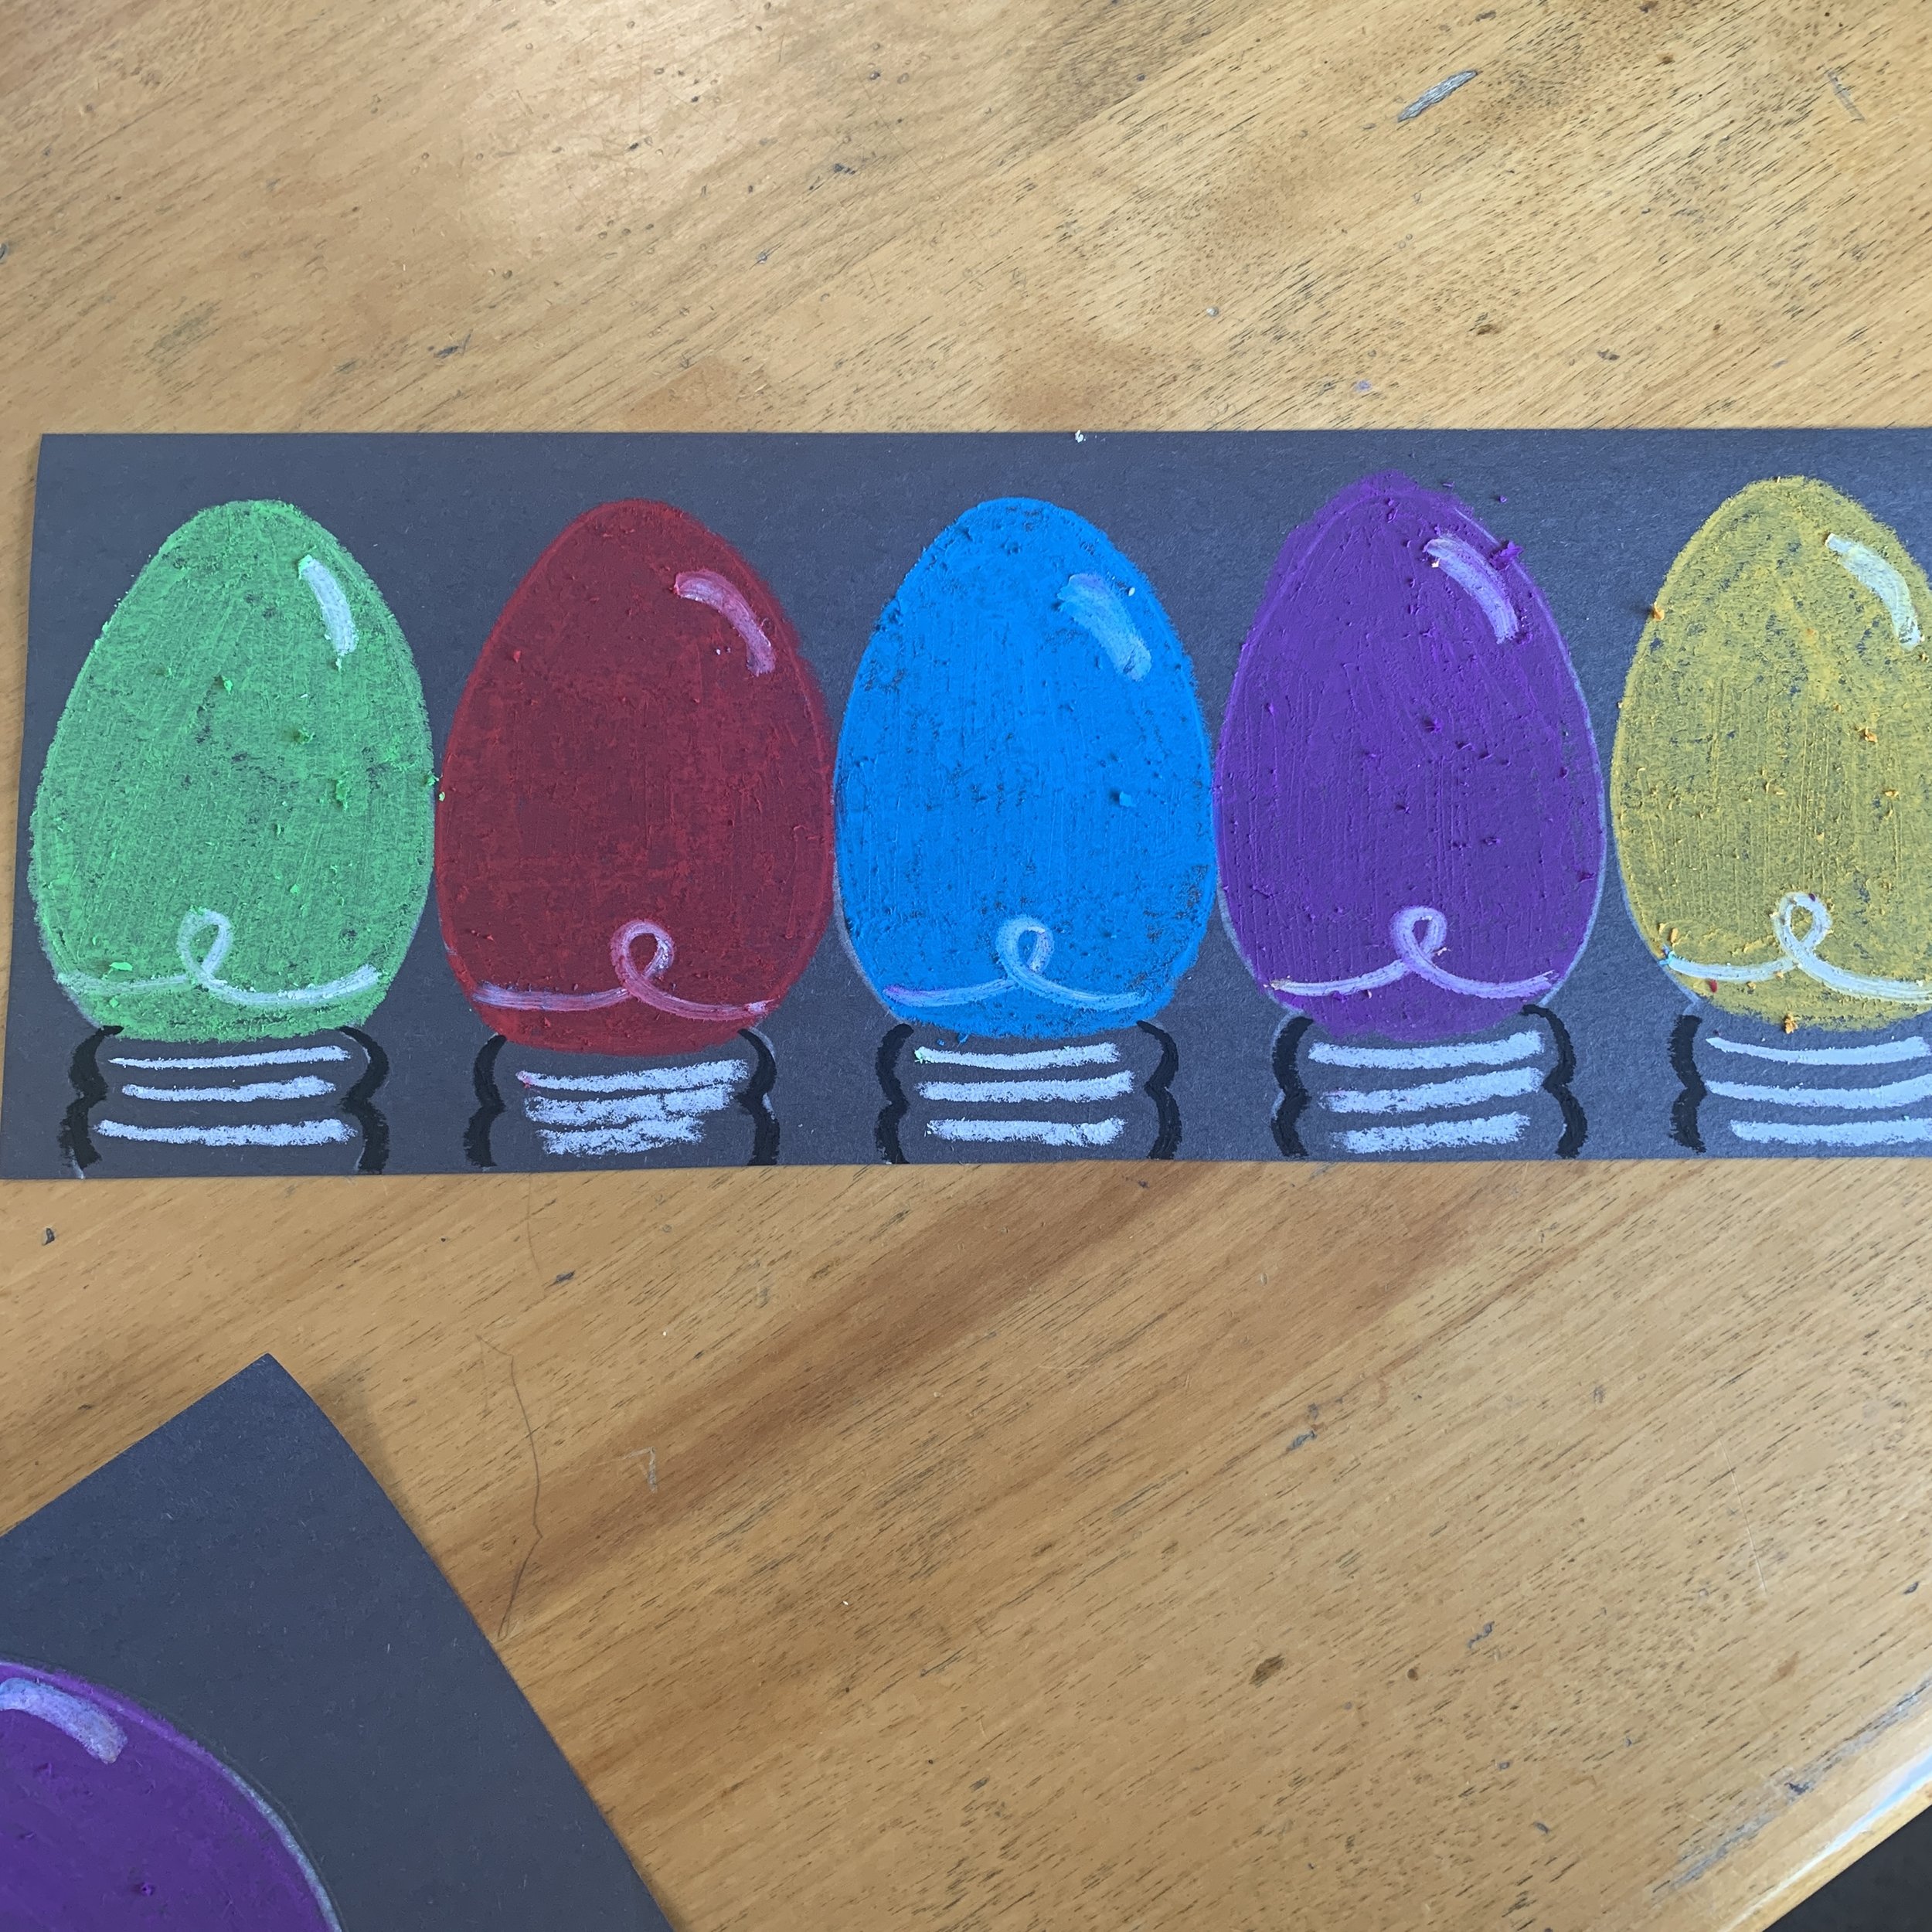
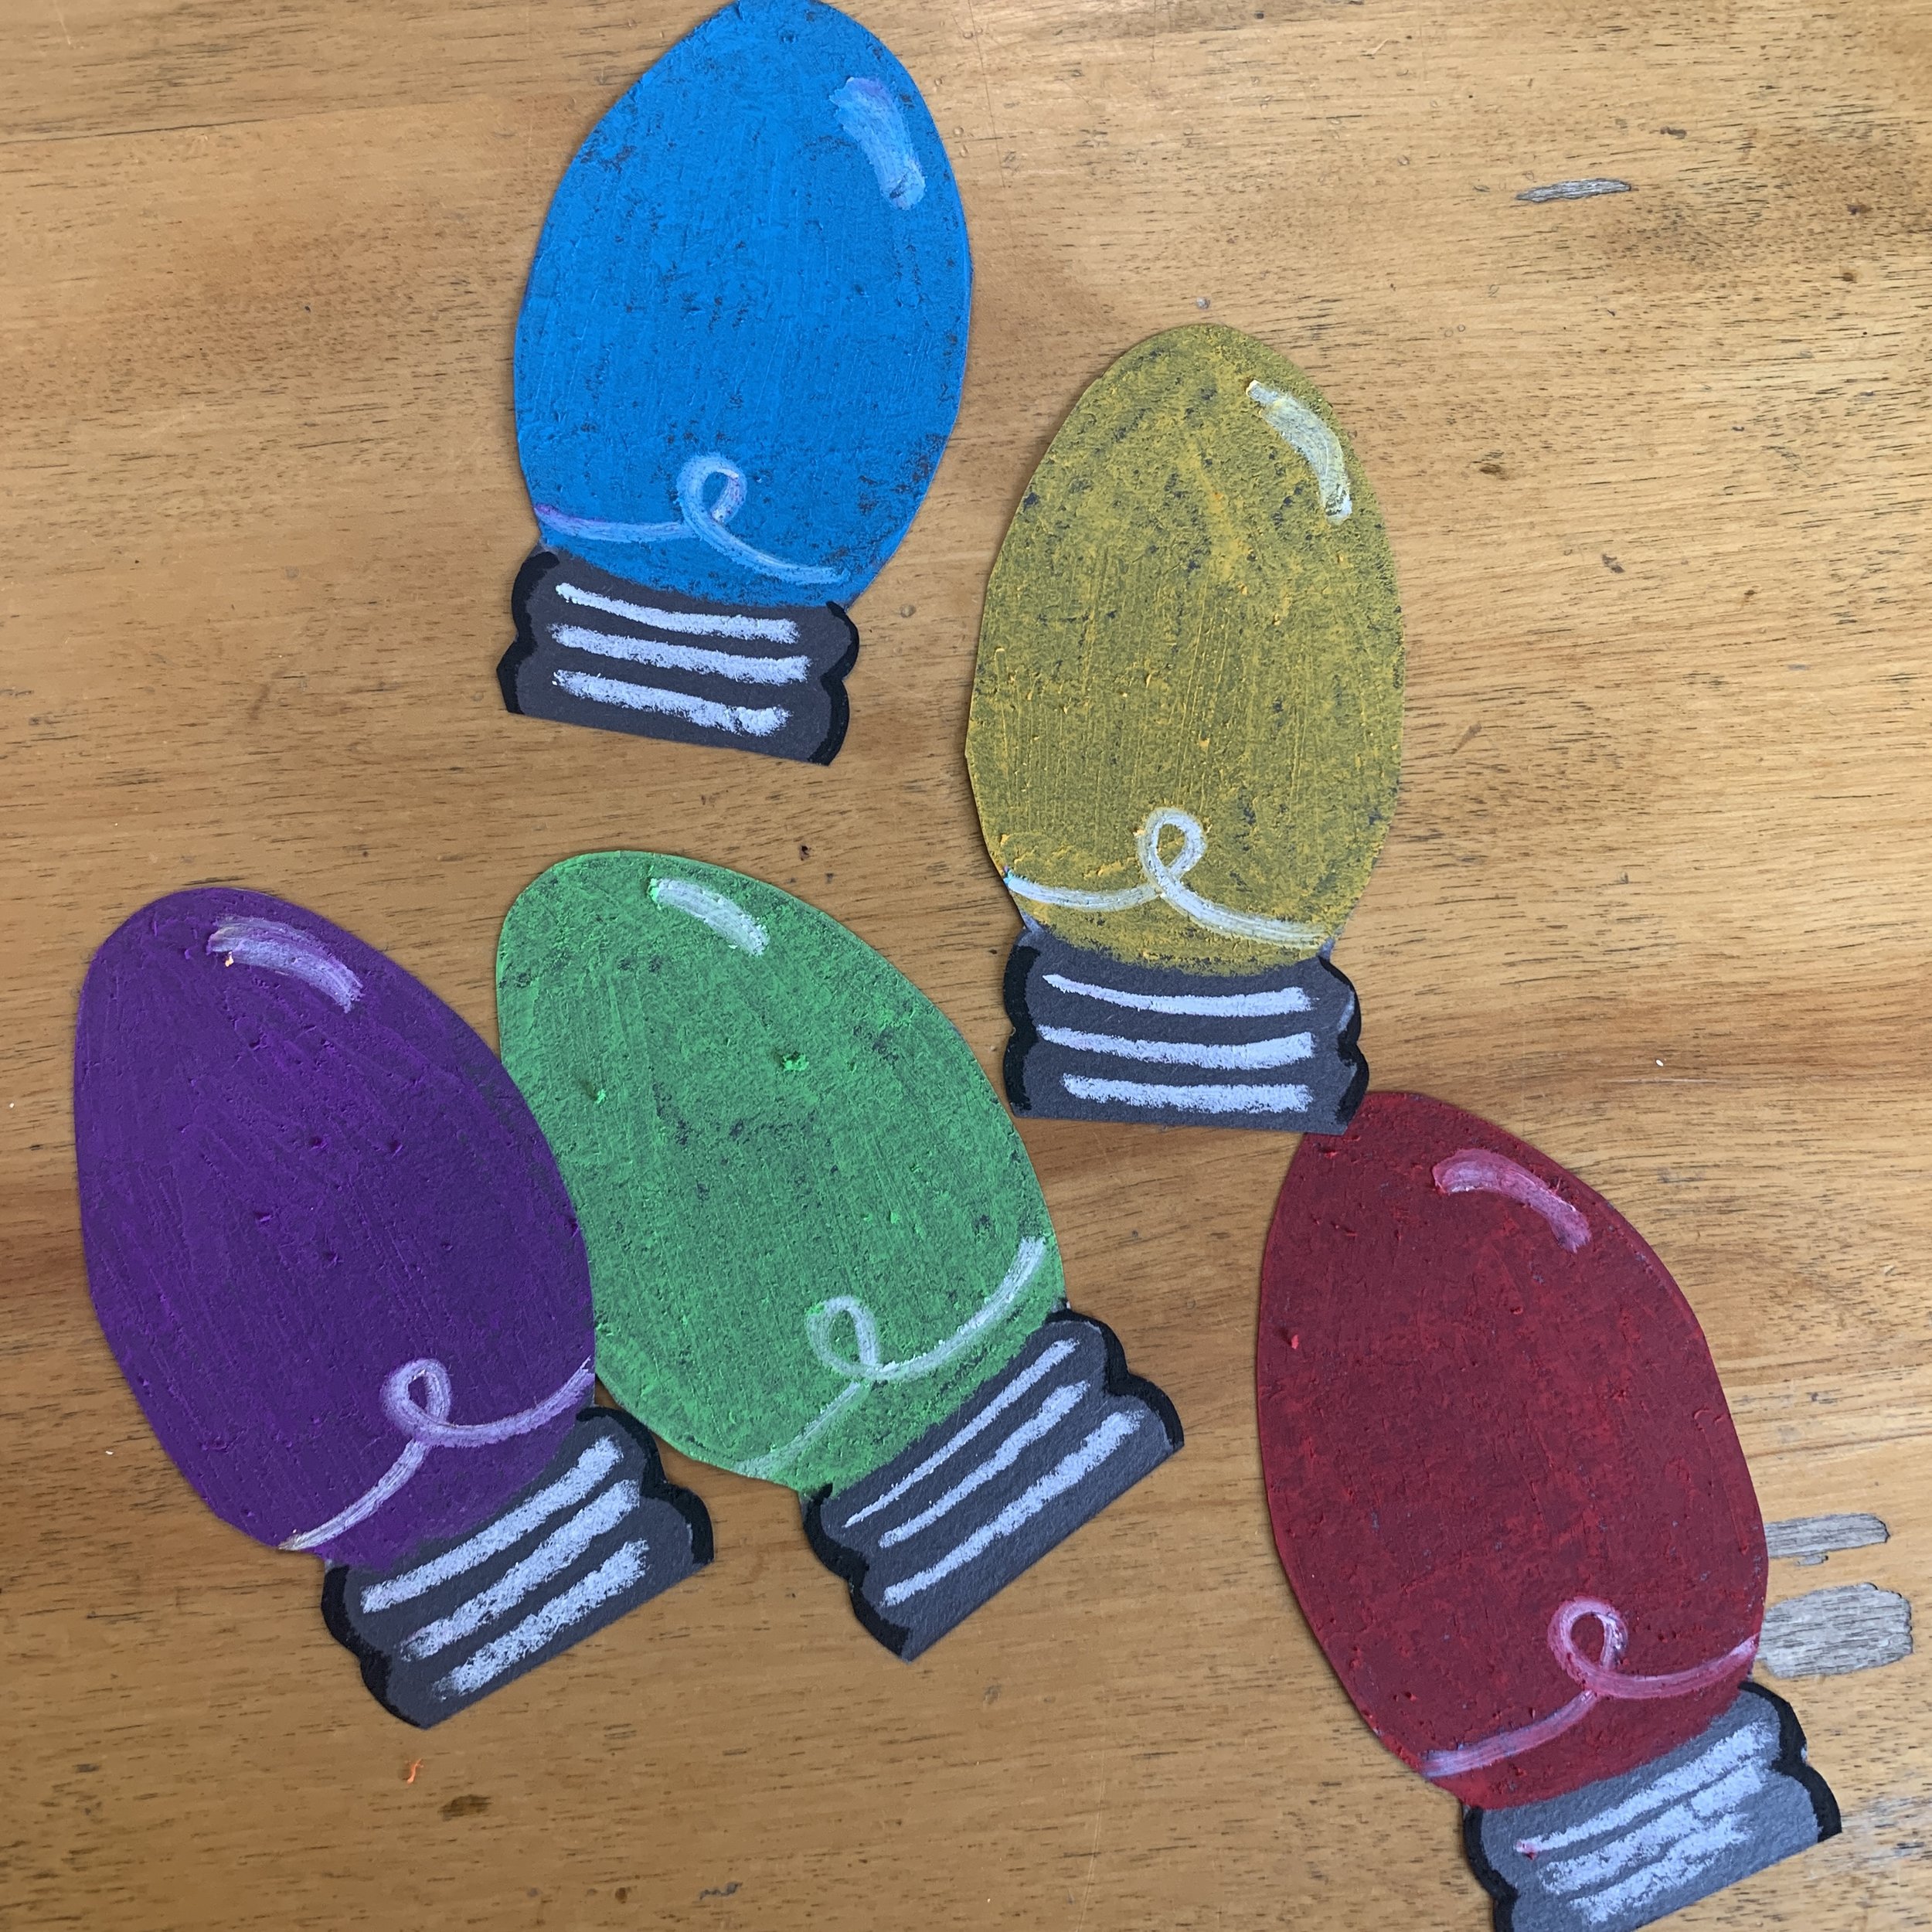
Go back to the 1/2 sheet. Colour in your lights using oil pastel. They can be any colour(s) you want. Make sure to add a white coil inside (after colouring) and fill in the bottom connector piece.
*note: I would colour the connector black, unlike my sample, so that it shows against the black paper later
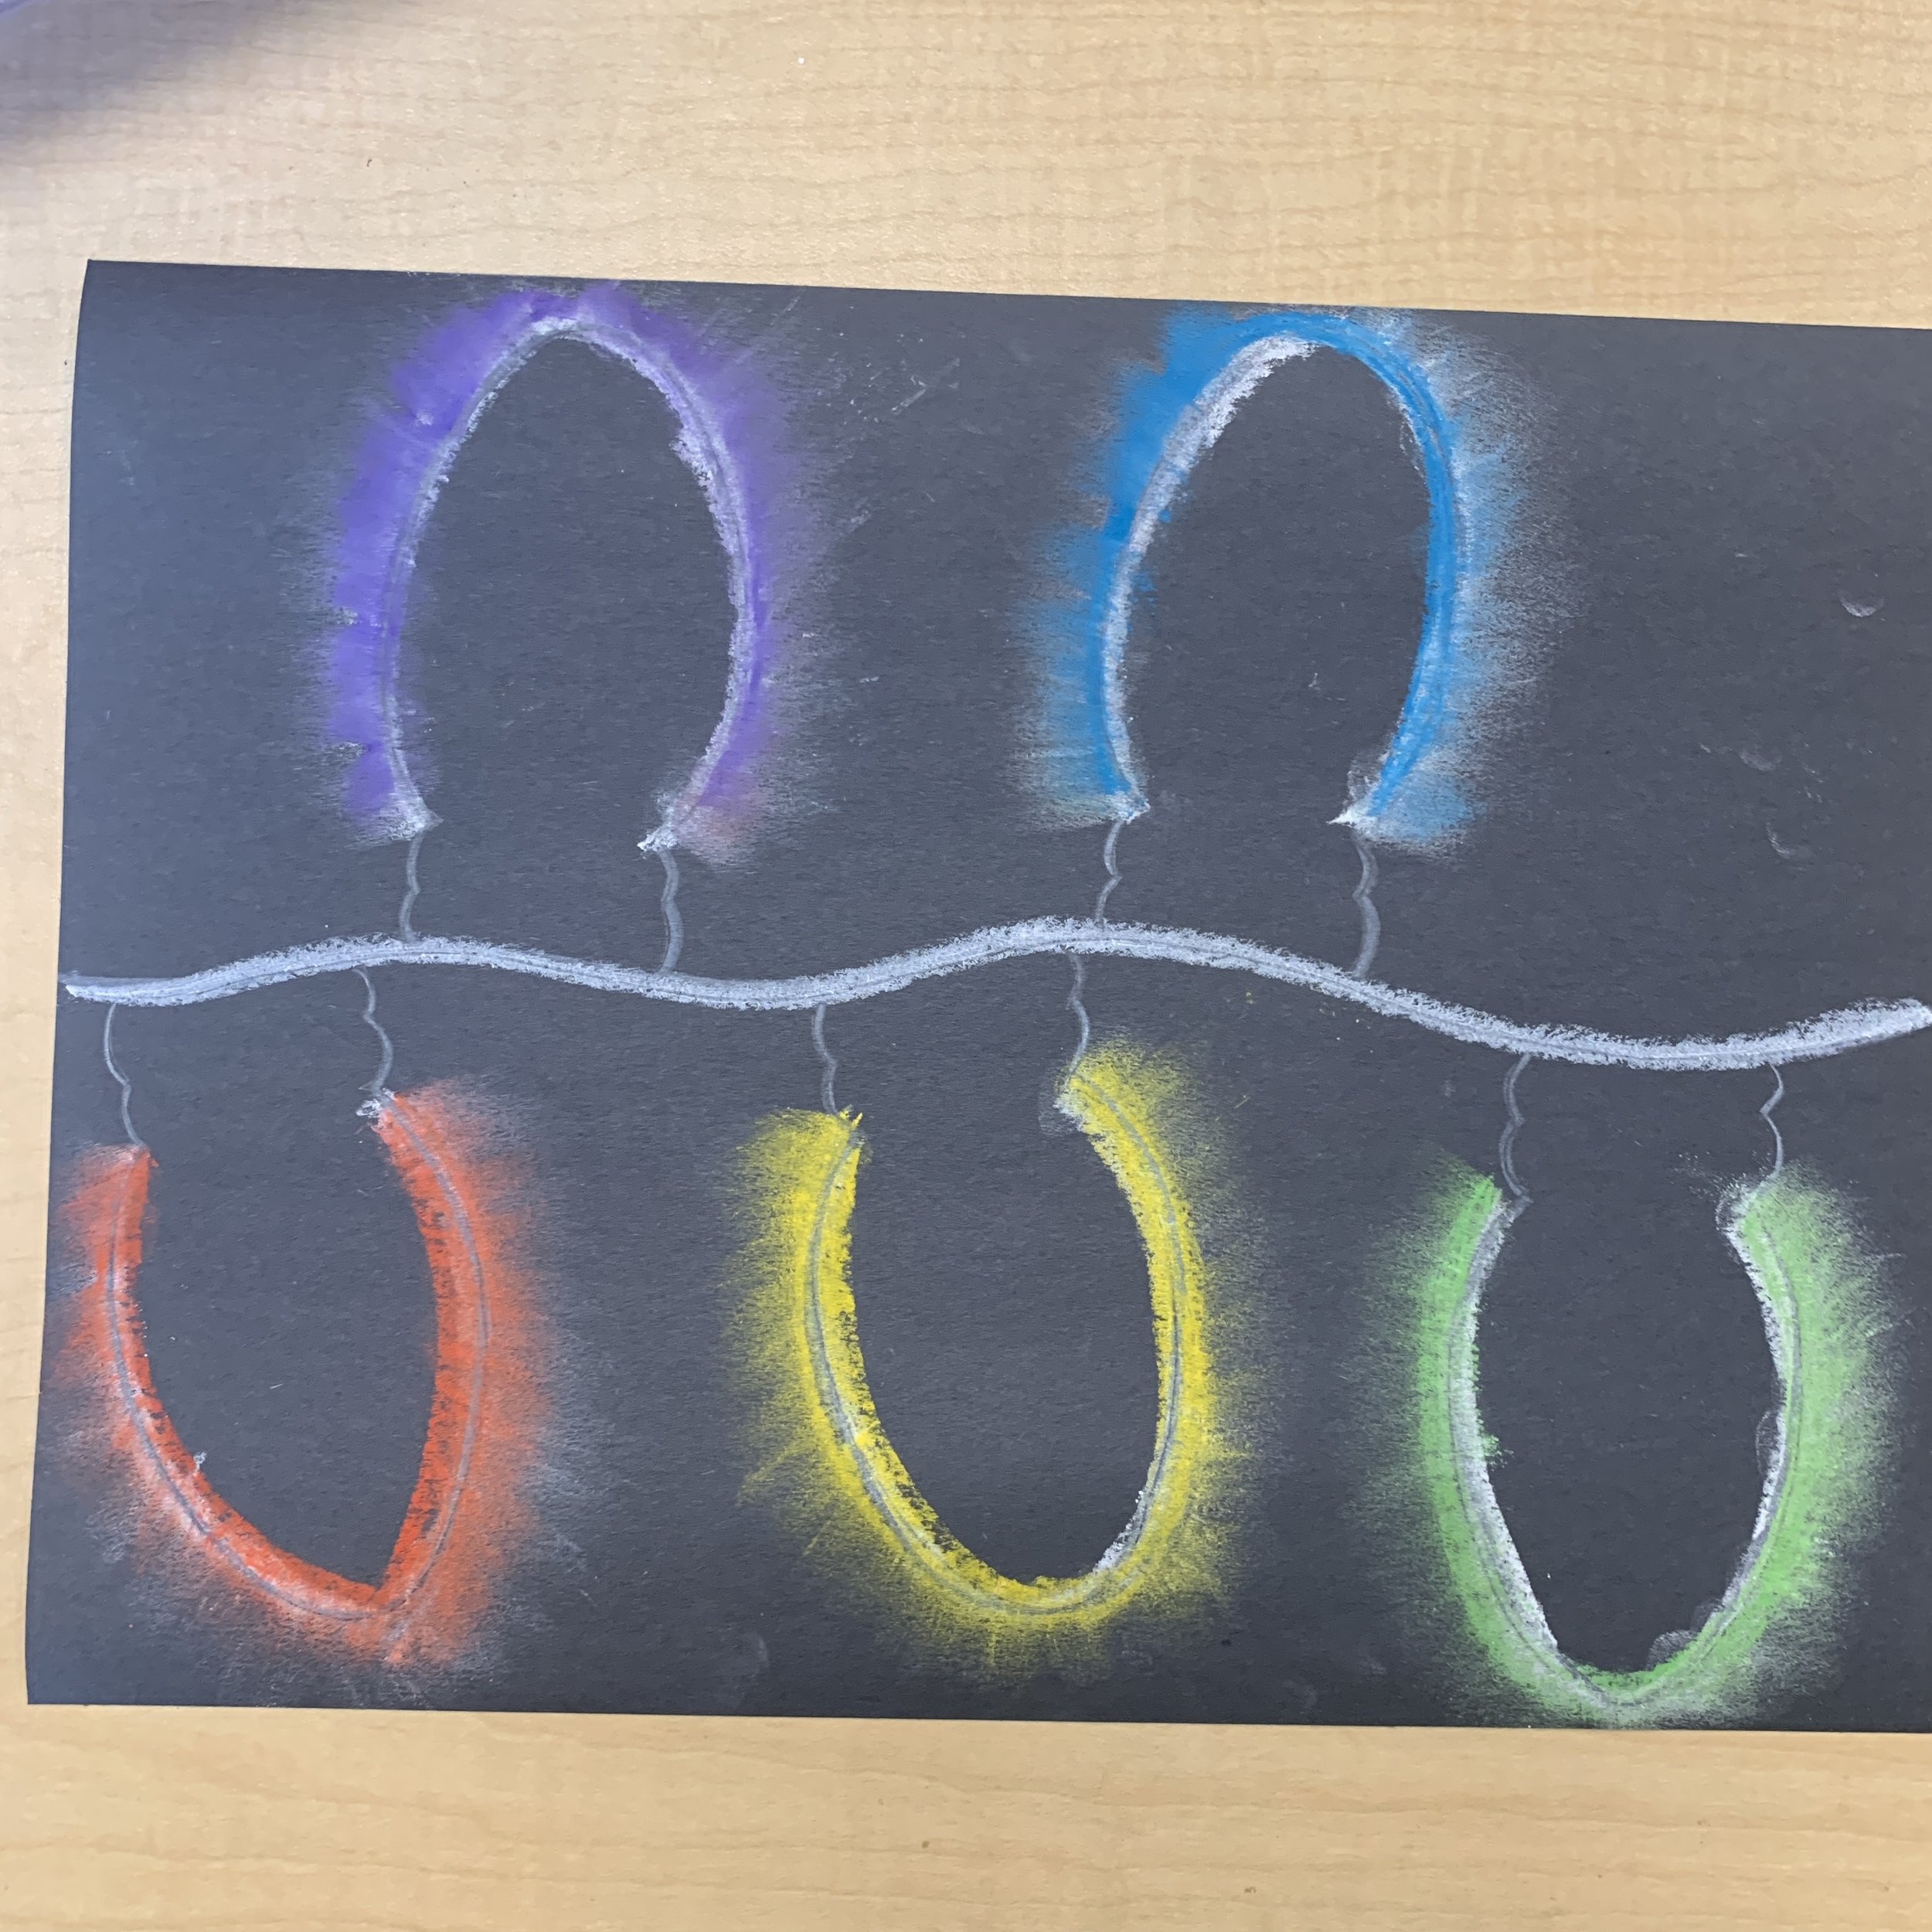
On the full sheet, go over the wire line with white oil pastel. Then, go over your pencil crayon light lines with a white chalk pastel.
Using your finger, smudge the chalk pastel outwards, away from the light.
On top of the white chalk pastel, do a ring of whichever colours you made earlier. Again, use your finger to smudge the coloured chalk outwards.
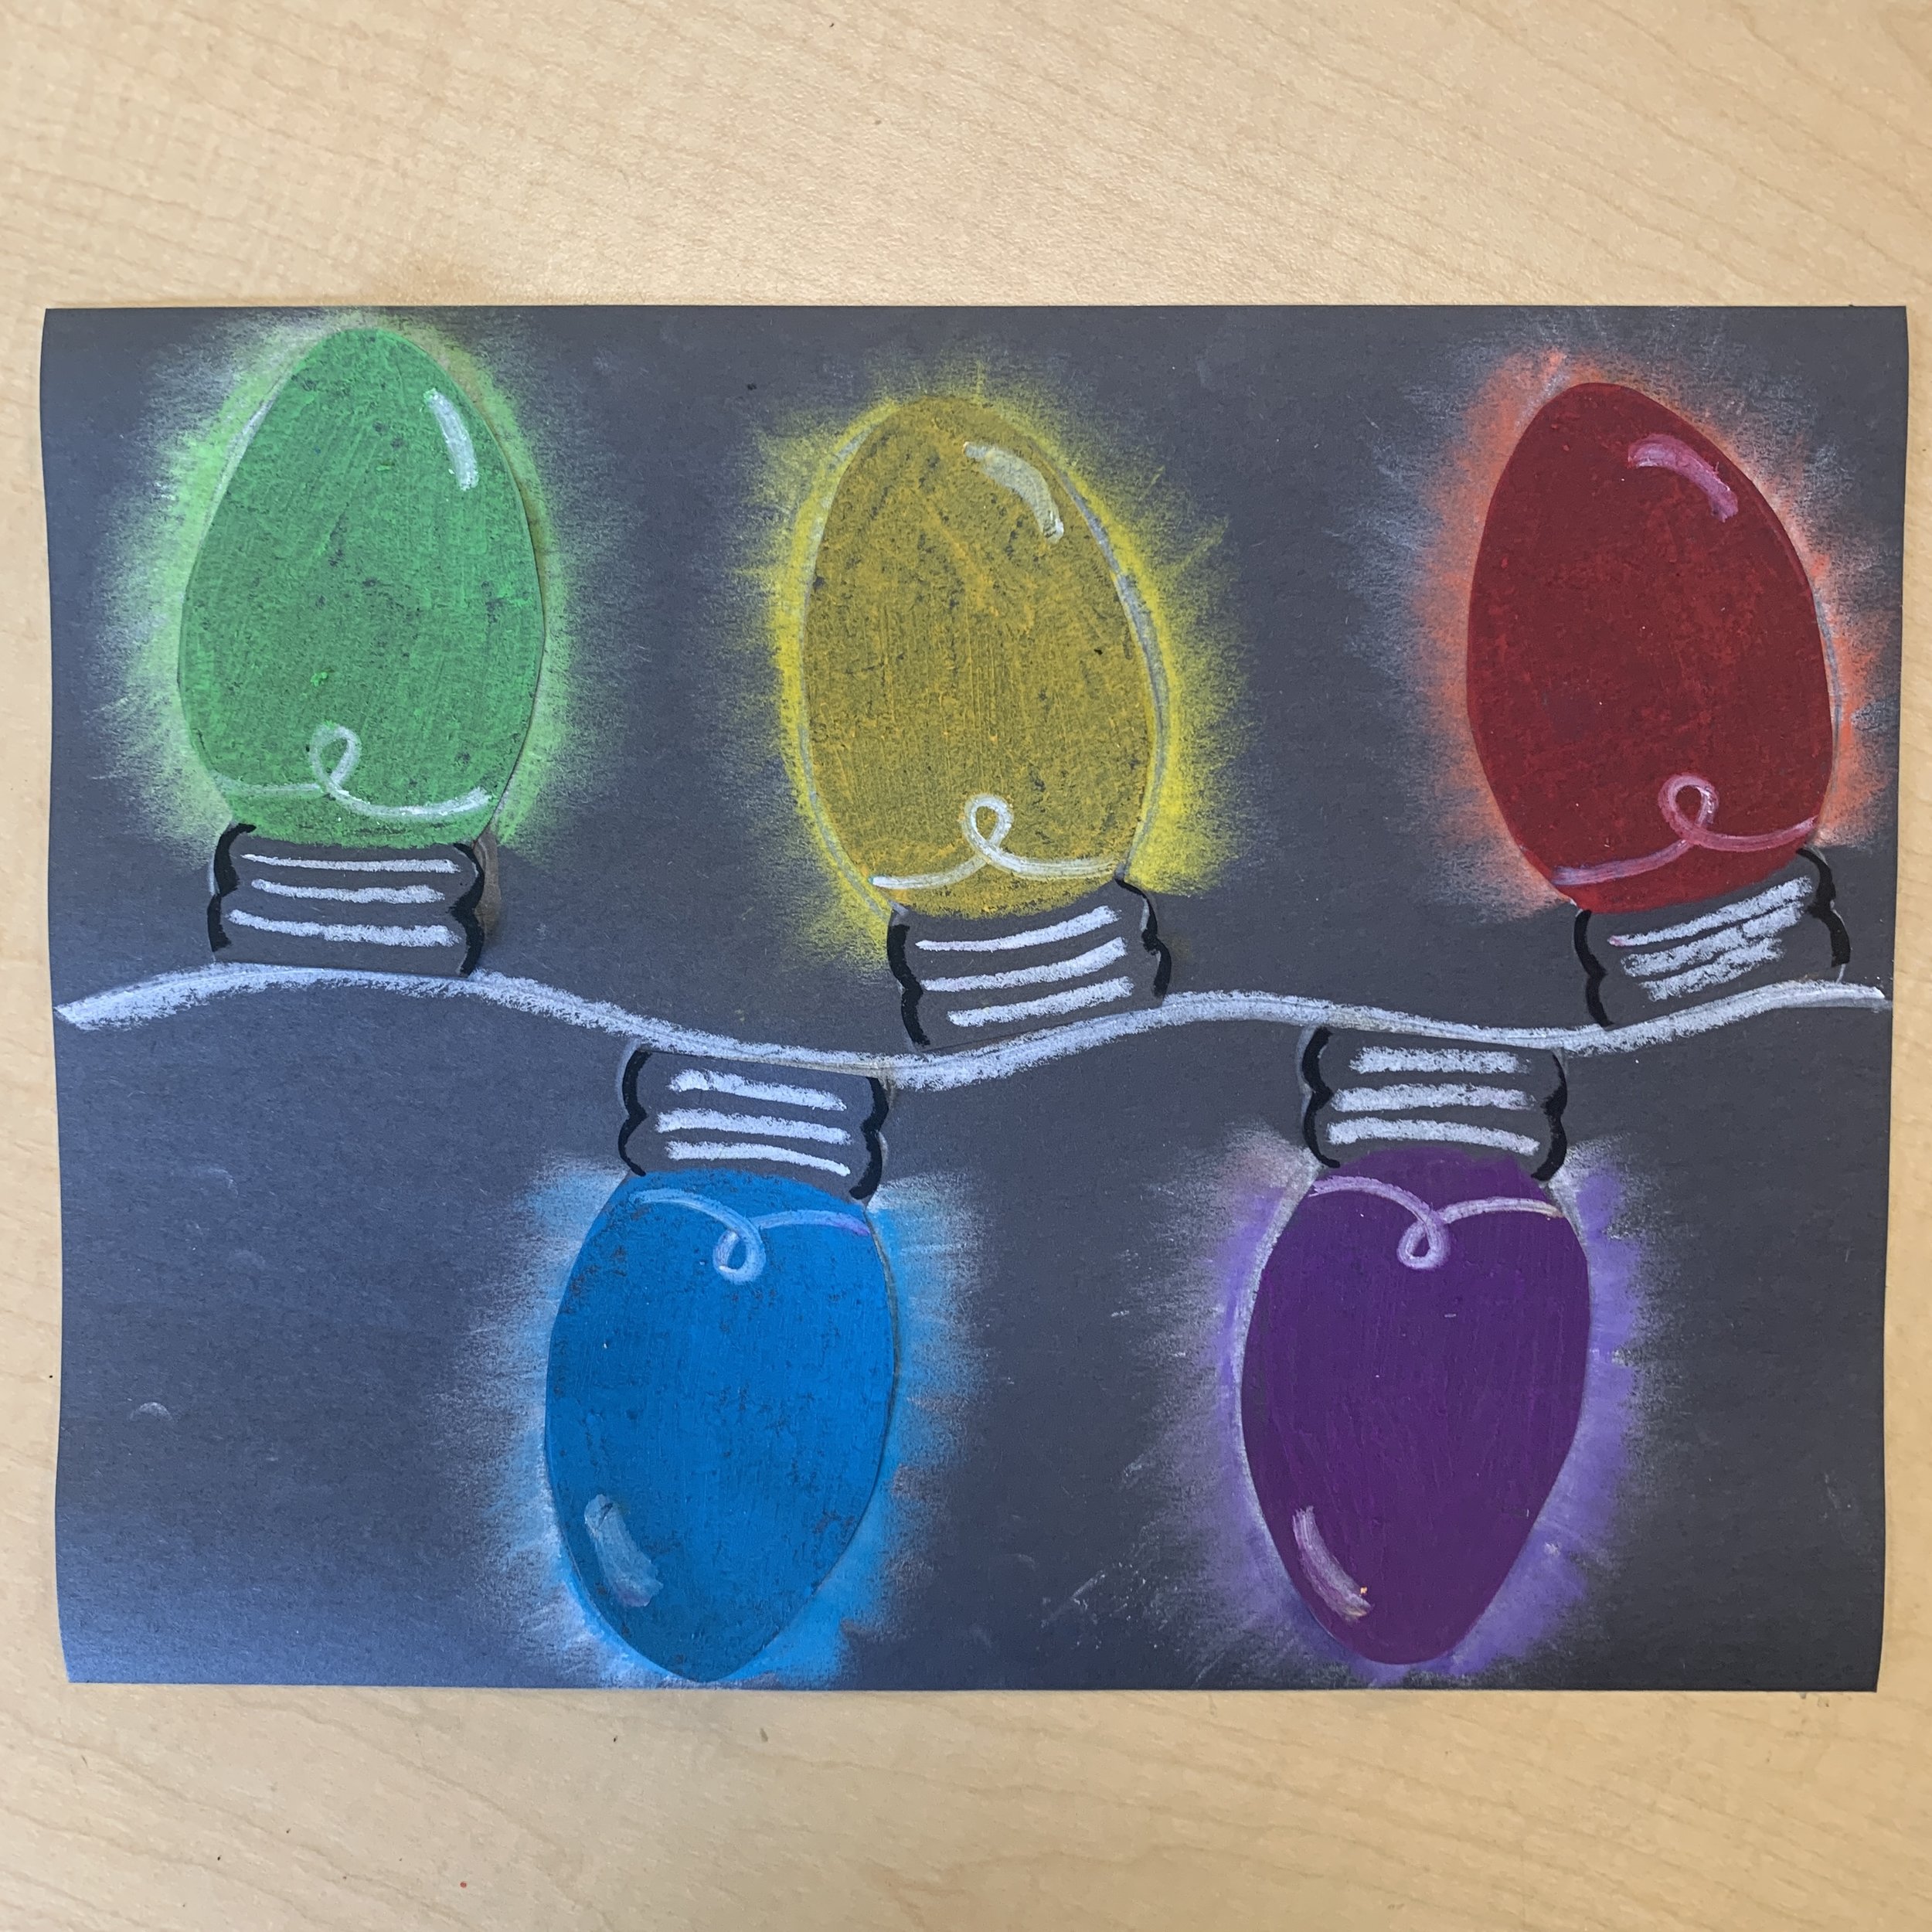
Cut out the lights and glue them onto your full sheet. It should now look like they’re glowing.
You can use hairspray to try to “set” the chalk. It’s not perfect but it may help. The key is to use a hairspray with a very fine mist so that large droplets don’t land on the paper or chalk and discolour it.