

Foil Transfer Christmas Ornaments Art Project

Time required (requires 1 day of dry time in between):
Day 1 - 40 minutes
Day 2 - 30 minutes
Materials Day 1:
White paper
Pre-print the ornament shapes OR use tracers
Sharpie
Markers
Tin foil (one paper sized sheet per student)
Spray bottle with water
Materials Day 2:
Construction paper (any colour other than green for background)
Oil pastels (white, dark and light green, brown, black)
Glue stick
Ornaments from step 1
Scissors


Procedure - Day 1
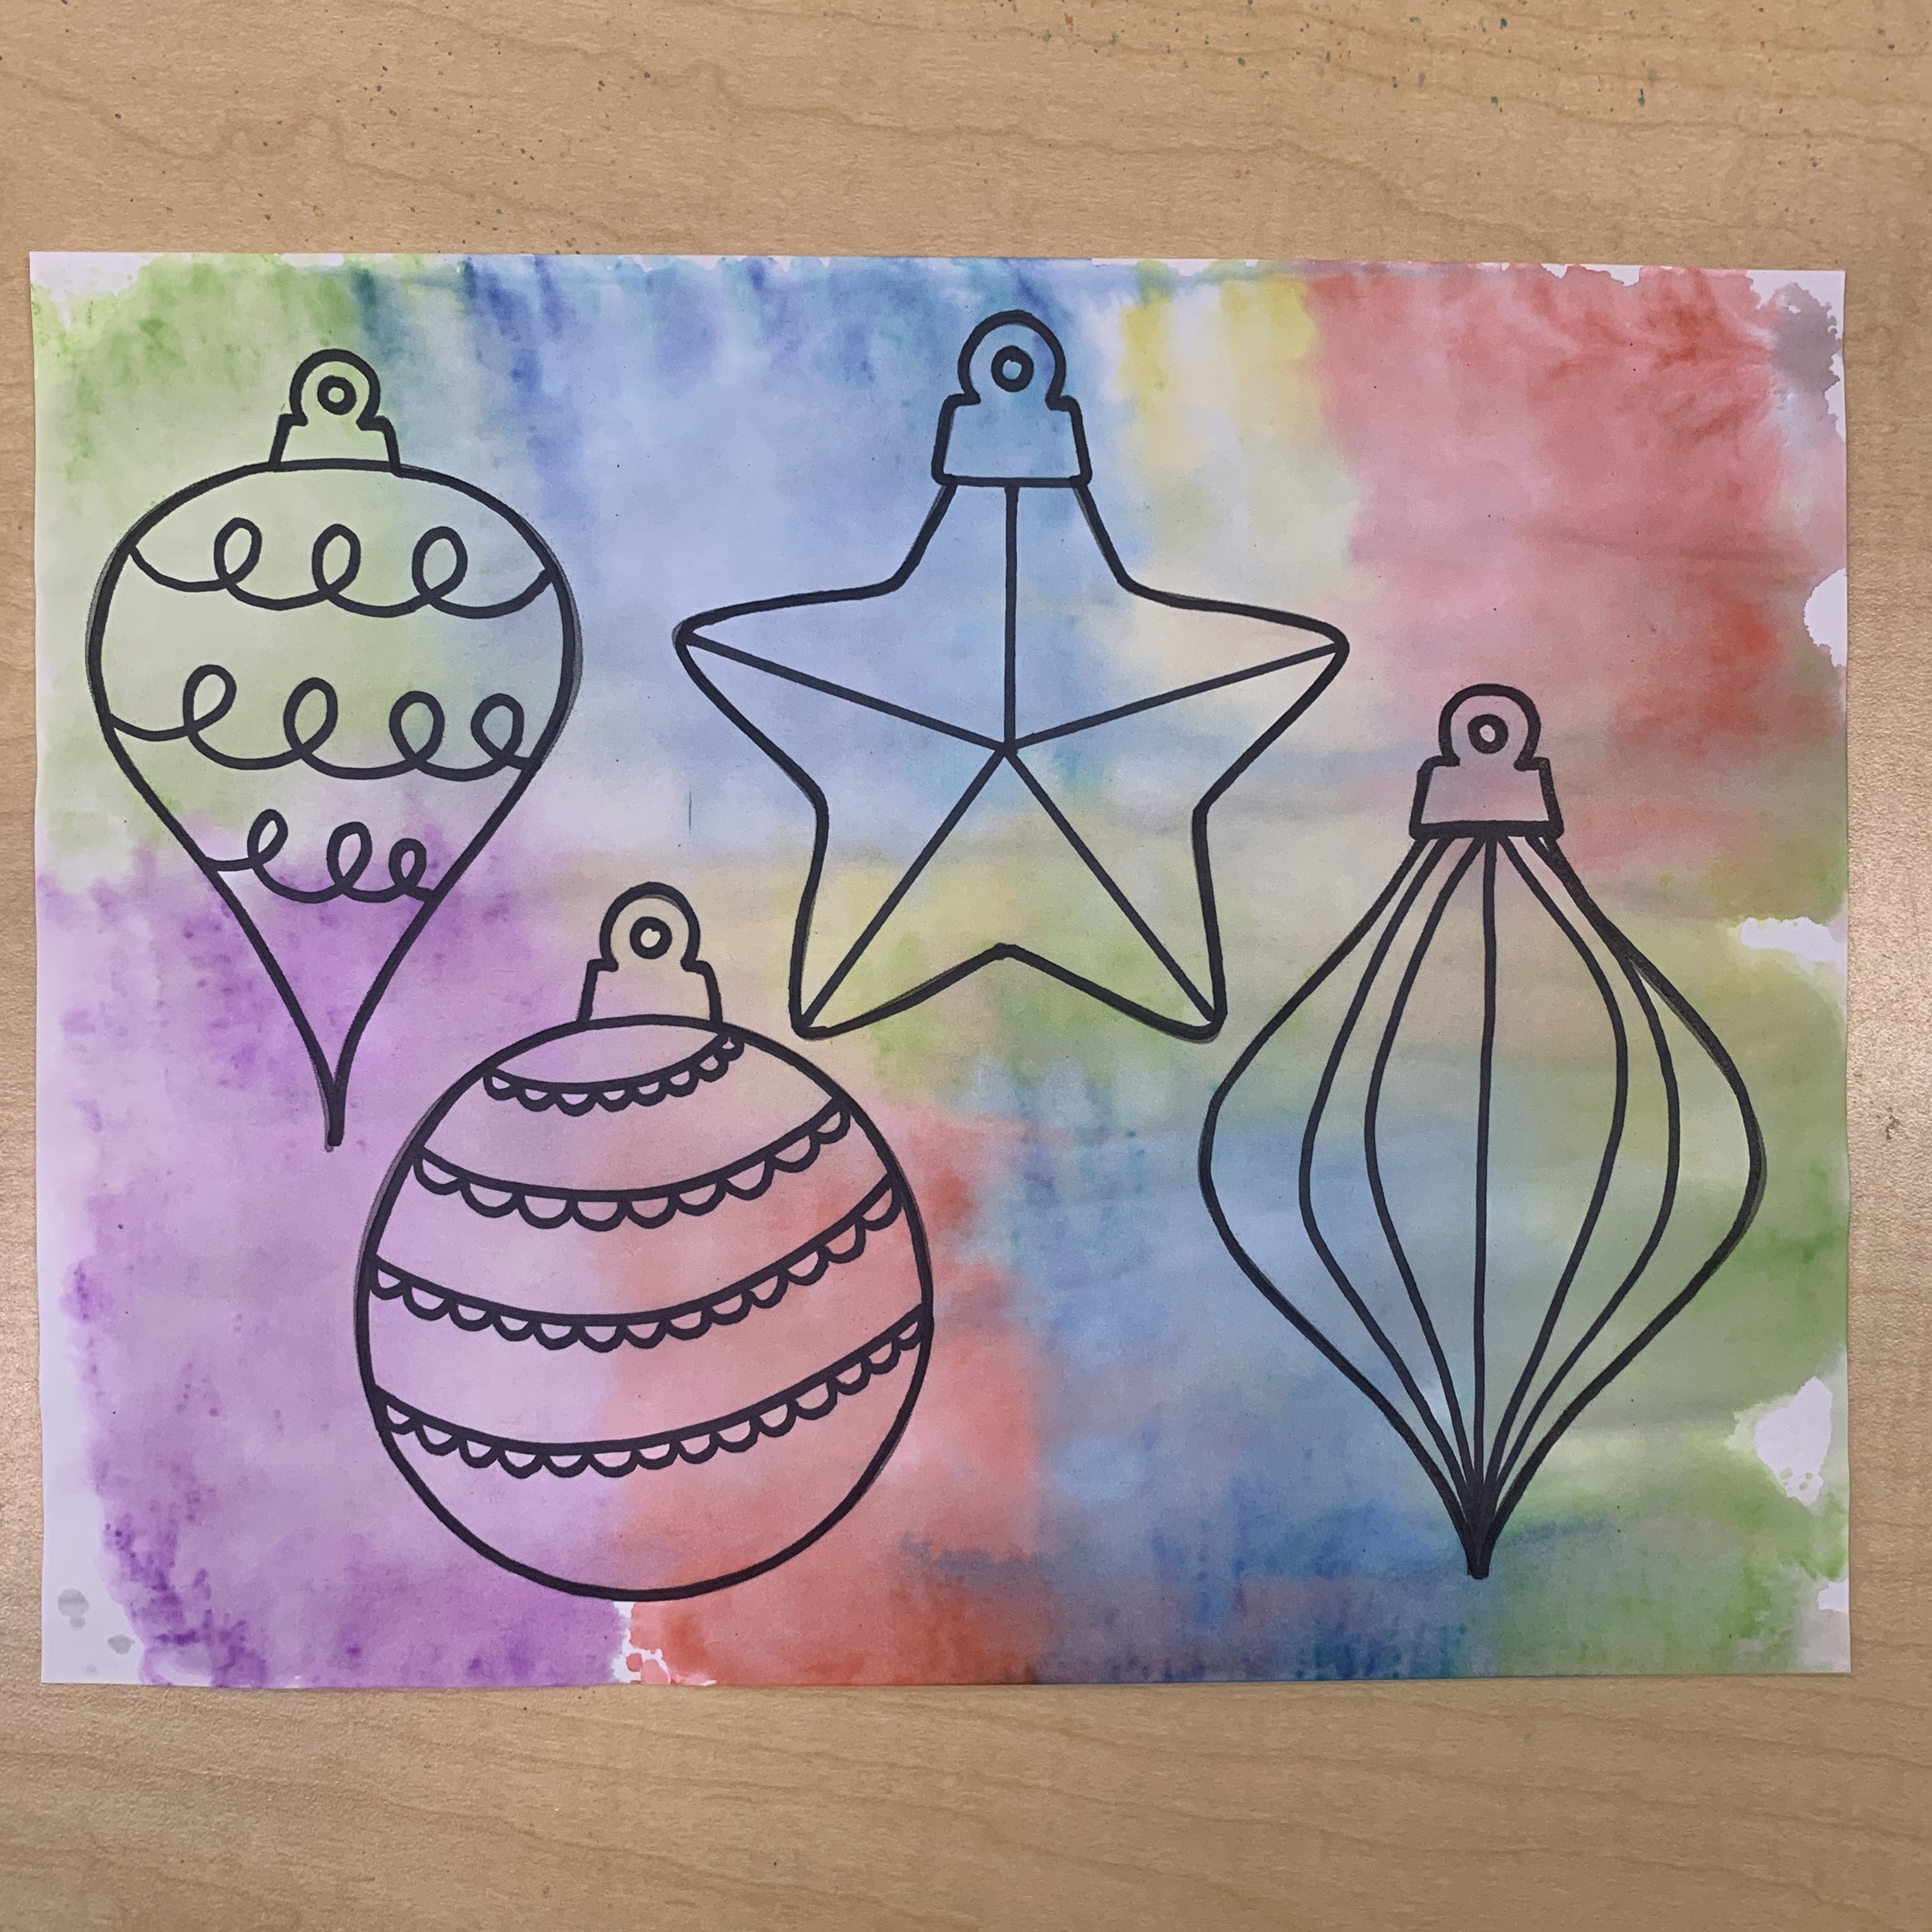
Trace your ornament shapes or have them pre-printed on white paper.
Use a Sharpie to draw designs on them.
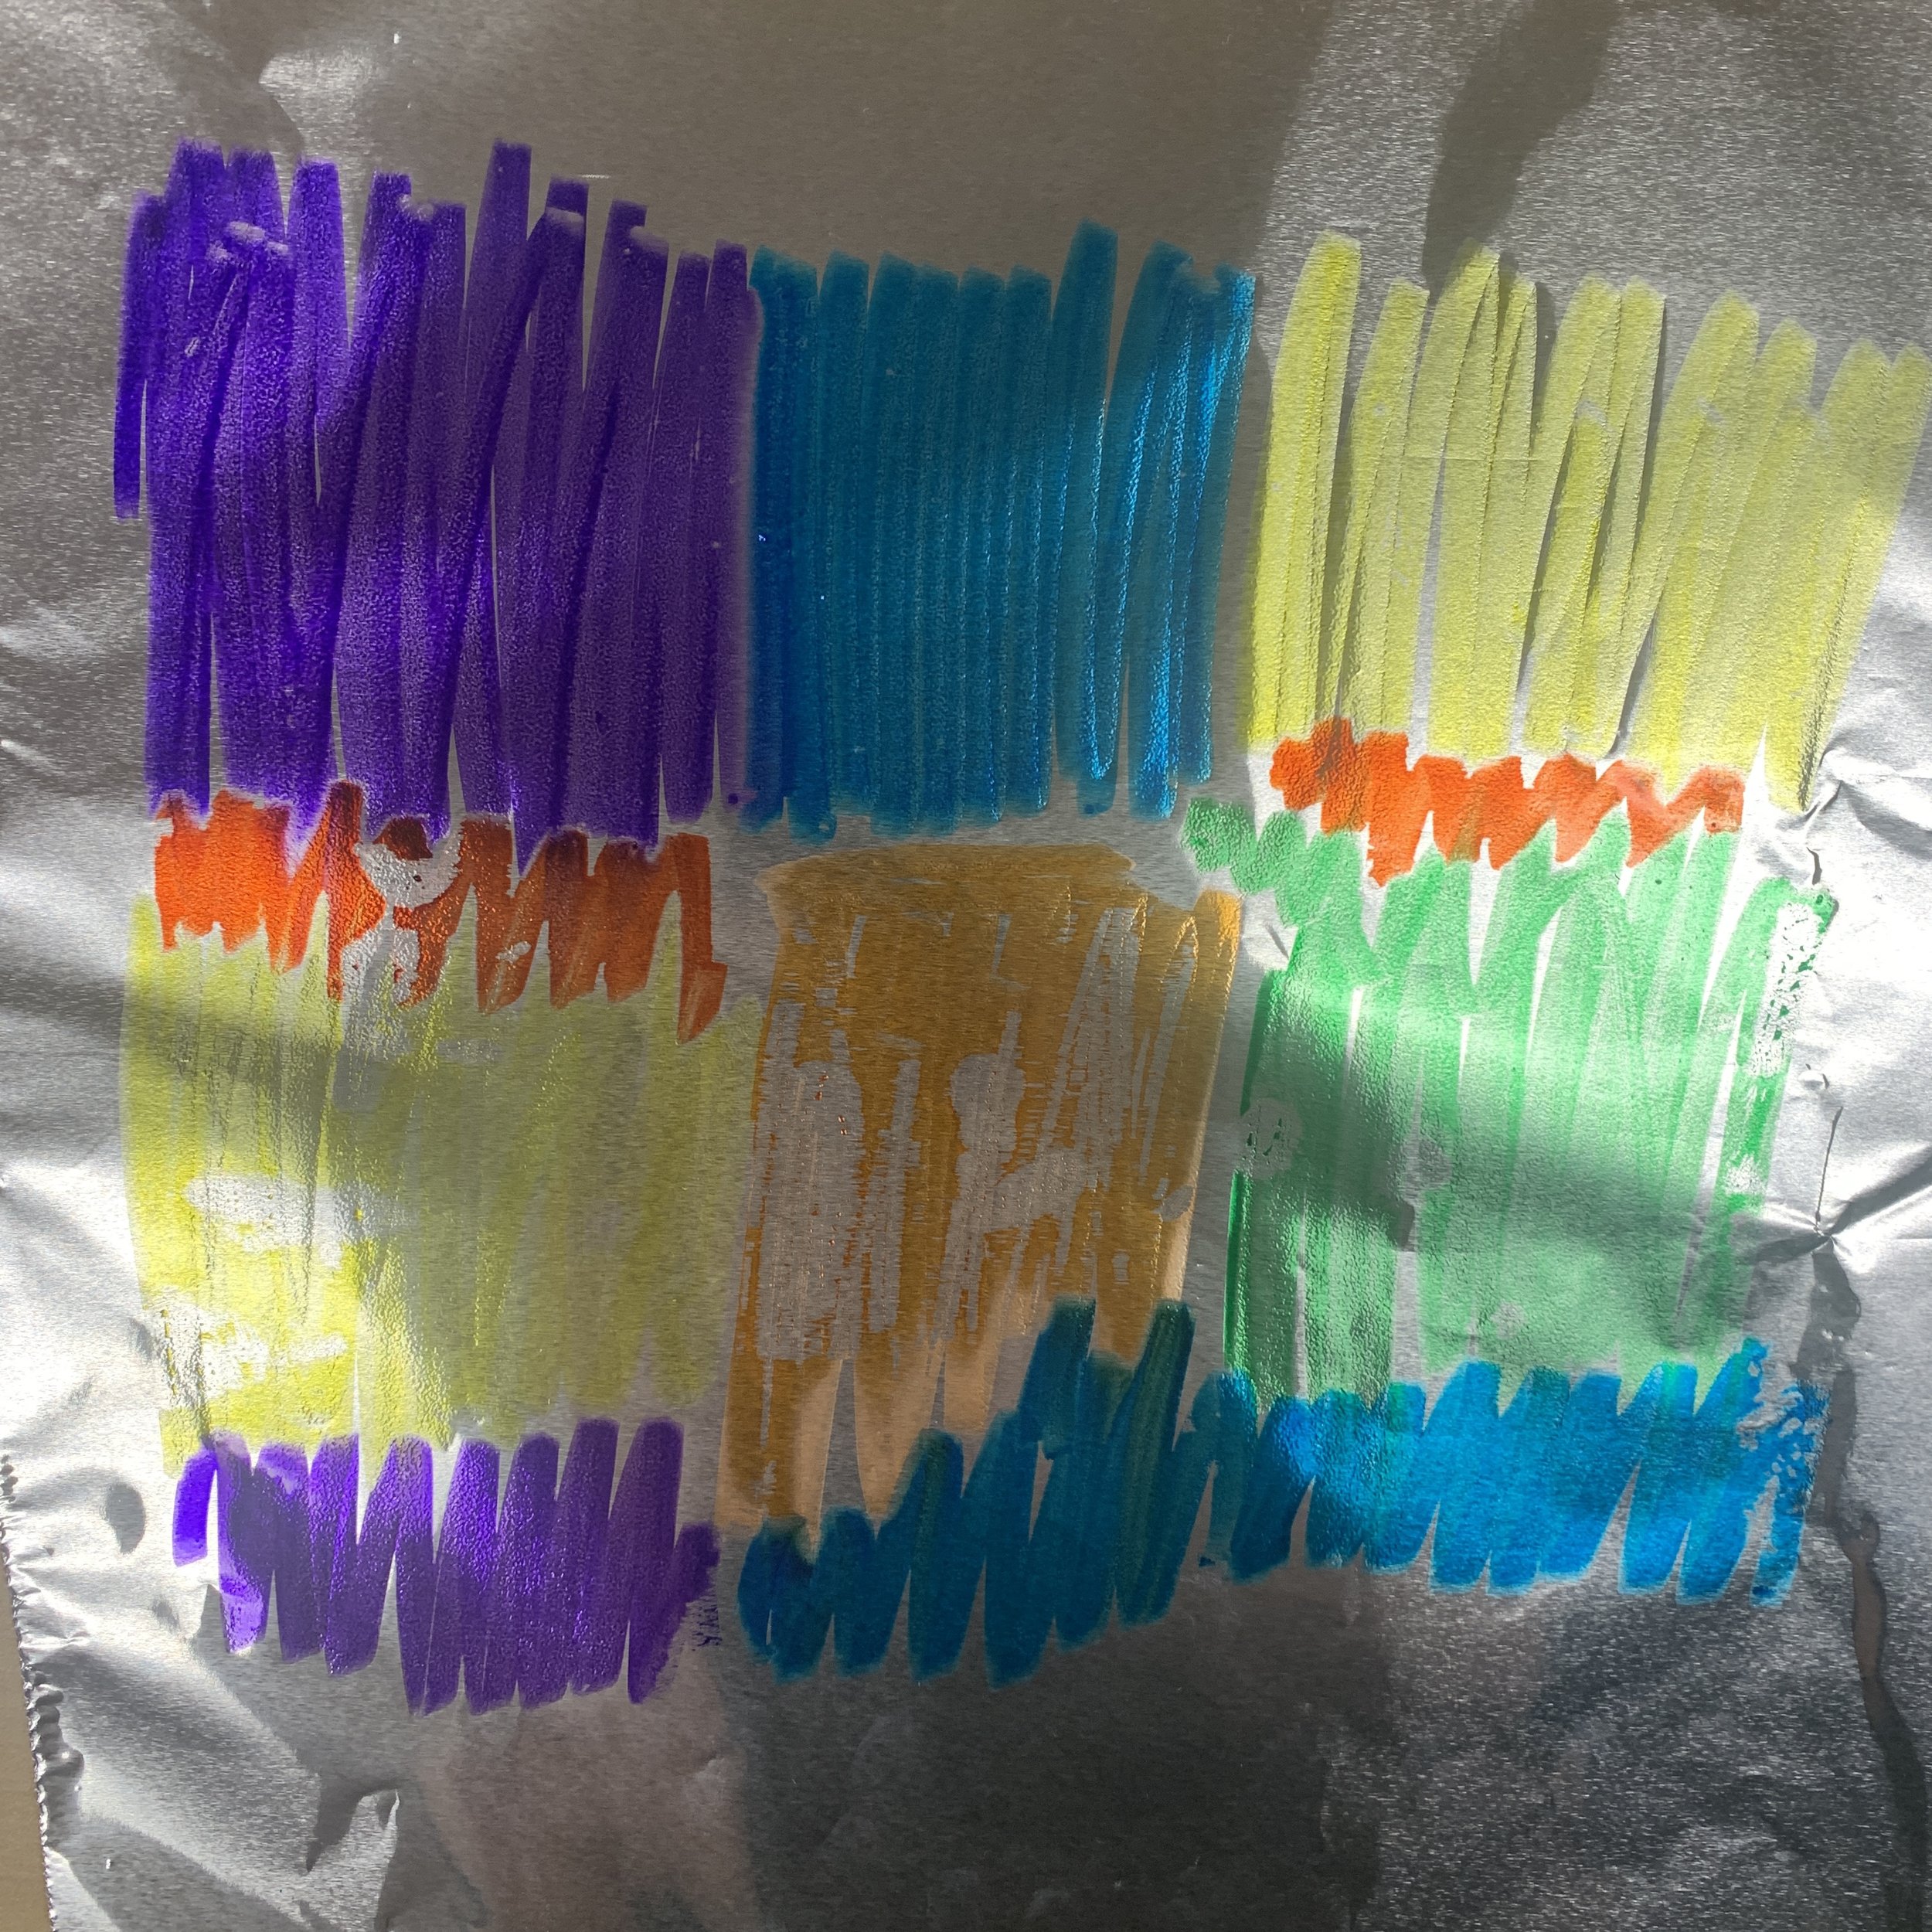
On a piece of tin foil, use any colours you’d like and colour right on the foil. Make sure that it’s the size of your paper.
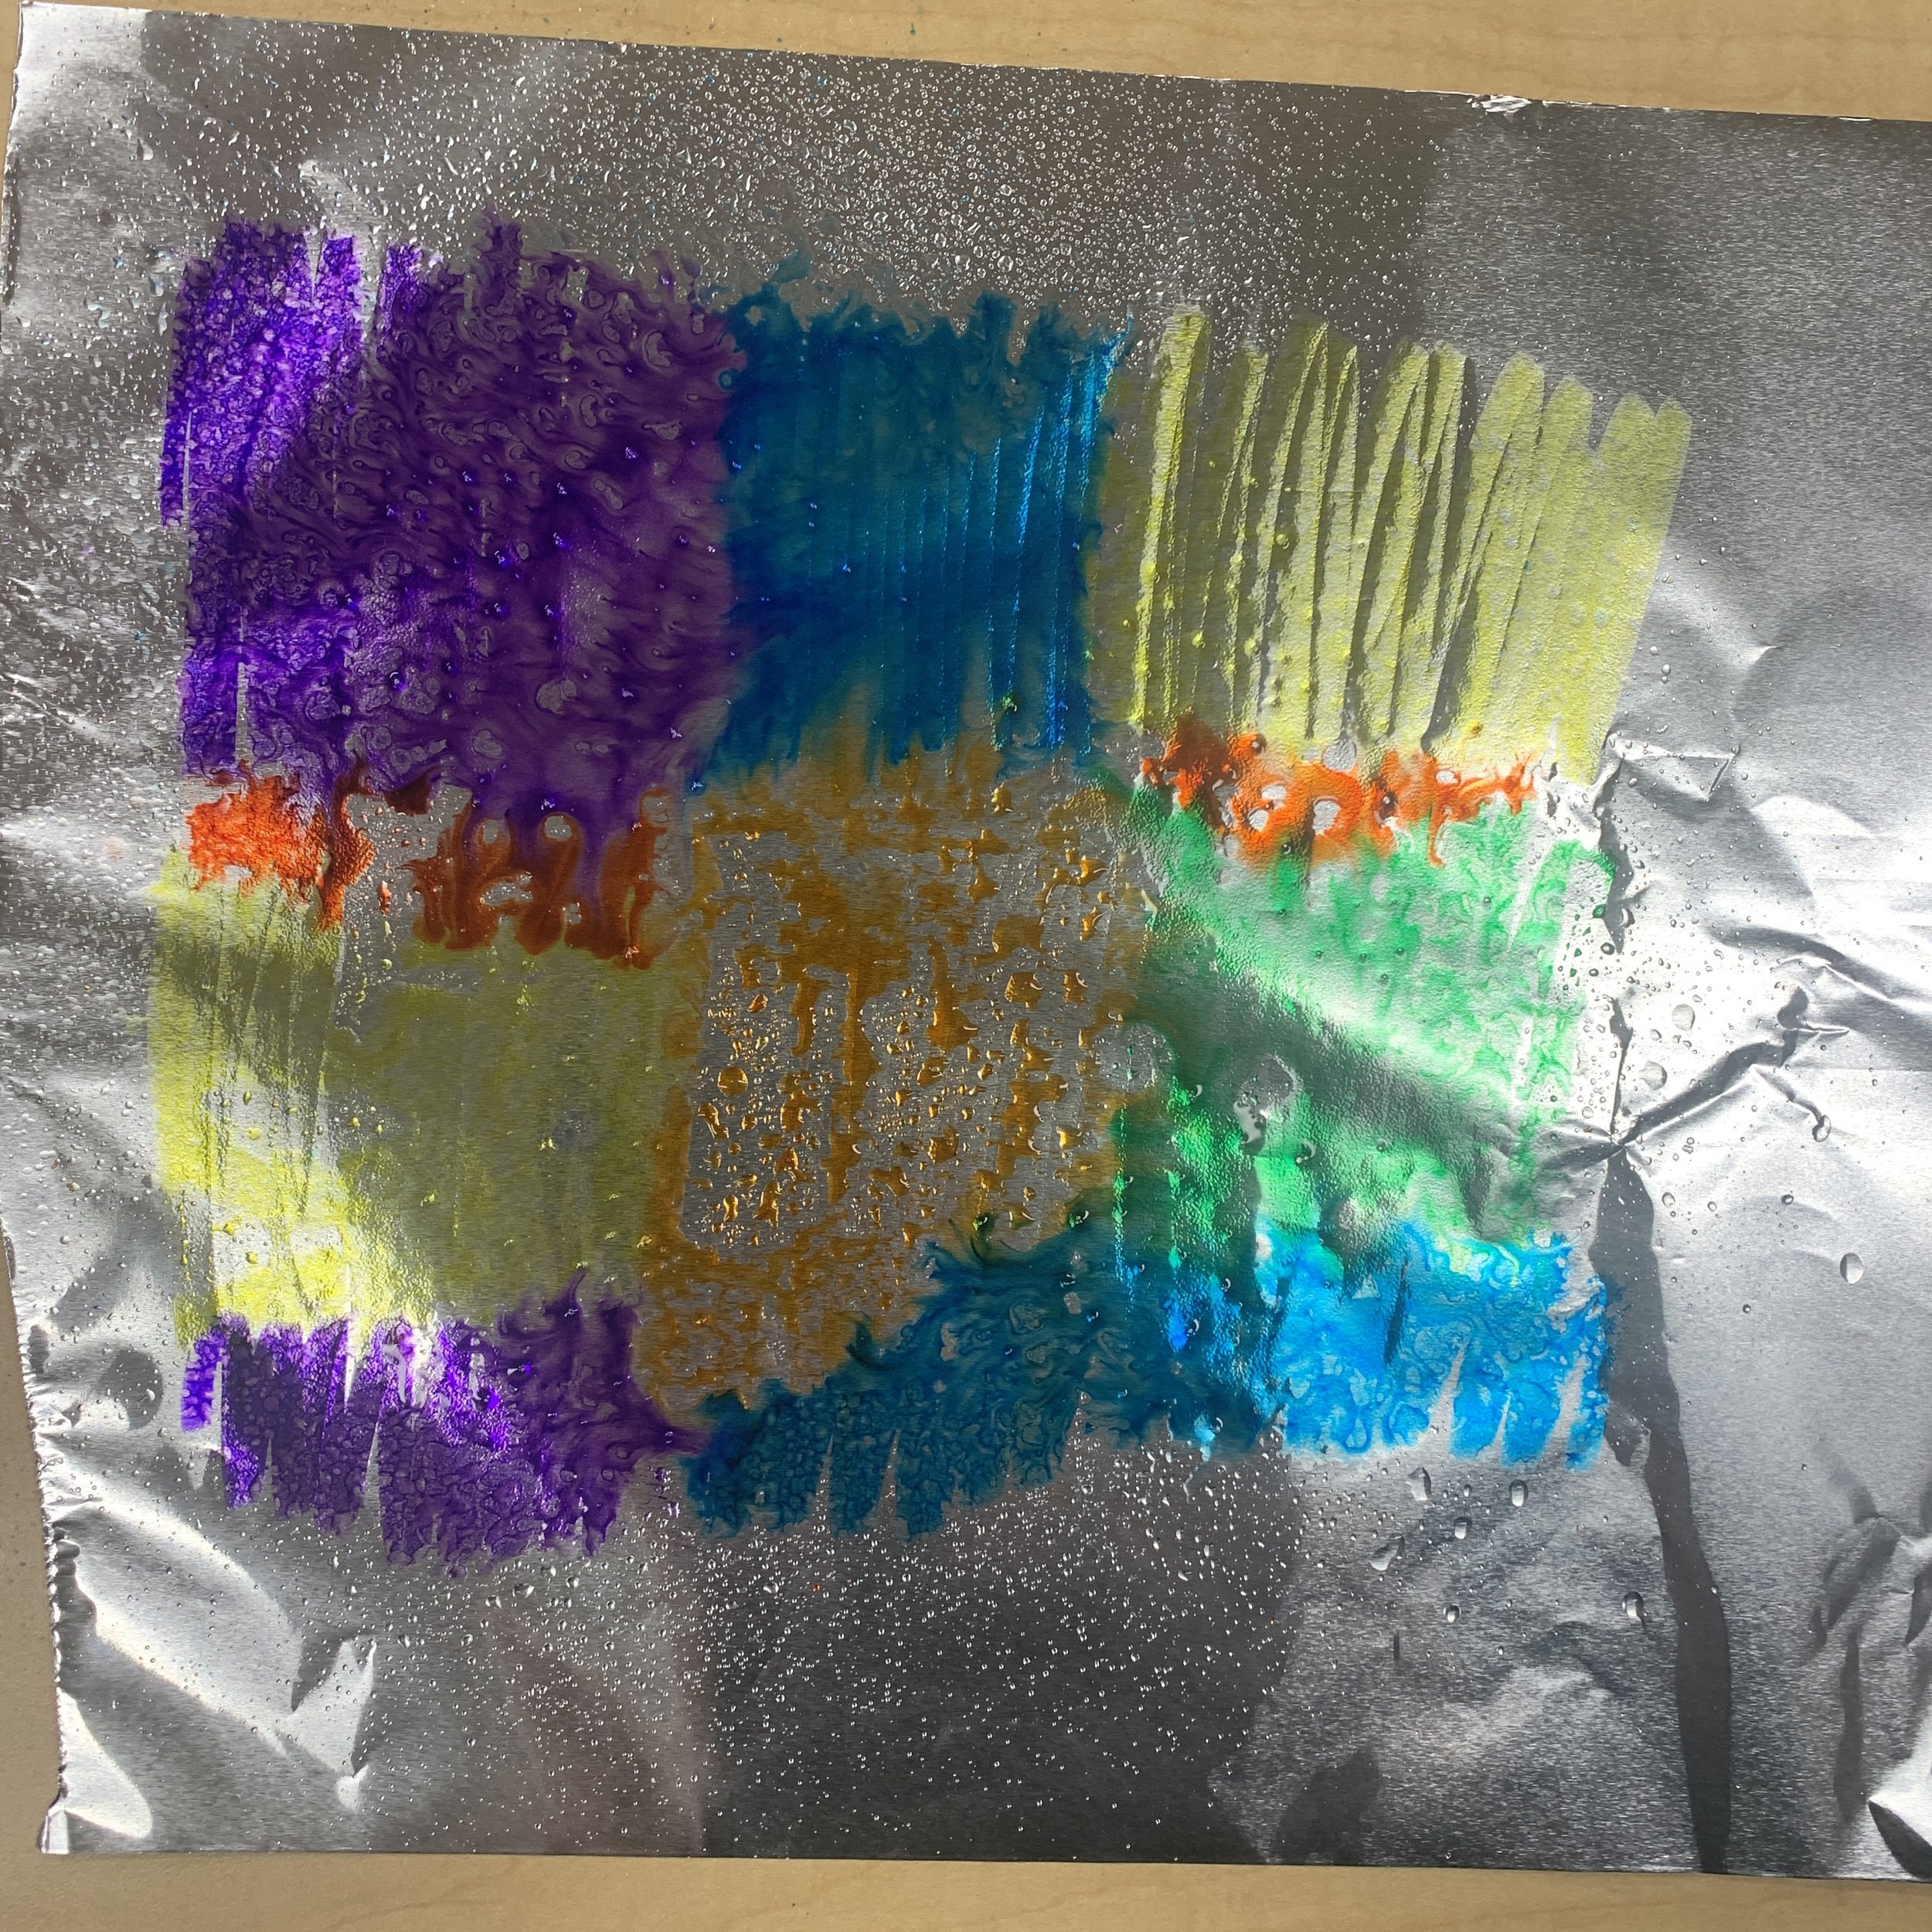
Use a spray bottle to wet the colours. Wait a few moments and allow the ink to lift.
Lay your paper face down onto the wet marker.
Gently press down, ensuring that each part gets ink transfer.
Carefully lift the paper off and set it aside to dry. I recommend a drying rack for this.
Procedure - Day 2:
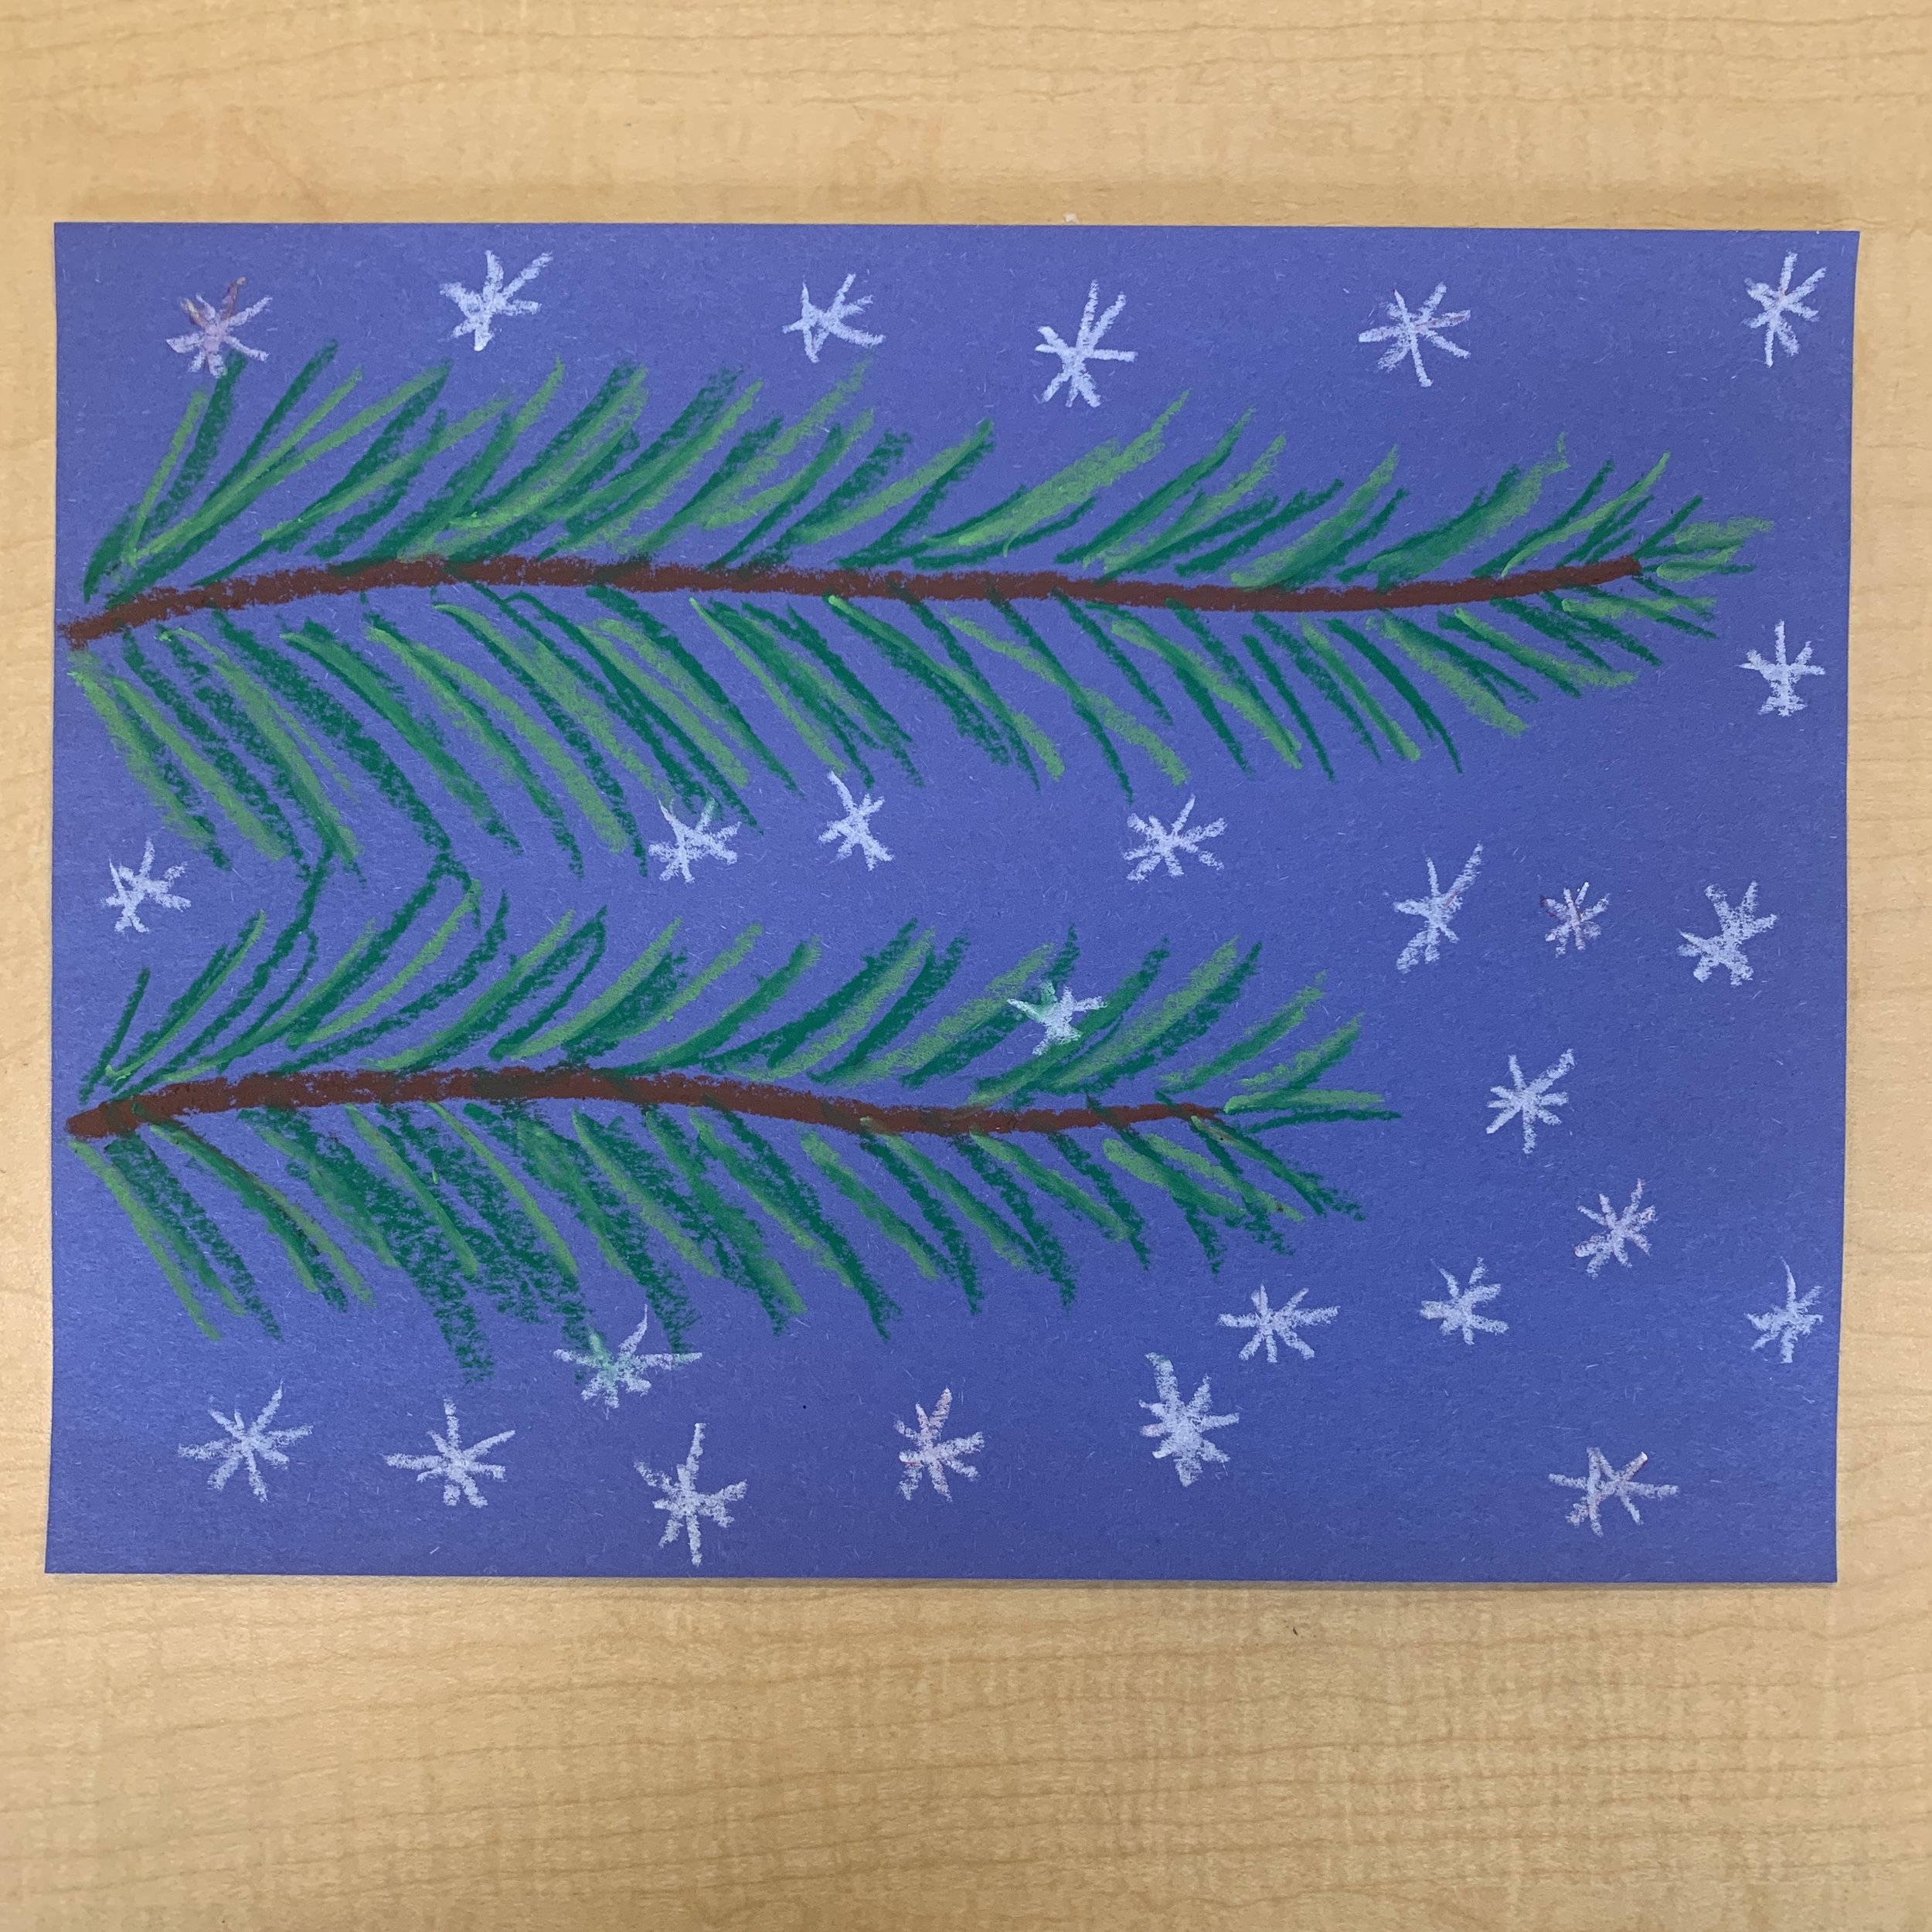
Draw two branches on your coloured construction paper with brown oil pastel.
Use the two green oil pastels to create needles on each branch.
Draw some snow (or stars) around your branches to fill in the background gaps.
Cut out the ornaments from day 1.
Glue your ornaments down on top of the background, close enough to a branch that a hook could naturally fit.
Use a black oil pastel to draw hooks from the top of the ornament onto the branch.

