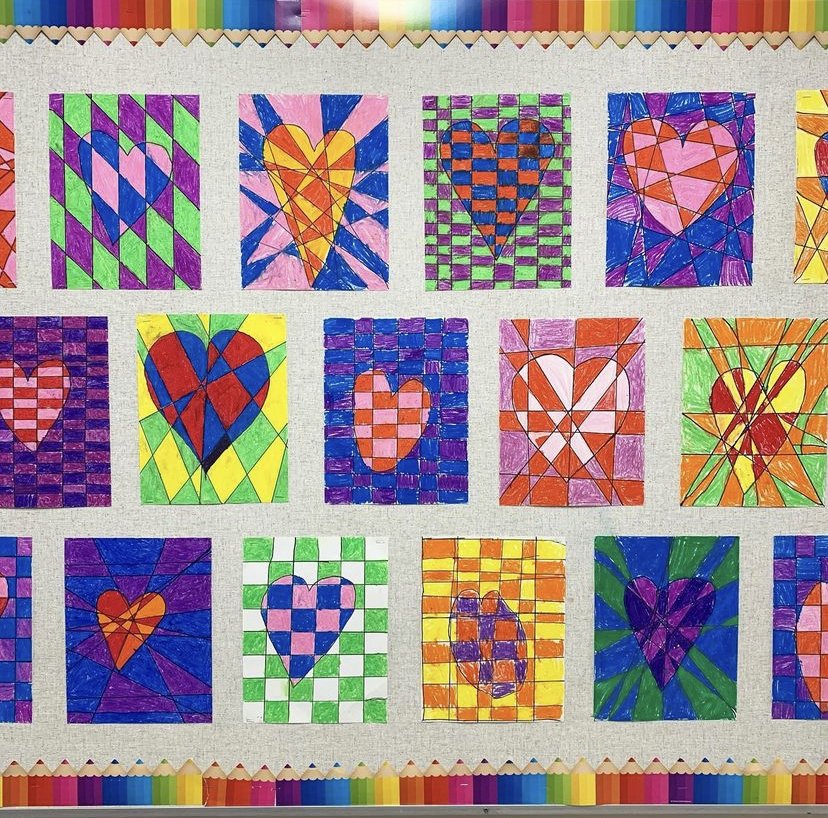
Geometric Heart Valentine’s Day Art Project
Timeline: 45 min-1 hour (colouring medium will impact the time it takes)
Materials:
White paper (card stock or copy paper weight)
Ruler
Pencil
Sharpie
Colouring tool (crayons, markers, pencil crayons, paint or pastels)
Optional: scissors (if doing a square version)
Steps:
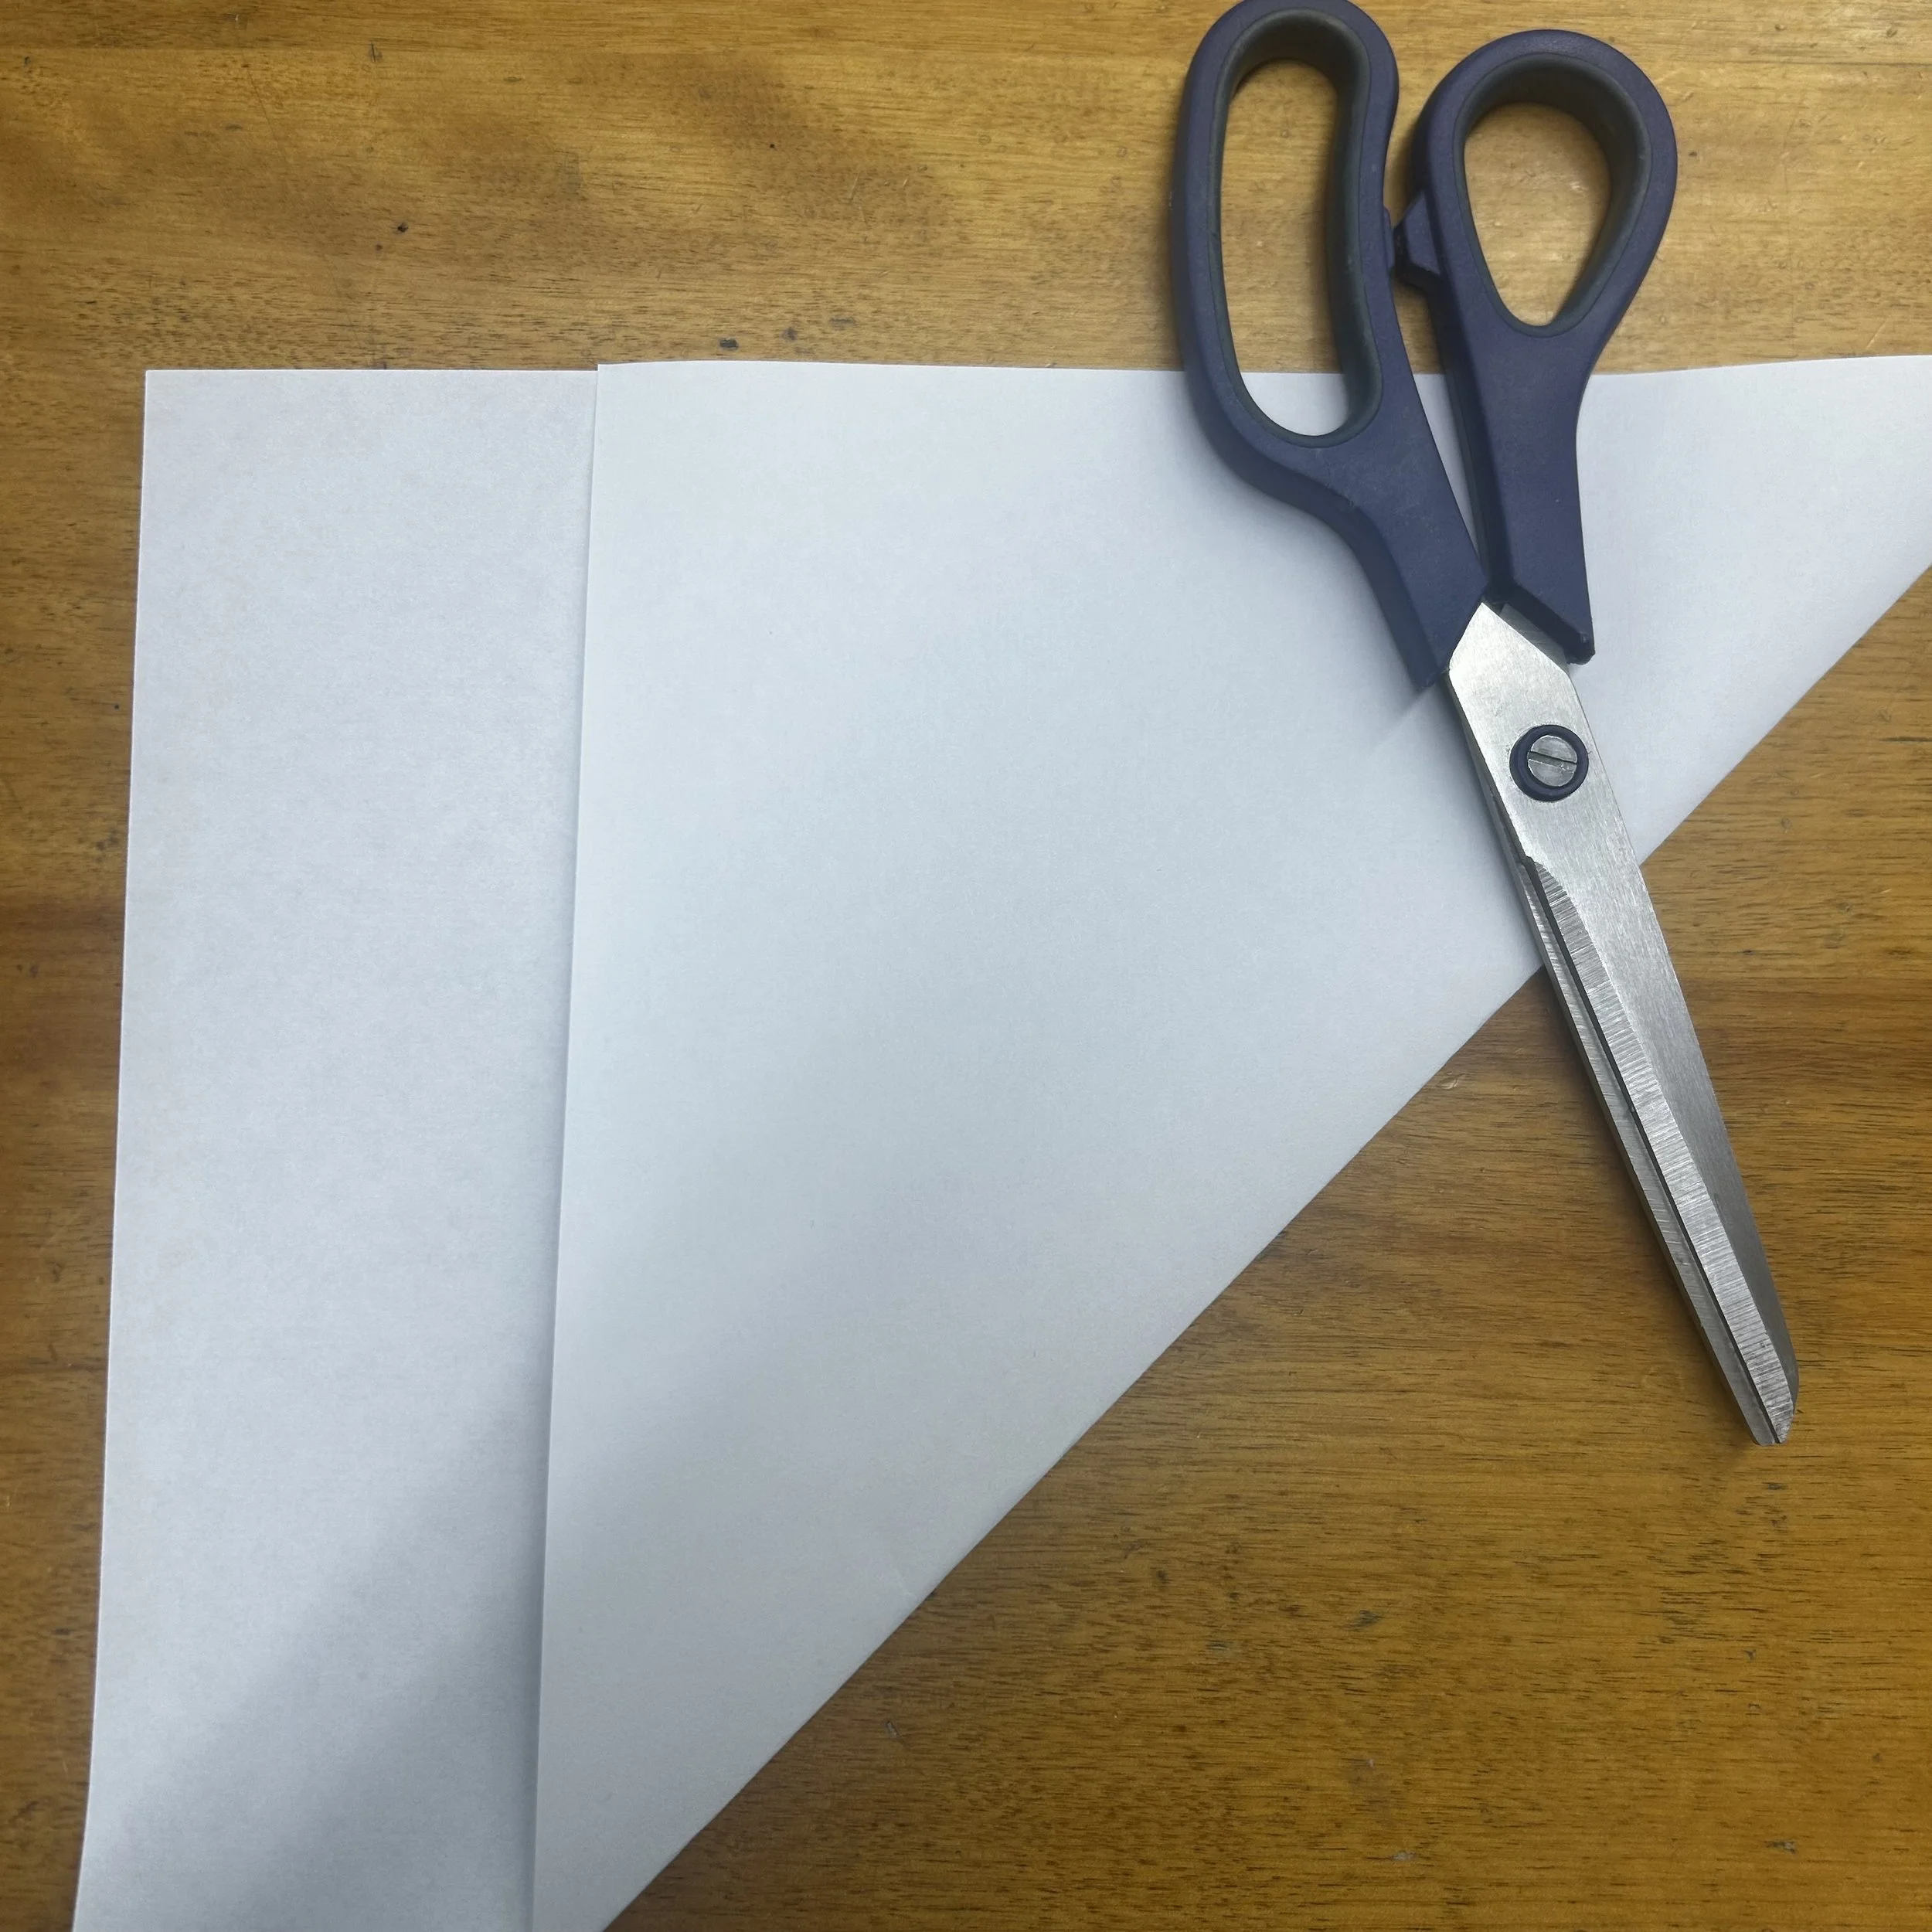
Optional step for square project
Fold the paper across itself, ensuring the corners are in line. Cut the extra bit off.
Depending on the age of your students you may choose to just cut the paper into squares for them or have them do this step themselves. It’s totally optional. Rectangular works too!
Main steps
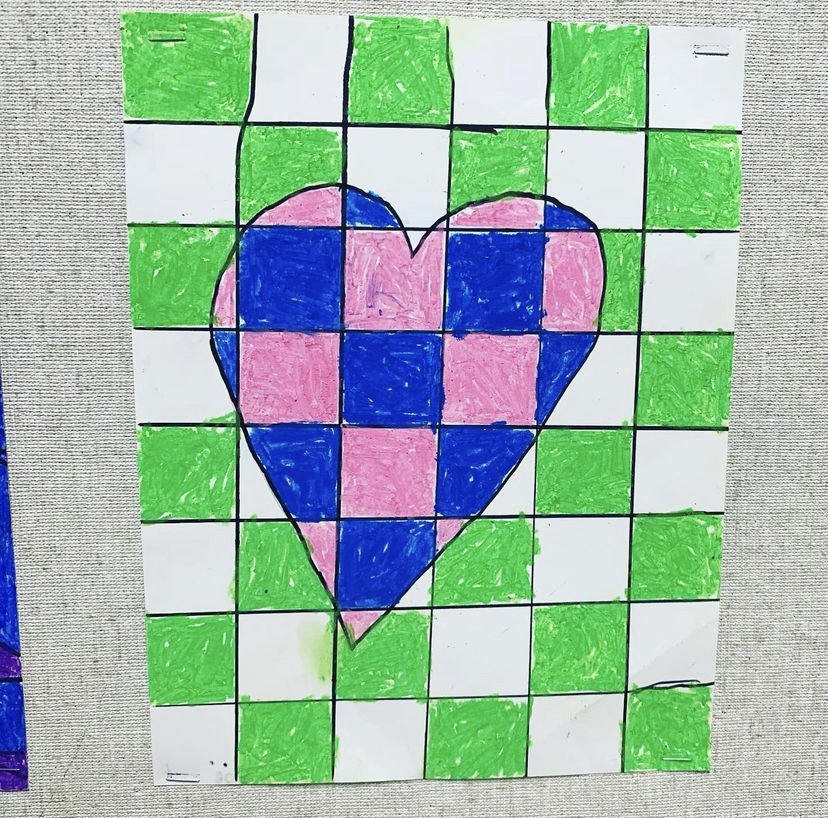
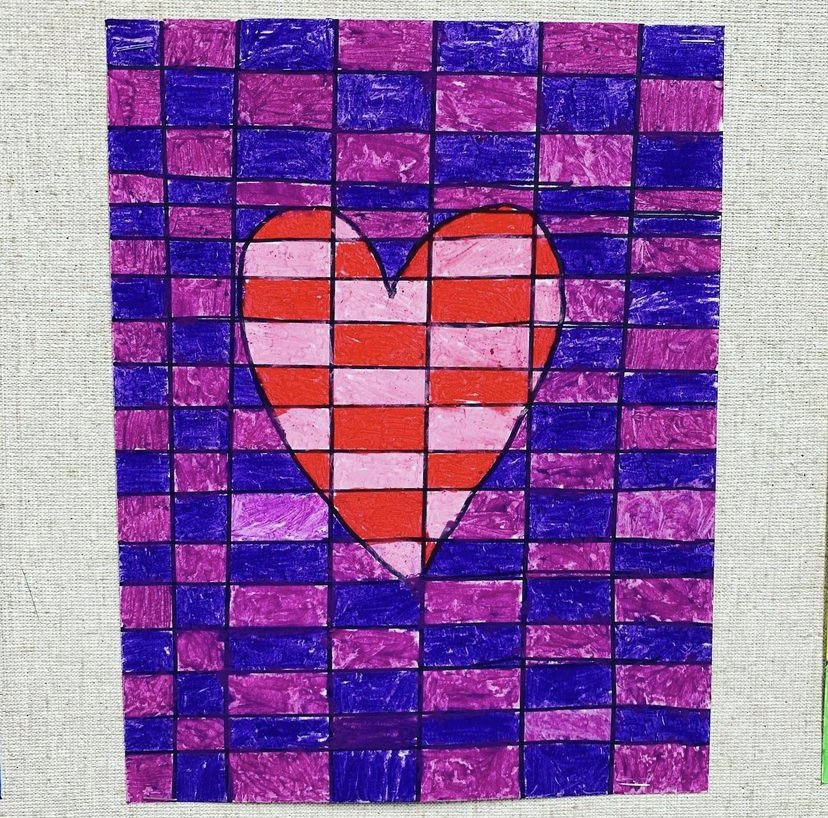
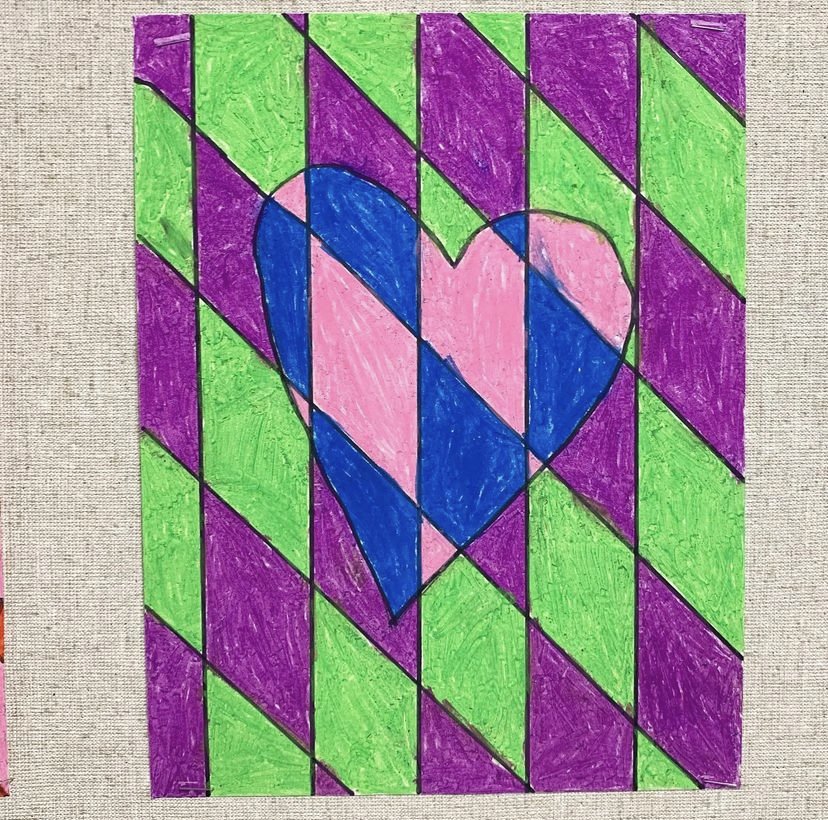
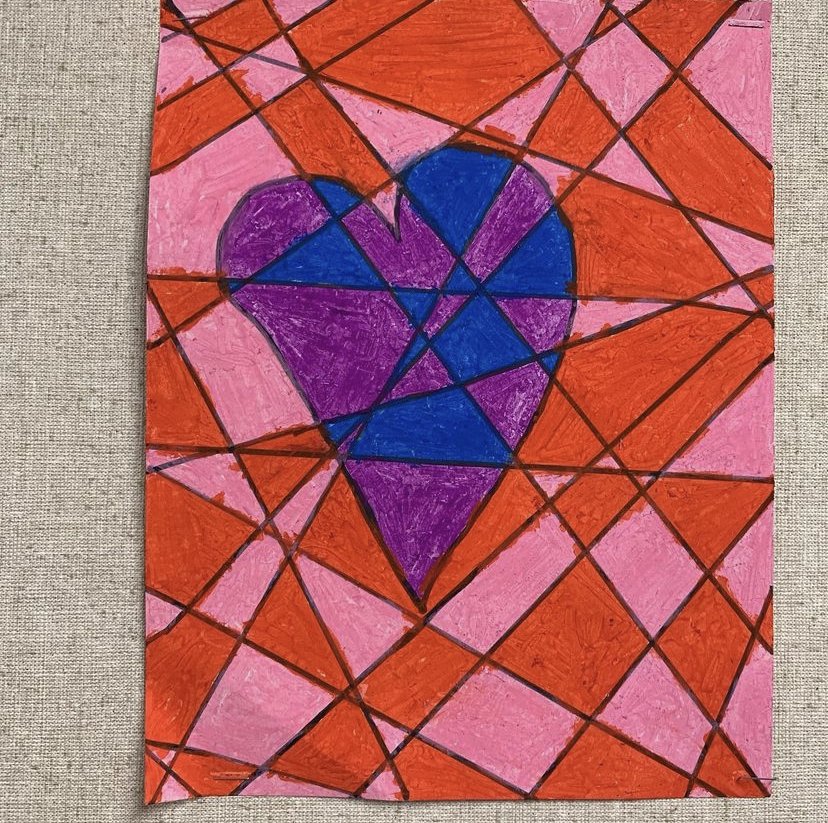
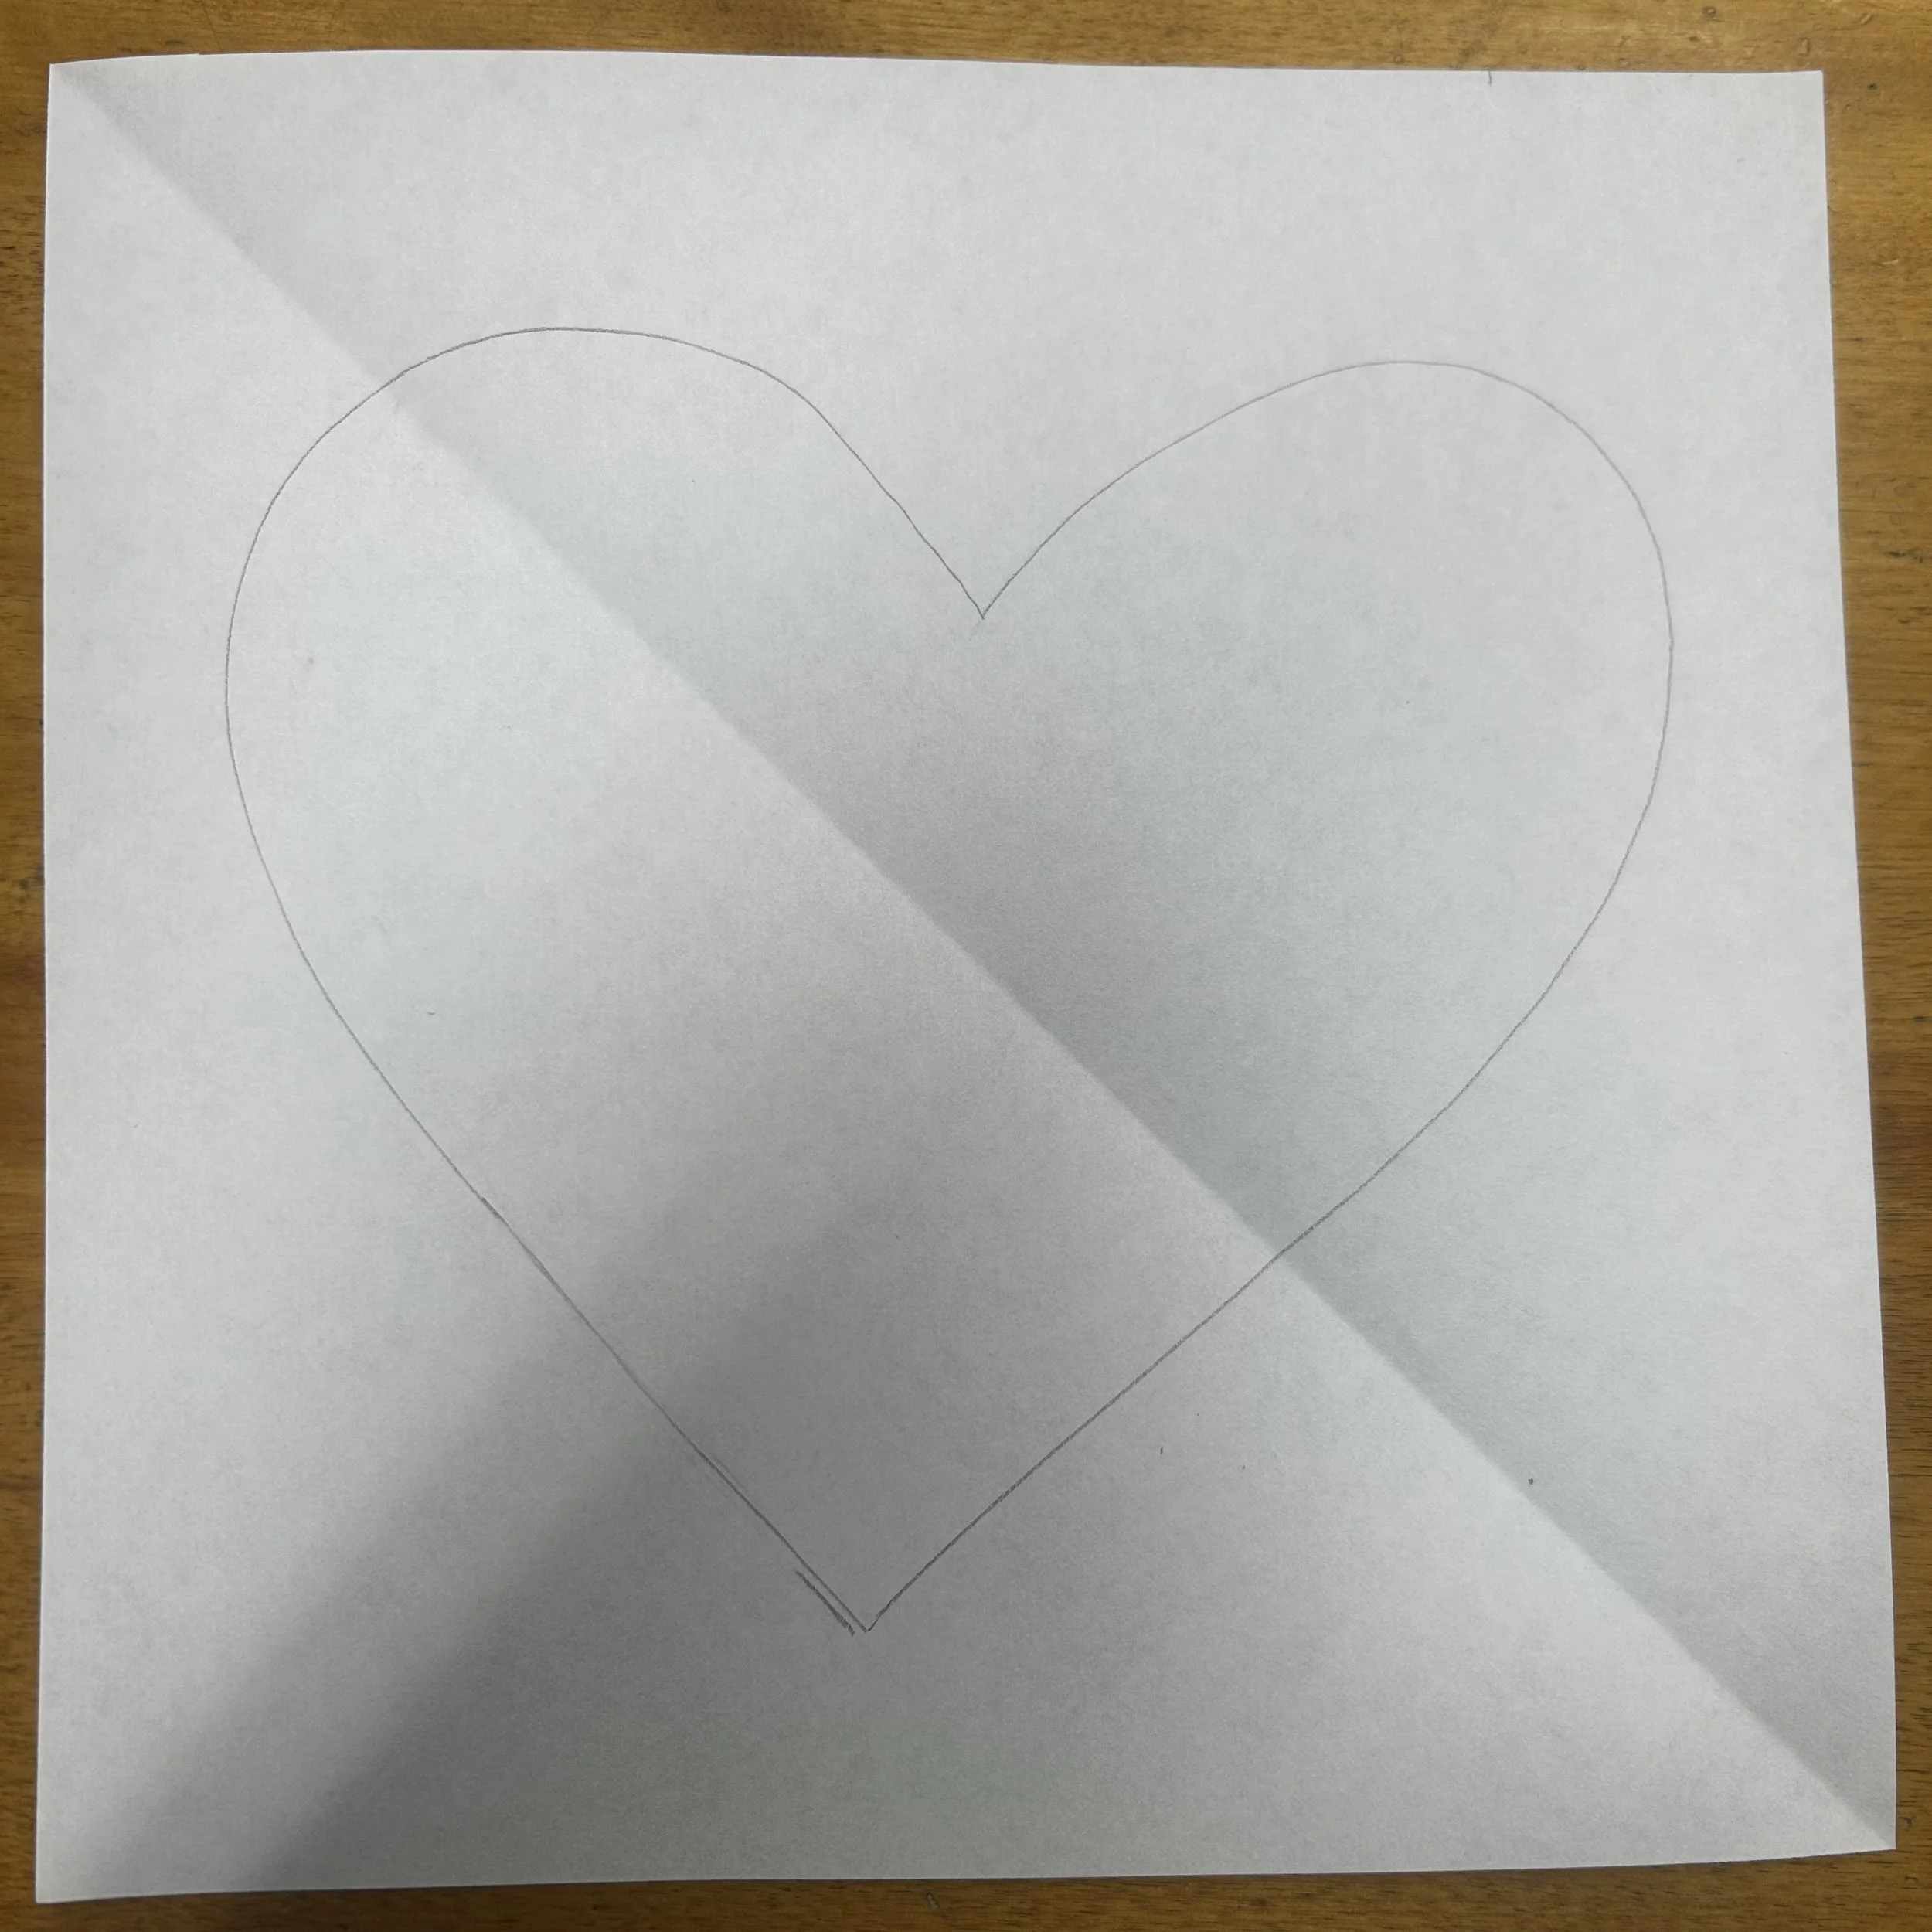
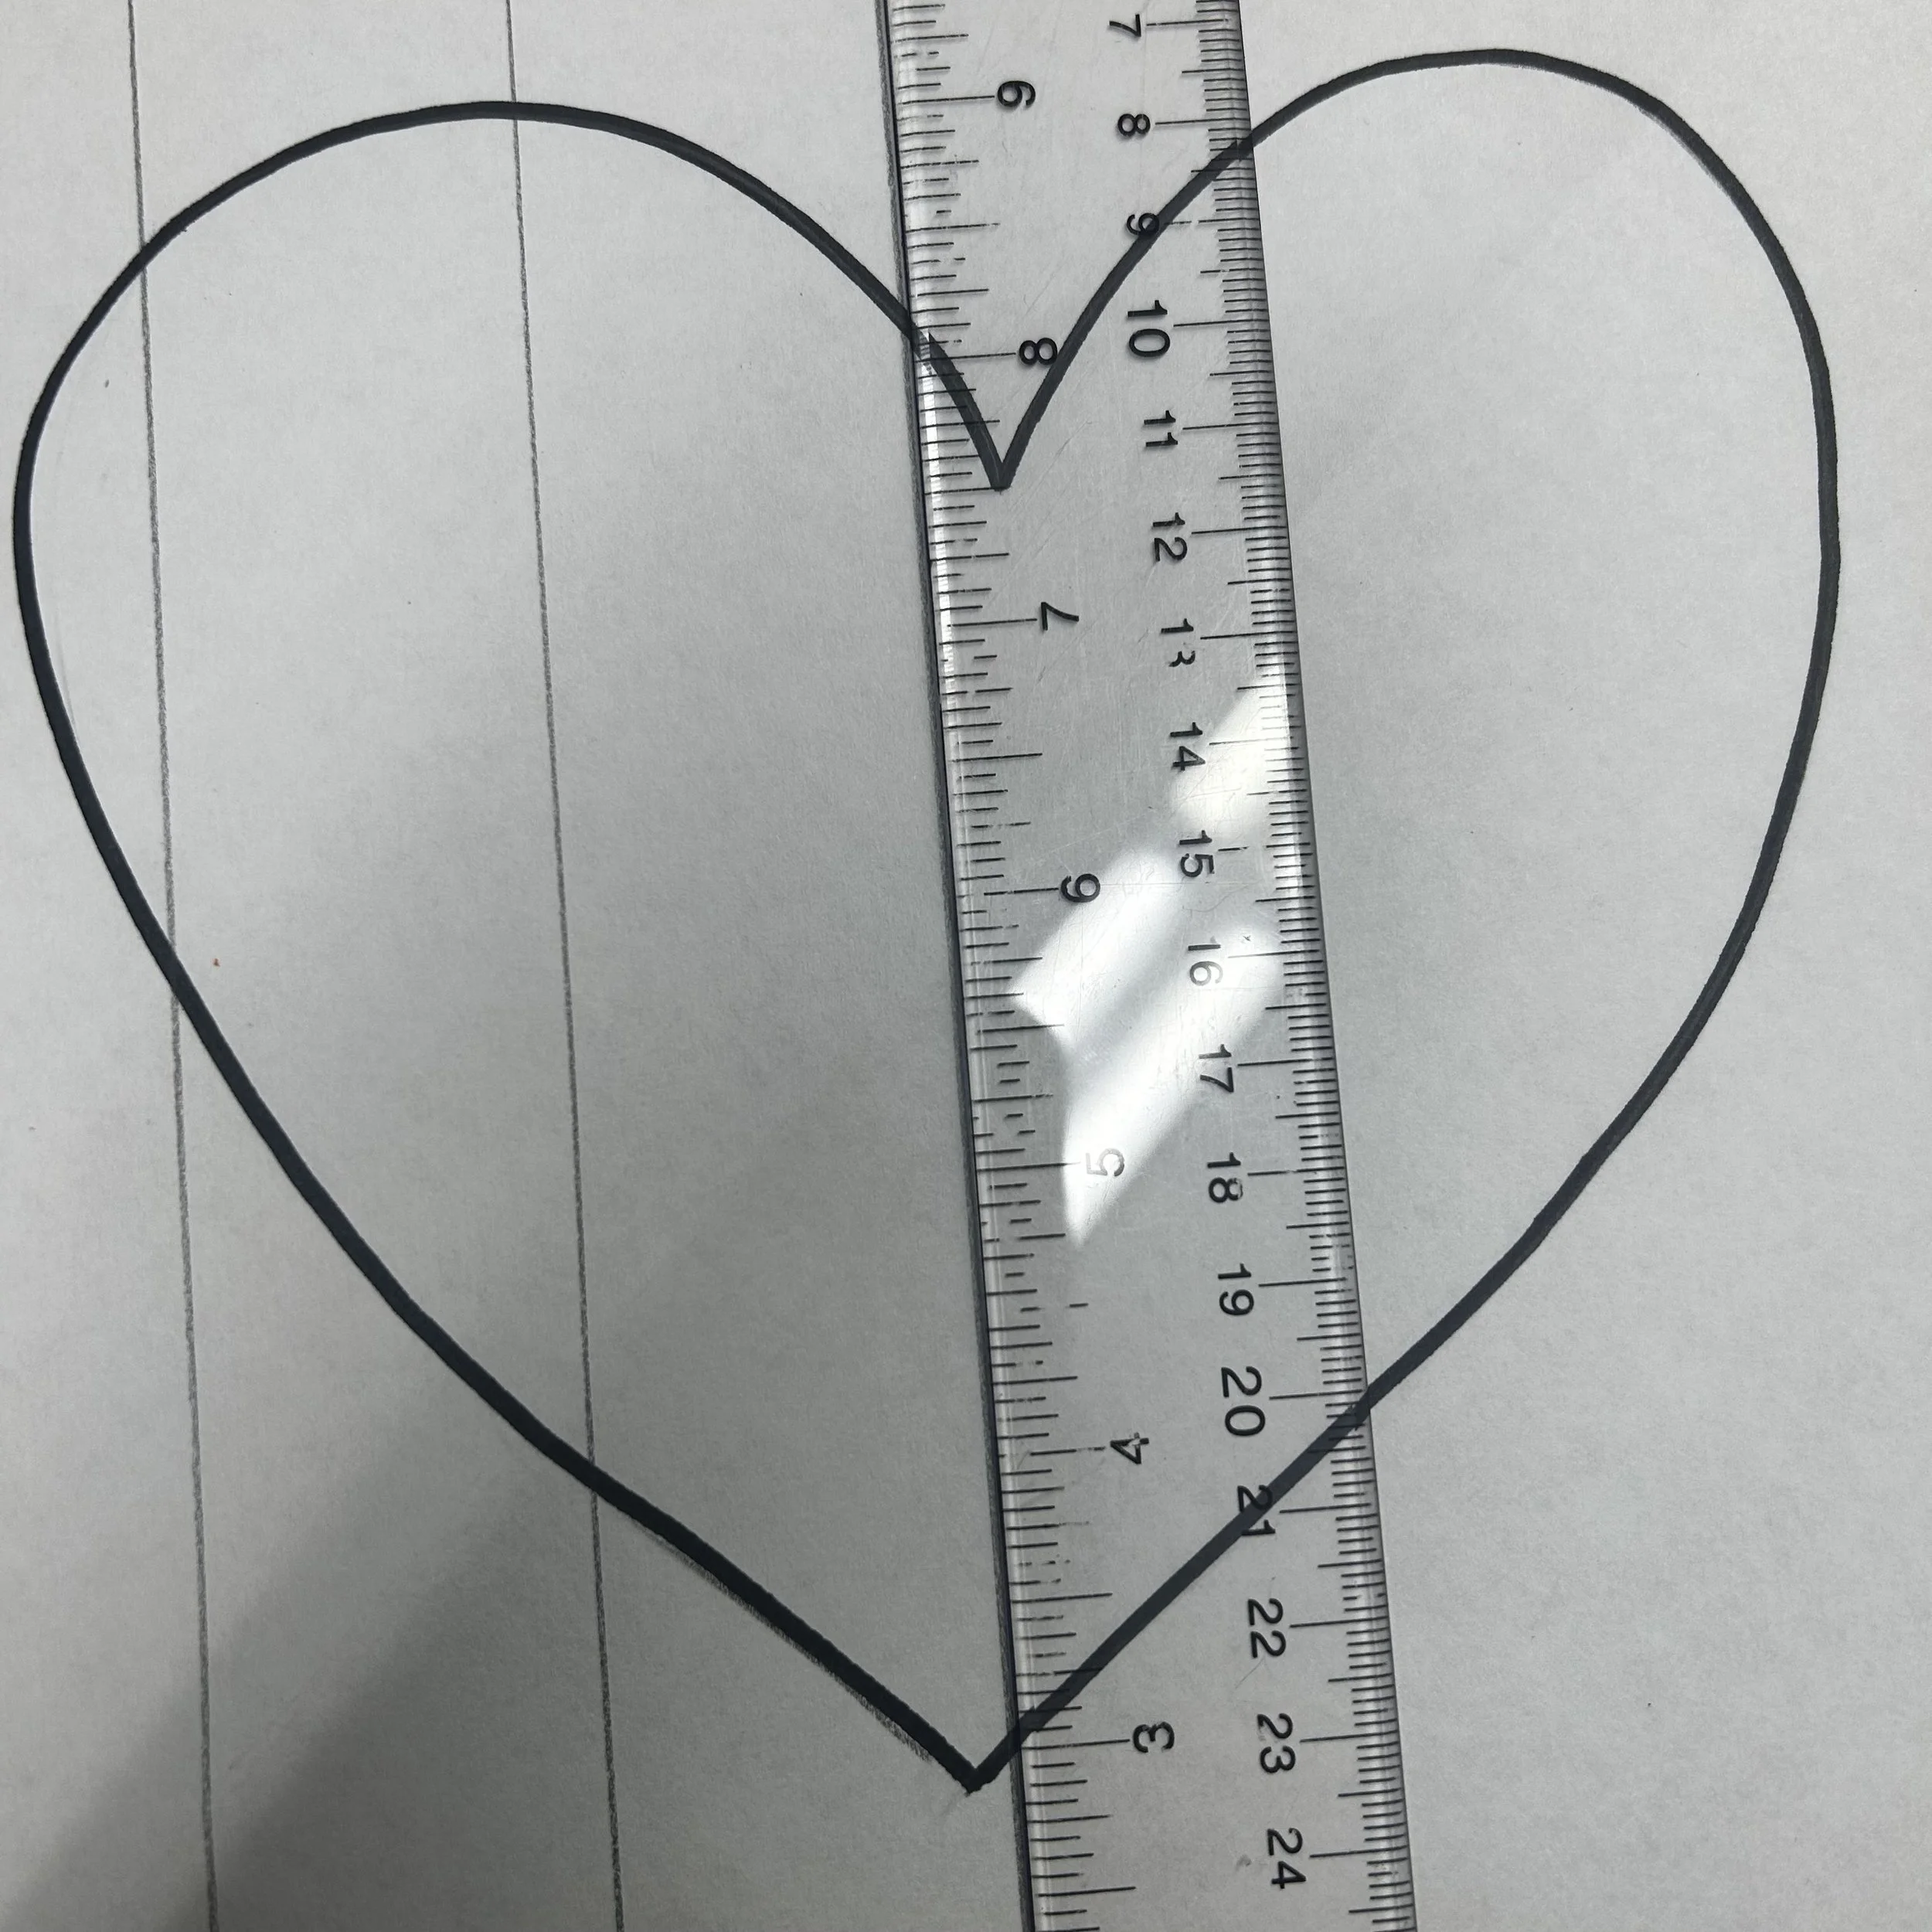
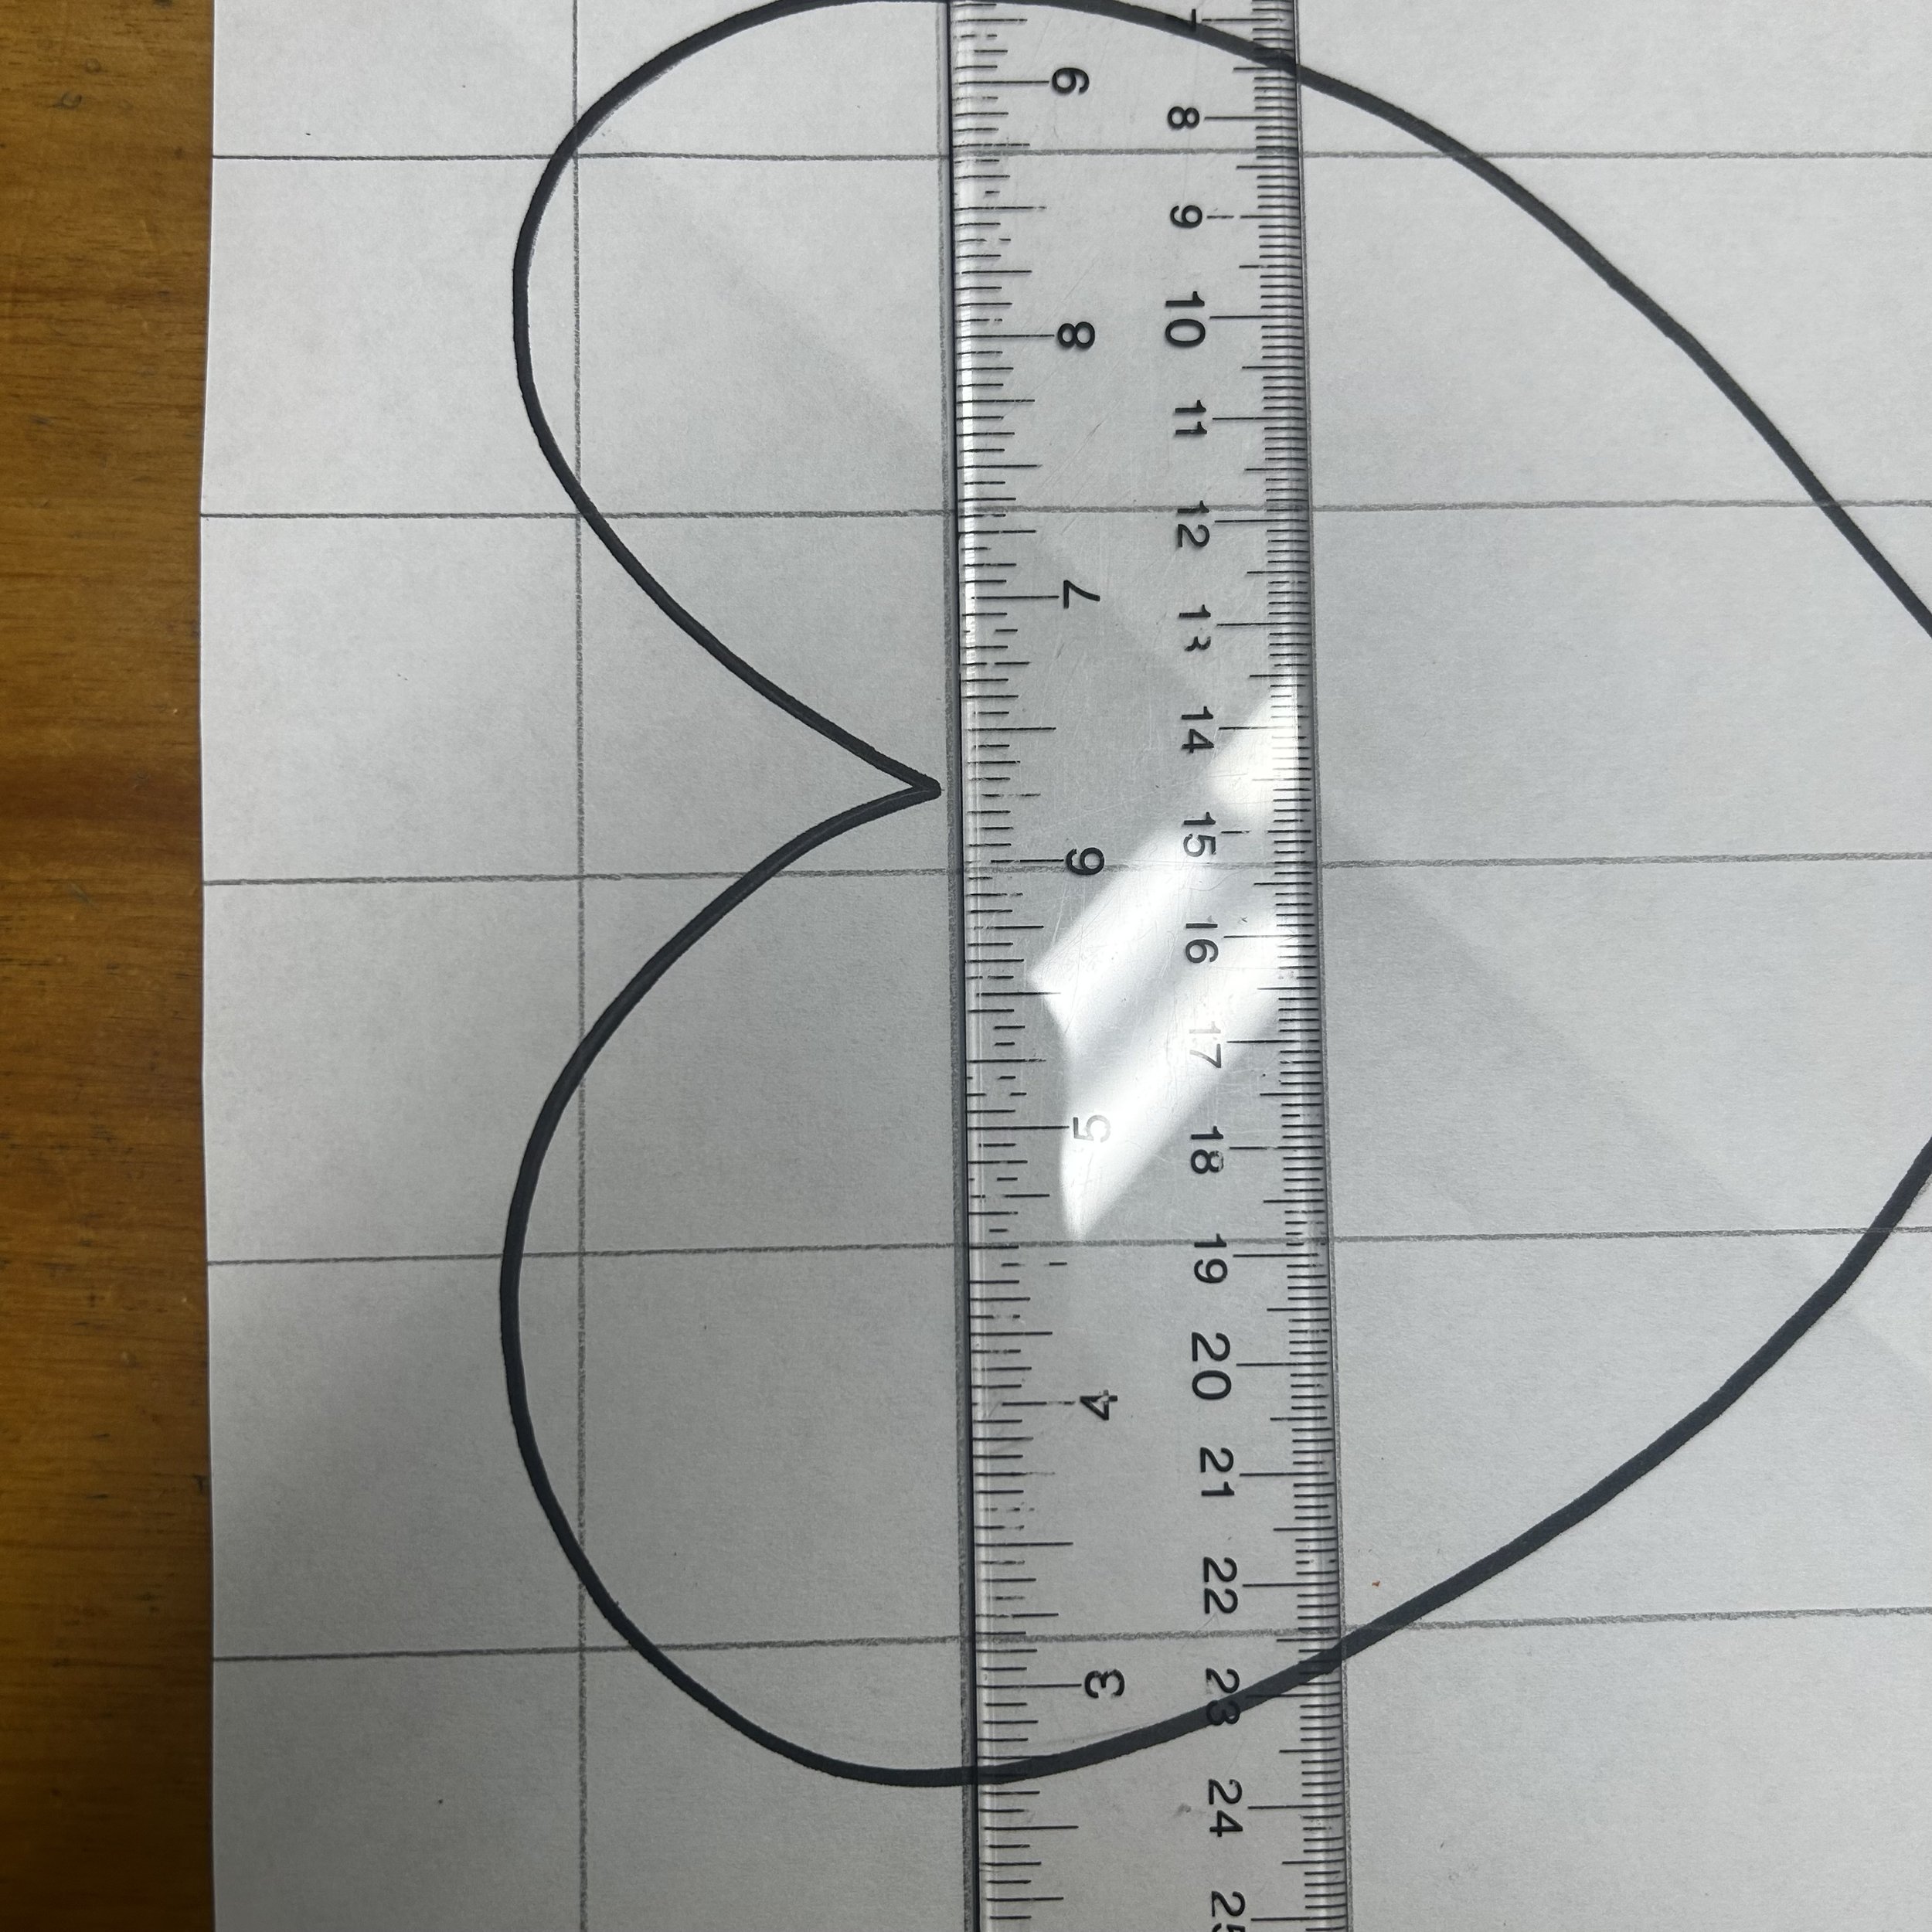
In the middle of the page, draw a large heart. Draw it in pencil first, then trace with a Sharpie.
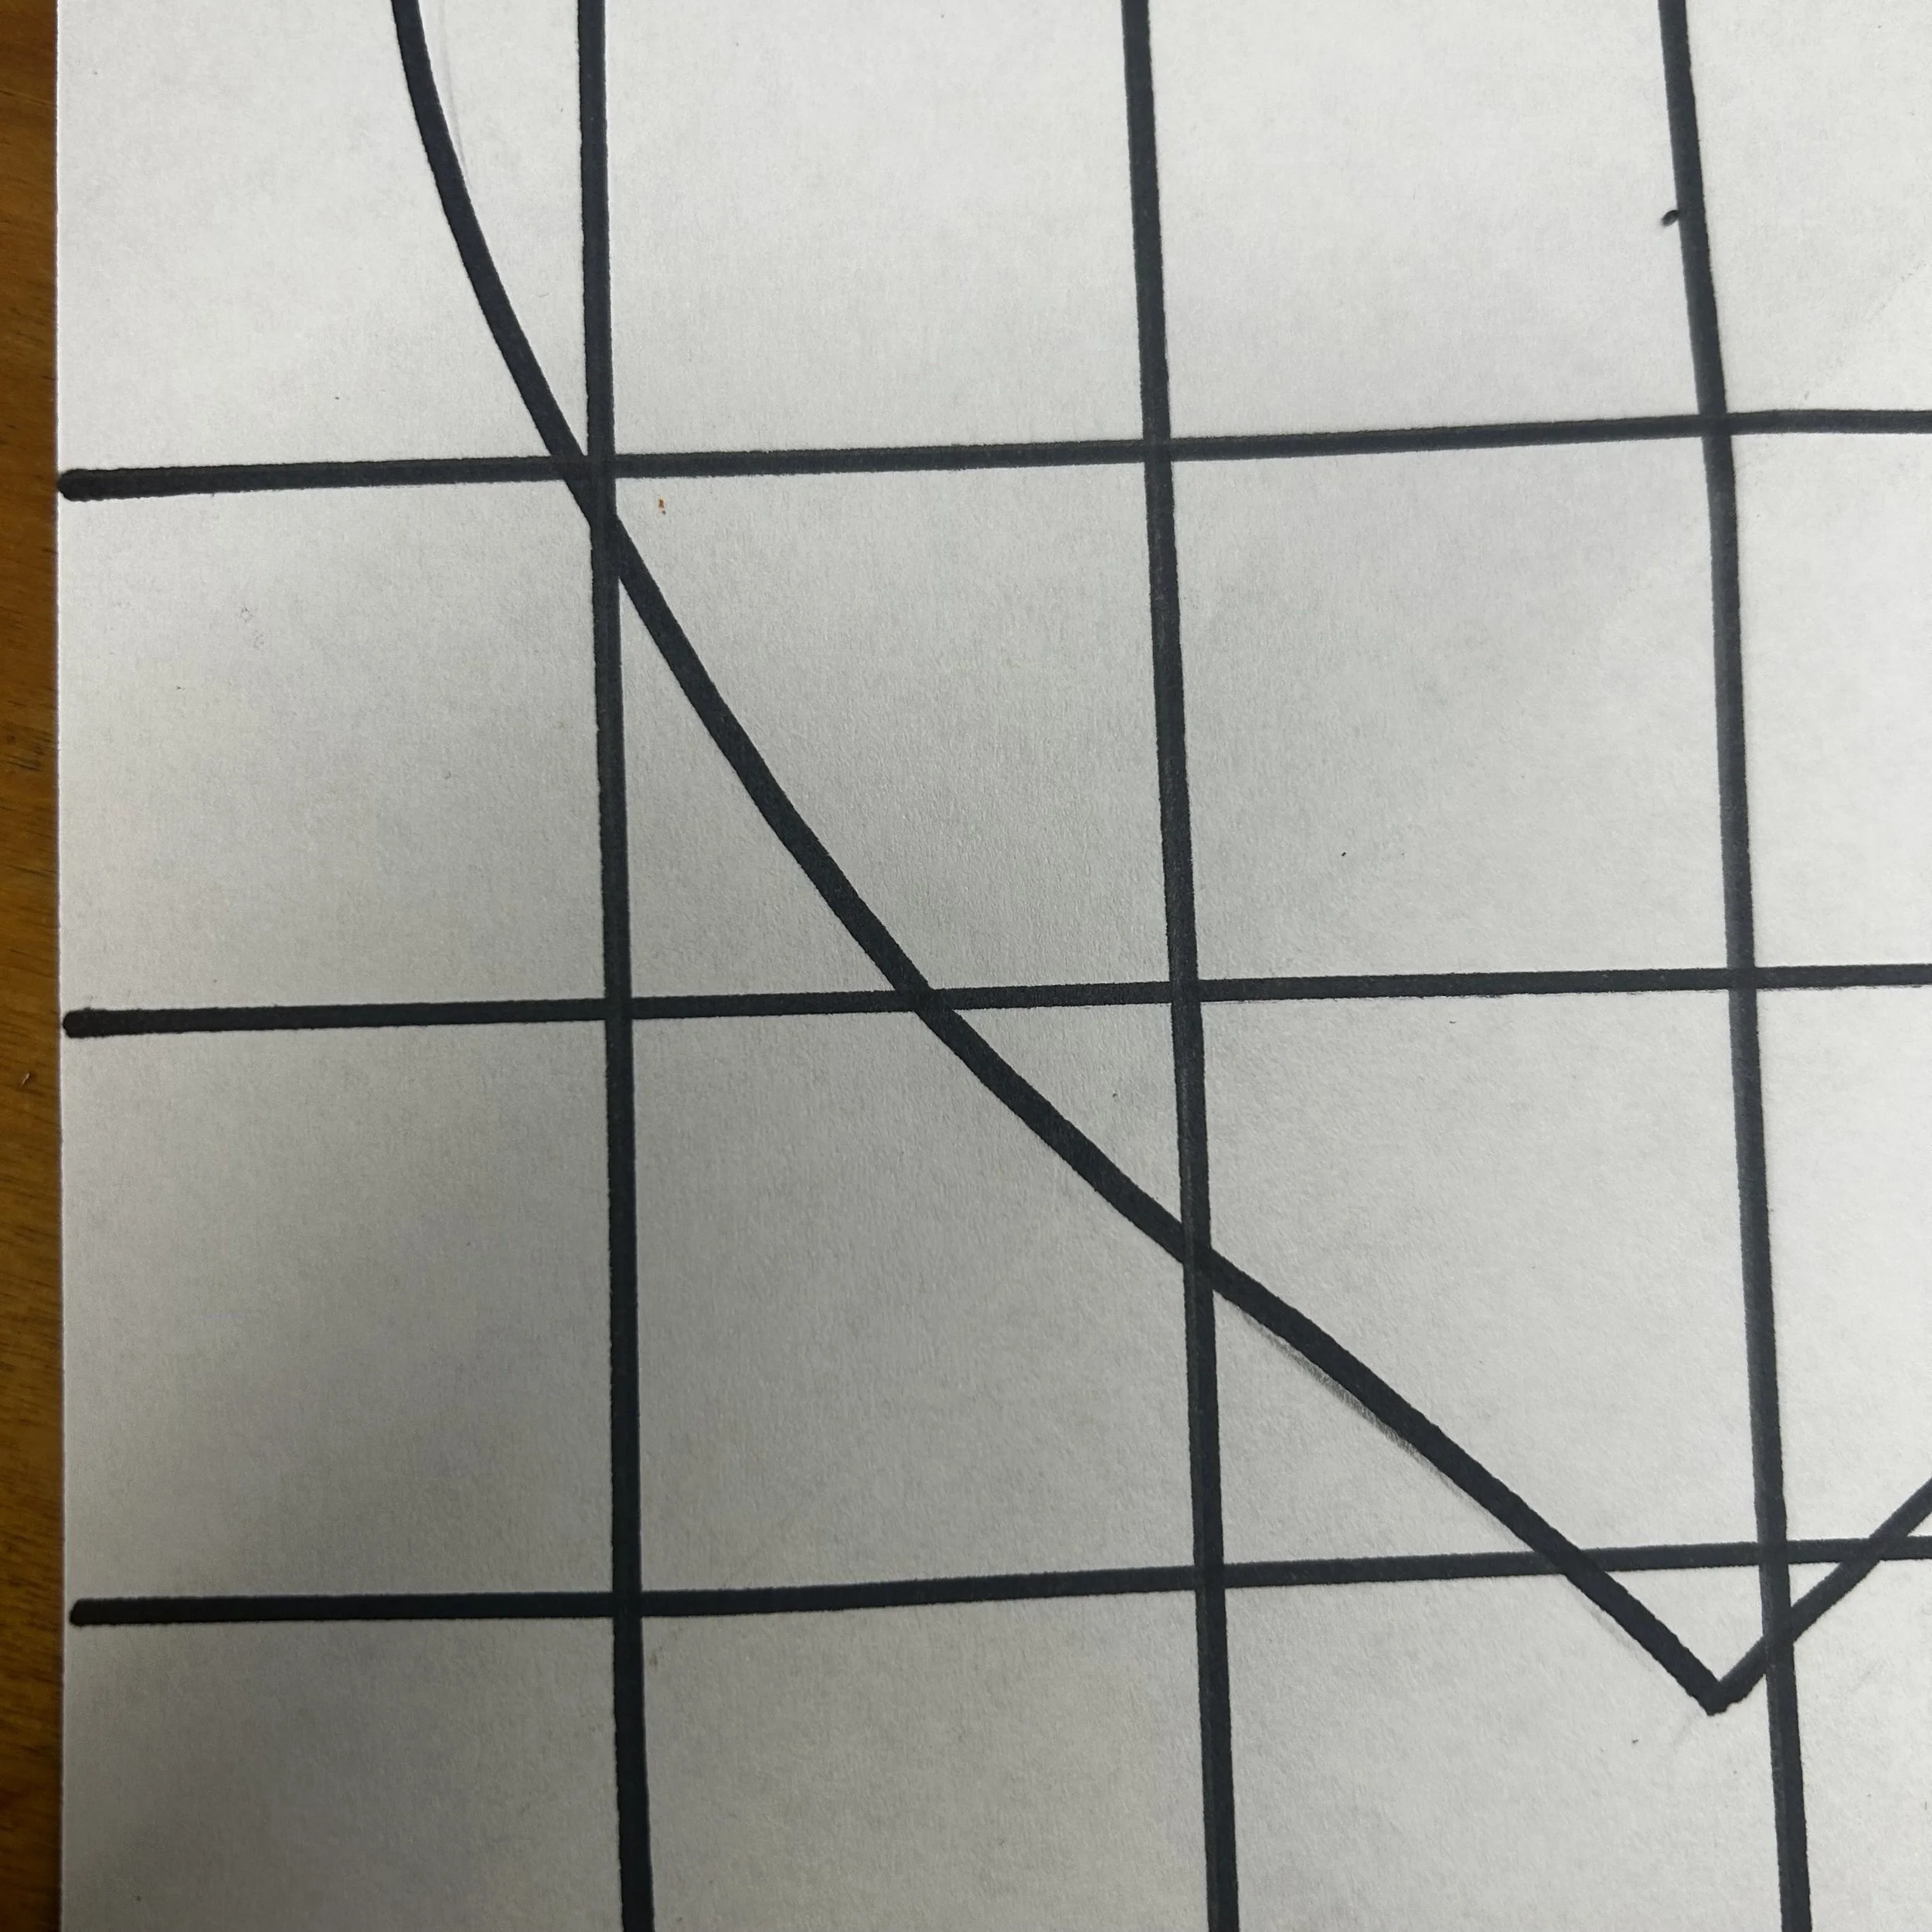
Using a ruler, make straight lines going from one edge to another. These can be vertical, horizontal or diagonal or any mix. You’ll probably want to just go for it with the Sharpie but you can draw in pencil first, then go over it after with the marker.
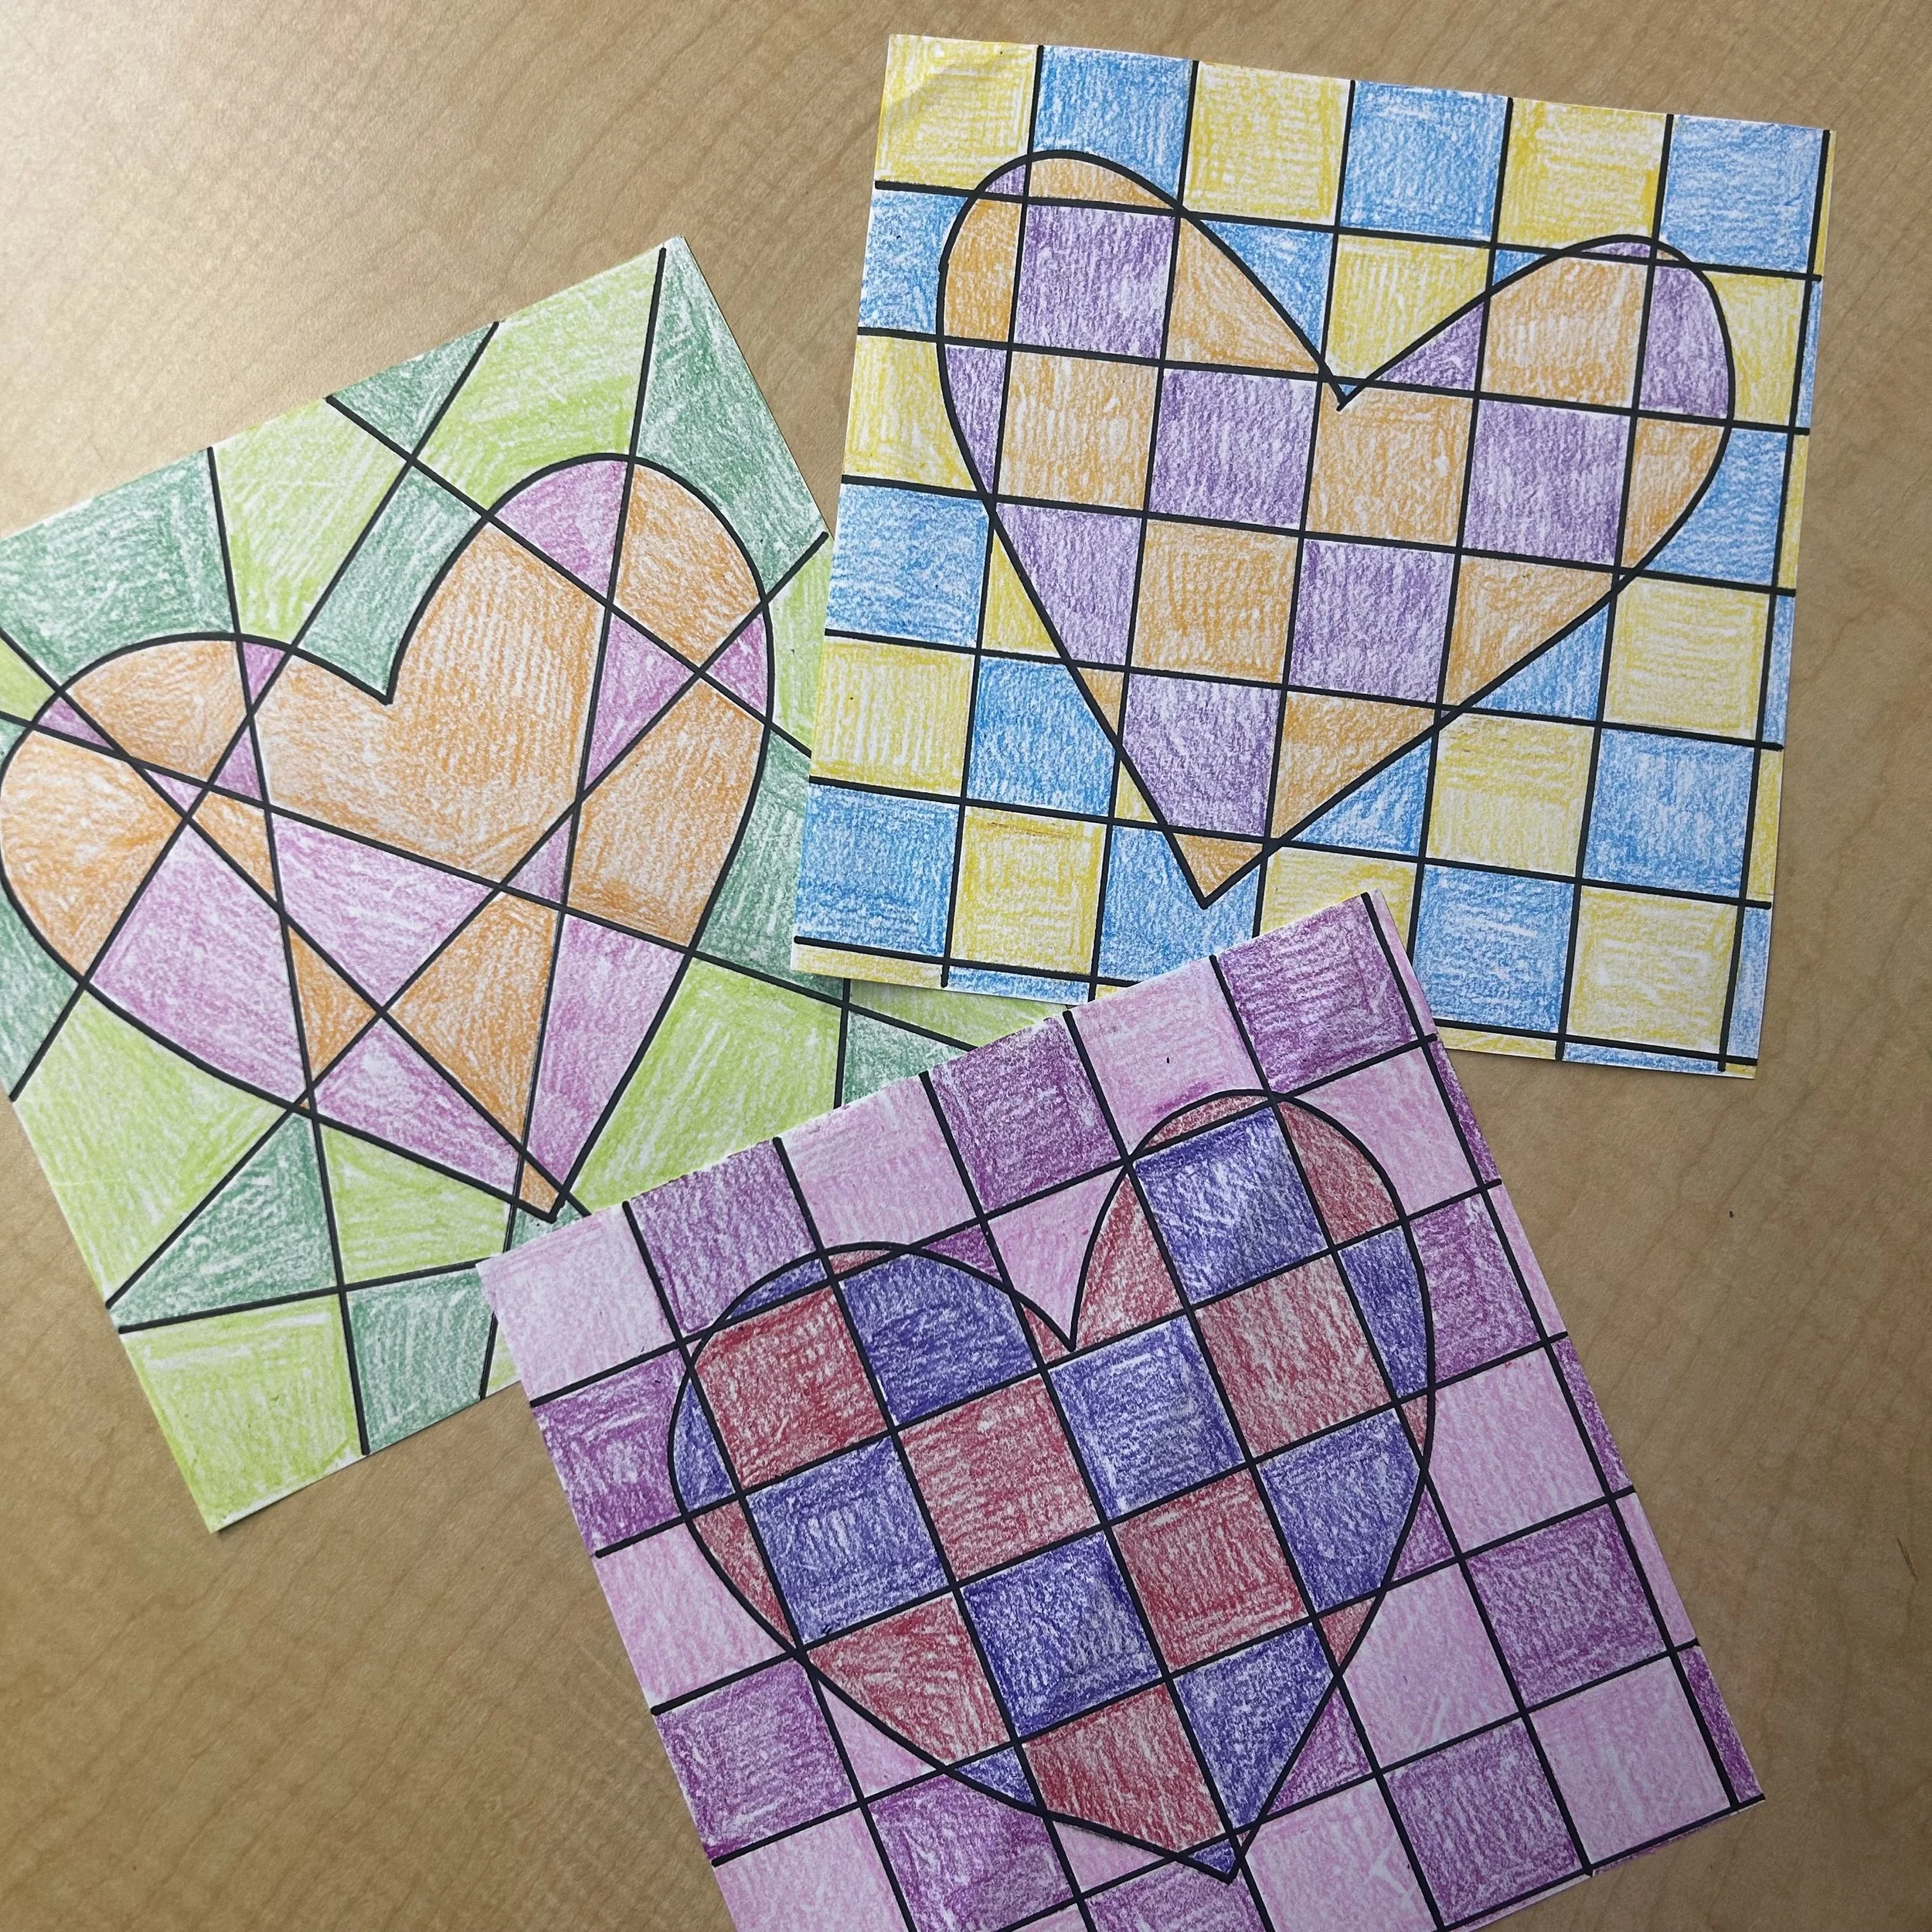
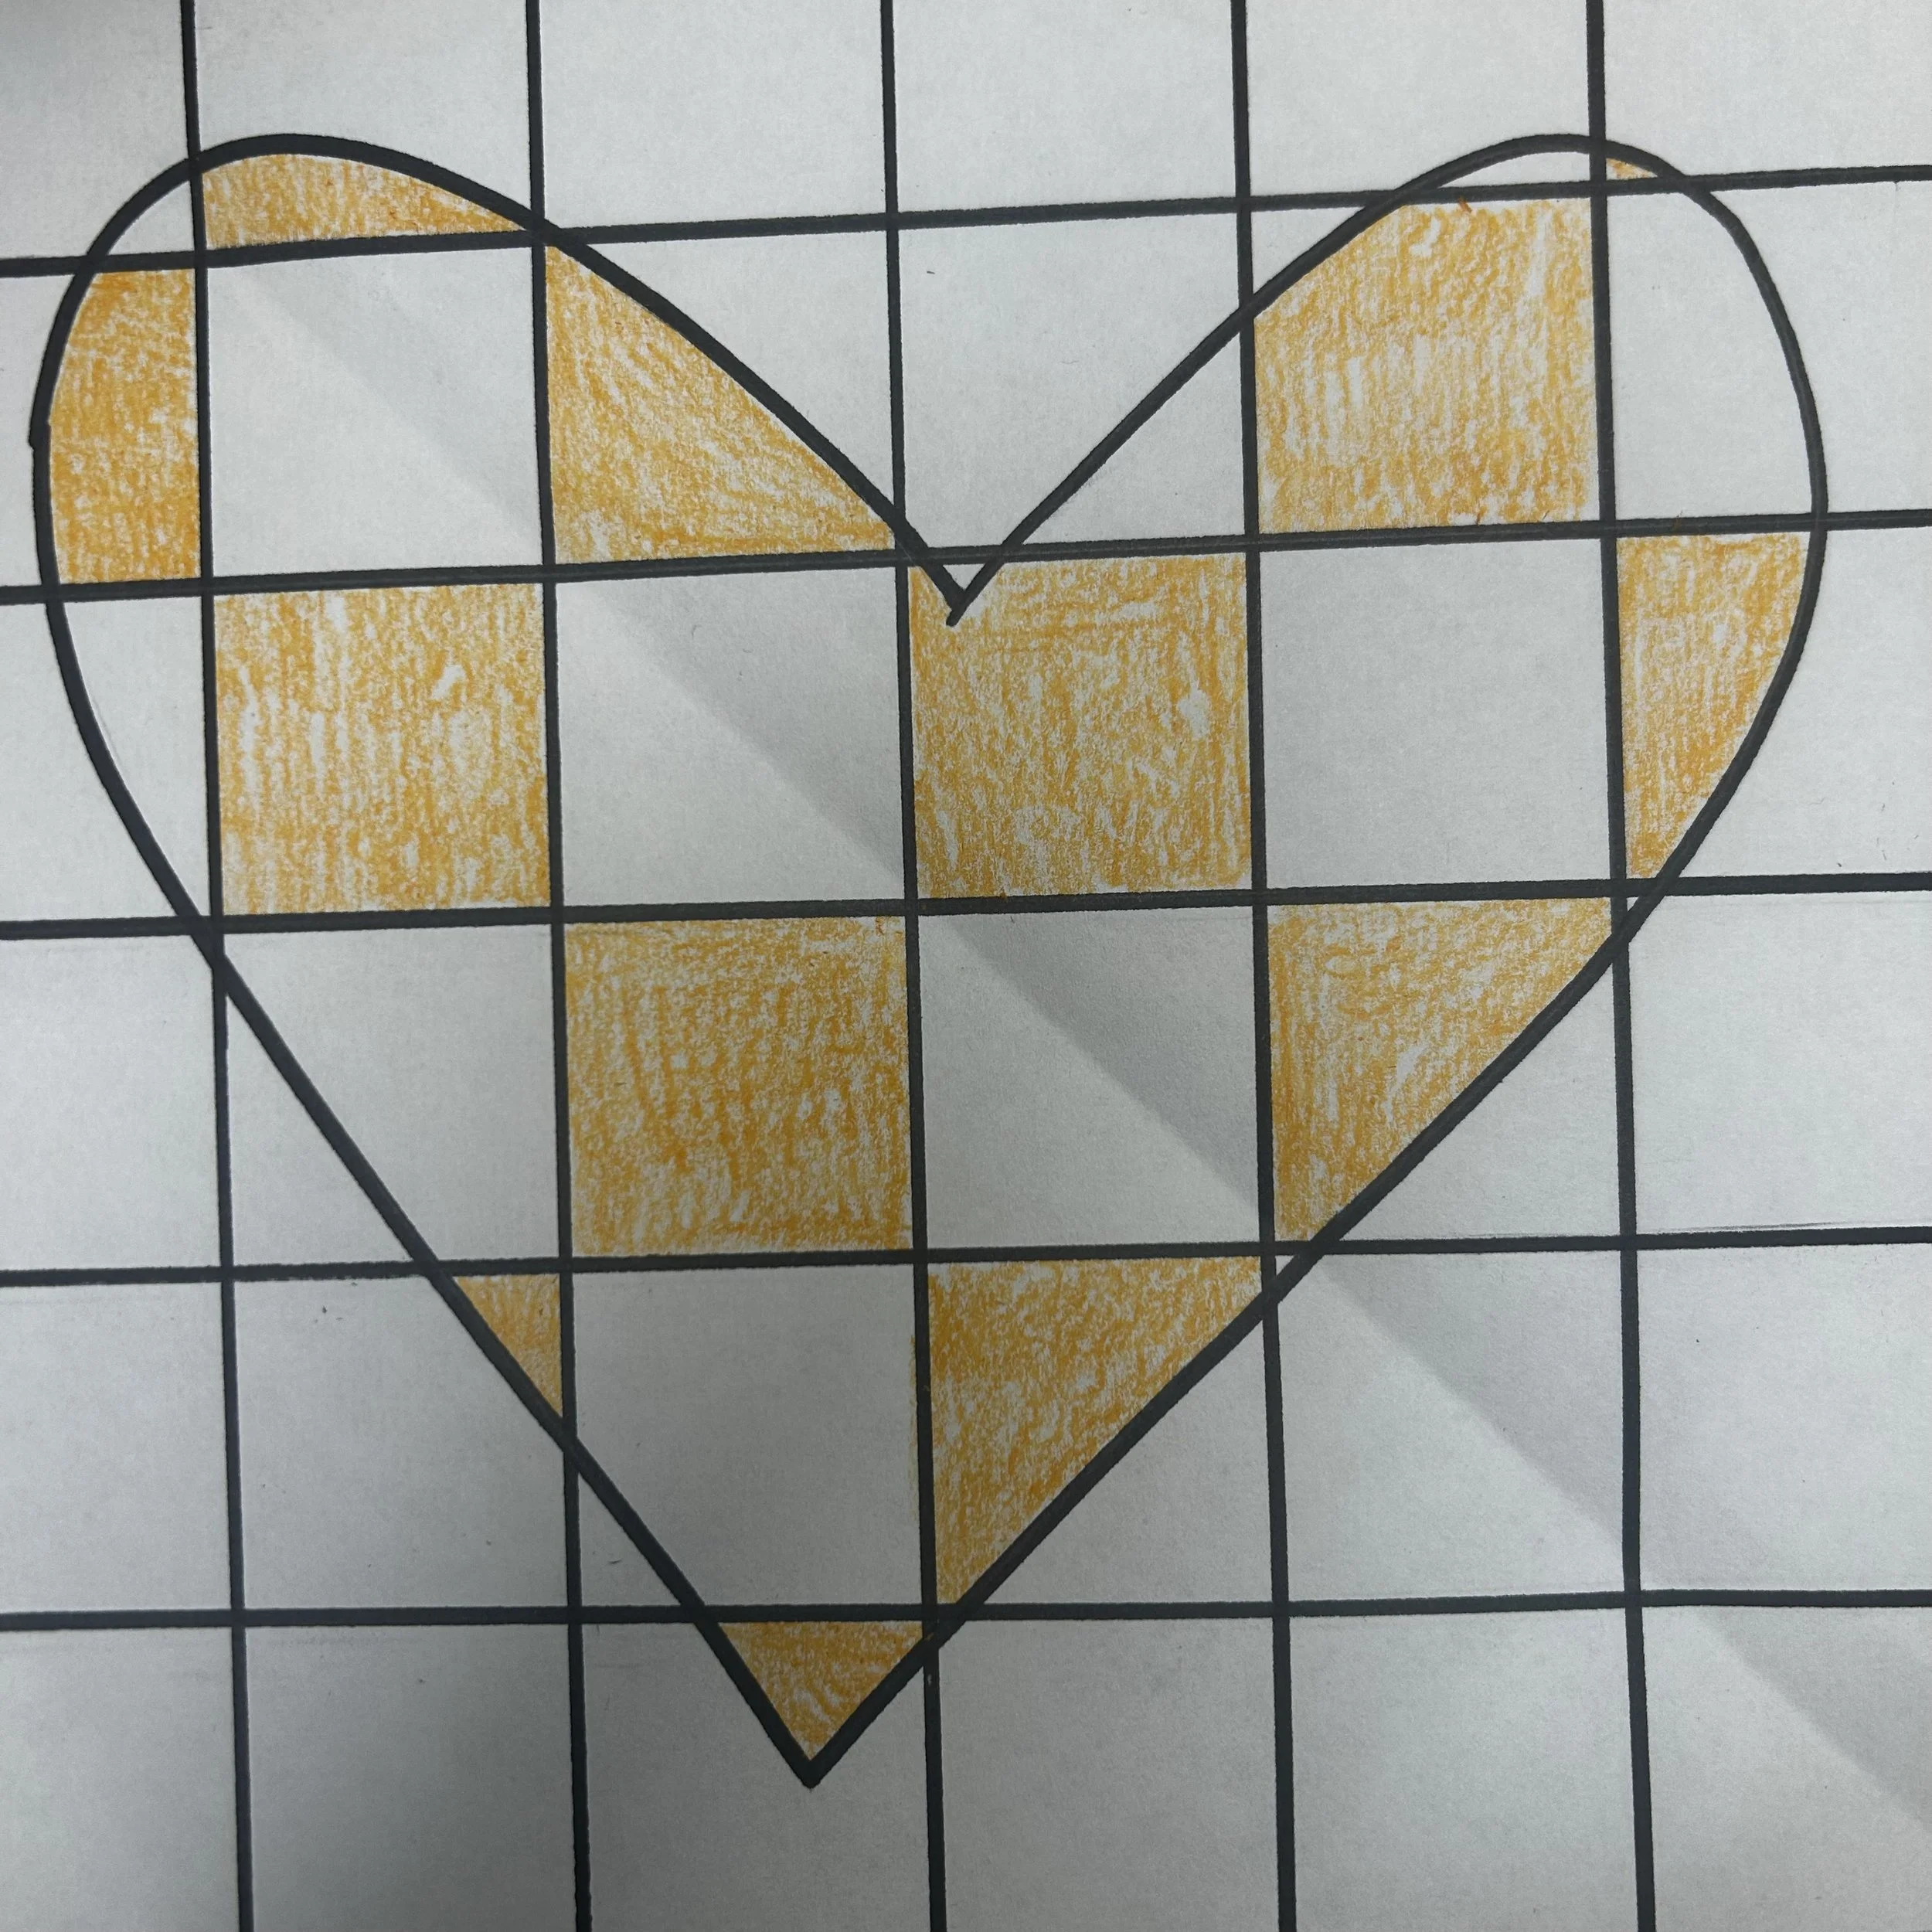
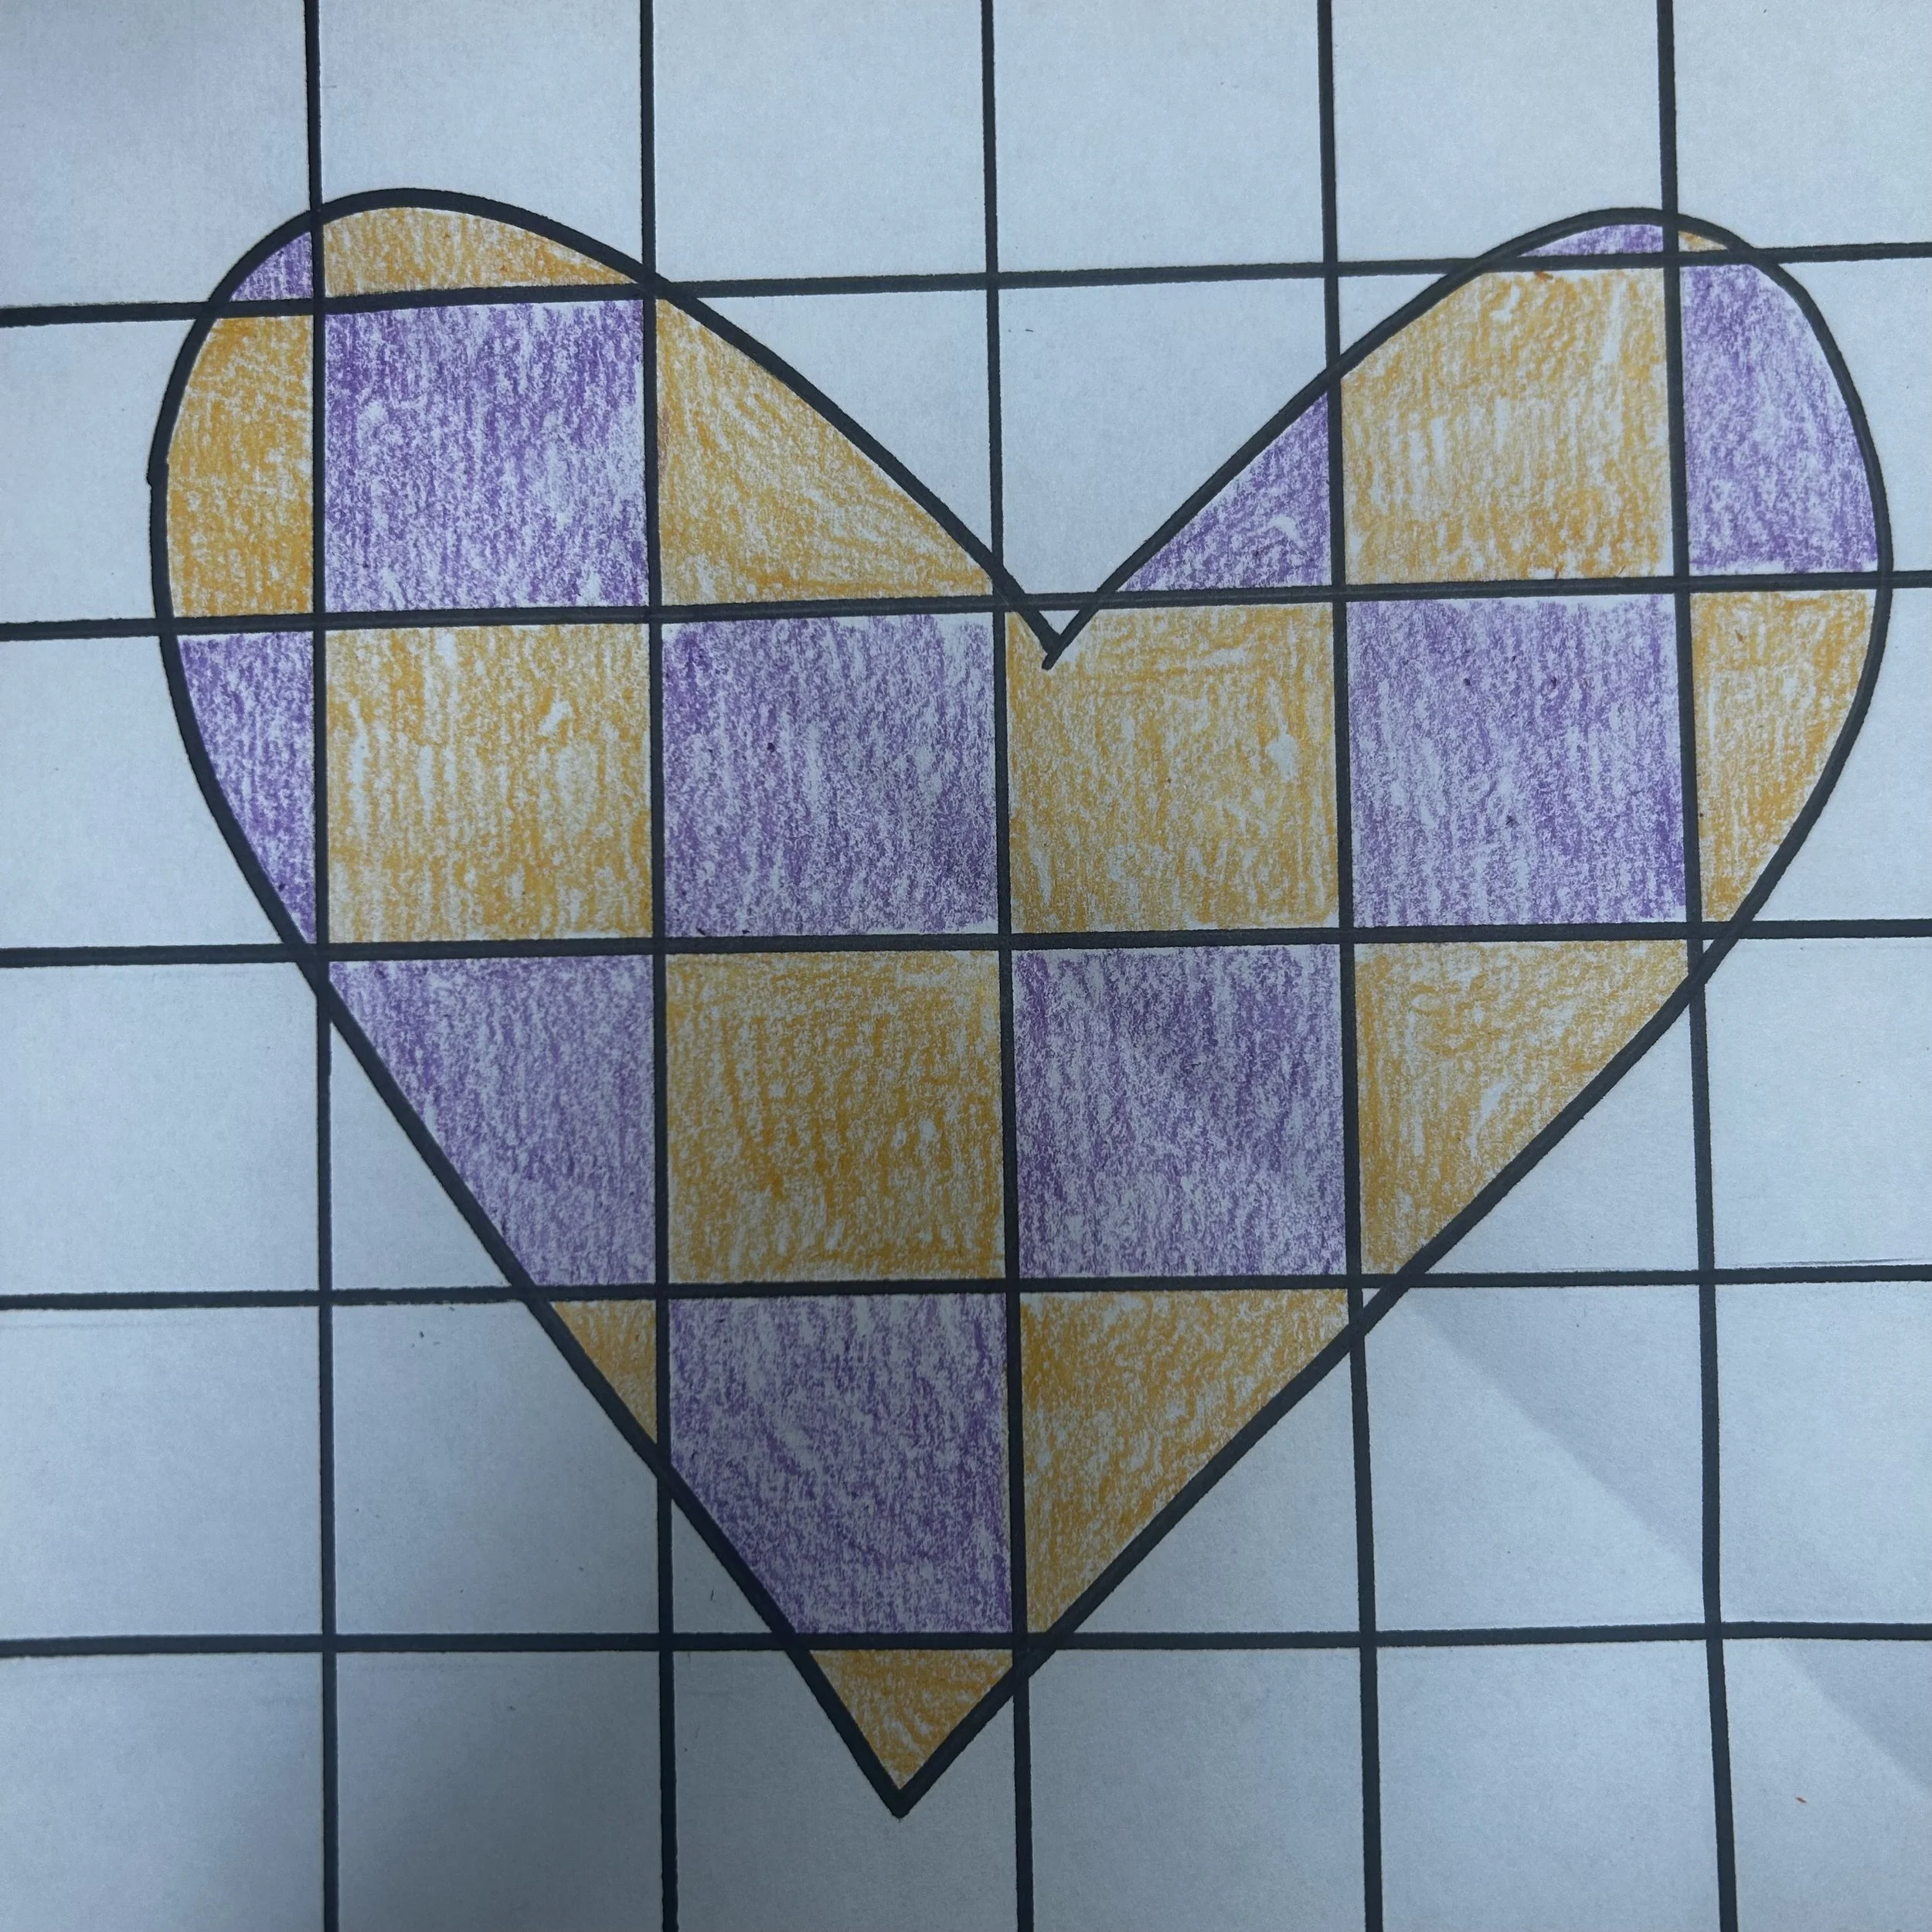
Choose 4 different colours: 2 for the heart and 2 for the background.
Colour inside the heart first with two of the colours. Alternate colours so that you don’t end up with two sections in the same colour next to each other.
Now colour the outside with the other two colours. Again, alternate the colours.

Here is a version using rectangular paper and pastels. You can use any colouring medium and any size paper! We still used Sharpie here for the dividing lines, not black pastel to avoid smudging.