

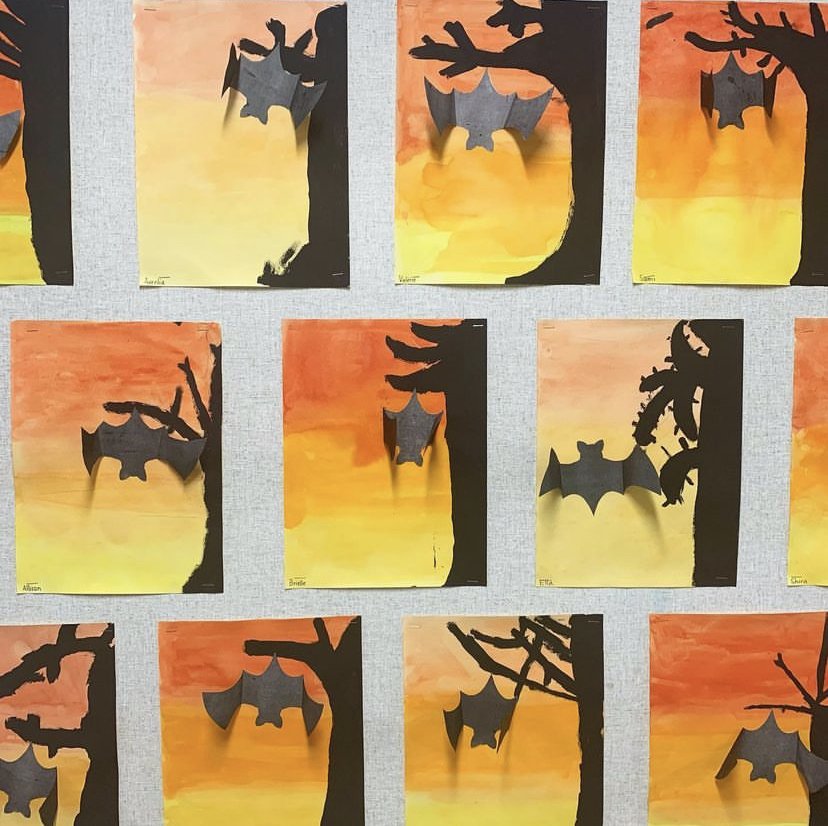
Spooky Halloween Silhouettes Art Project
This is a fun art activity that can be used even if your students don’t celebrate Halloween. Bats are real animals, and while they can be associated with Halloween, they don’t have to be. This can simply be a fall art activity. I can’t take credit for this project, I put my twist on it but it is inspired by Kids Craft Room. You can find the original post HERE.

Timeline: You will need two art sessions for this project as you need to allow for dry time. One to do the background sunset and one to do the tree and bat. I manage to do it in a single day, as long as you can afford 10 minutes earlier in the day to do it. If you can’t, maybe you paint on another day.
Materials:
White paper
Red, orange and yellow paint (I just use tempera paint pucks)
Black acrylic paint (you could use tempera, but the acrylic is really dark, giving a nice silhouette)
Table cloths or newspaper (protect your tables from the acrylic paint)
Paint brushes (large for sunset, smaller for tree)
Water cups
Bat stencil & construction paper OR bat silhouettes
Scissors
Glue stick
Teacher prep:
Either pre-making some bat stencils or printing the silhouettes out for students
Click here for the bat silhouette I used. You can use any, I just found this one on Google.
Steps:
Part 1 - Sunset
Paint a sunset on your white paper. Use a large brush for this to make it easier.
Start with yellow and work your way to darker.
Blending is the trickiest part and not all students will do the best blending (don’t worry!). To help them with blending the colours, I tell them to wet their paintbrush with water only and go over the “seams” of colour, trying to blend the sections. It’s also easiest to blend when the paint is wet, so blend each section as you go, not all at the end.
Leave to dry completely.
Part 2 - Tree silhouette
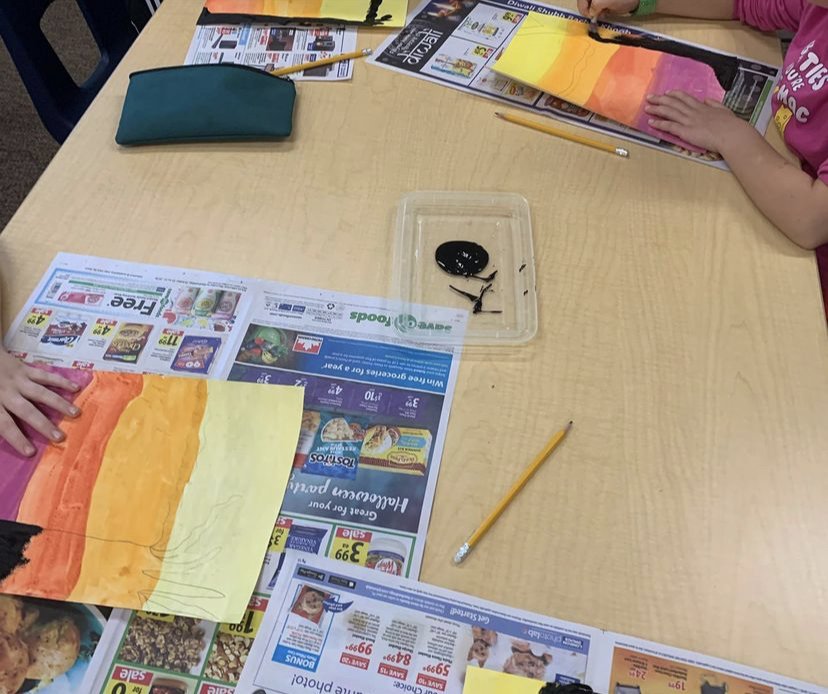
Some students might opt to use a pencil to sketch out their tree first. Be careful though, you can’t really erase it so don’t push hard.
Use the black acrylic paint to make the tree. I give them smaller paint brushes for this as there is more detail involved. Put some newspaper or table cloths under their work to protect your tables from the paint.
I have them do the tree on one side and have branches that come out to the side so that the bat has something to hang off of. The bat doesn’t have to hang, so they really do have freedom.
This past year, I changed it up and showed my students how to add a fence with the black paint. Some chose to, and others didn’t want to.
Part 3 - Bat
I print each student a bat (for size, I fit three bats on one standard page)
Since our printer toner kind of sucks, I have them colour it black because the toner makes it a bit grey. Hopefully you don’t have this issue! Even if you have great toner and it prints black, have students colour the back in black too. This is because we want 3D wings and don’t want them to be white underneath.
**If using stencils or having students draw their own bats on construction paper, you avoid all this colouring. Just skip to next step.
Once the bat is coloured, cut it out and fold the wings in so that they stick straight up. Glue the “body” part of the bat onto the paper. Like I mentioned before, their bat doesn’t have to hang. It can be flying if they want.
Some of my students wanted the bat to have it’s wings closed as it was hanging so they glued them shut.

