Neurographic Art: Abstract Positive & Negative Space Organic Shapes
Neurographic art is a meditative art process developed by Dr. Pavel Piskarev in 2014 that blends psychology, art, and mindfulness to reduce stress. The process involves drawing curved lines freely, called “neurolines”, then rounding the intersections, creating organic shapes.
This project is great to have in your back pocket as it requires no prep and uses easily accessible materials. There are several variations including crayon, paint and foil transfer. You are welcome to use the material that suits you.

Suggested grade: 2-4 fine motor skills required (adapt to 1 - do less lines, creating larger sections)
Time required: ~40-60 min
Materials:
White paper (printer weight or card stock)
Pencil & eraser
Sharpie
Colouring tool (crayon, pencil crayon, marker or watercolour/tempera puck paint)
Steps:
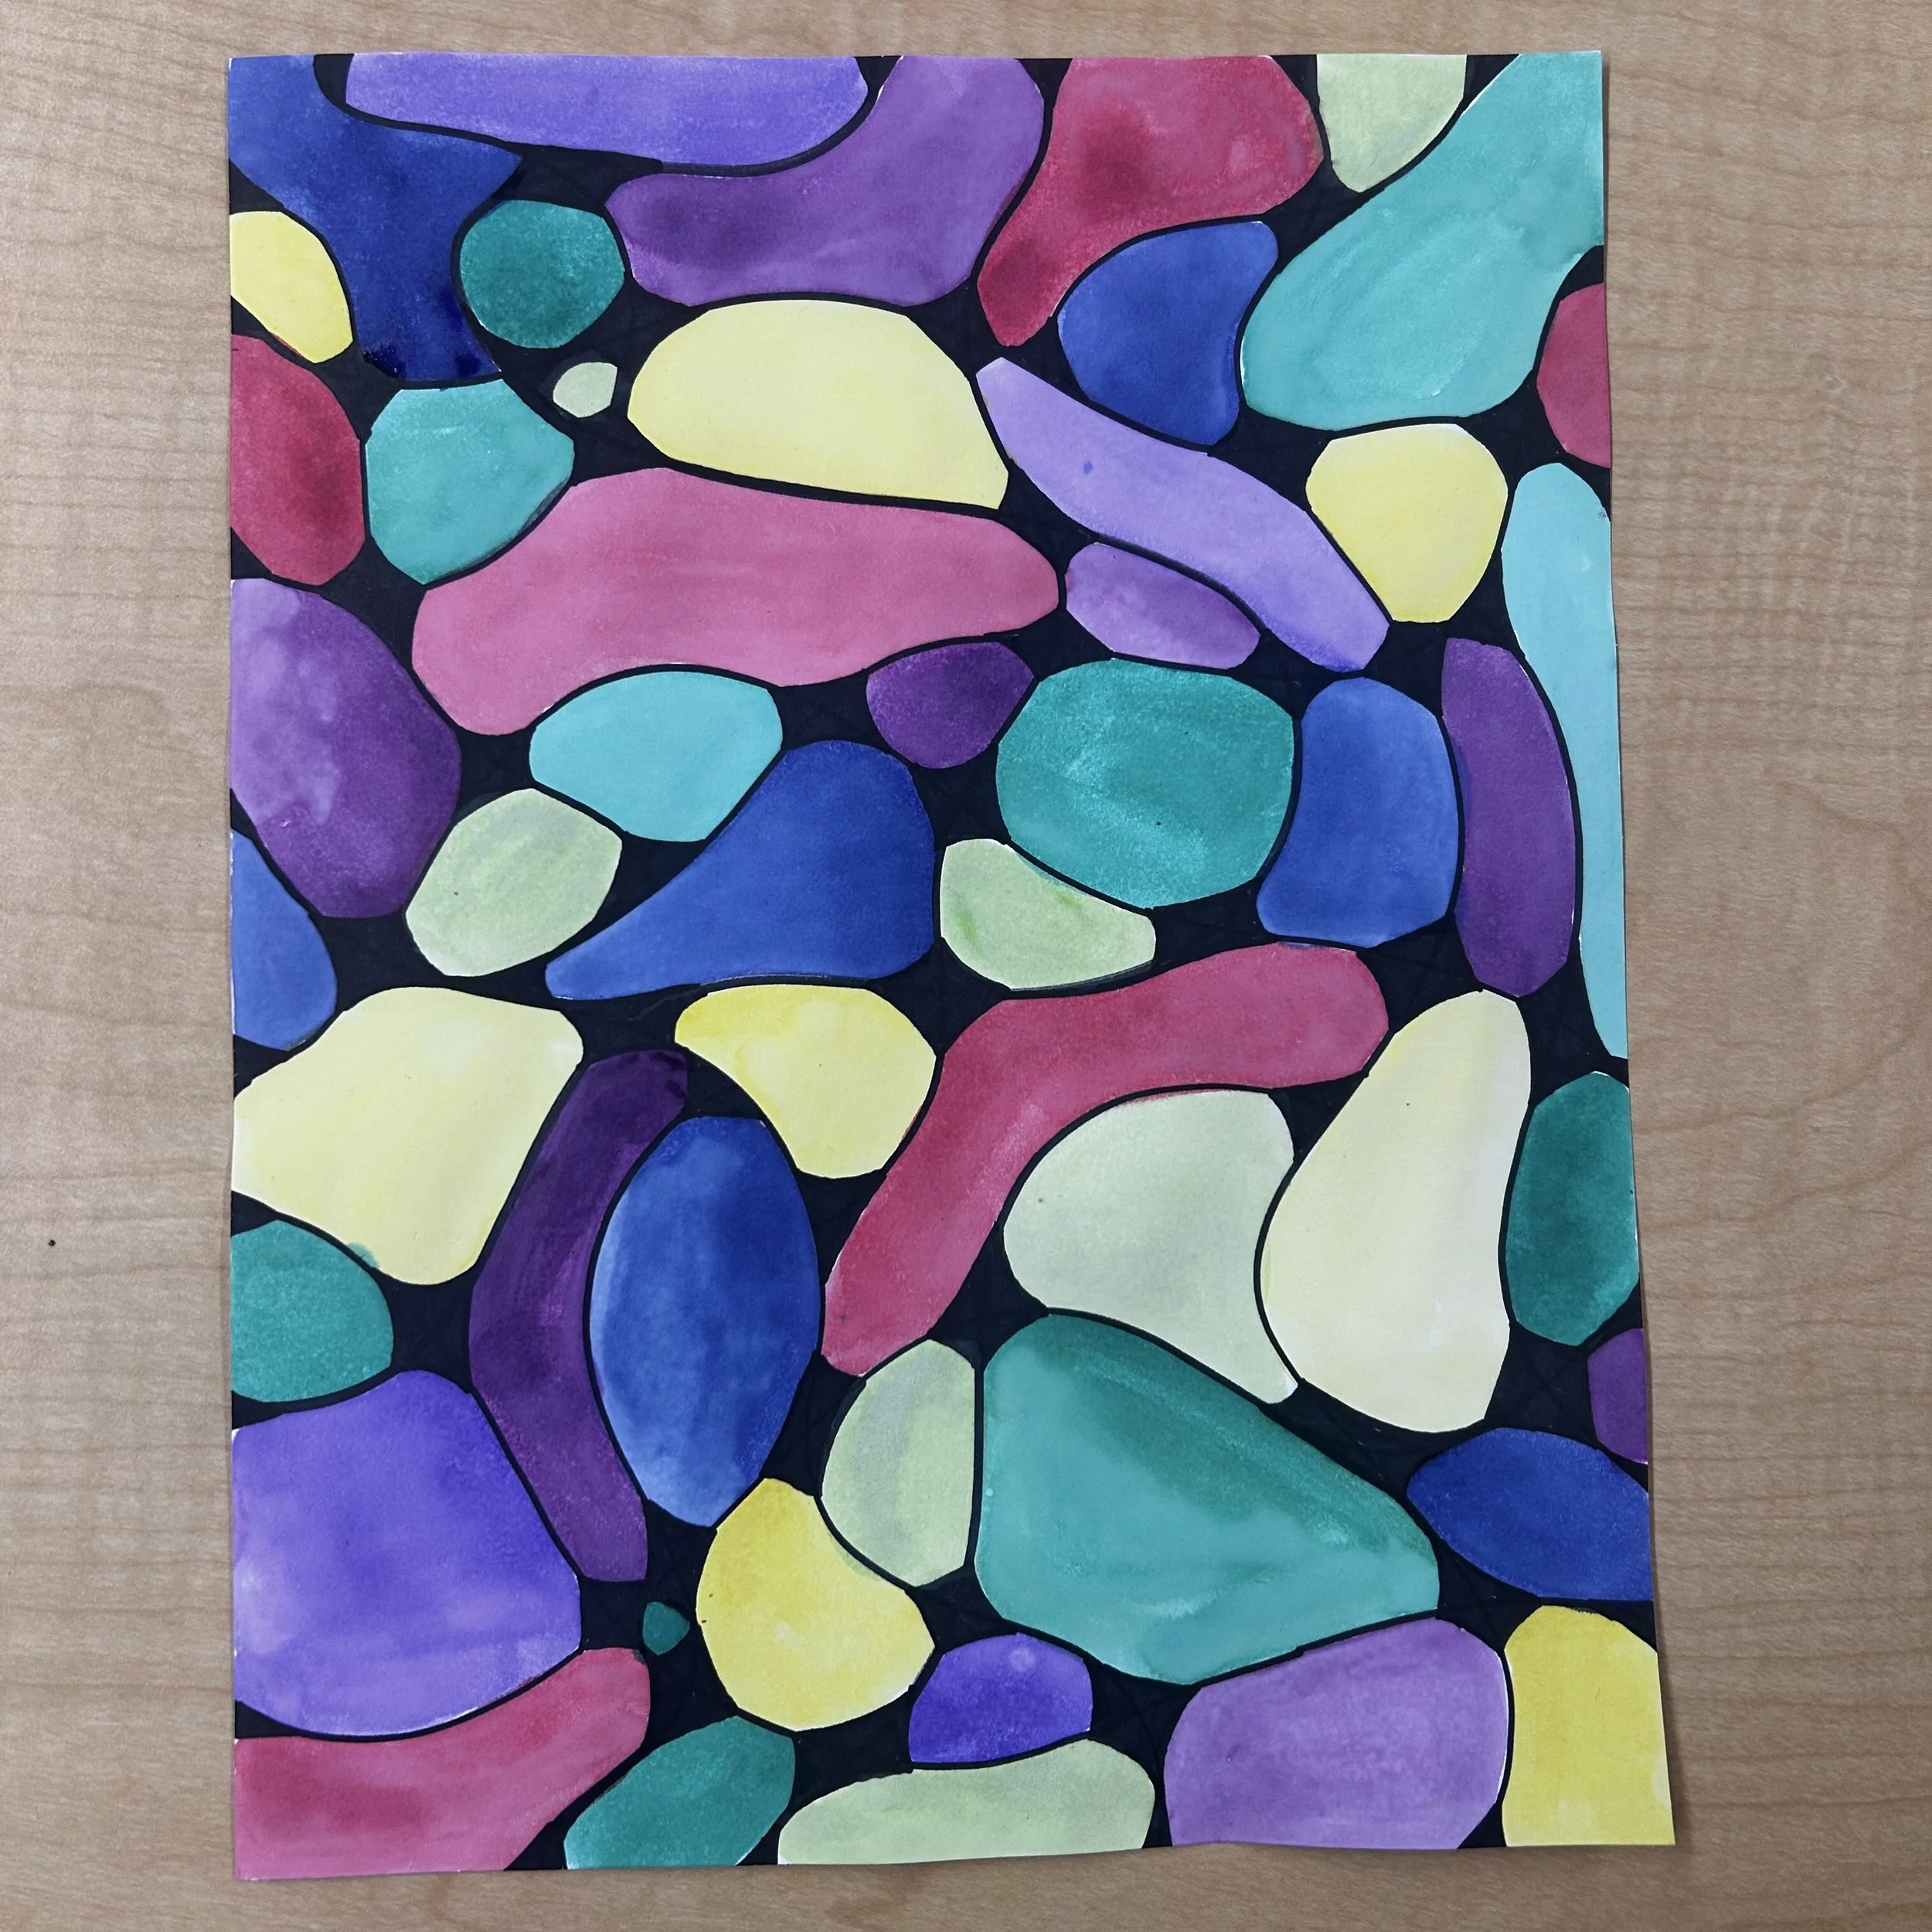
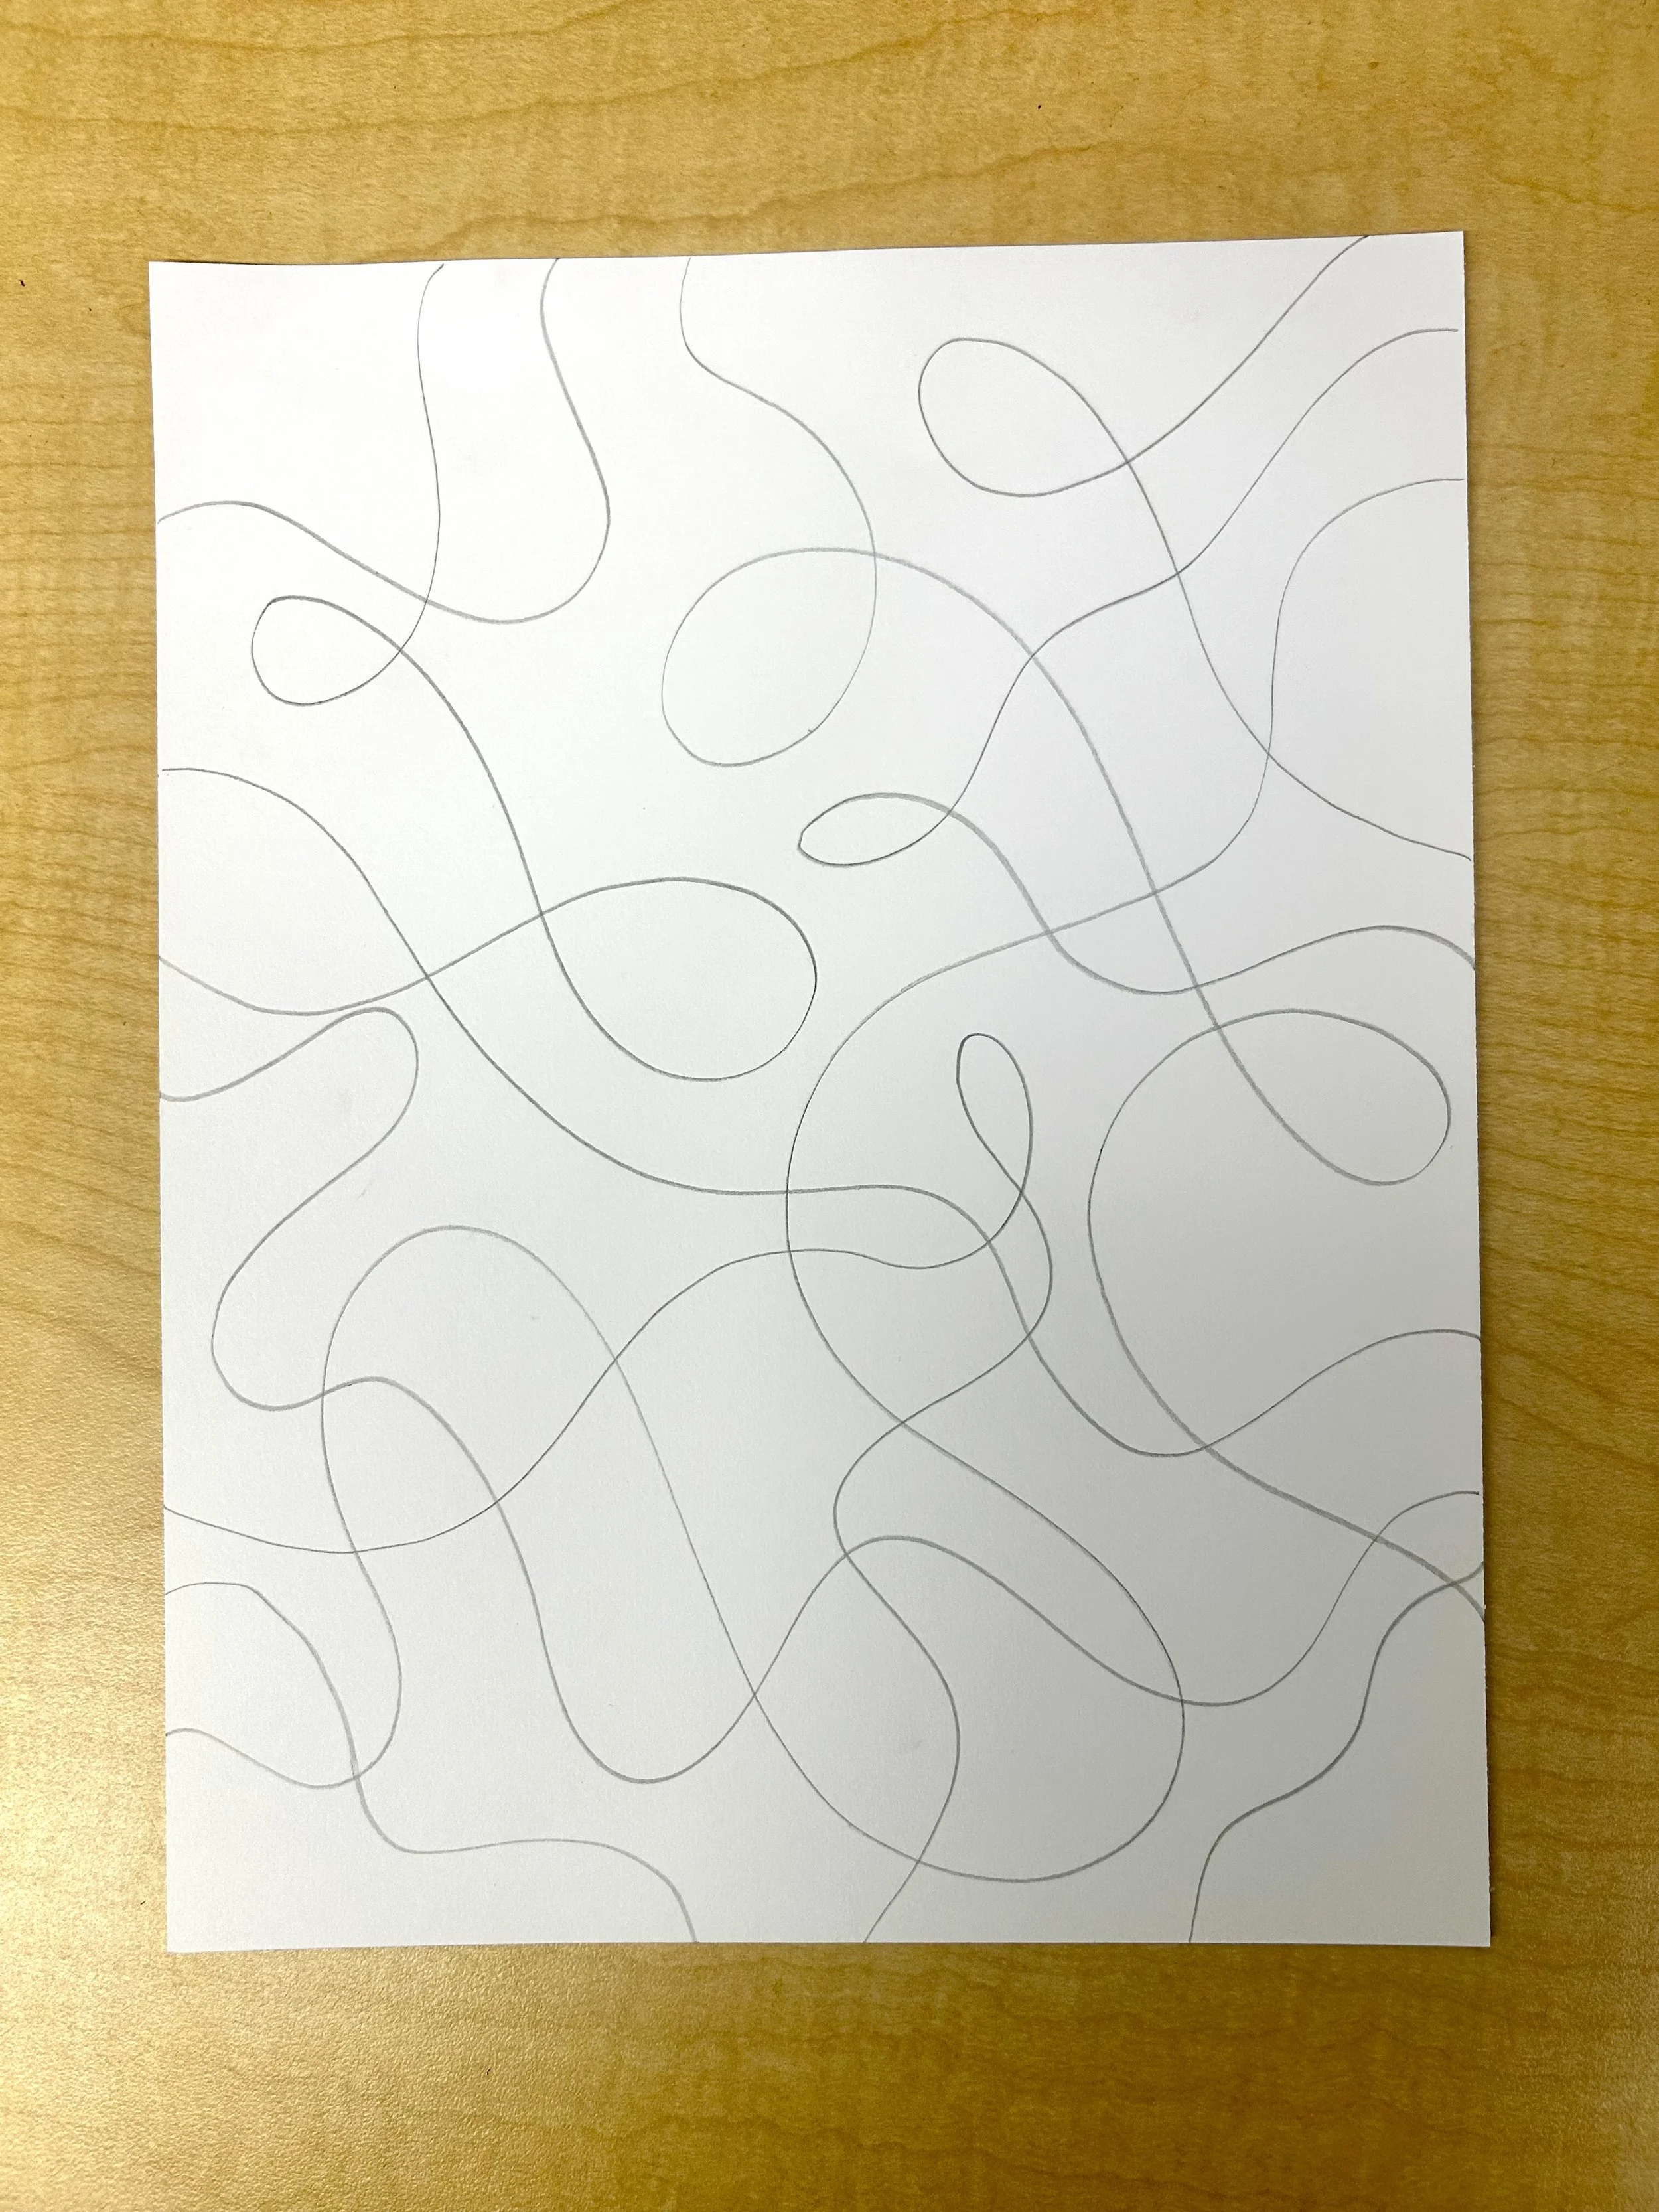
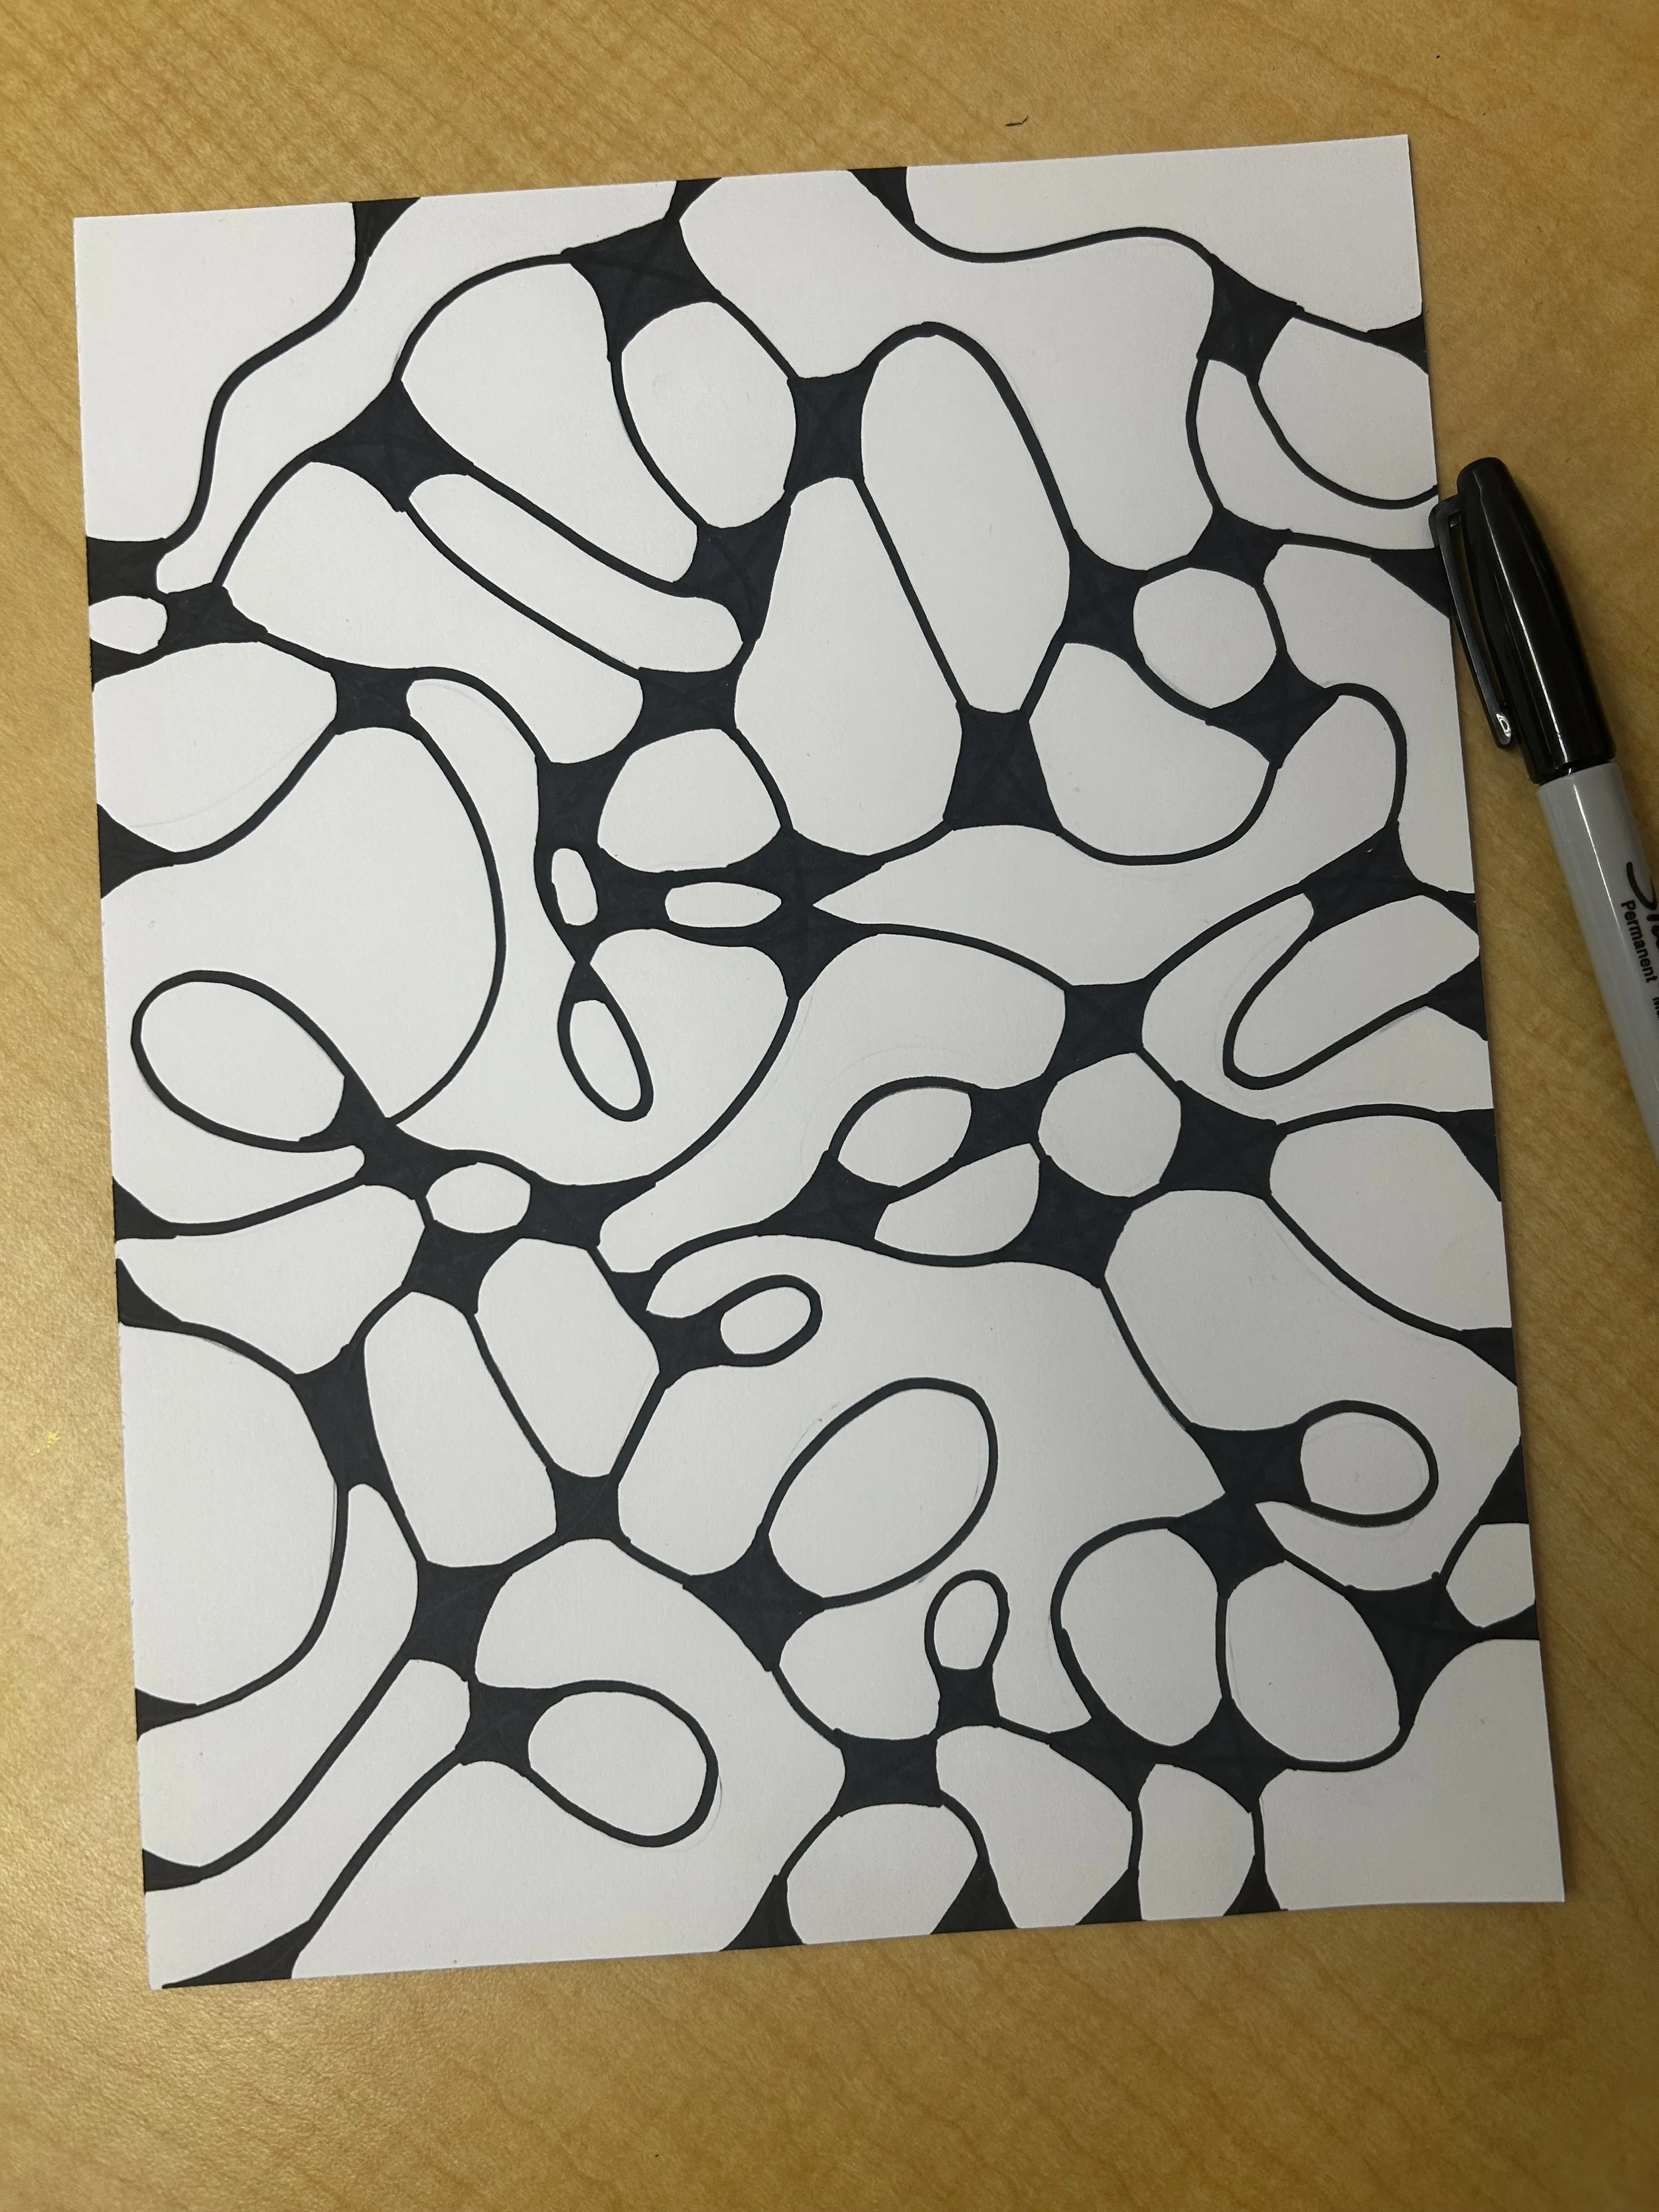
Draw many curved lines going in various directions.
*Note: the pre-coloured photos show very loopy lines. You can do loops but I’d recommend just wavy lines to keep it simple (as I did with most of the samples)
You can skip this step and go straight to Sharpie, depending on the age and ability of your students.
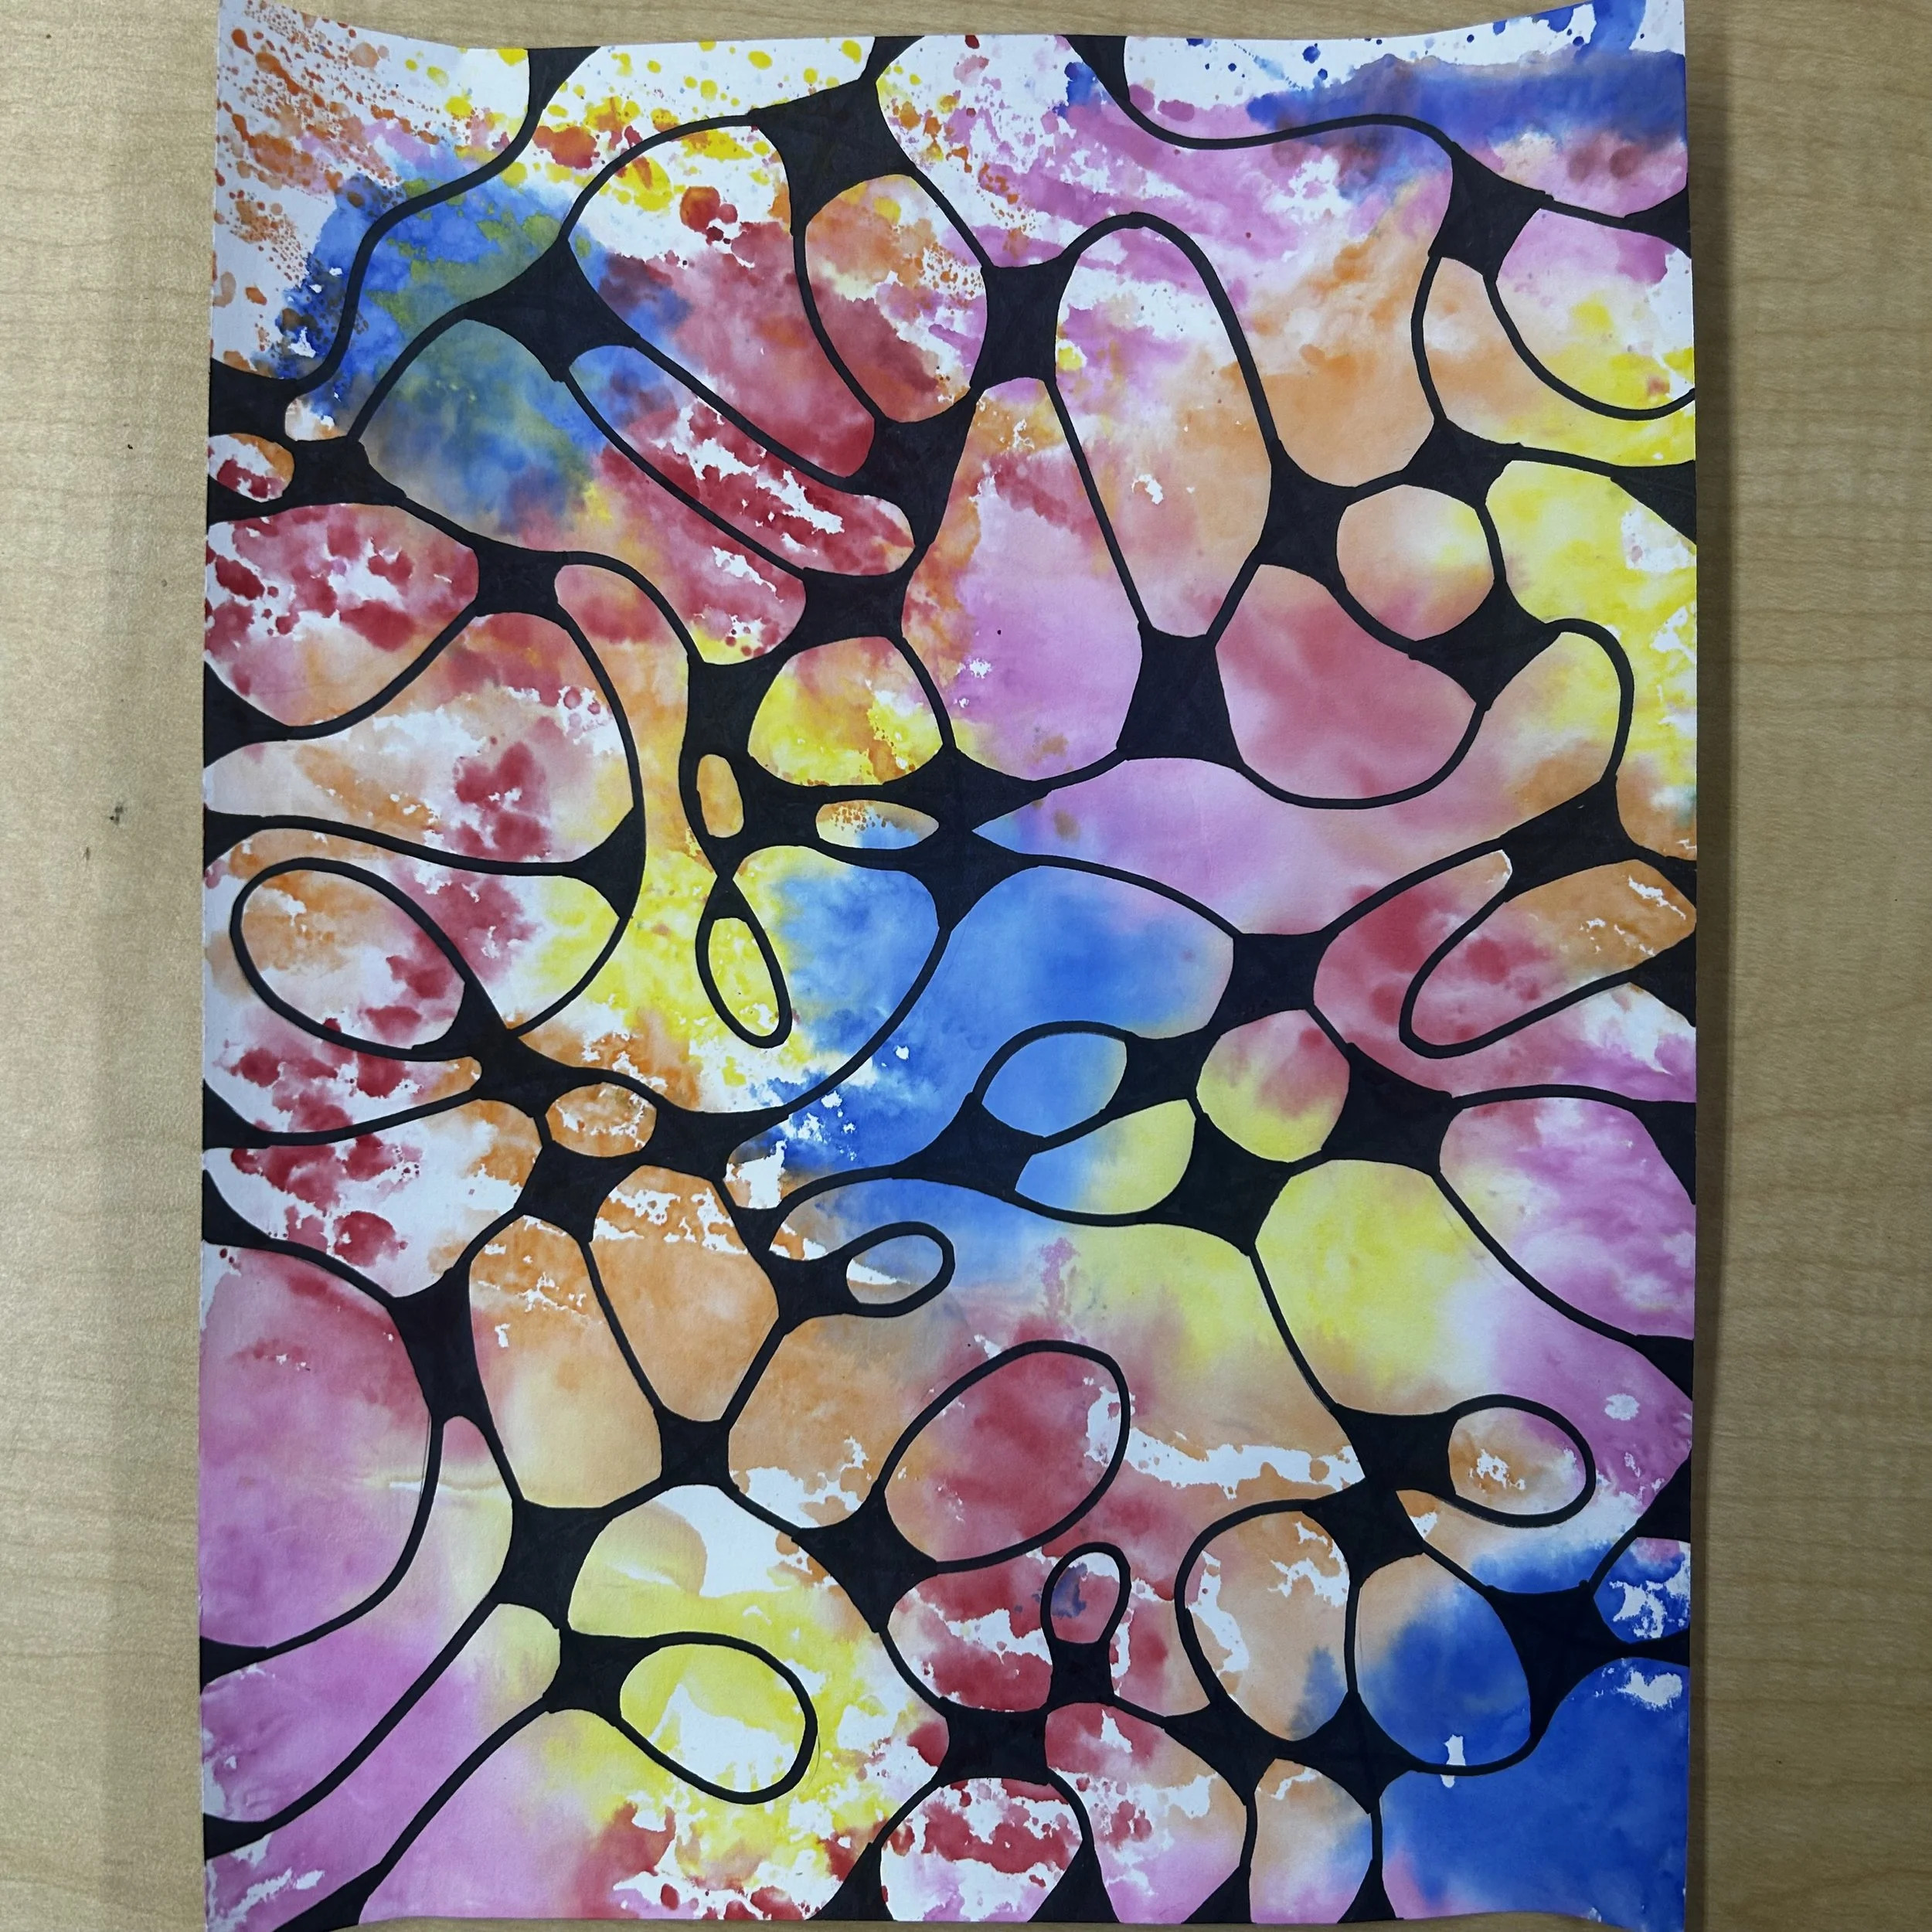
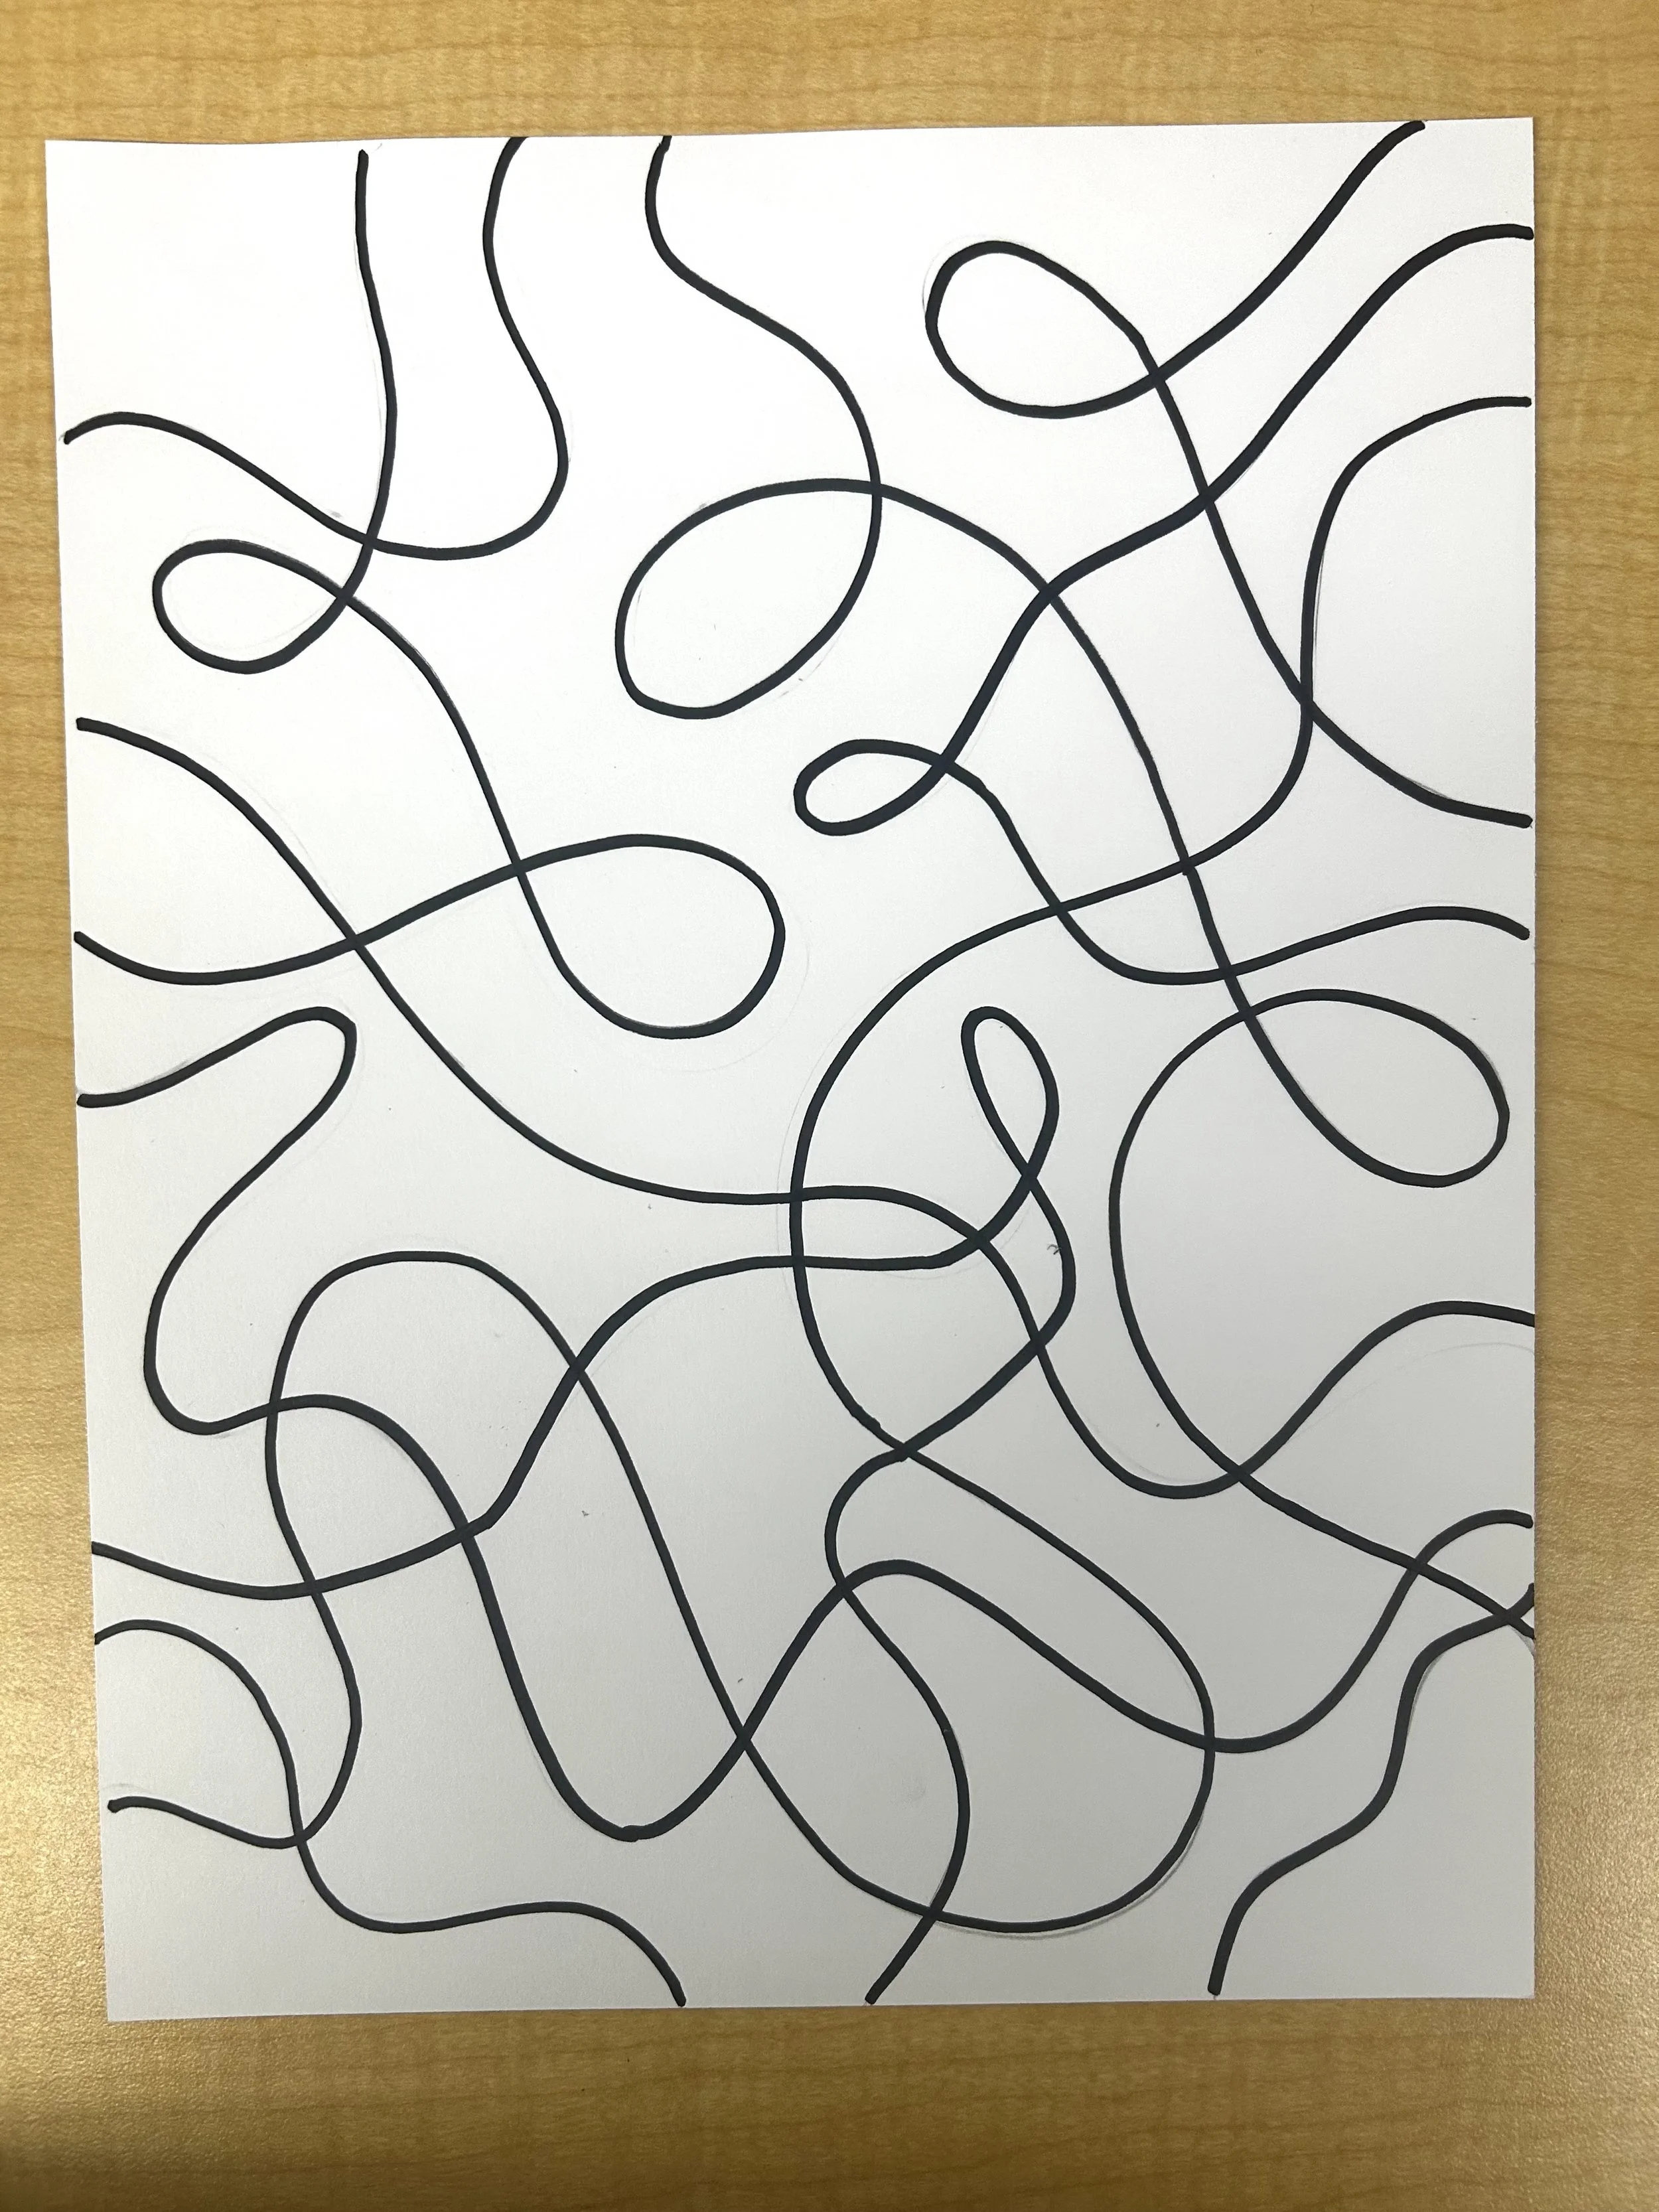
Trace lines with a Sharpie and erase pencil lines.
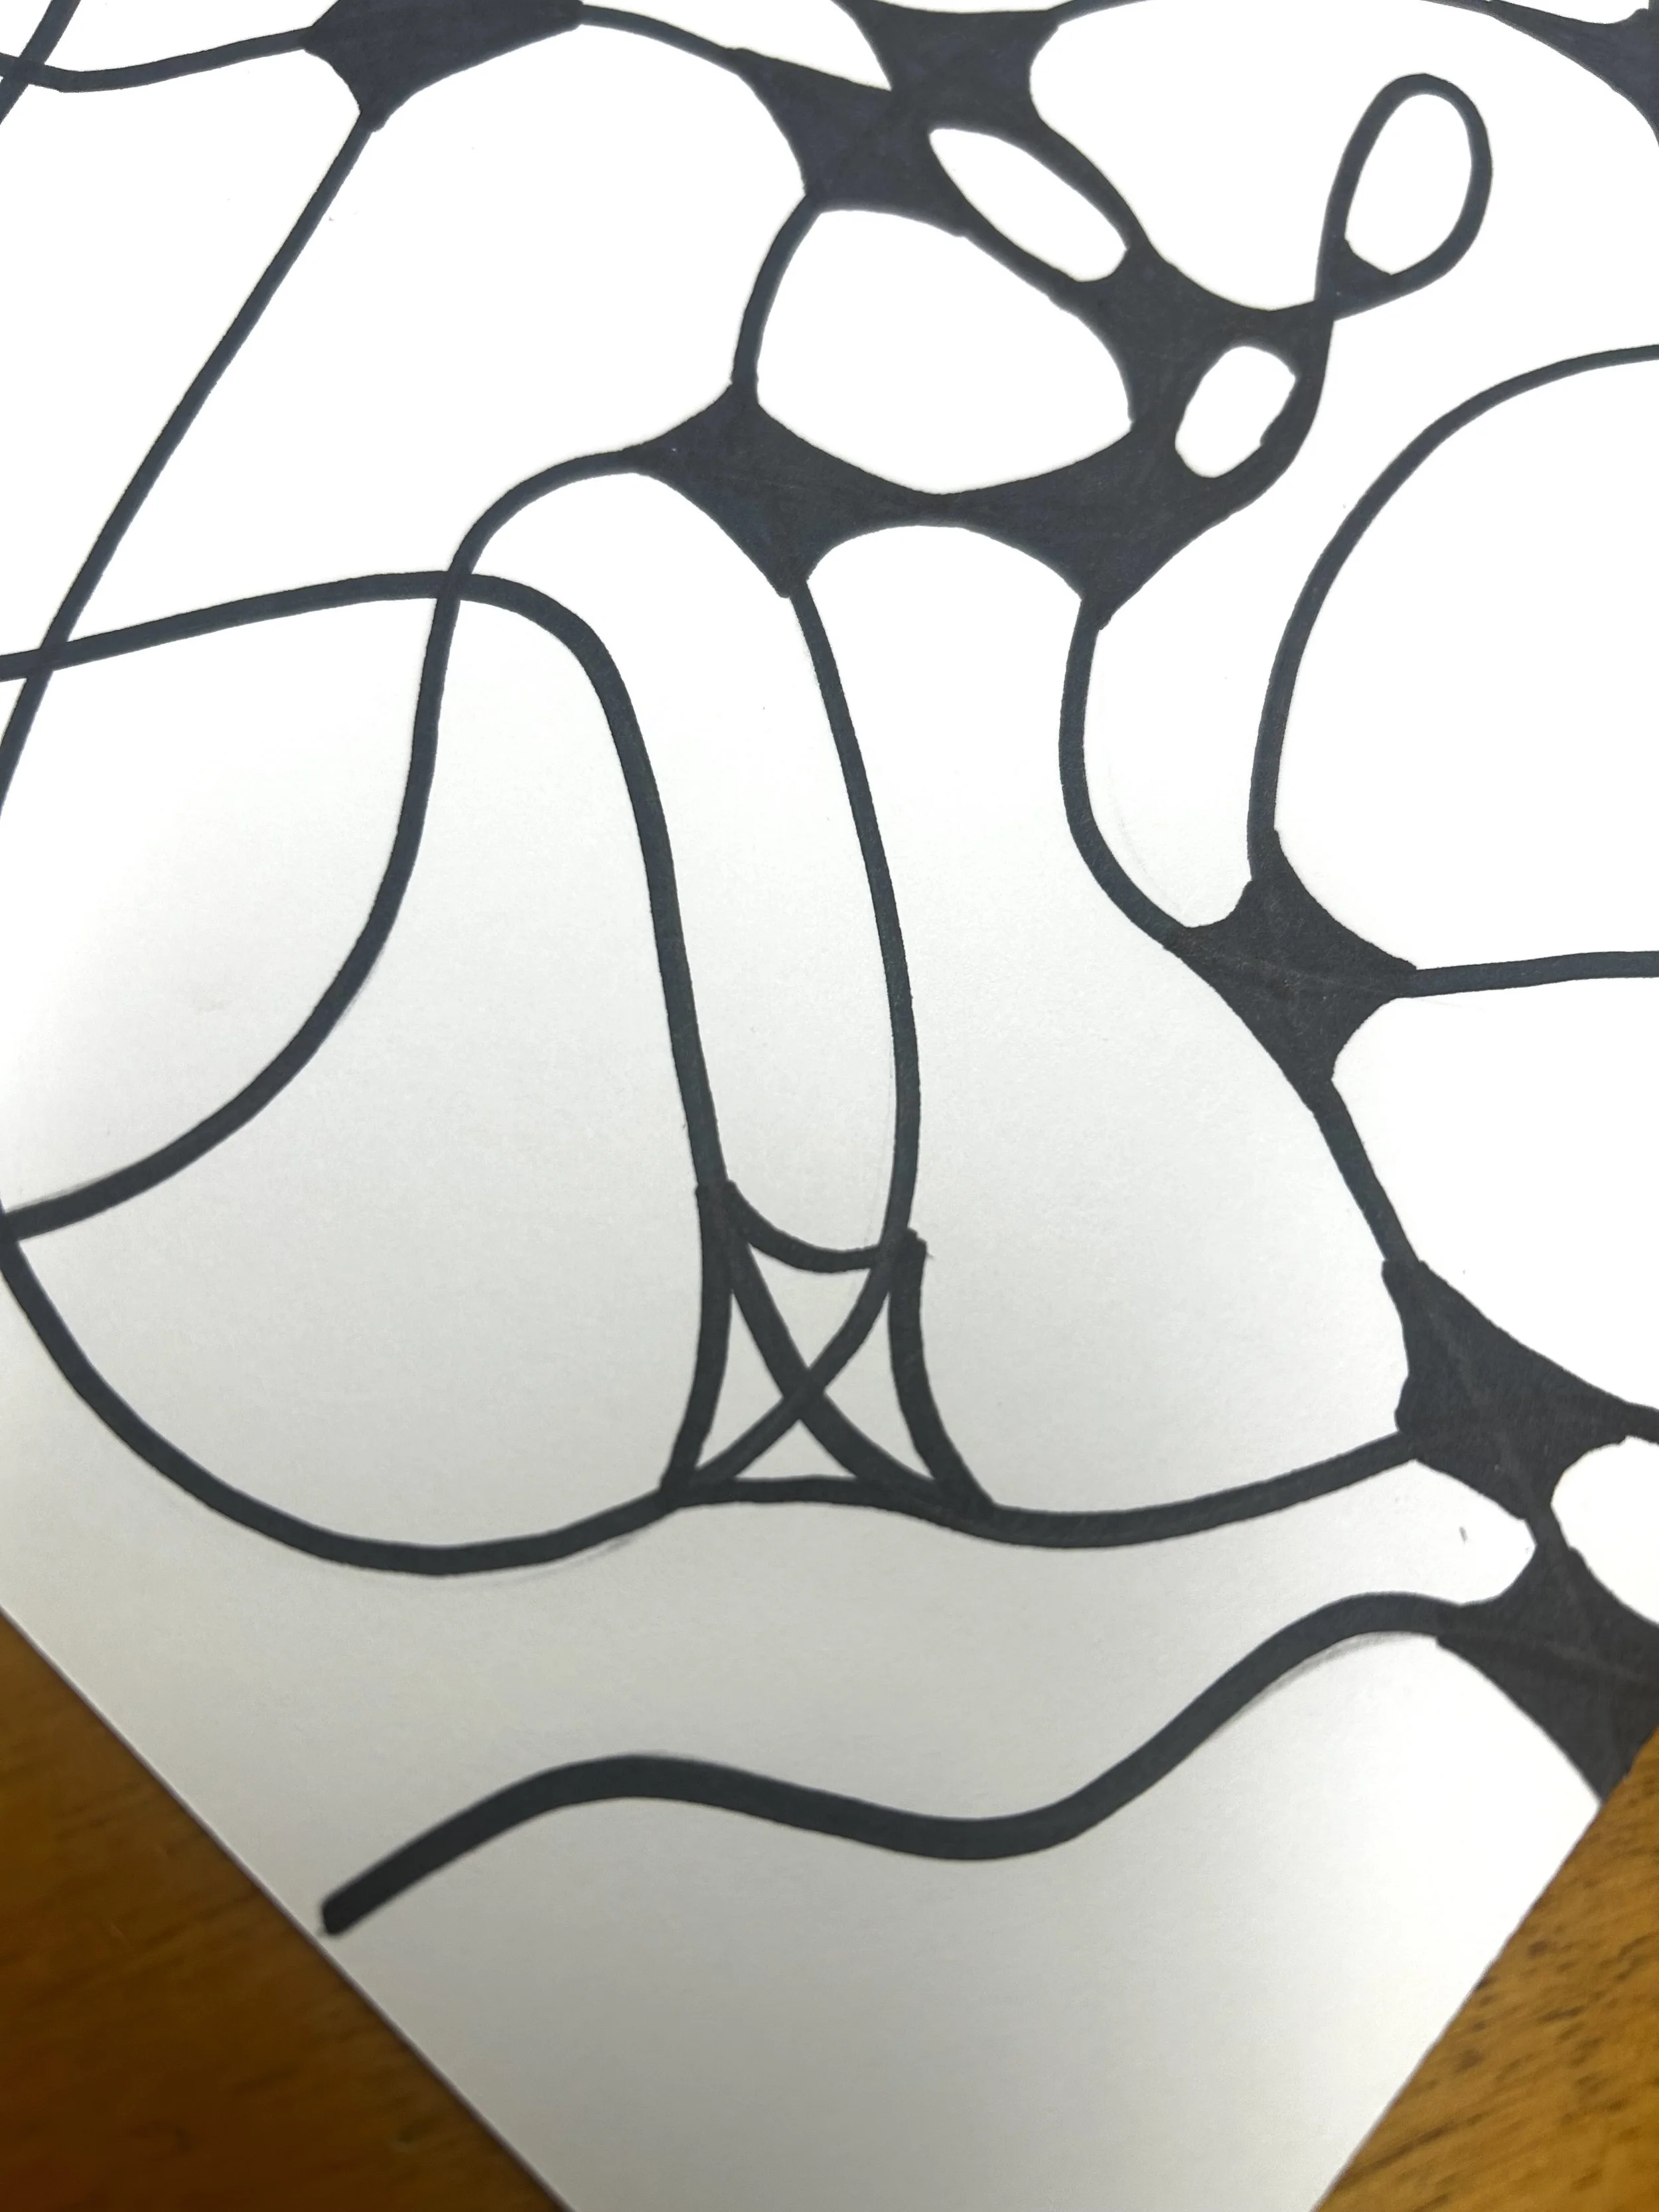
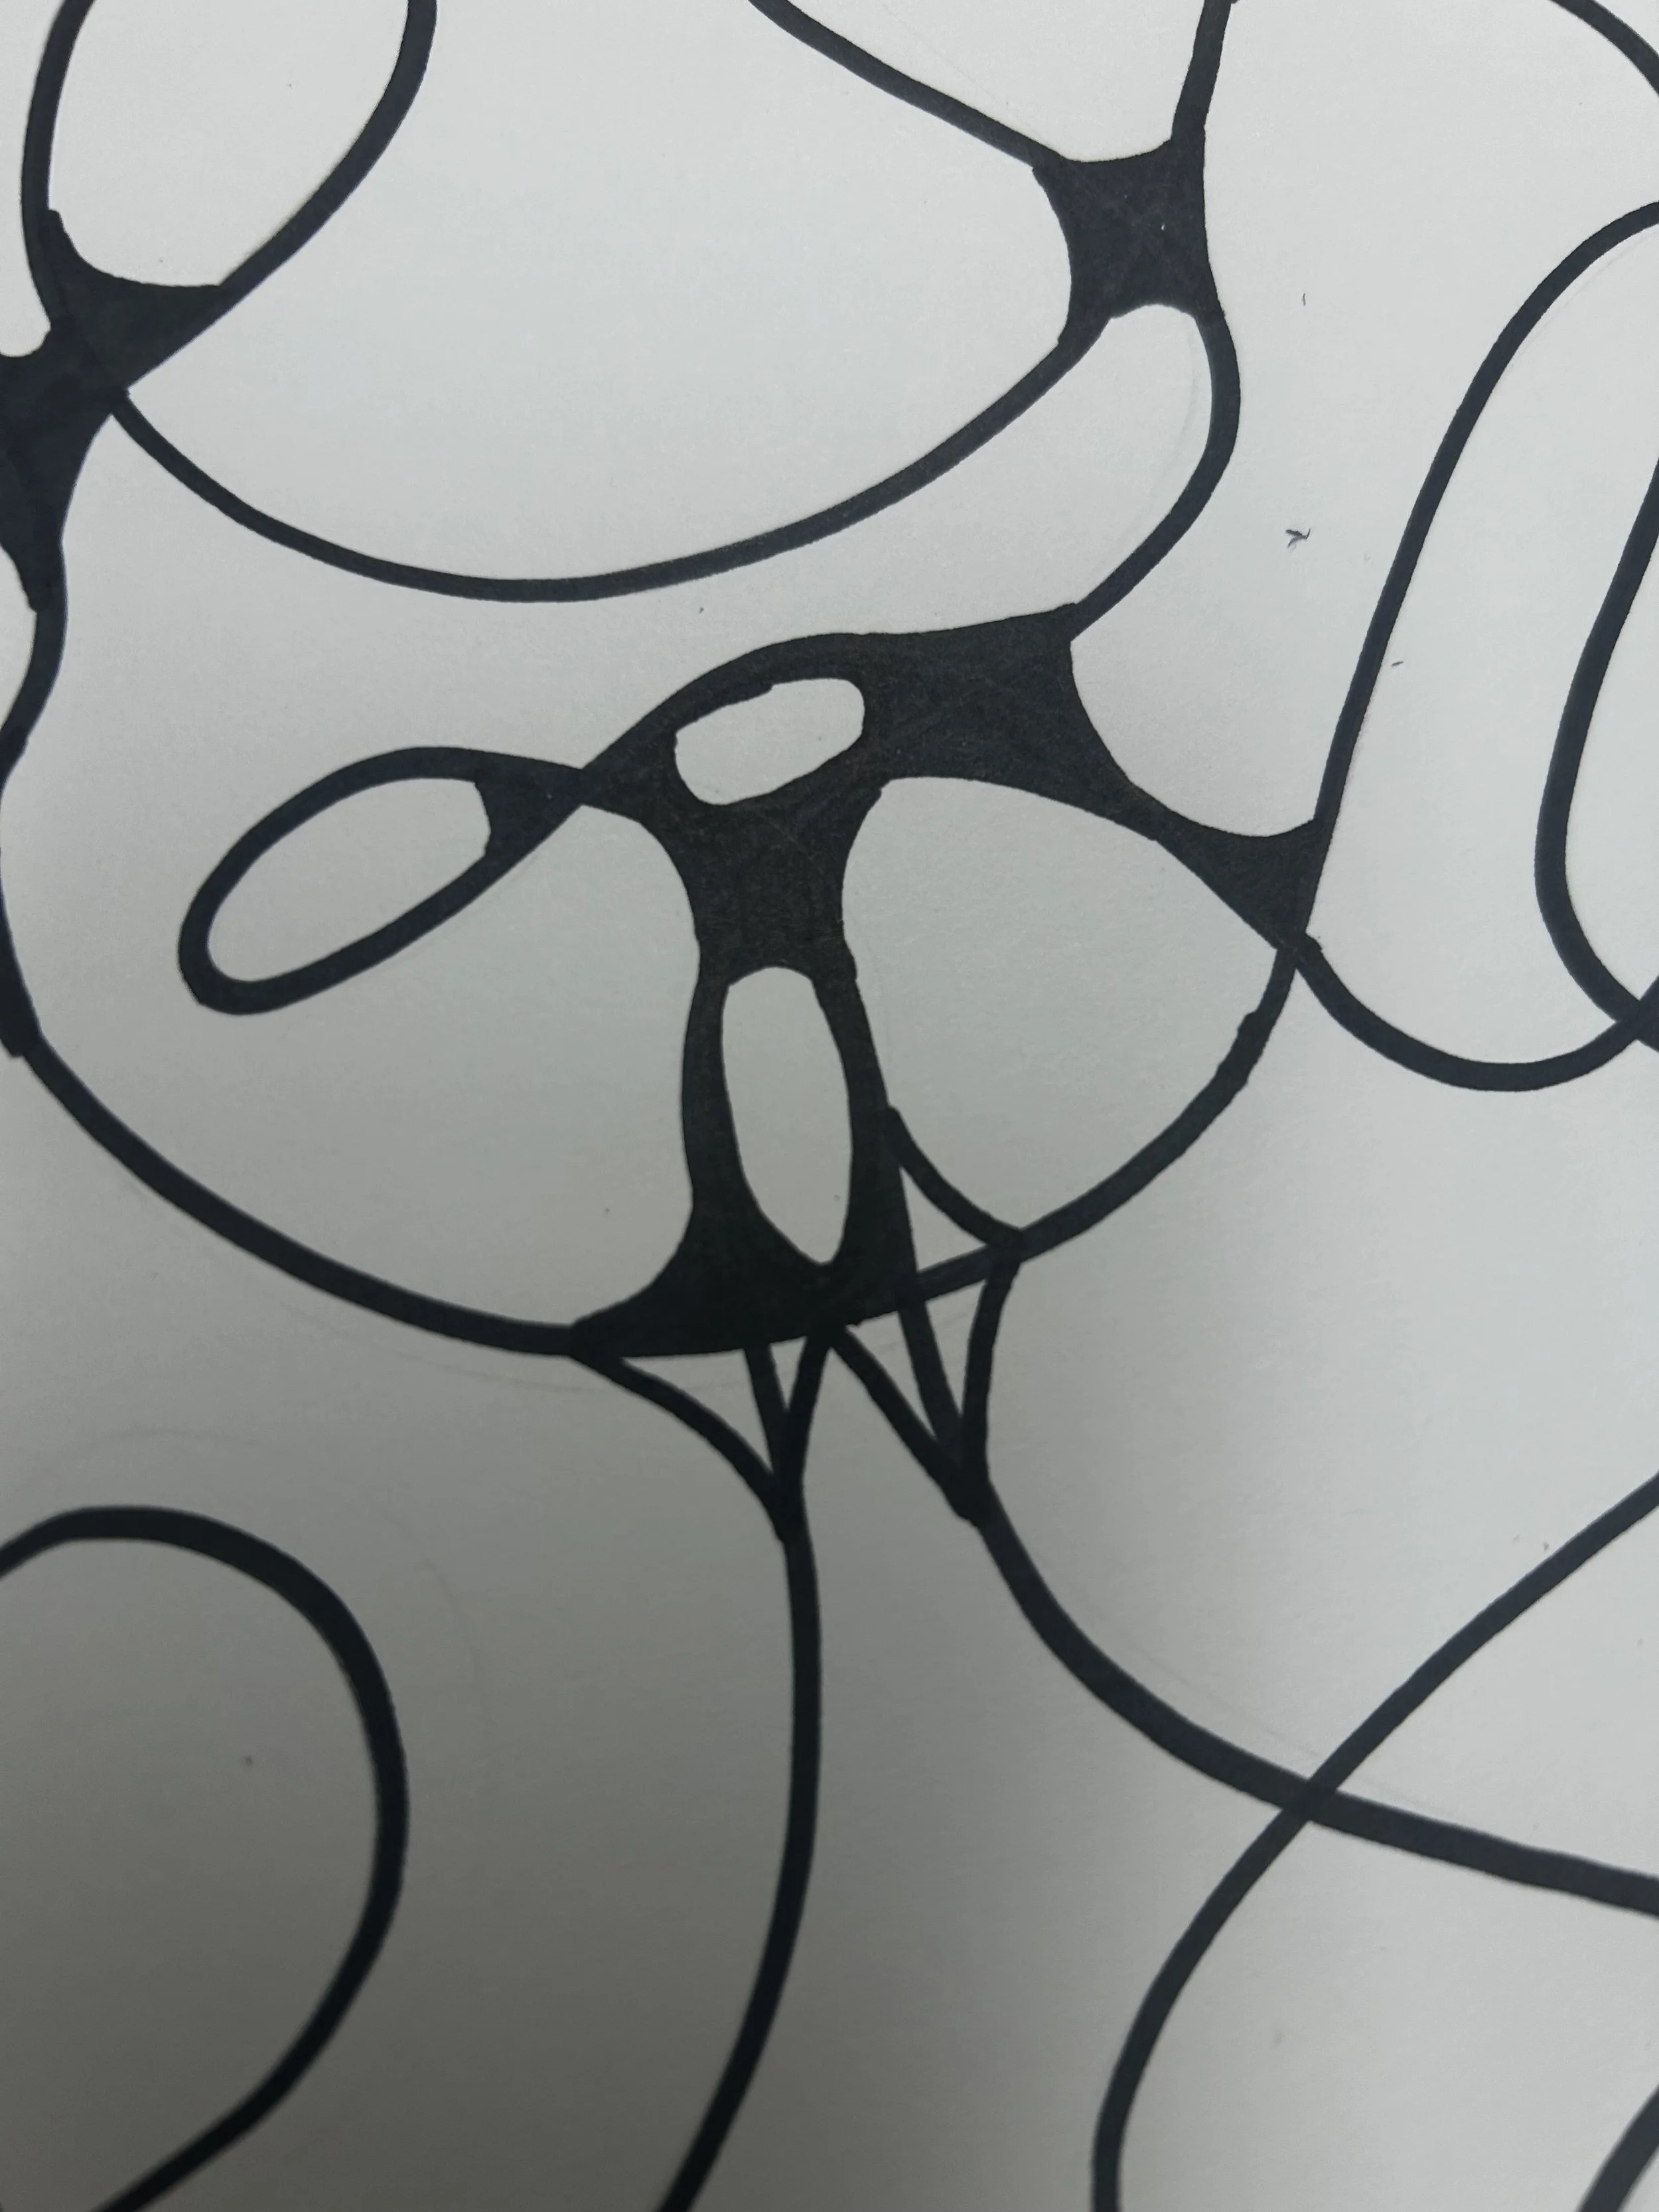
Anywhere lines intersect, you will round off the edges. Think of it like a kite around these intersections. Colour this area in with Sharpie. You can thicken the Sharpie line if needed to smooth out the line.
Even though there isn’t an intersection, fill in the space where the lines connect with the outer edge of the paper, as if the edge was a line crossing the other. This helps create the organic shape.
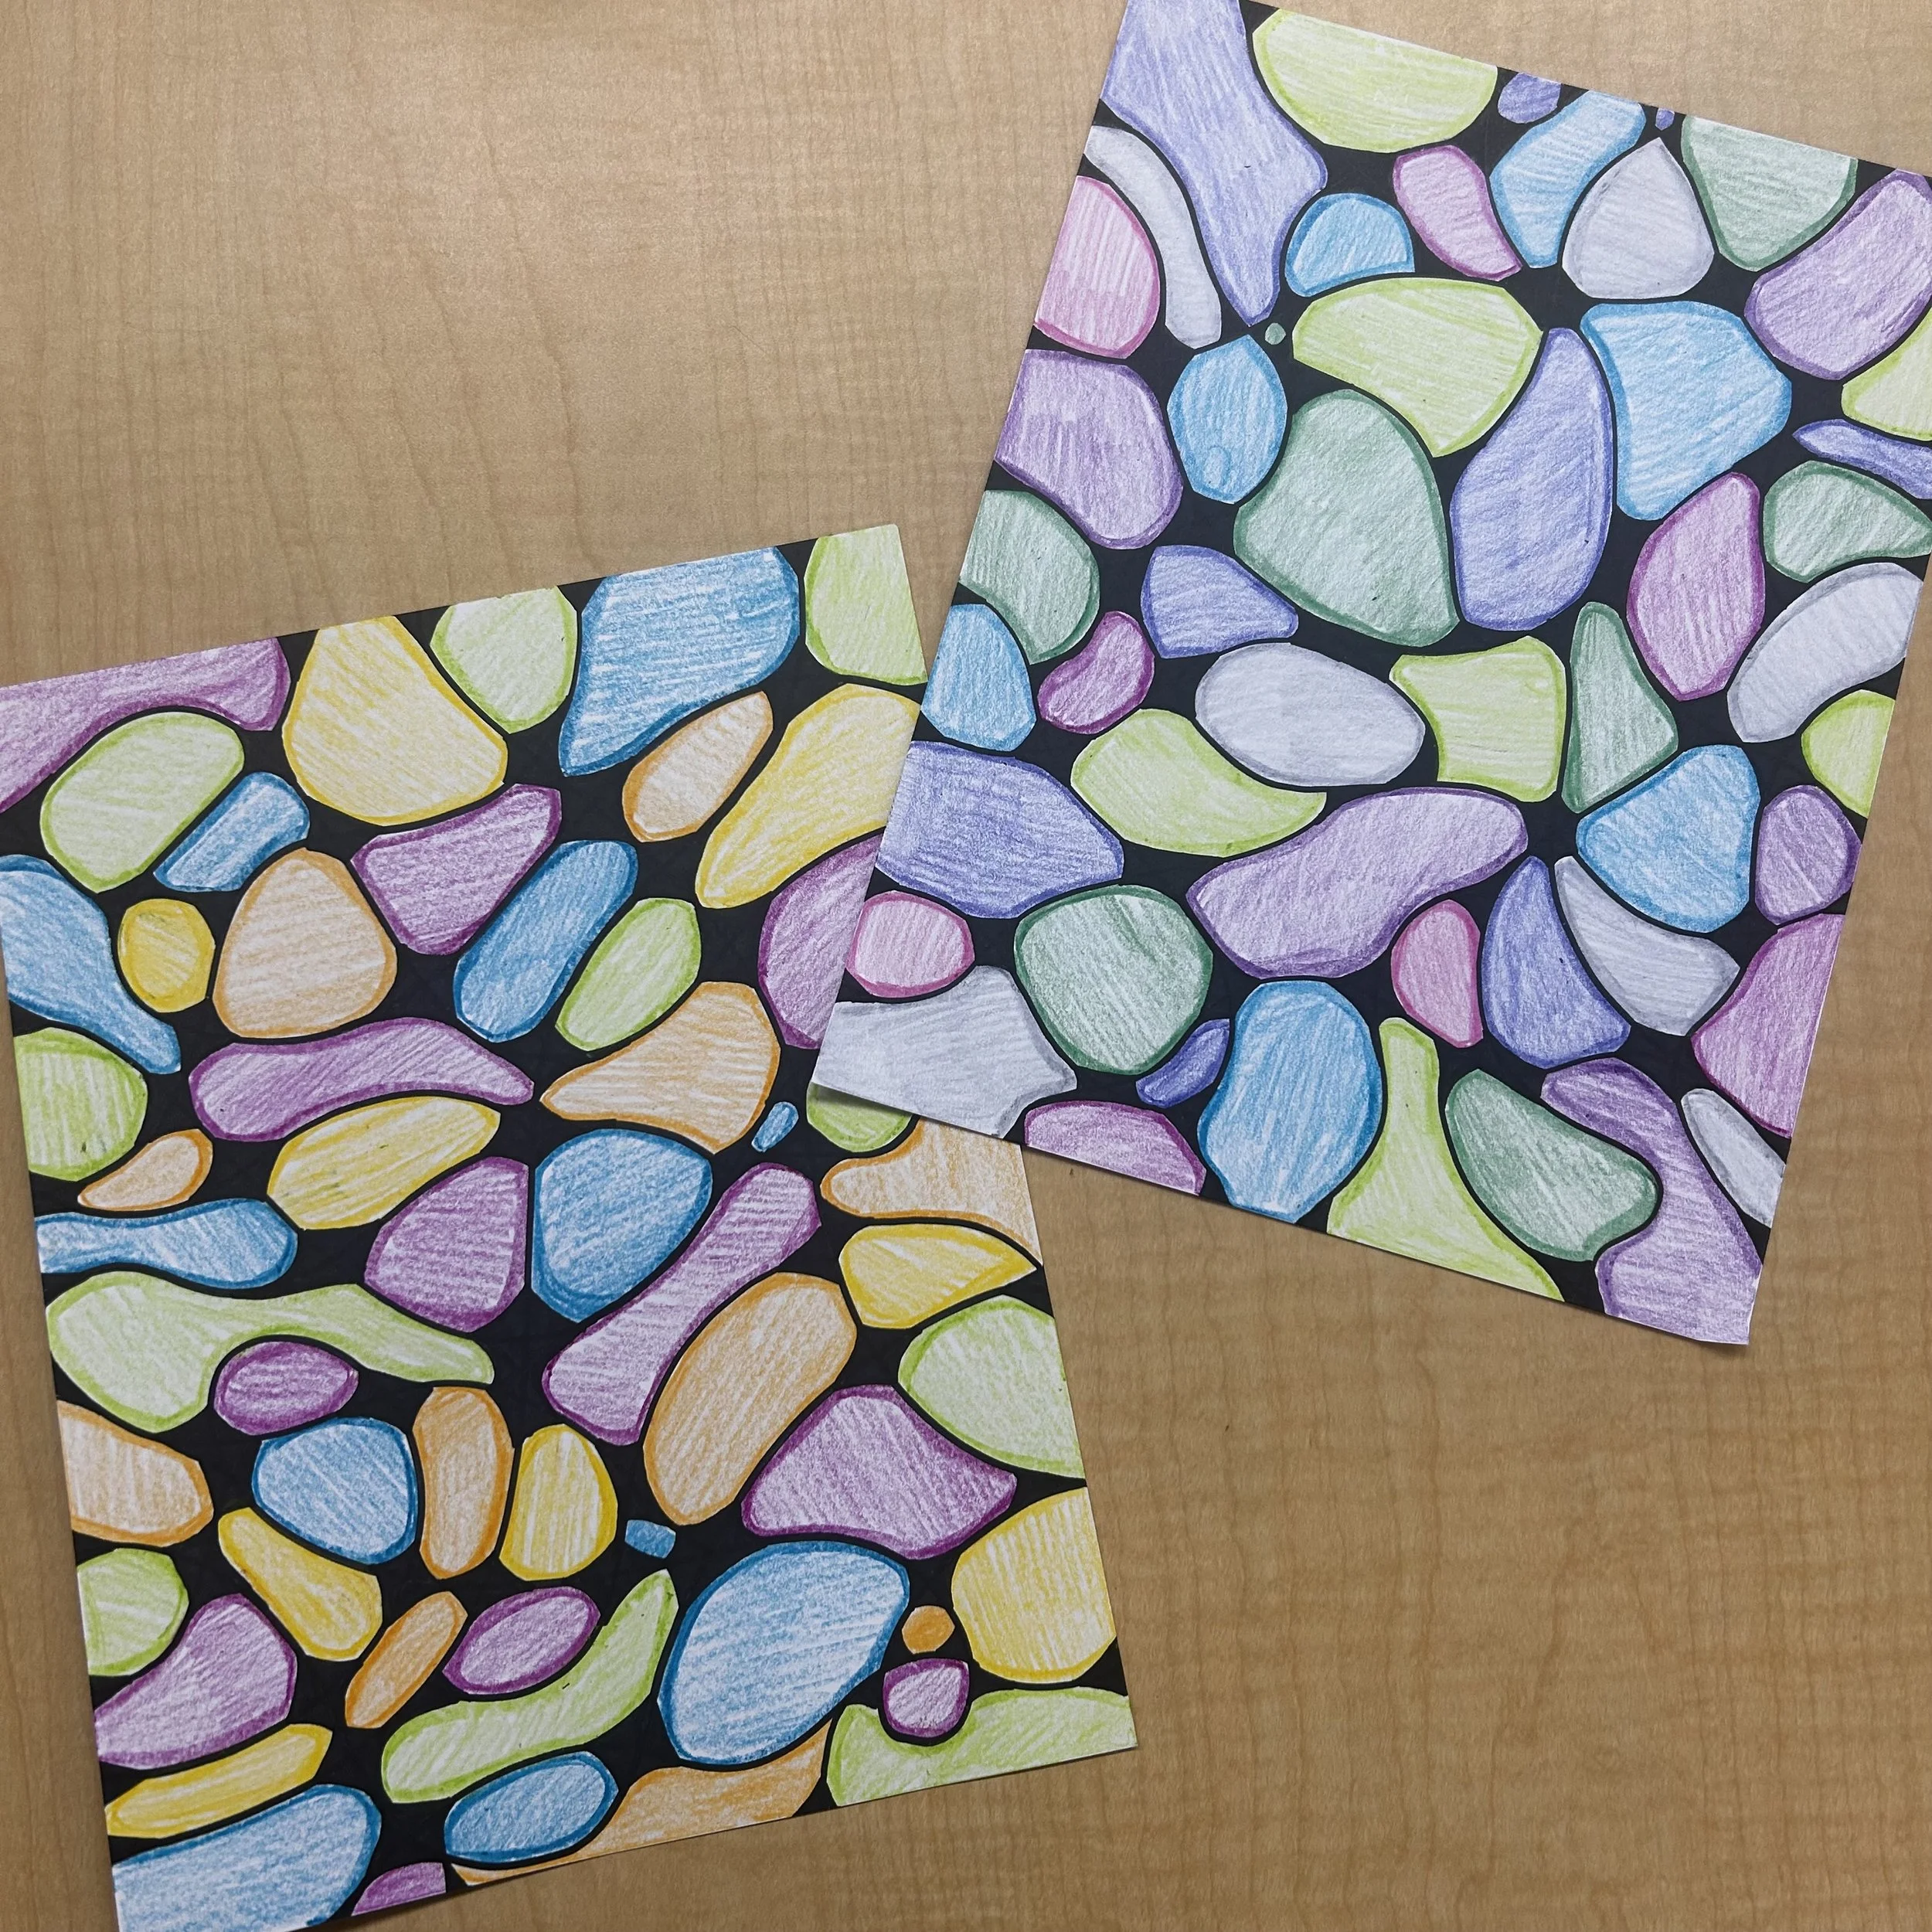
Colour your shapes with the material of your choice. Try not to colour two shapes next to each other the same colour.


SIMPLIFIED ADAPTATION
Instead of a Sharpie, use a thicker black maker. This makes it easier to join the intersections smoothly.
If using a washable marker like this, paint is not a good choice as it will run. Choose markers, pencil crayons or crayons.
VERSION #2 - ZENTANGLES
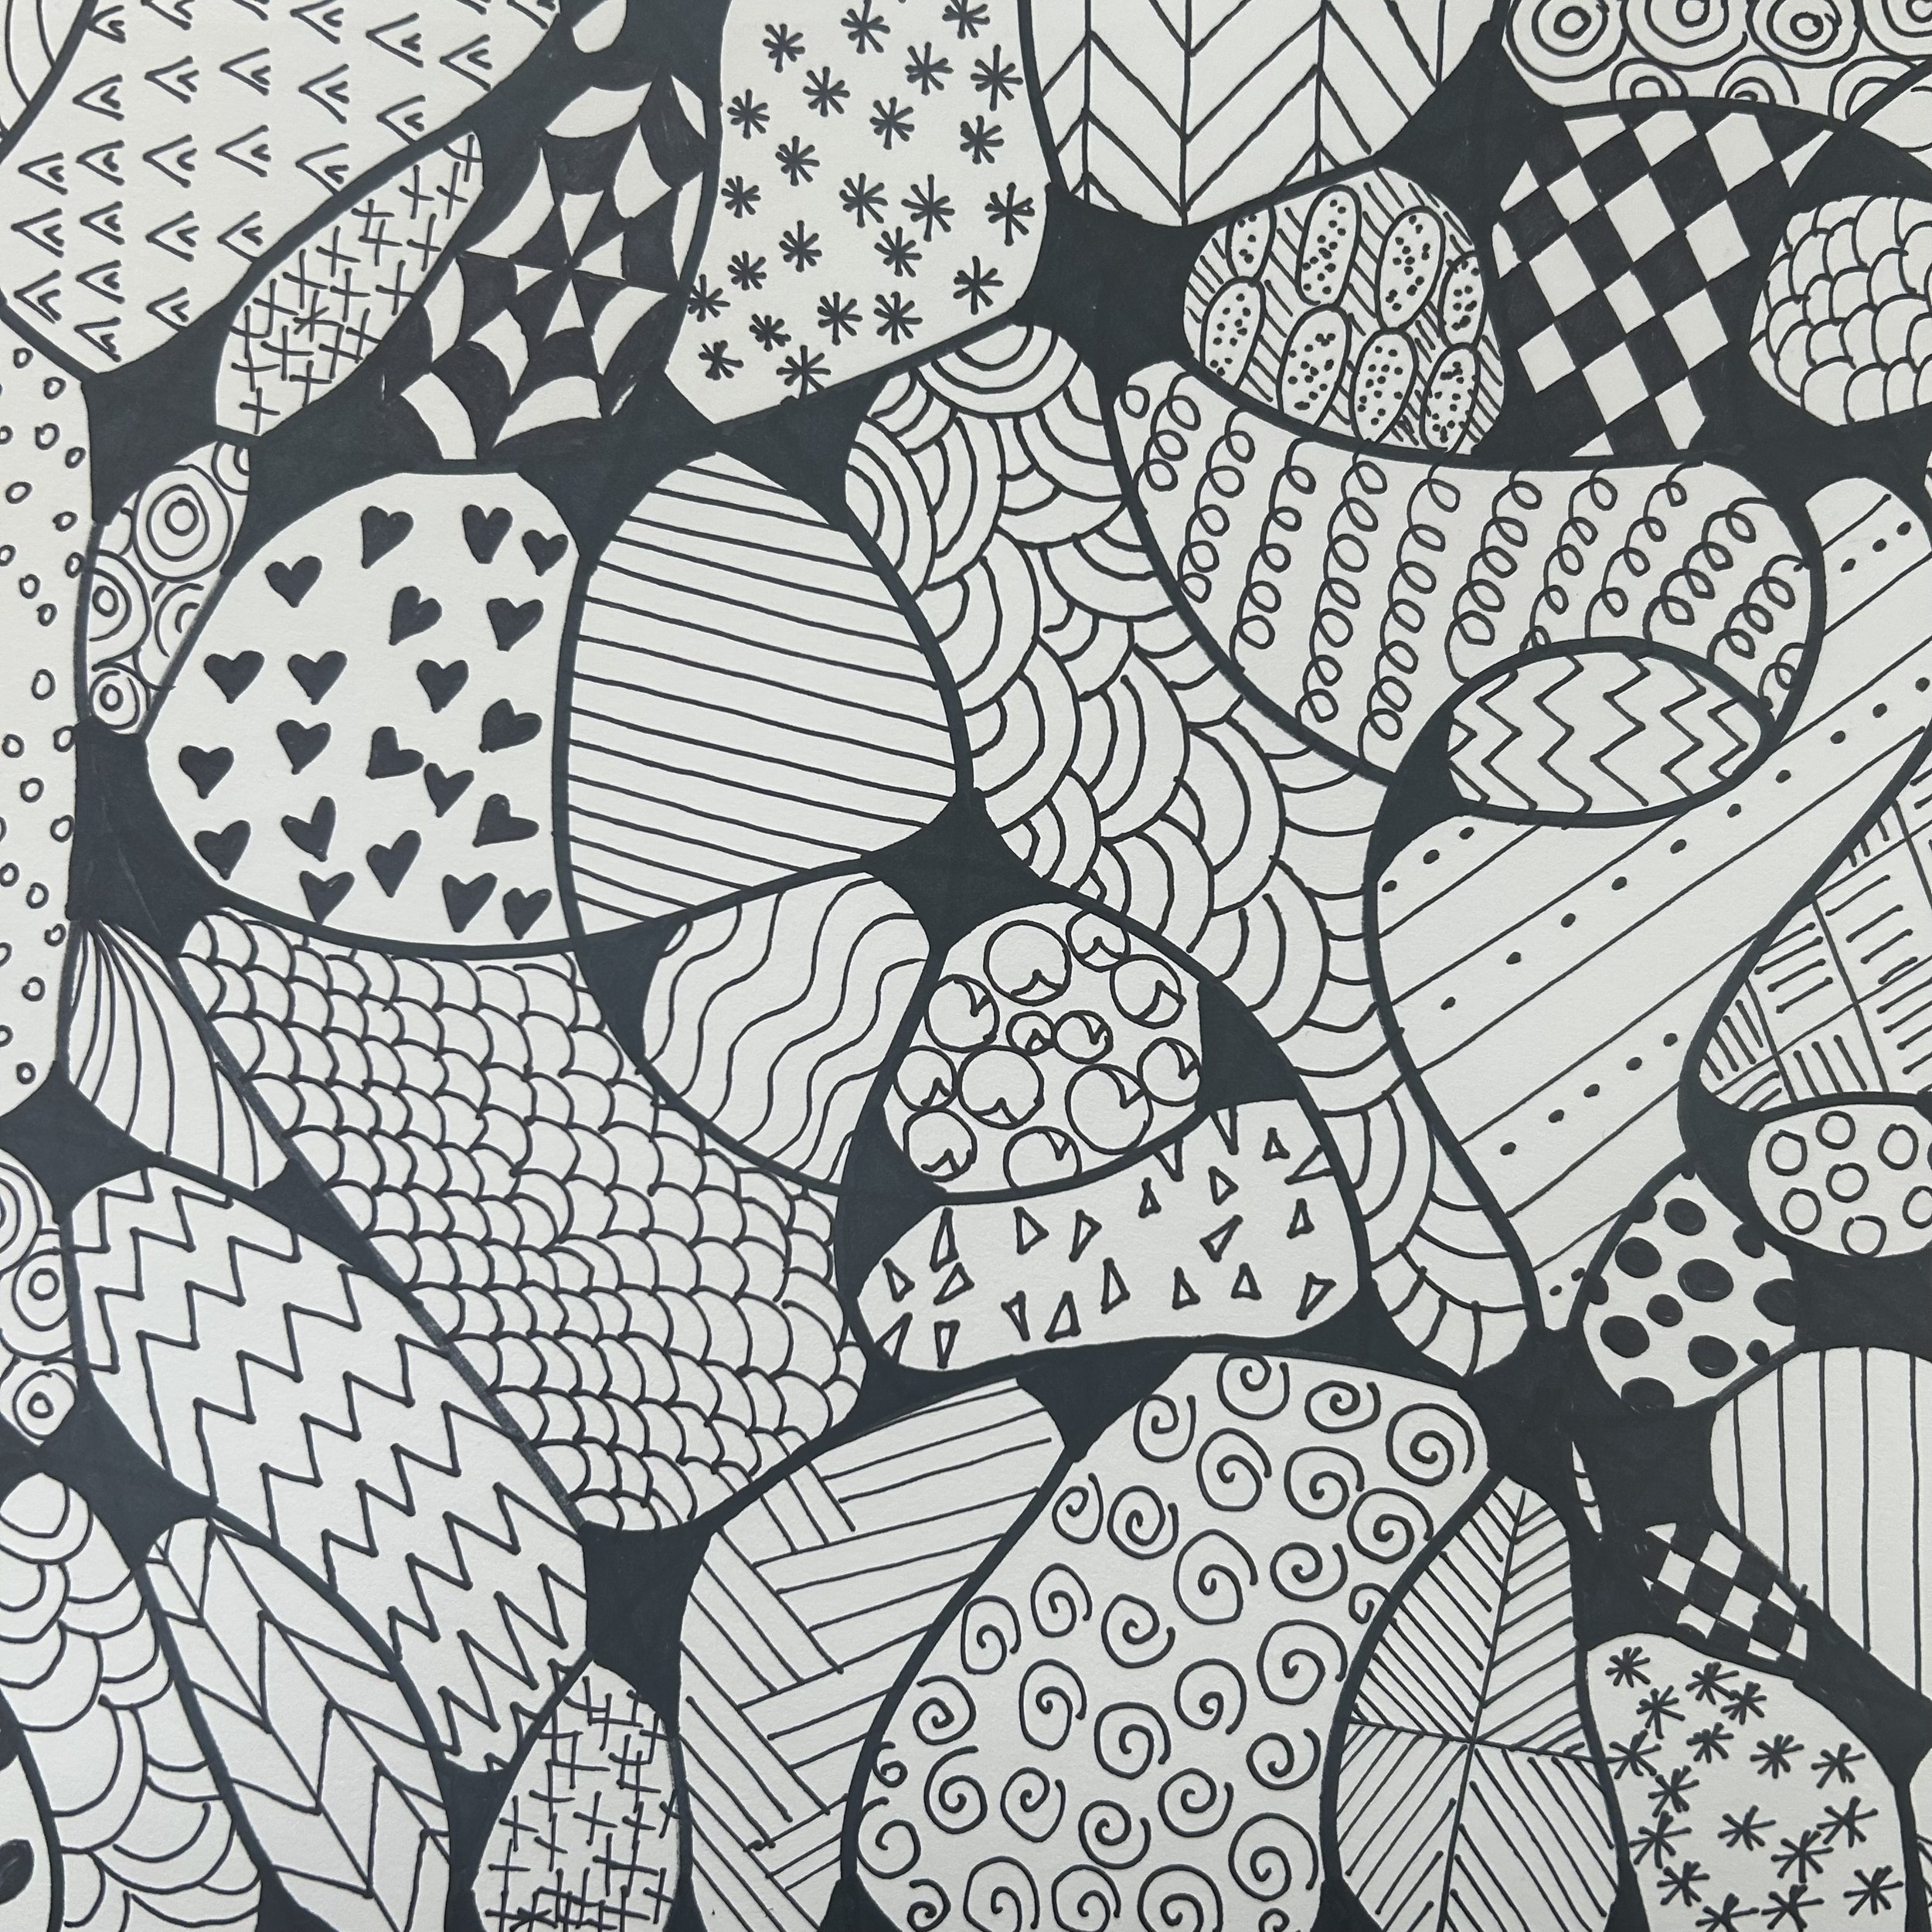
Zentangle doodling lends itself well to this project as it is another form of meditative drawing. This is a great way to extend the project for more advanced learners.
Students will follow the same steps to create their sections but before adding any colour, they’ll use a black fine liner, or black Sharpie to doodle in each section.
You can stop there to leave it black and white on you may choose to use watercolour overtop in some or all sections.
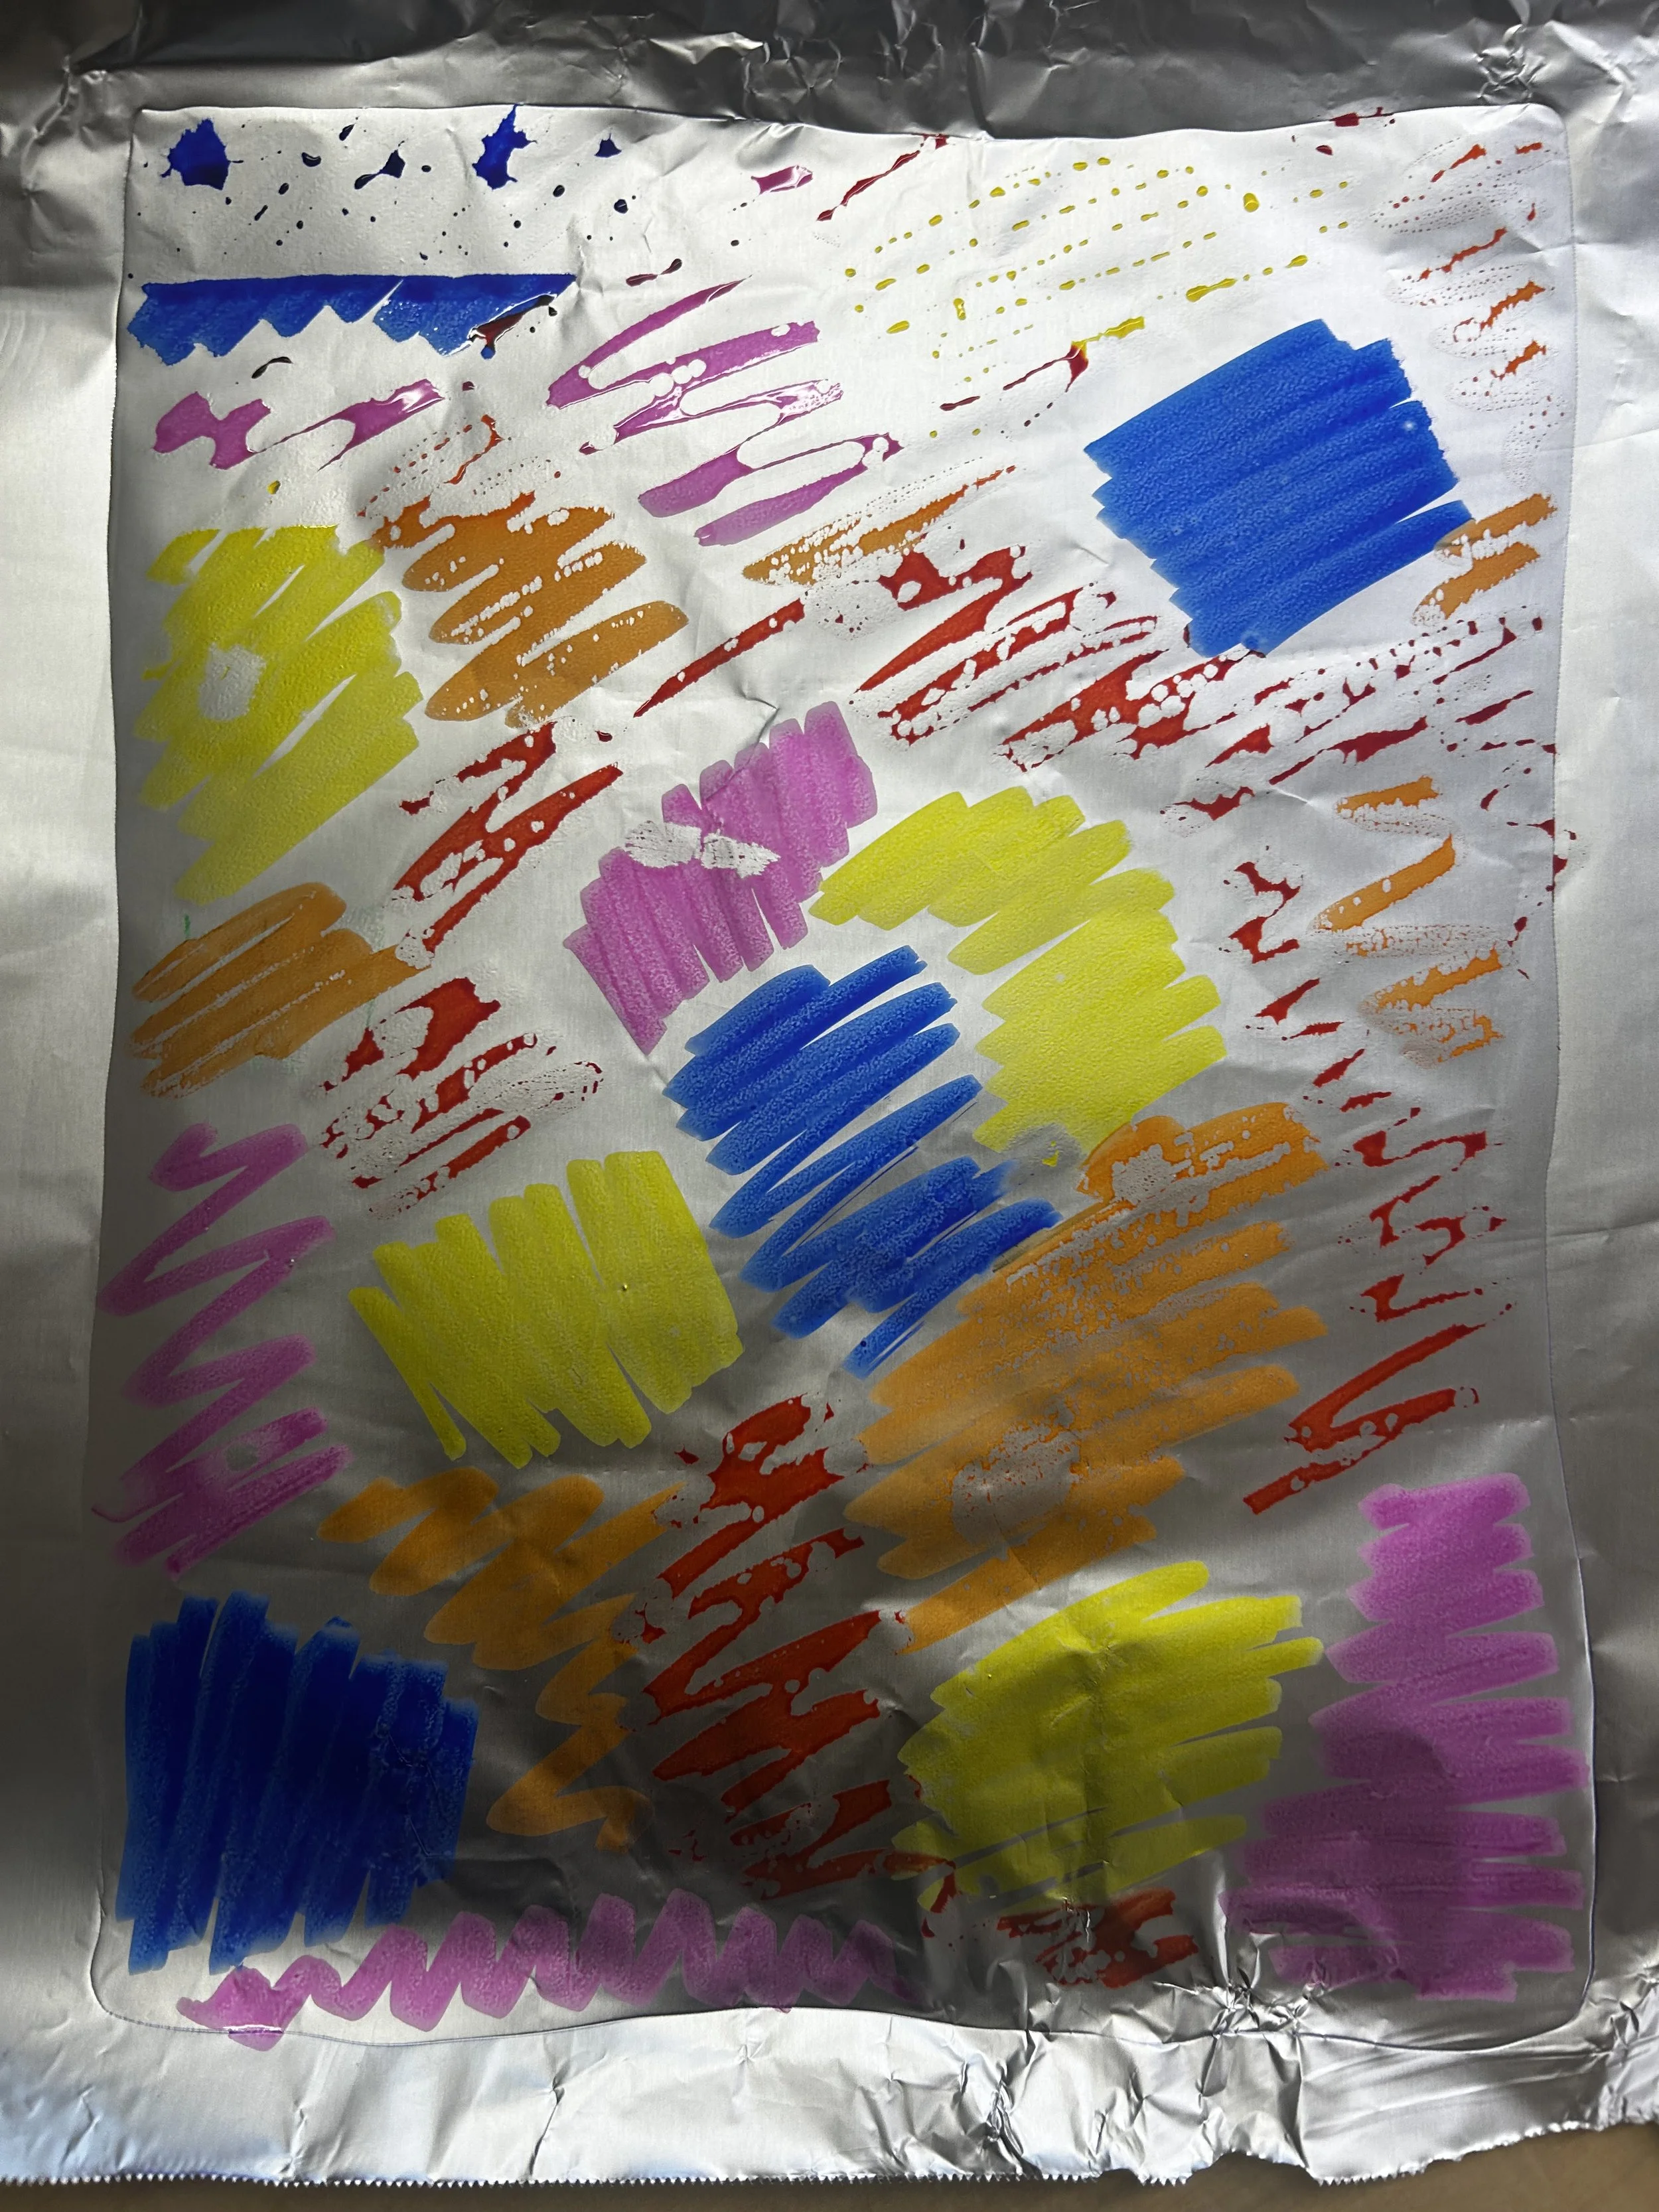
VERSION #3 - FOIL TRANSFER
This version doesn’t show the shapes and positive/negative space as well as the colour isn’t contained to each one but it’s still fun and could be used depending on the techniques you wanted to work on for this project.
Materials:
Washable markers
Tin foil
Water in a spray bottle
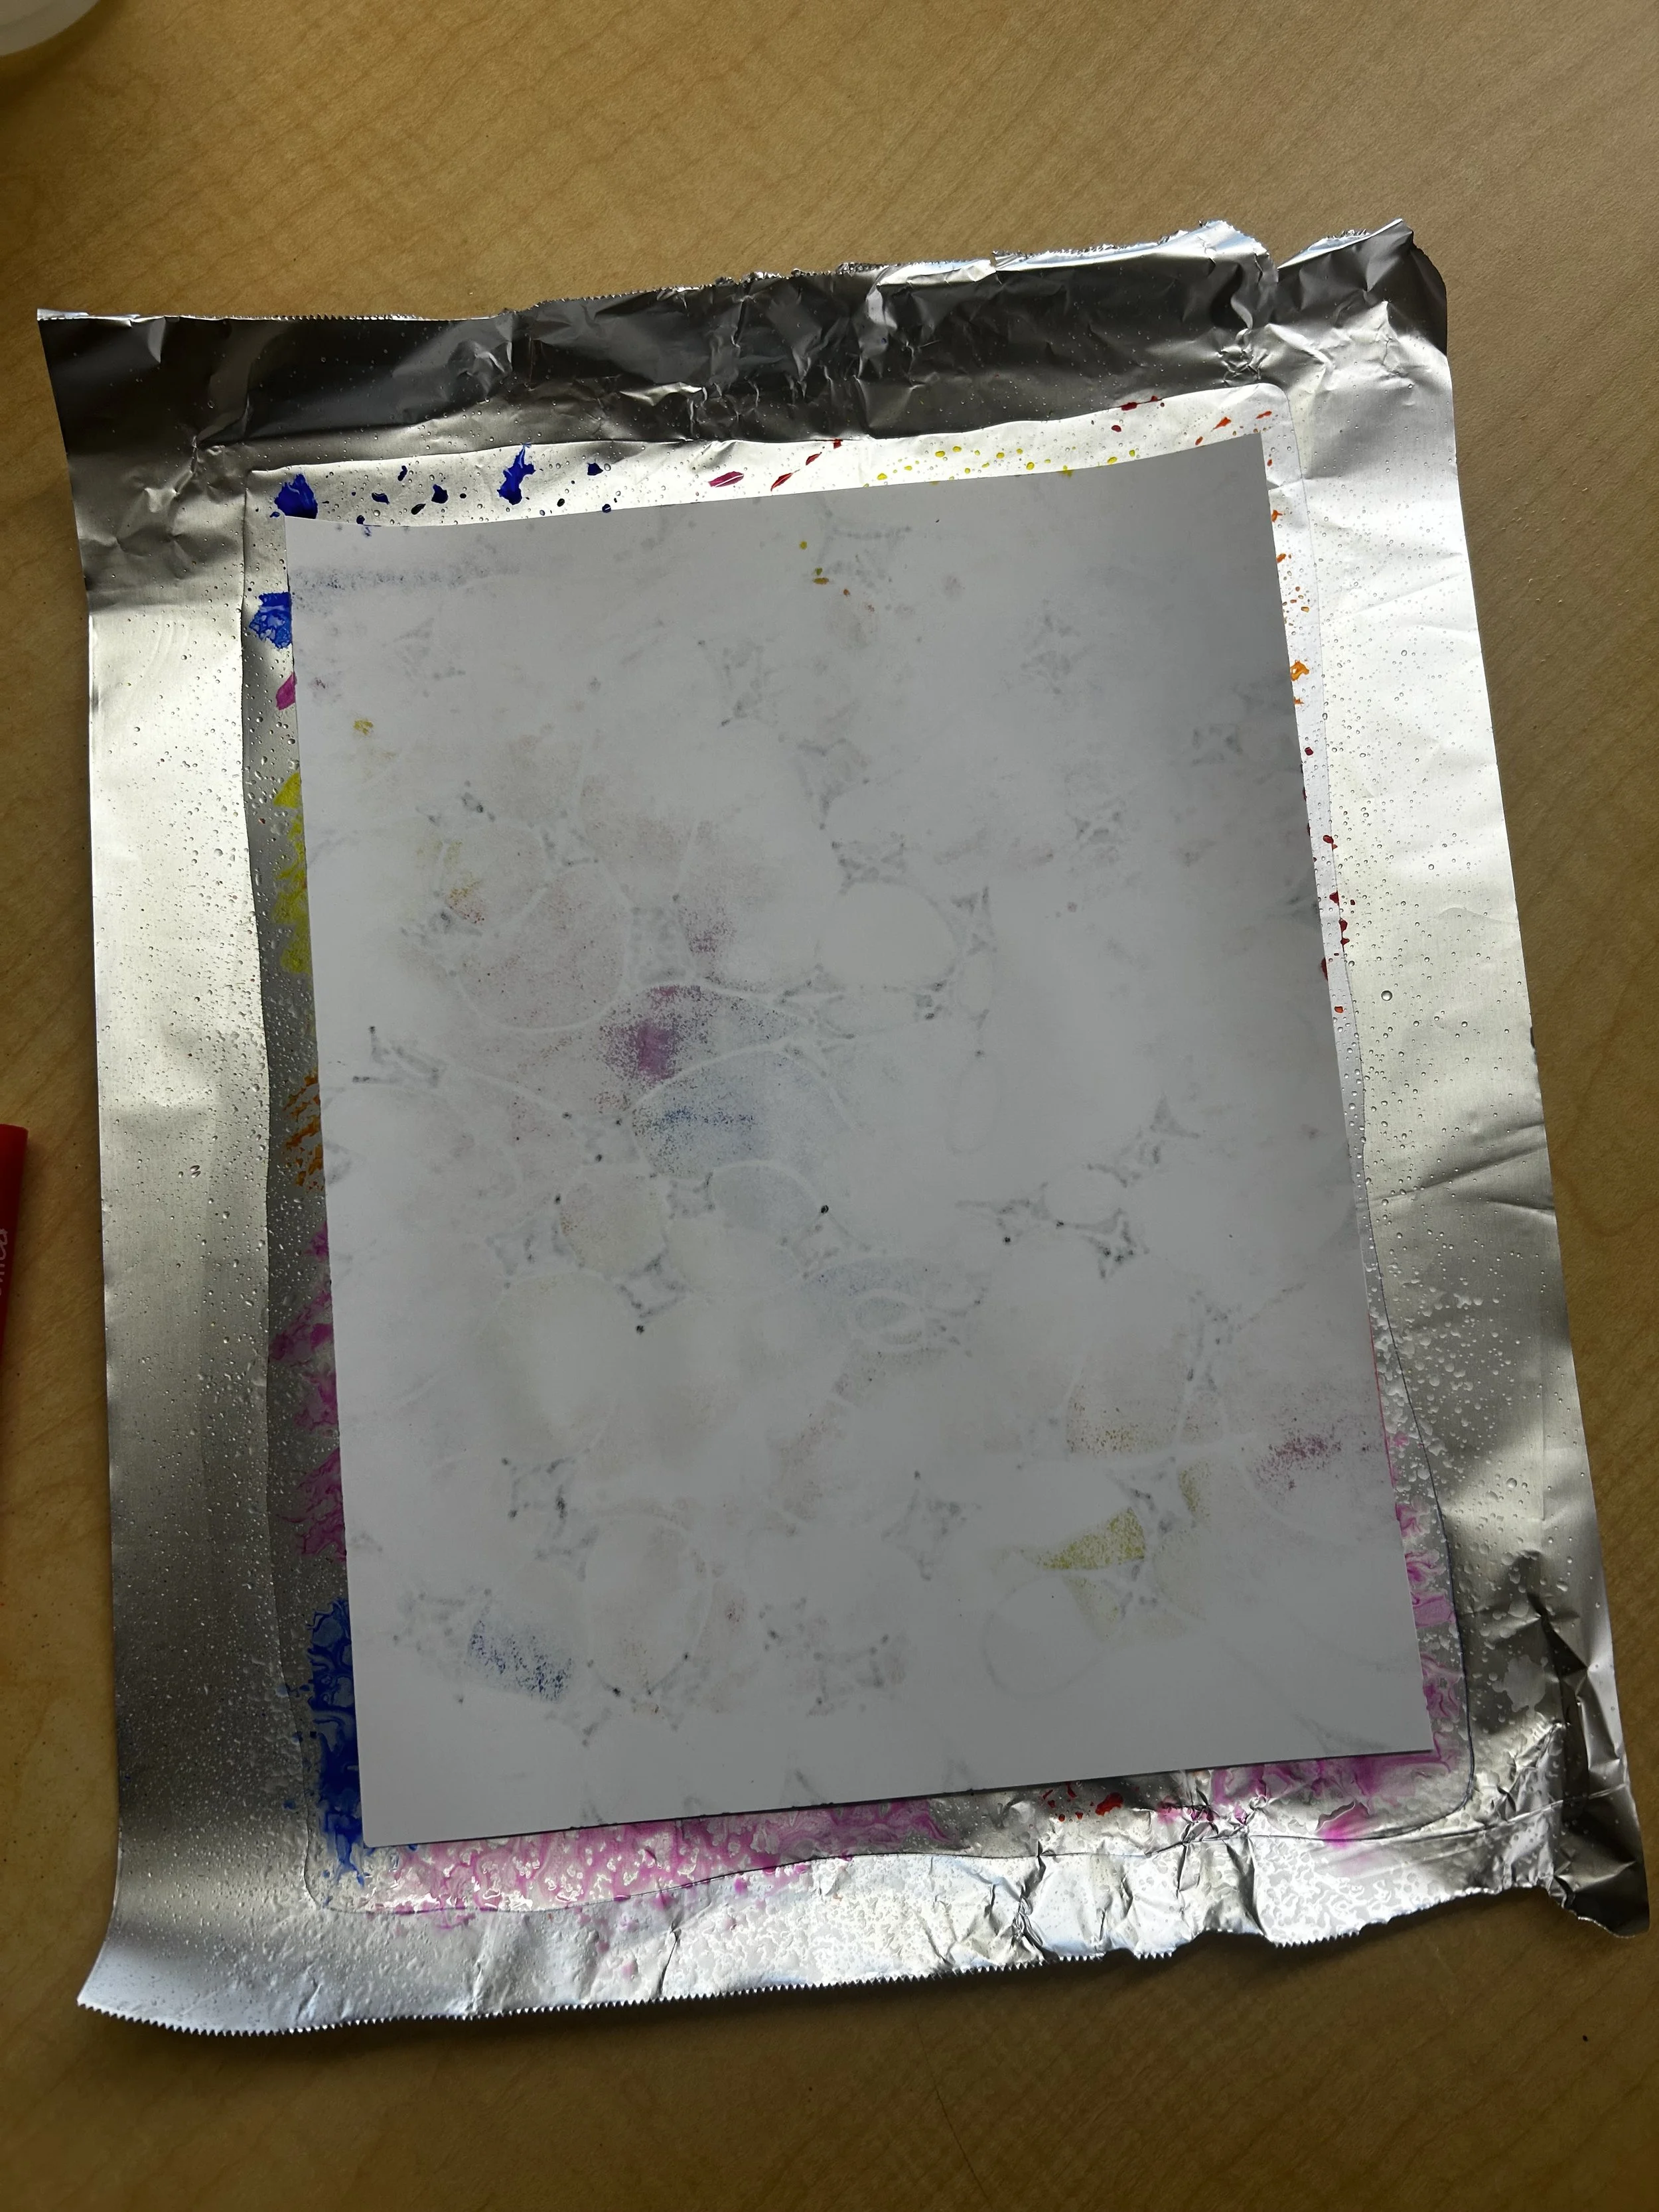
Steps:
Colour an area large enough to fit your paper. *work quickly!
Spritz with water and turn your paper onto the colour.
Make sure the paper is fully pressed into the foil so that the colour transfers.
Carefully lift and set aside to dry.